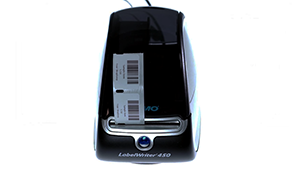
Use Lightspeed Label Printing to print barcode labels for inventory items directly from BackOffice on a Mac or Windows computer to a DYMO LabelWriter 450 or 550 printer. Learn about available label printing methods below, then install the DYMO drivers and customize optional label settings to start printing labels individually or in bulk with Lightspeed Label Printing.
Watch our DYMO Printer Setup video:
Table of Contents
Lightspeed Label Printing vs. DYMO Software
There are two ways to print labels for inventory items: from BackOffice using Lightspeed Label Printing or via the third-party DYMO Connect or DYMO Label software. Learn about each method below to decide which to use for your inventory.
Lightspeed Label Printing is our in-house solution for printing labels. Use this if you:
Prefer to print directly from BackOffice.
Want to print labels individually or in bulk.
Need to print Butterfly, 1″ x 1″, 1″ x 1.5″, or 1.25″ x 2.25″ labels.
DYMO Connect or DYMO Label
DYMO Connect and DYMO Label are DYMO’s own label printing software. Use this if you:
Are comfortable working with spreadsheets.
Prefer to print using DYMO software.
Want to print labels in bulk.
Need to print 1″ x 1.5″ or 1.25″ x 2.25″ labels.
Visit our DYMO Label Printing article to learn how to print labels using the DYMO software.
DYMO Connect and DYMO Label are third-party software for printing labels from a desktop or laptop computer running Windows or macOS. For help with DYMO software, contact DYMO for support.
DYMO Installation
Download and install the DYMO drivers to prepare your computer to start printing labels.
Follow the steps here to connect the DYMO printer to a Mac or Windows computer and load the labels.
The DYMO printer cannot be connected to an iPad, Android tablet, or mobile device.
Visit DYMO Support and download the latest version of the DYMO Connect software for your LabelWriter 450 series or 5 series printer.
Do not install the CD included with the printer as it may not contain the most up-to-date drivers.
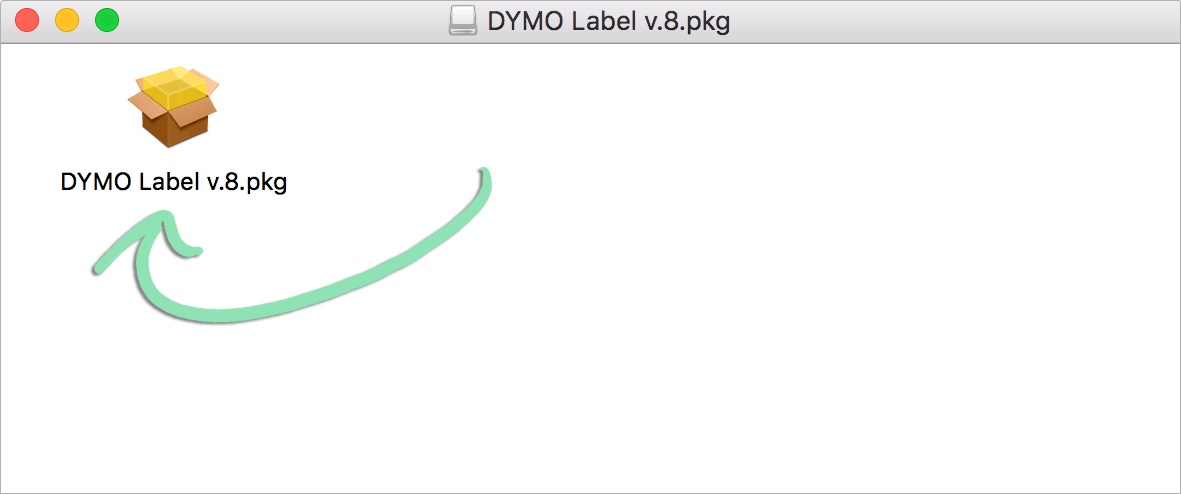
Open the file (.dmg for Mac or .exe for Win) and run it.
The images below are for Mac. Windows installation will look different.
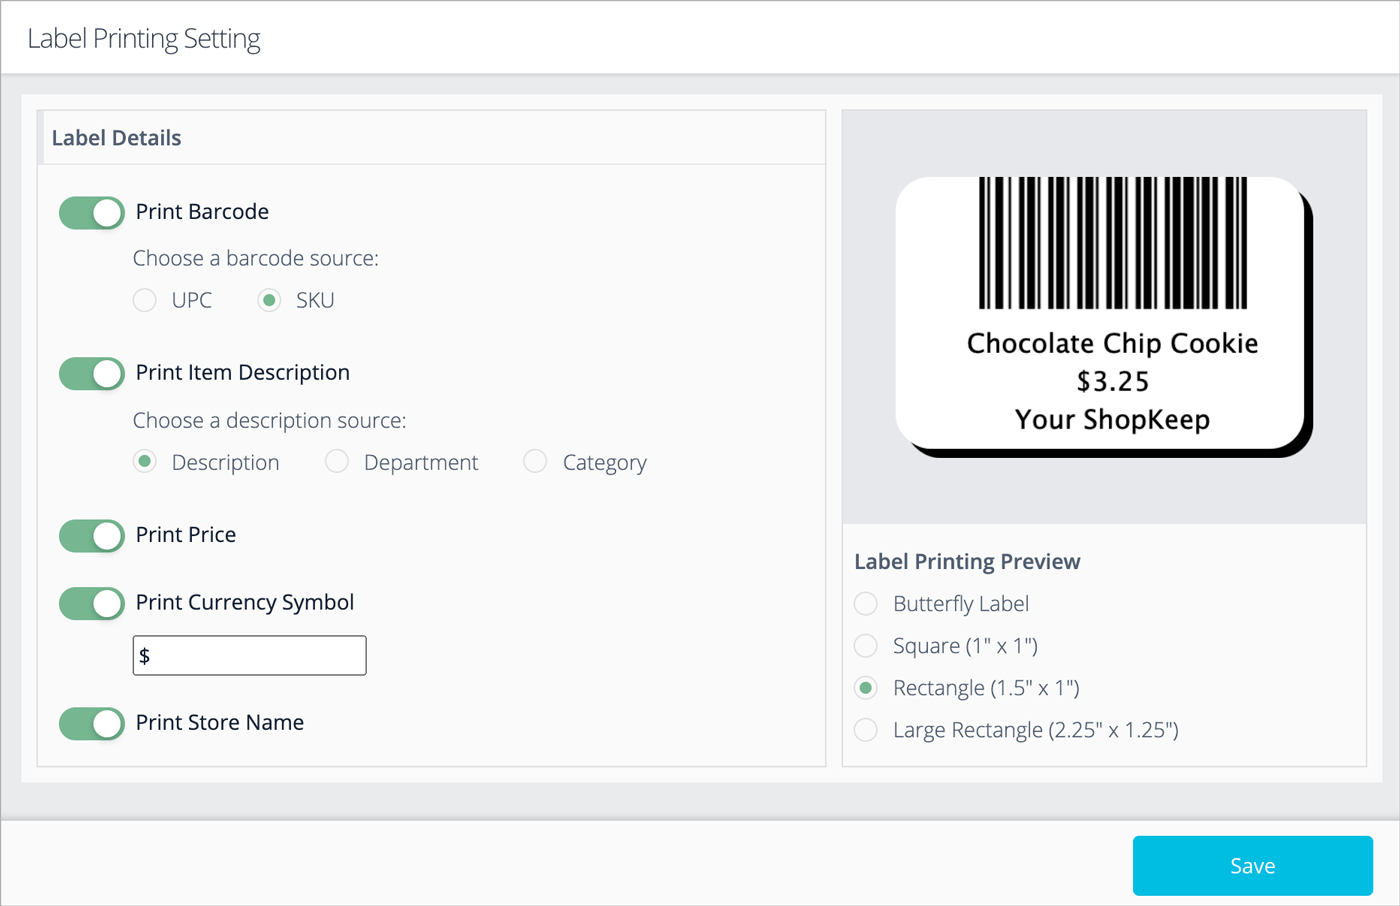
Customize how labels look with the following optional settings. Enable prices and add currency symbols, change what appears in the description field, print barcodes based on item SKUs or UPC codes, enable or disable the store name, select the default label size used for printing, and preview a completed label.
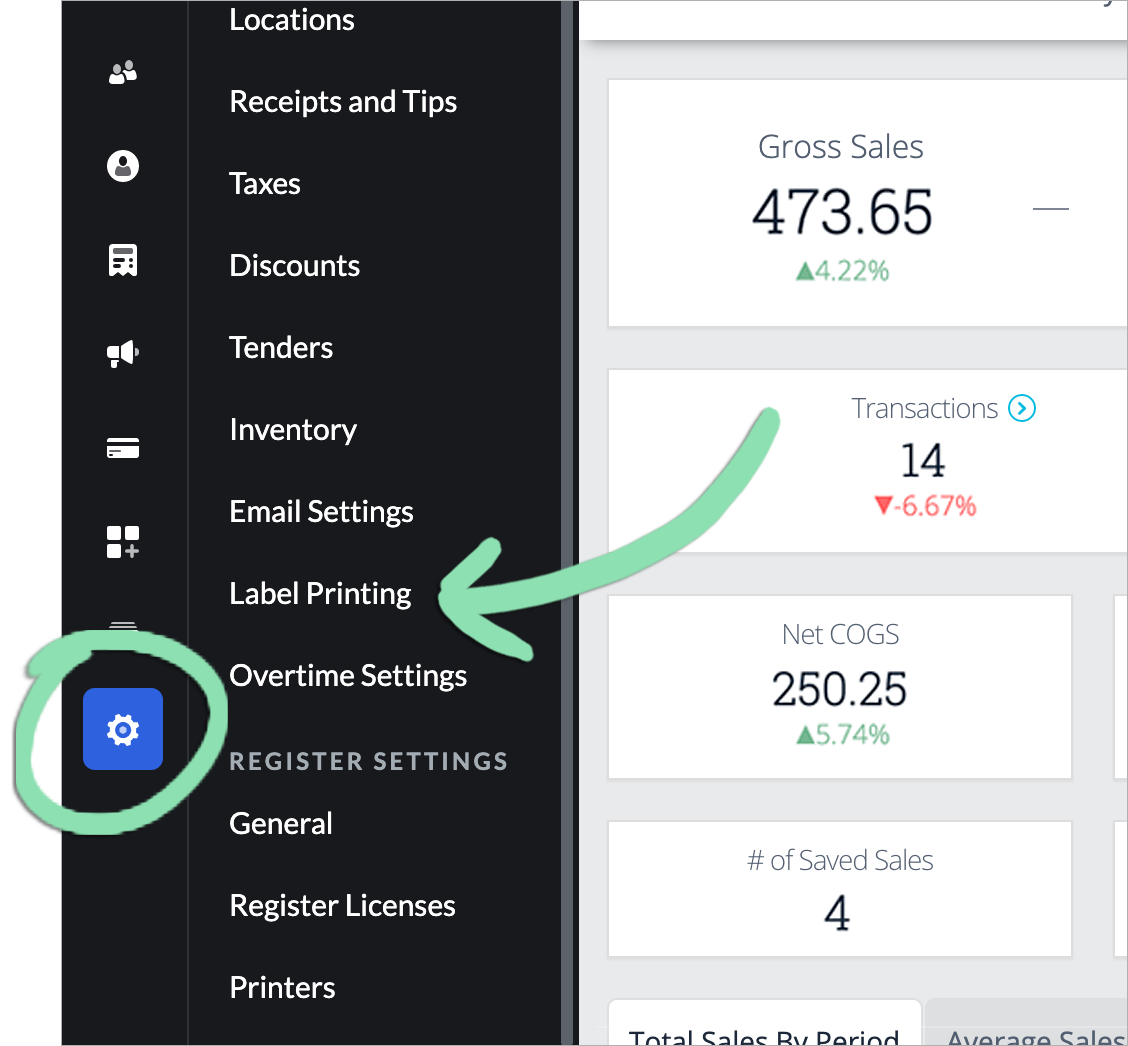
In BackOffice, click 'Settings' and select 'Label Printing'.
Click to Enlarge
Change settings as desired.
The label preview will update in real time to reflect the selected settings.
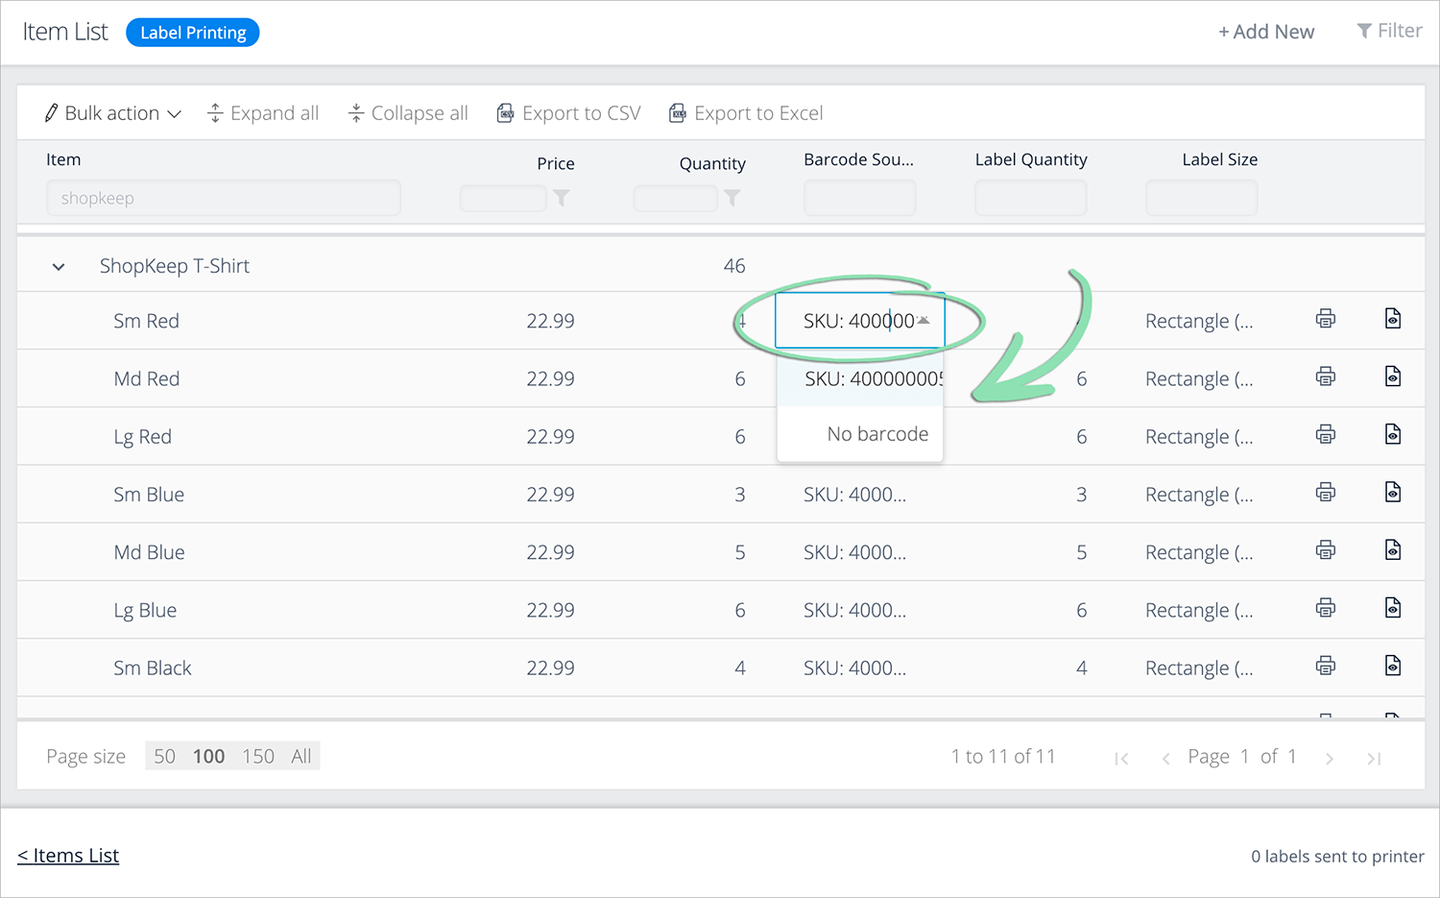
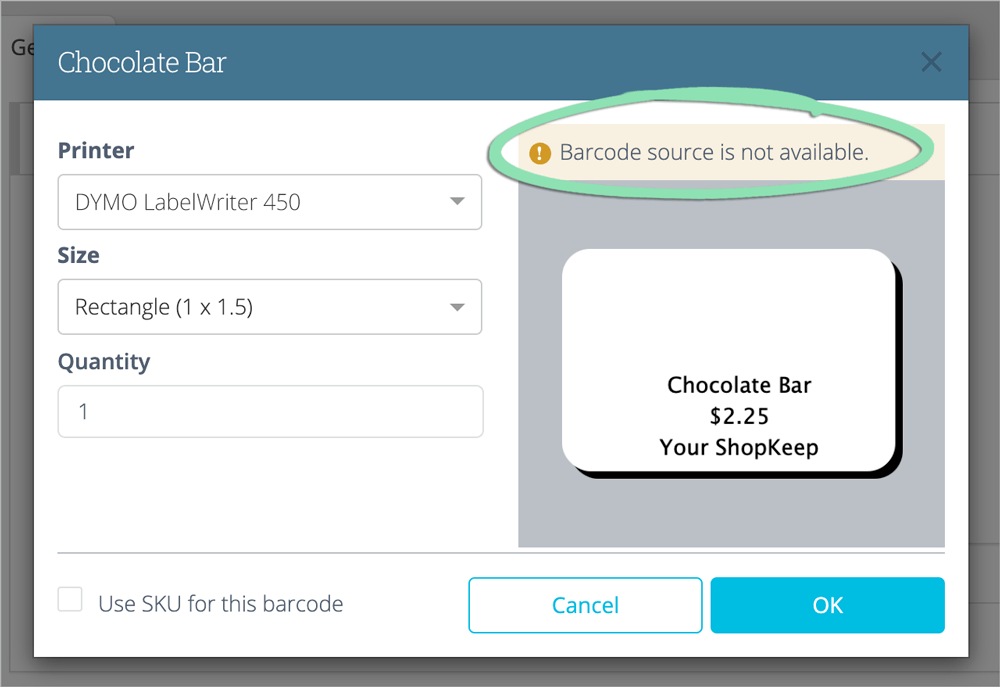
Print Barcode | Enable to print a barcode on labels. Select the ‘SKU’ or ‘UPC’ of the item as the barcode source. If toggled on with ‘UPC’ selected as the barcode source, items without UPC codes will have the option to use the SKU when printing labels. Print Item Description | Enable to print a description of the item on labels. Select either ‘Description’ (item name), ‘Department’, or ‘Category’ as the description source. This is taken from the information currently entered for the item on the Item List. Print Price | Enable to print the item price on labels. Prices are taken from the information currently entered for the item on the Item List. Print Currency Symbol | Enable to add a currency symbol next to the item price. If toggled on, you must enter a currency symbol ($, €, etc.) of 3 characters or less in the field that will appear below the setting. Enabling this setting requires ‘Print Price’ to be turned on. Print Store Name | Enable to print the name of the store on labels. The name used is the ‘Store Name’ entered in receipt settings. If no store name is set, the location nickname will be used instead. Label Printing Preview | Select a label size to use as the preview image displayed on this page and as the default label size that will be automatically selected when printing labels. Choose ‘Butterfly Label’, ‘Square (1” x 1”)’, ‘Rectangle (1.5” x 1”)’, or ‘Large Rectangle (2.25” x 1.25”)’.
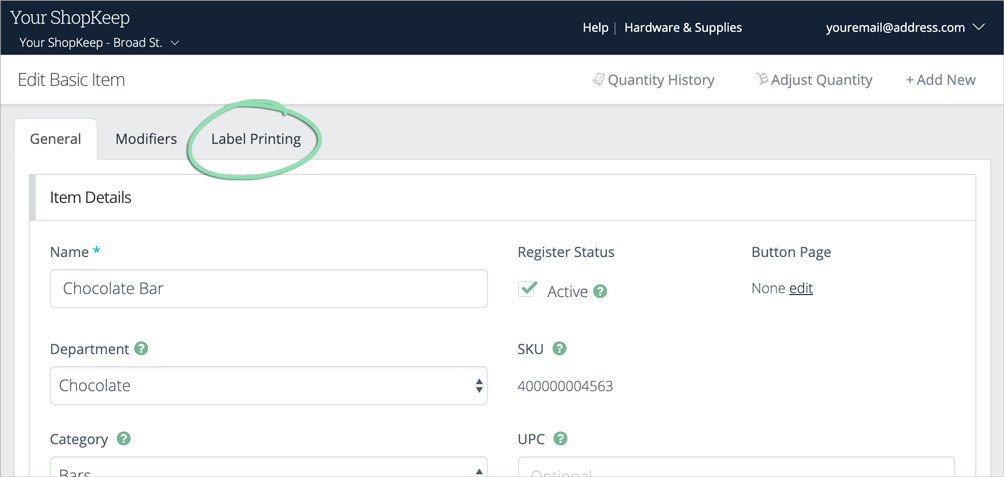
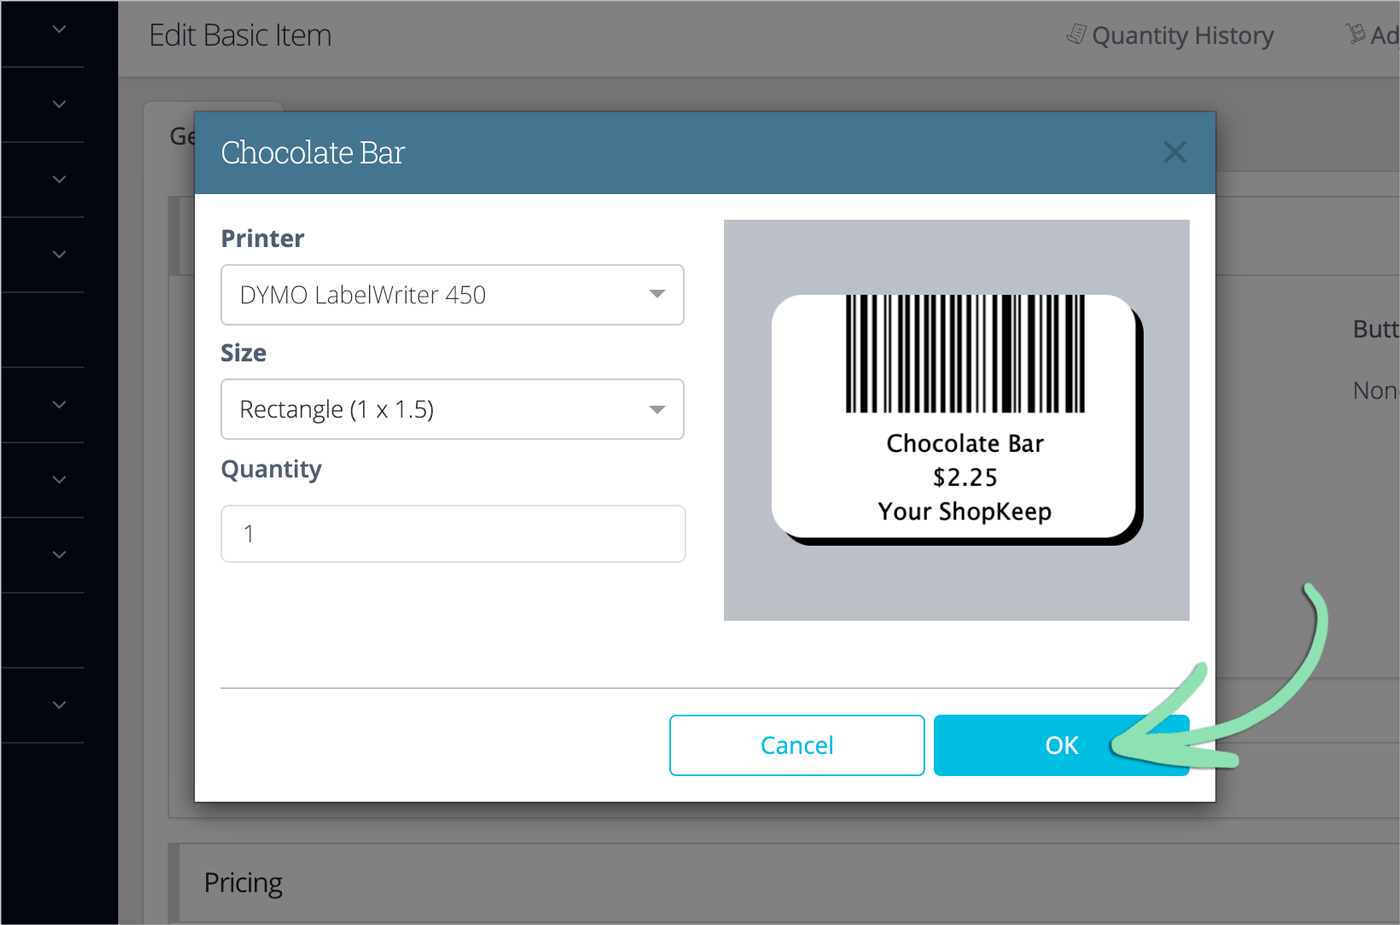
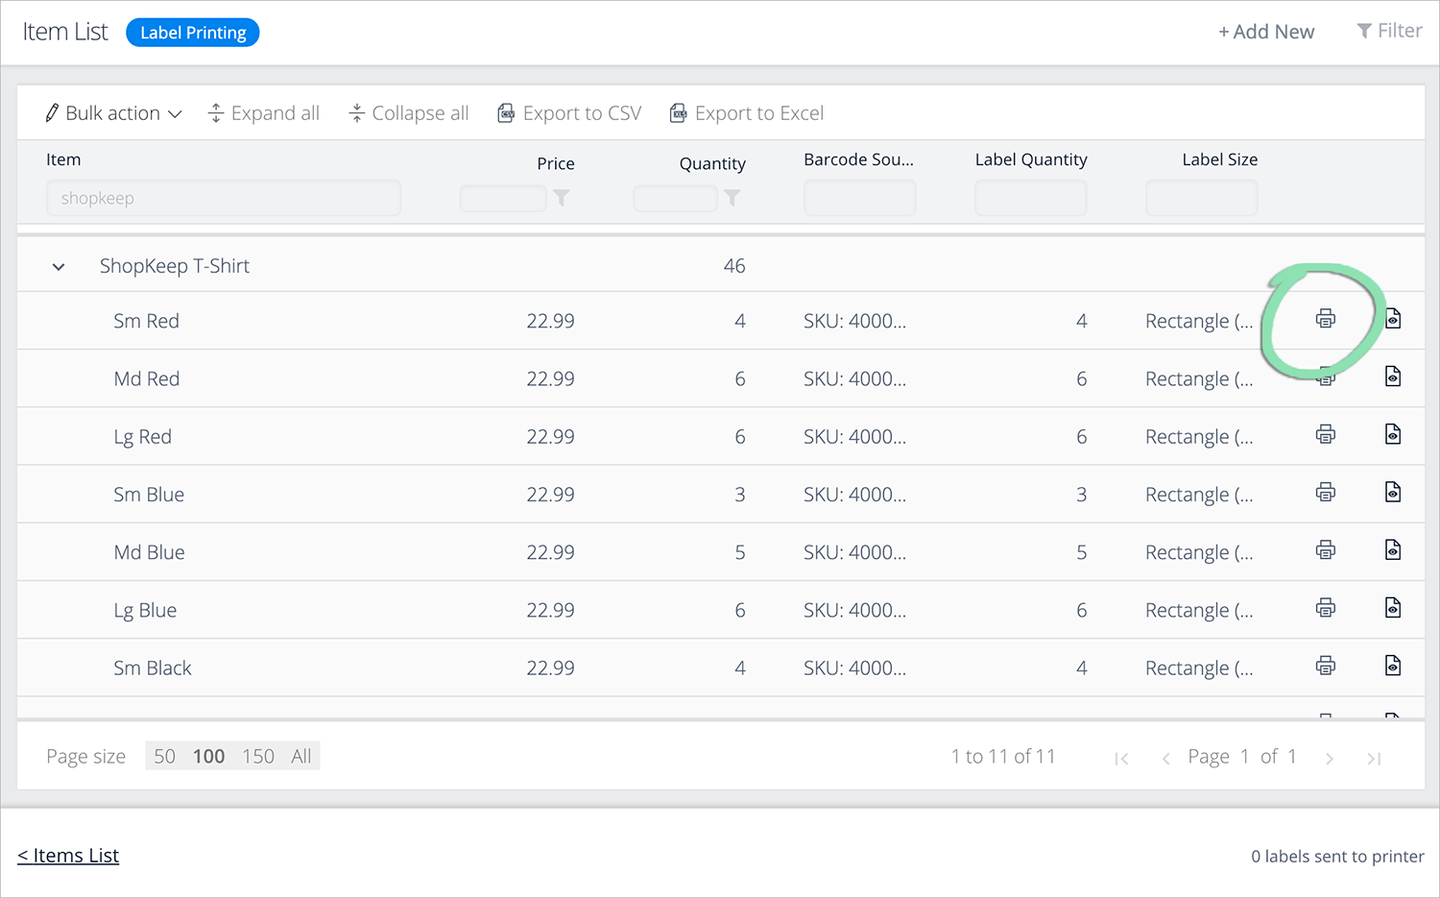
Print labels one item at a time from the BackOffice Item List to a connected DYMO LabelWriter printer. Select an inventory item, set the label size, and enter a quantity to print labels for individual items from BackOffice.
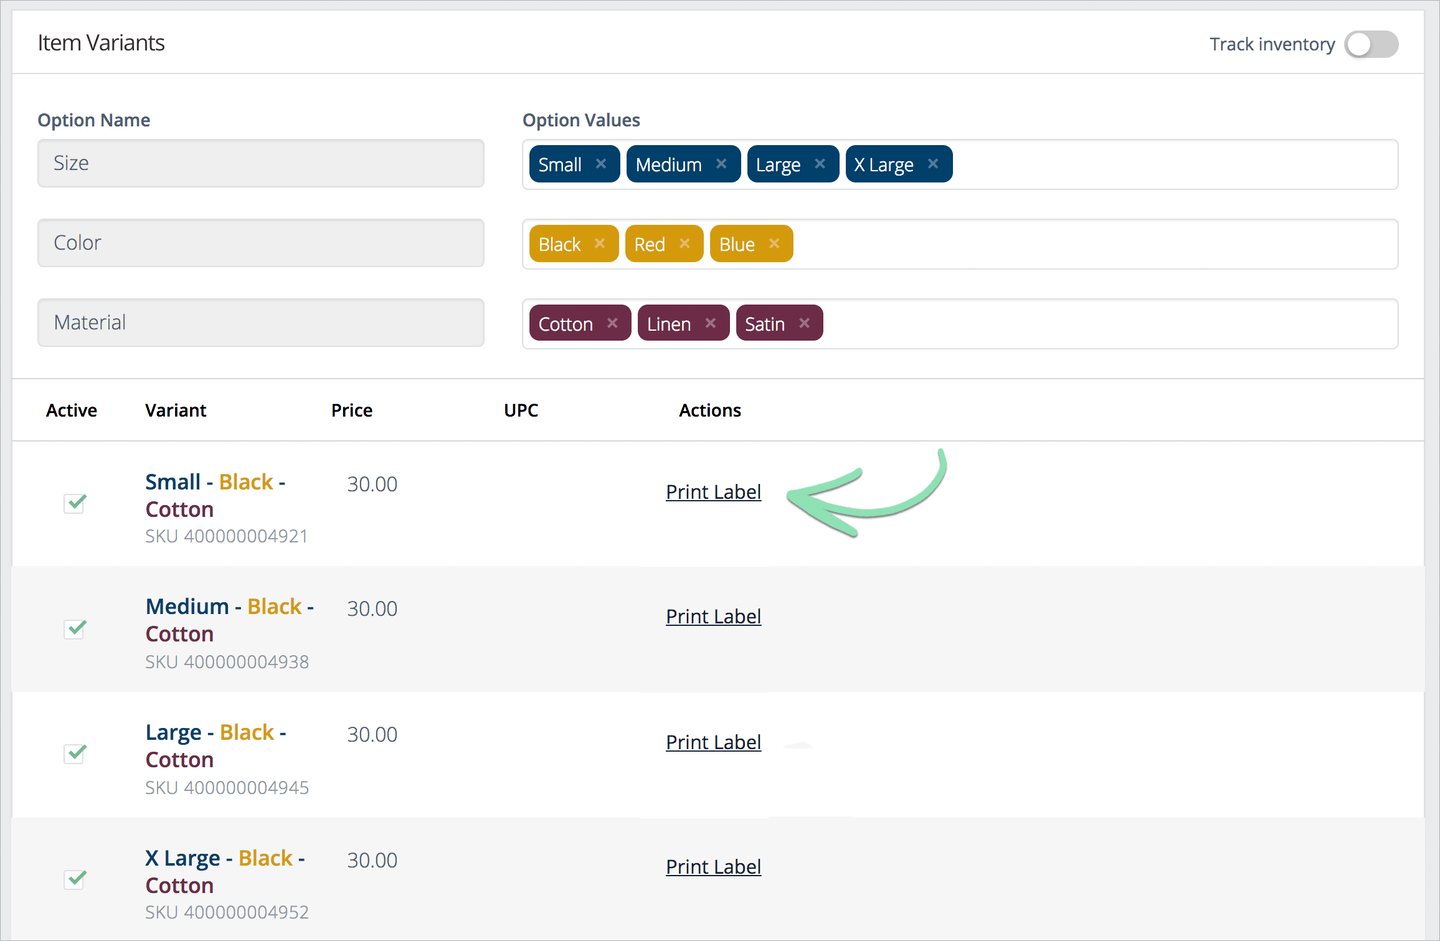
For items with variants, click the arrow next to an active variant and select ‘Print Label’ (if ‘Track Inventory’ is enabled), or click ‘Print Label’ (if ‘Track Inventory’ is disabled).
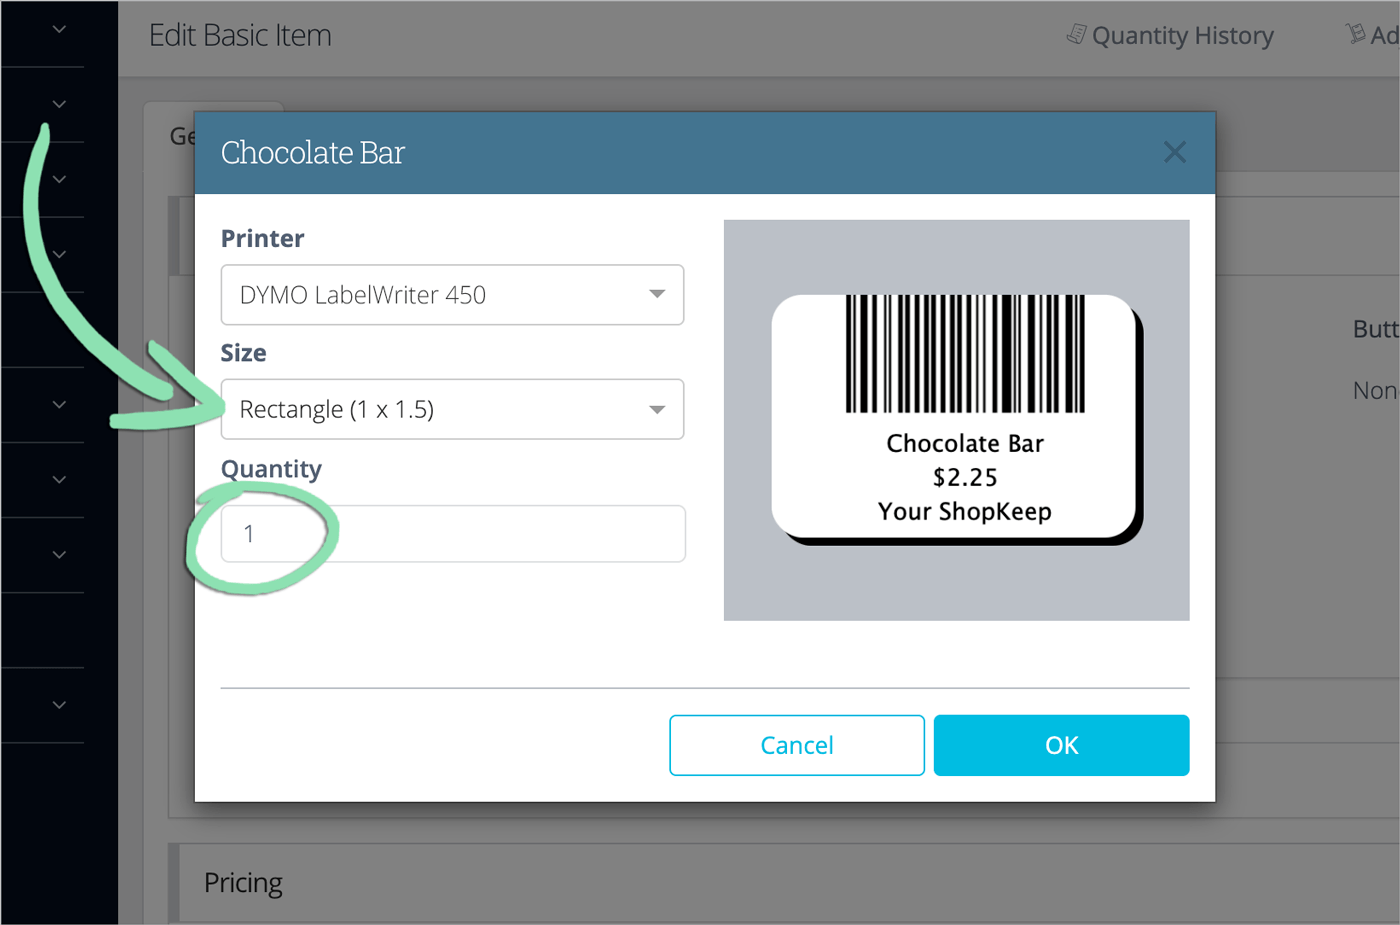
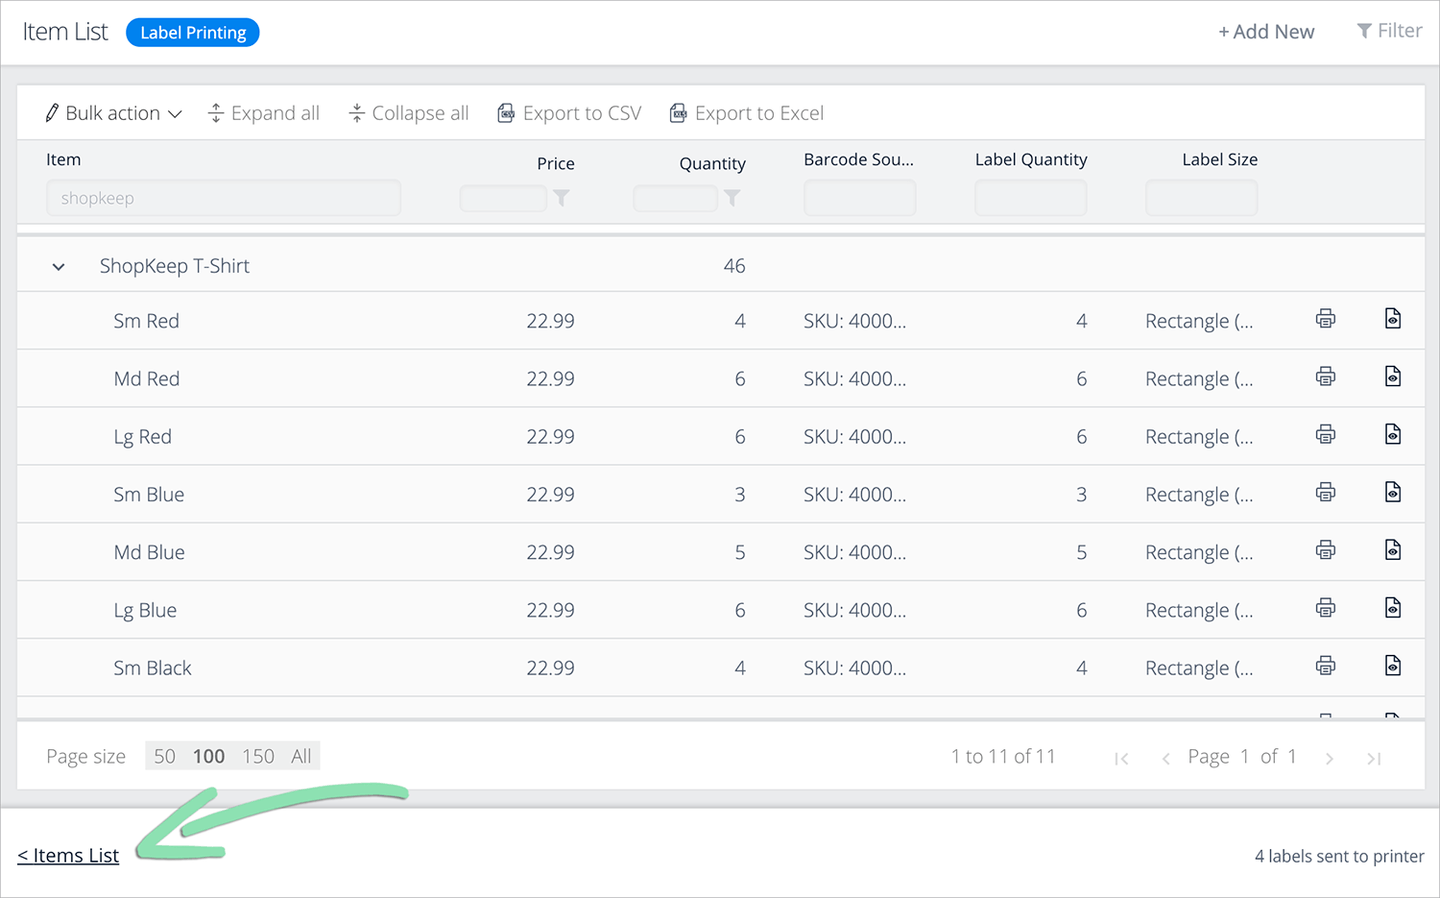
Click 'OK' to send the label(s) to the printer.
Click to Enlarge
Having trouble printing labels? Visit our DYMO Troubleshooting guide for help resolving the issue.
Print Bulk Labels
Print labels for multiple items simultaneously from the BackOffice Item List to a connected DYMO LabelWriter printer. Enter bulk label printing mode on the Item List, set the label size, and enter a quantity to print labels in bulk from BackOffice.
Prices do not print on labels by default. To learn how to enable prices, visit the Settings section above.
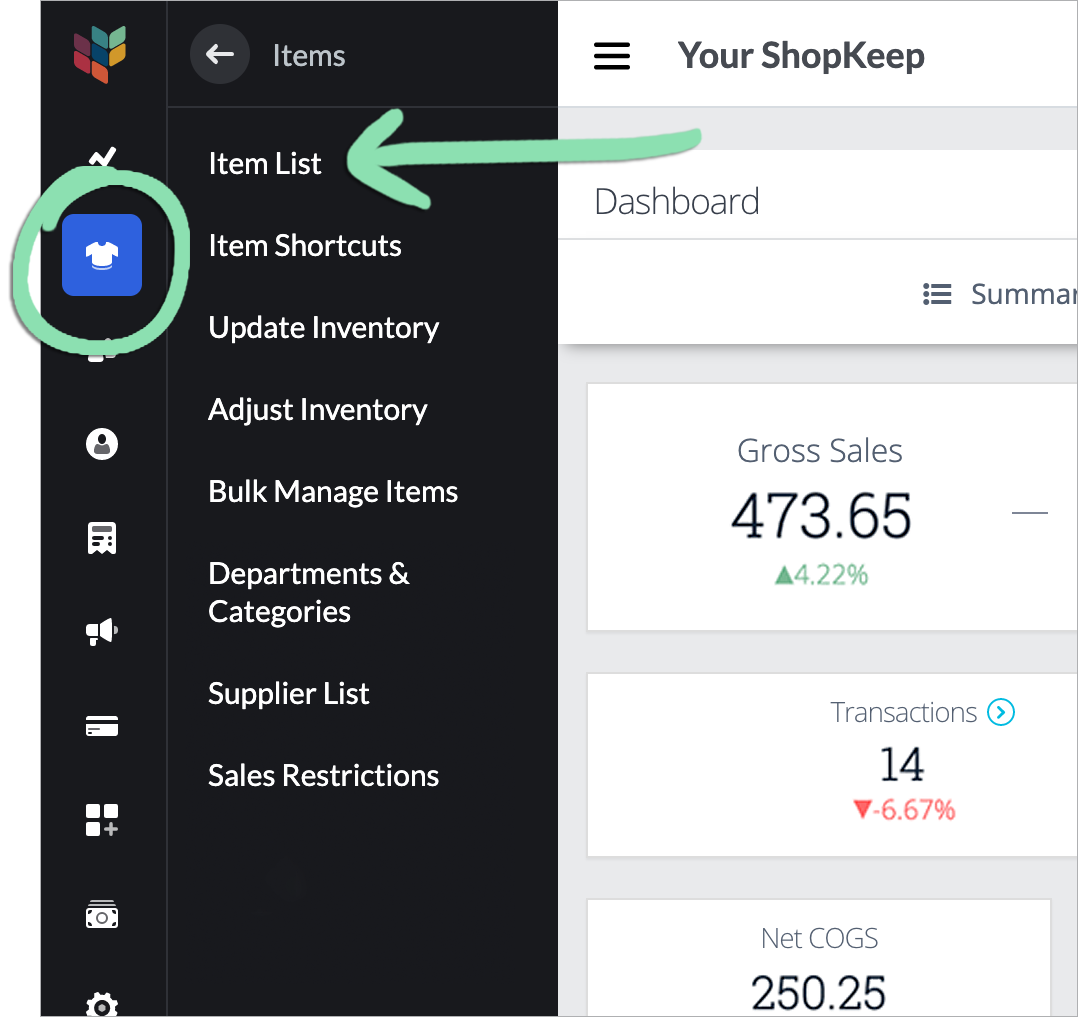
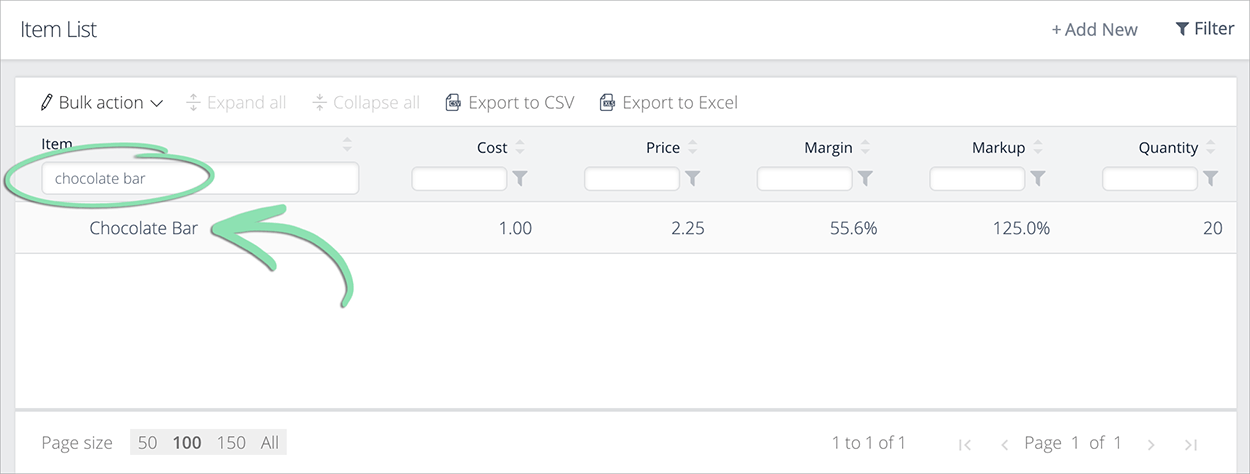
In BackOffice, click ‘Items’ and select ‘Item List’.
Click to Enlarge
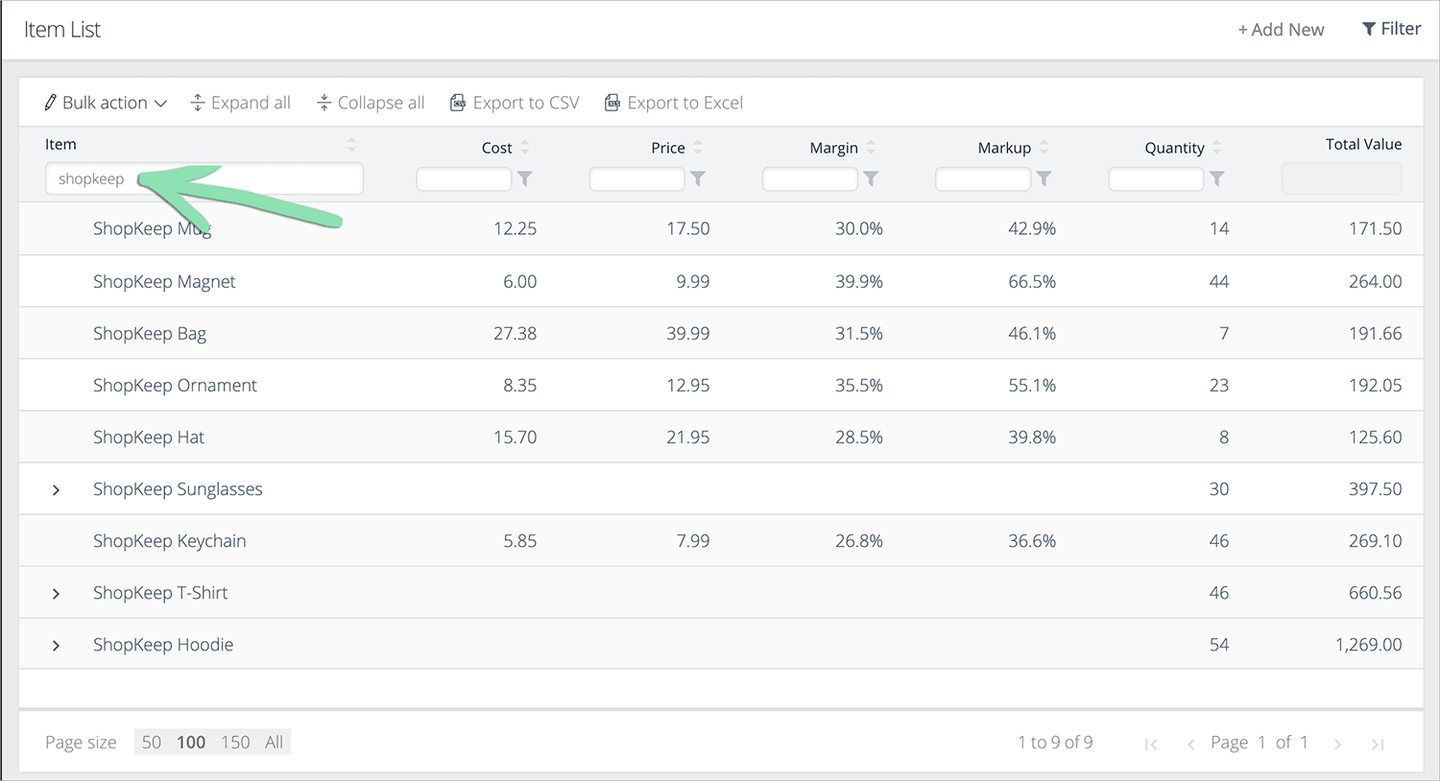
(Optional) Search, filter, and sort the Item List to display only the items that need labels printed.
Searching, filtering, and sorting must be done before entering label printing mode (step 3). For detailed help using these features of the Item List, visit our Organize Inventory article.
To search the Item List, enter the name, SKU, UPC, or supplier item ID of an item under the relevant column header.
Don’t see the SKU, UPC, or supplier item ID columns? Enable them by clicking ‘Filter’, selecting ‘Show/Hide Columns’, and checking the relevant boxes.
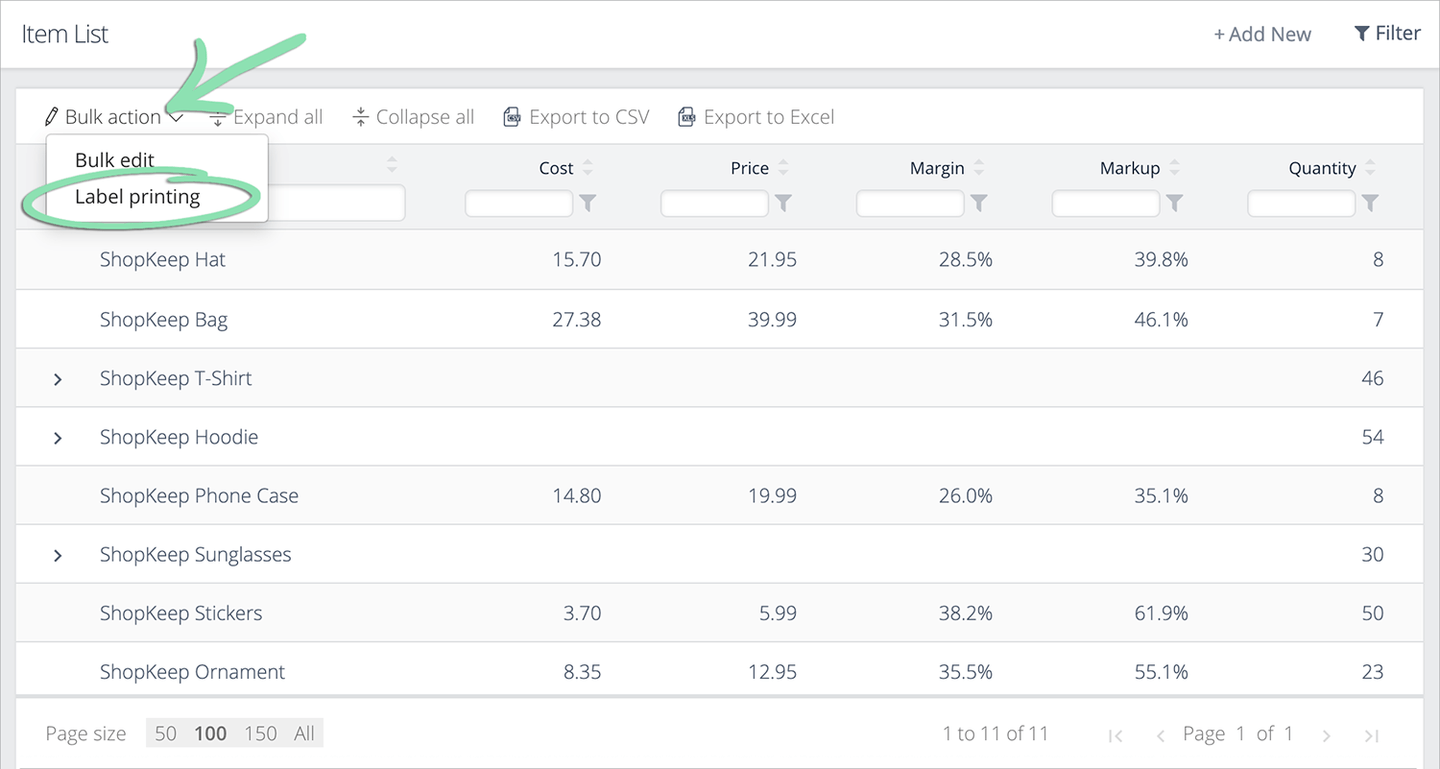
Click ‘Bulk action’, and select ‘Label printing’.
Click to Enlarge
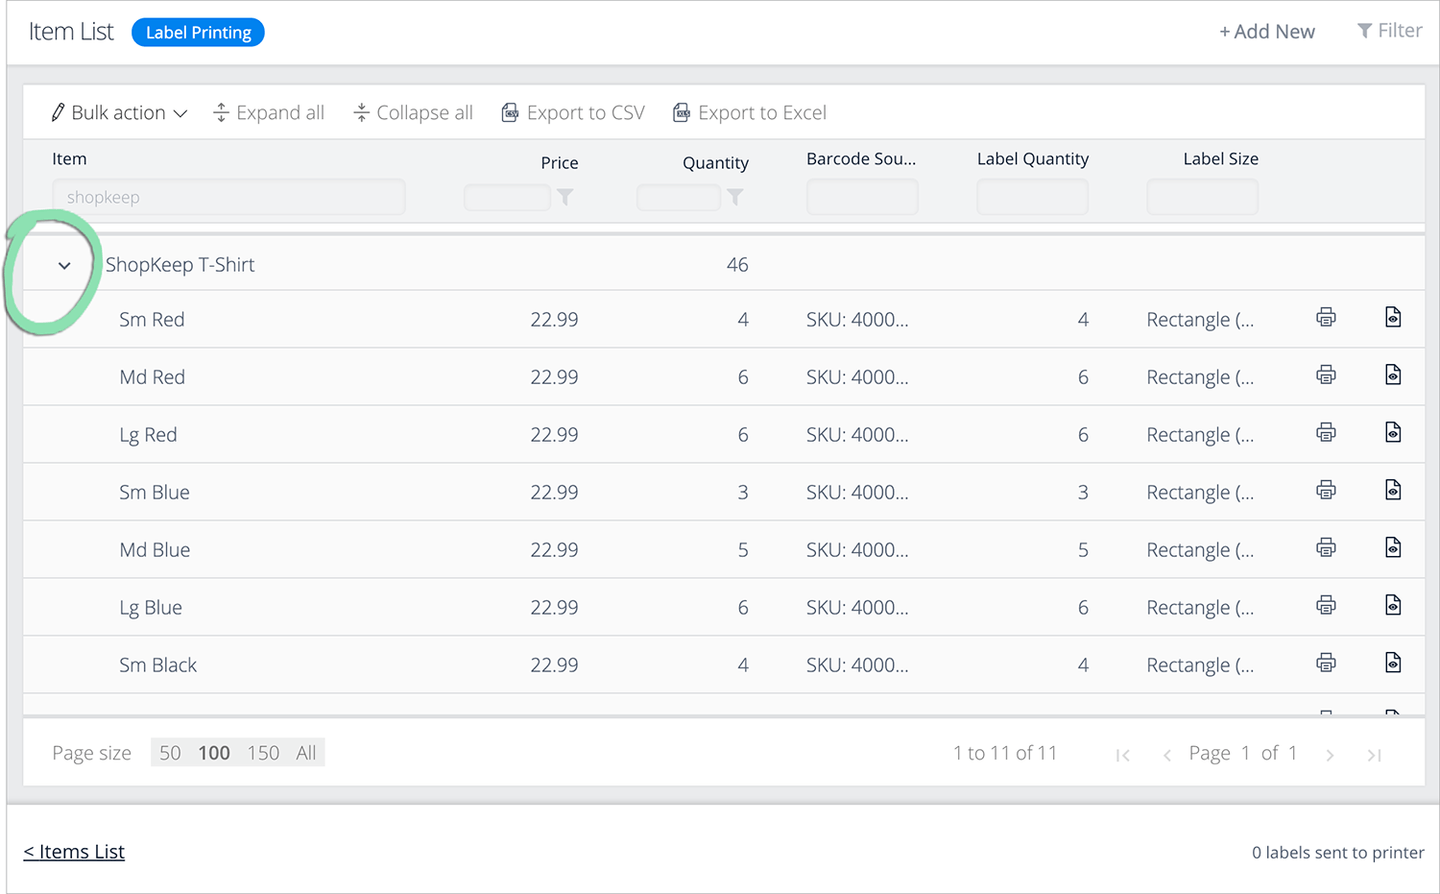
If printing an item with variants, click the arrow next to that item to view its active variants.
Click to Enlarge
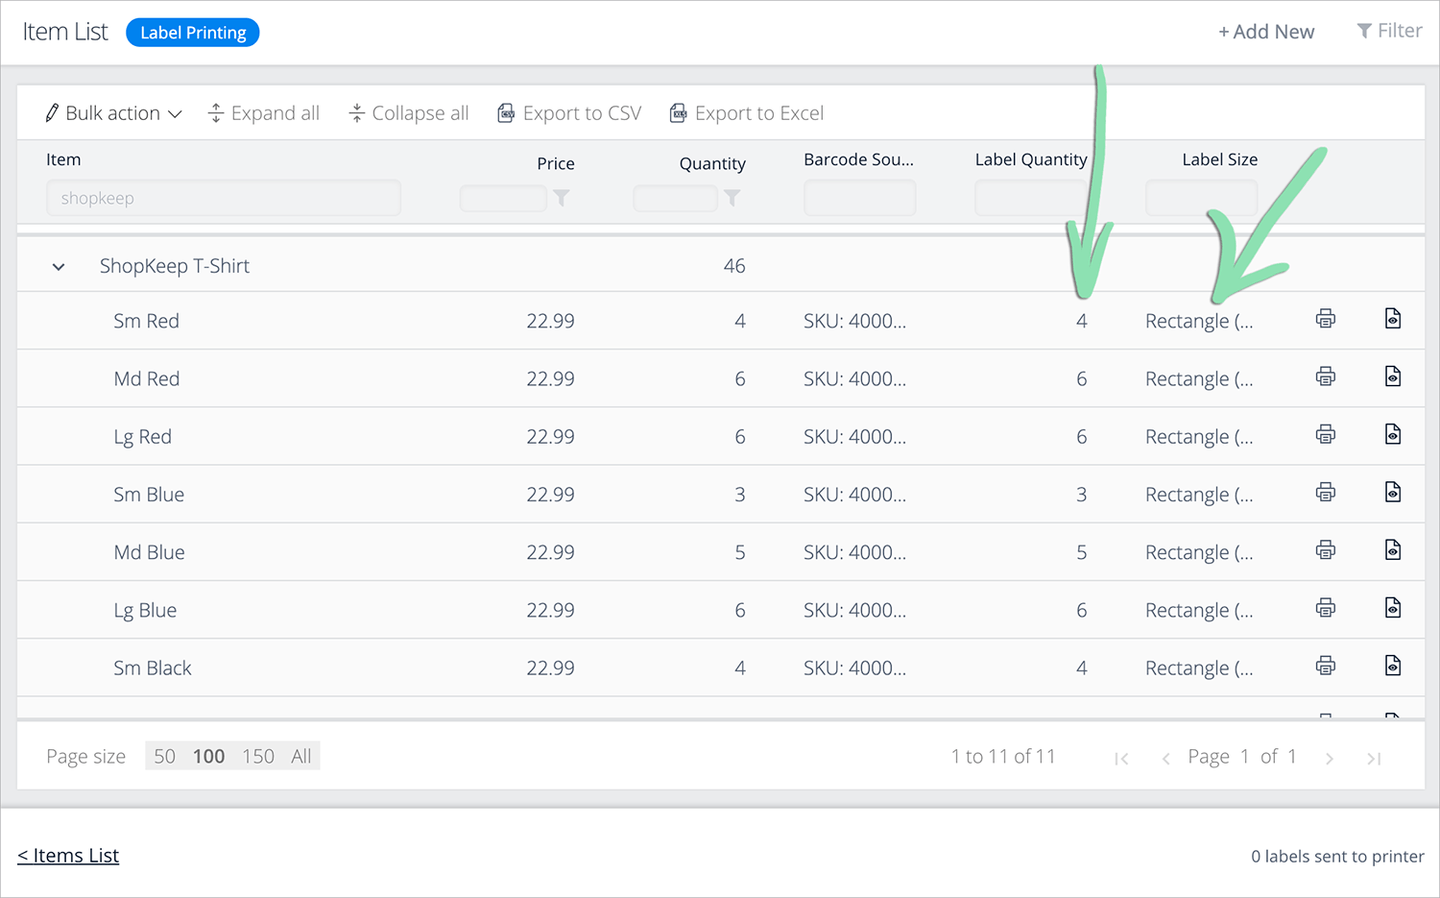
Enter a label quantity and select a label size for an item and/or variant being printed.
Available label sizes include ‘Square (1 x 1)’, ‘Rectangle (1 x 1.5)’, ‘Large Rectangle (1.25 x 2.25)’, and ‘Butterfly’. To preview what a specific label will look like, hover over the preview icon.