Clover Flex Setup

The light, compact, and mobile Clover Flex All-in-One Credit Card Reader and Printer allows you to accept credit cards and print customer receipts from one device. Customers can also view sale details, enter tips, and select receipt options right on the customer facing screen.

Table of Contents

In the Box

The Clover Flex Credit Card Reader and Printer ships with the parts listed below:

Click to Enlarge
  • Clover Flex Device
  • Clover Flex Cradle
  • Power Brick and Cable
  • Receipt Paper
  • Quick Start Guide
  • Screwdriver
  • Privacy Guard
  • Hardware Setup

    Complete the basic Clover Flex set up steps below to prepare the hardware for use with the Lightspeed Retail POS.

    1. Connect the power cable to the power brick and the other end of the power cable into a power outlet.
    2. Plug the power cable into the round port on the cradle and push the cable into the rubber grip.
    3. Place the Clover Flex on the cradle.
    4. Press and hold the power button to turn on the device.
      Click to Enlarge
    5. Lift open the printer cover on the underside of the device.
    6. Load the printer paper so it feeds up from the bottom of the roll.
      Click to Enlarge
    7. Close the cover on the paper, allowing some paper to show.
    8. Follow the steps below to activate your device.

    Device Activation

    After hardware setup, activate the Clover device for use with the Lightspeed Retail POS.

    1. Locate your activation email and make note of the activation code.

      The email is sent to the Lightspeed Retail account’s Business Owner email address.

      Click to Enlarge
    2. On the Clover device, select your language and tap ‘Set Language’.
    3. Tap 'Configure' to set up the device over your wireless network.
    4. Select the Wi-fi network.
    5. Enter the password for the network, then tap 'Connect'.
    6. Enter the 8 digit activation code from step 1.
    7. Set a 4 or 6 digit passcode and tap ‘Set Passcode’.

      This is code used to unlock the device when rebooted, wake it from sleep mode, or to exit the Network Pay Display app.

    8. Enter the passcode again, then tap 'Confirm'.
    9. Wait for the default apps to download and install.
    10. Tap 'Print Test Receipt' to print a test receipt. Tap 'Continue'.

      Click to view sample test receipt.

    11. Customize the passcode setting (optional) and tap ‘Continue’ to go to the Home screen.

      With Lightspeed Retail, you do not need to change the tip and signature setting. Tip and signature preferences are controlled using the preferences in receipt settings.

    12. (Canadian merchants only) Skip the rest of this section and follow the steps here to install the Secure Network Pay Display app.

      U.S. merchants proceed to step 13 in this section.

    13. On the Home screen, open the Network Pay Display app.

      Don’t see the app? If using the Clover device in Canada, follow the steps here to download it.

    14. In the Network Pay Display app, tap 'Start'.
    15. Review how to exit the Network Pay Display app and tap 'Got it'.
    16. With the Network Pay Display app open, follow the steps here to connect the device to the Lightspeed Retail POS.

    Install Secure Network Pay Display

    Canadian merchants must manually install the Secure Network Pay Display app after device activation to be able to connect the Clover device to the Retail POS (S-Series) app.

    U.S. merchants can skip this section as it only applies to those using the Clover device in Canada.

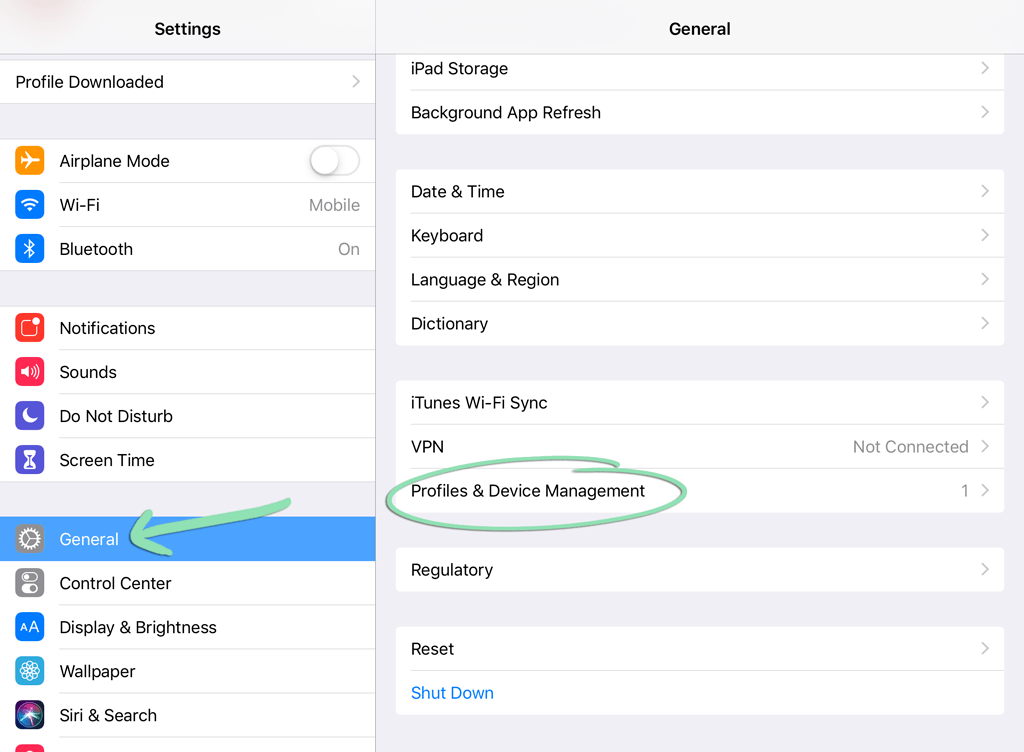
    1. From the Home screen, open the ‘More Tools’ app.
    2. Tap the magnifying glass.
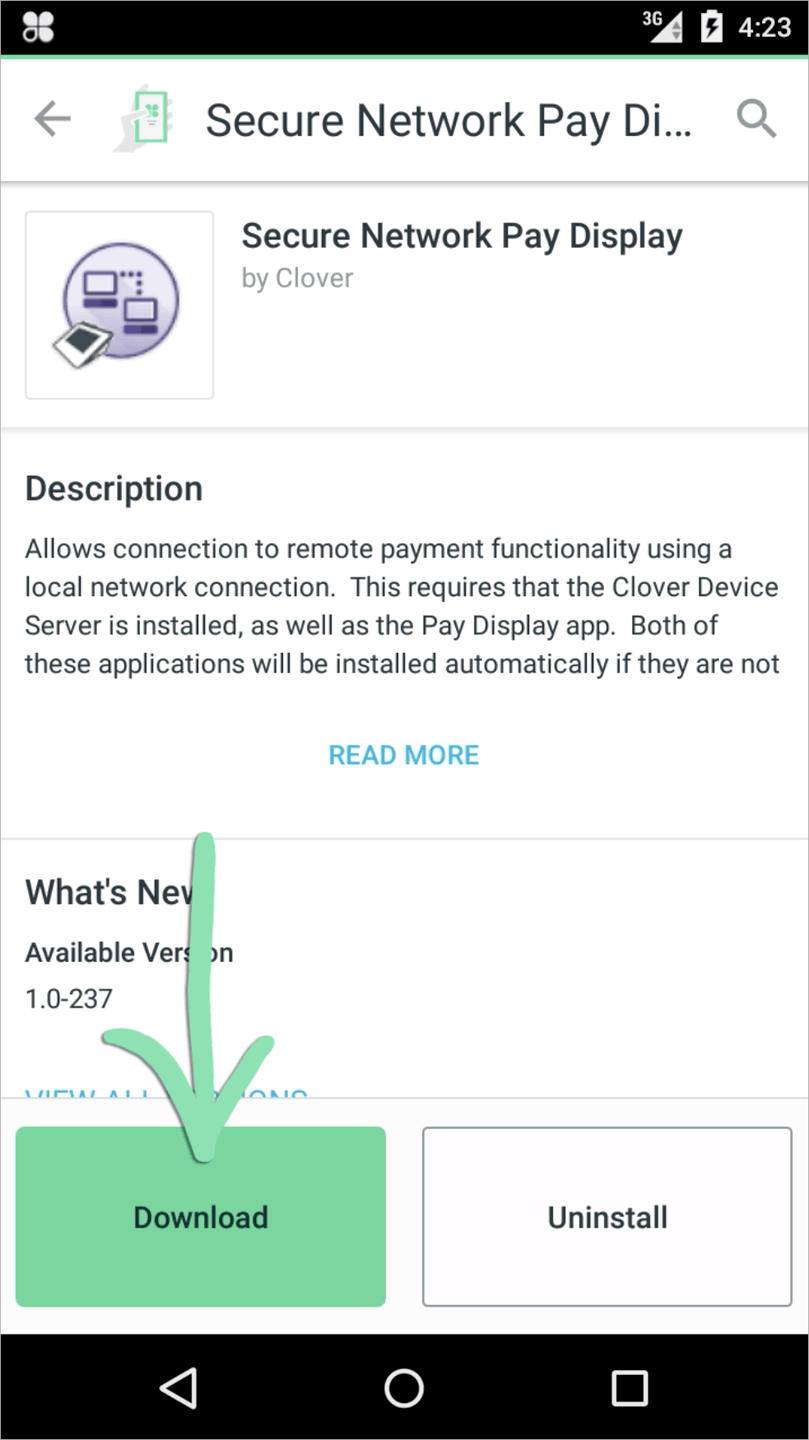
    3. Search for ‘Secure Network Pay Display’ and tap to select it.
    4. Tap ‘Connect’, then ‘Connect’ again to confirm.

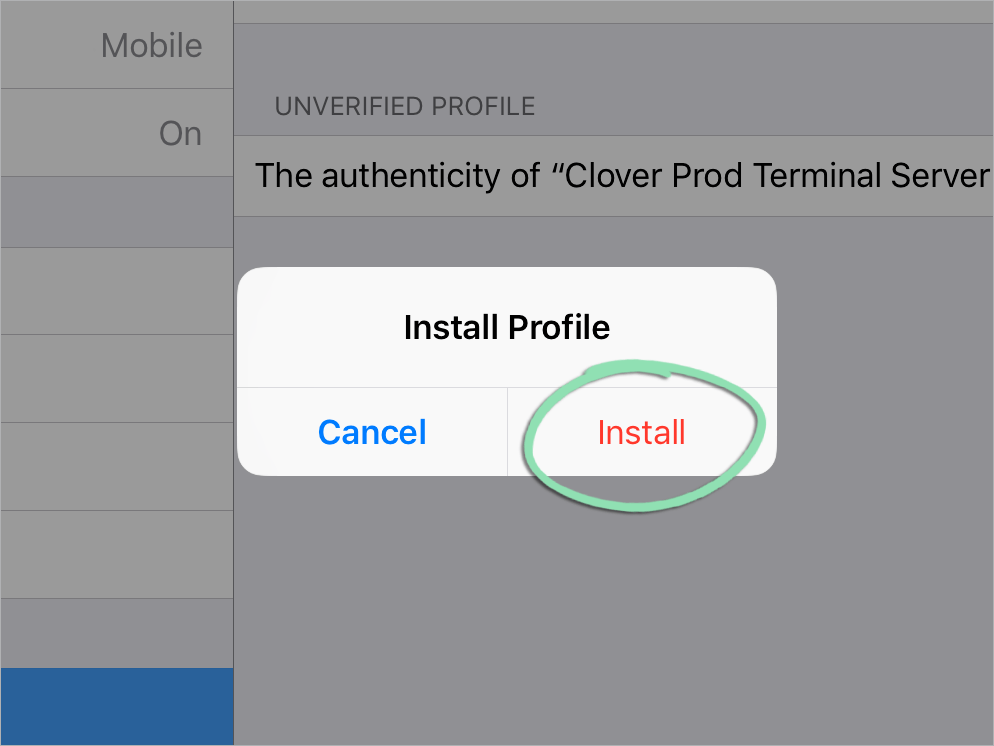
    5. Tap ‘Download’ to begin downloading and installing the app.
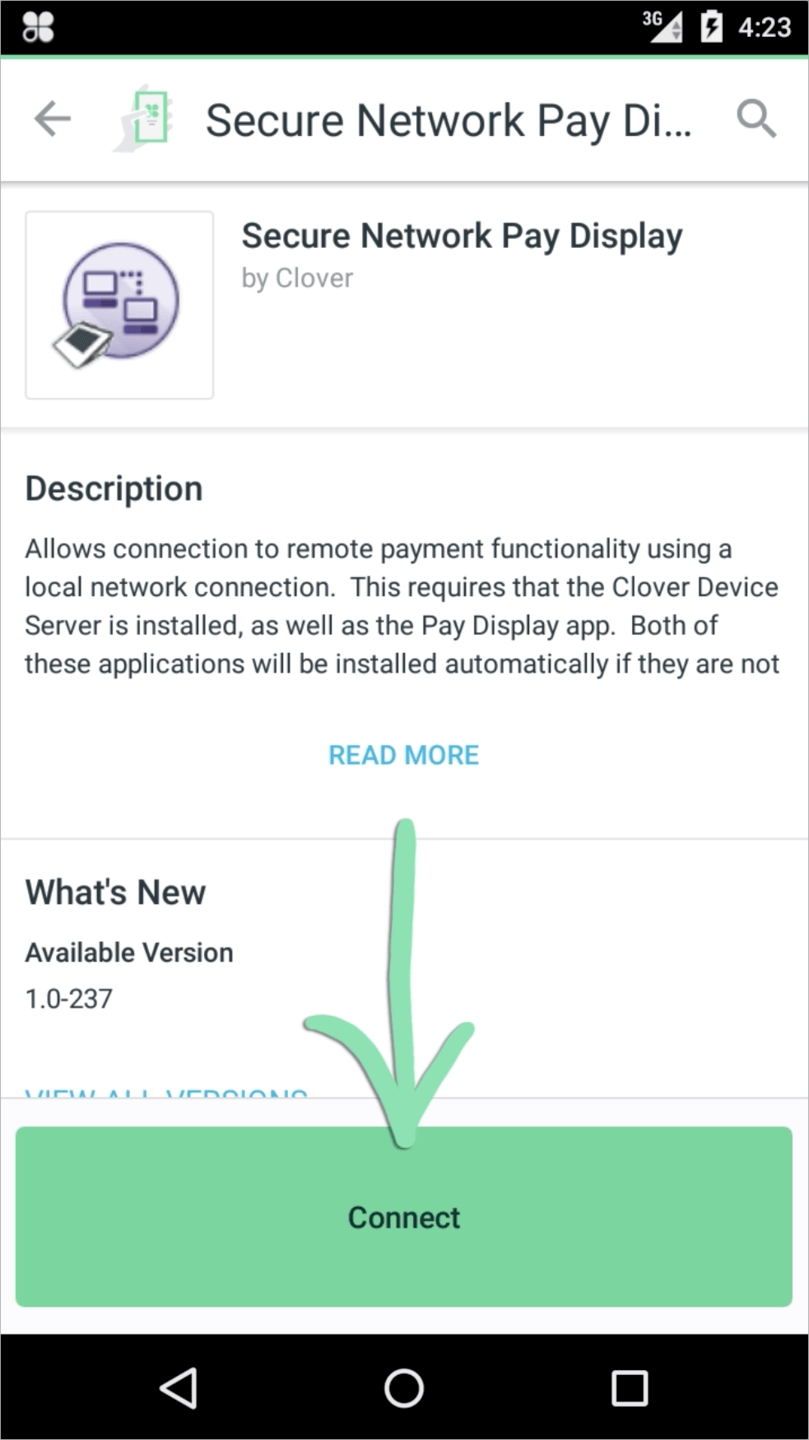
    6. Once finished installing, tap ‘Open’ to launch Secure Network Pay Display.
    7. In the Secure Network Pay Display app, tap 'Start'.
    8. Review how to exit the app and tap 'Got it'.
    9. With the Secure Network Pay Display app open, follow the steps here to connect the device to the Lightspeed Retail POS.

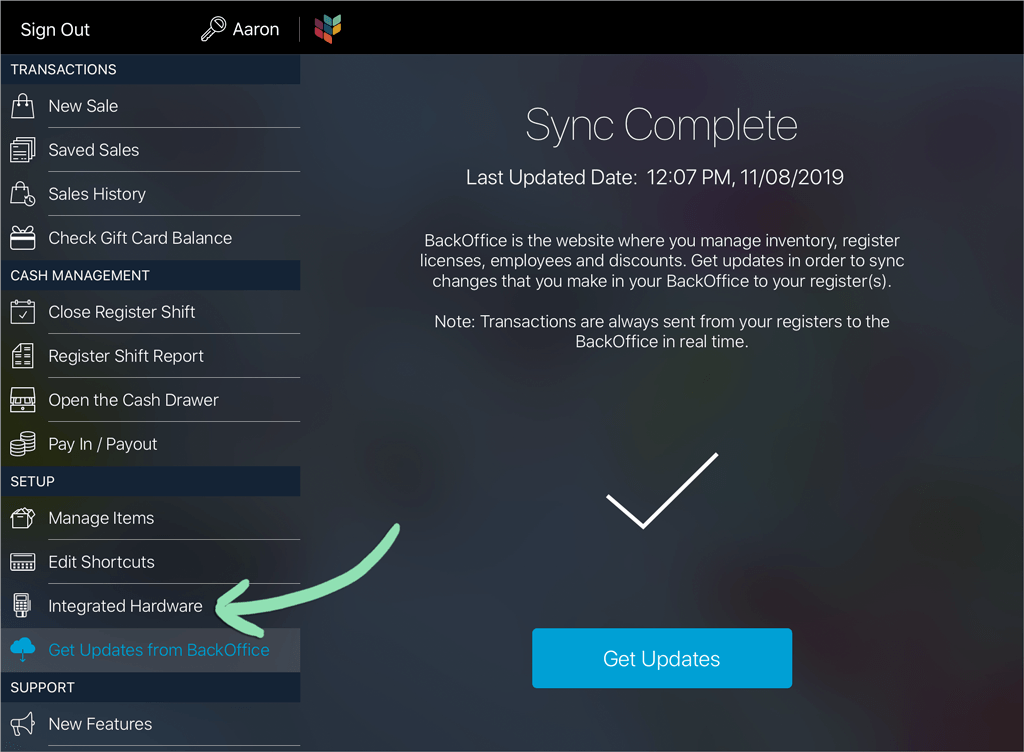
    Connect to Lightspeed

    With the Clover device activated, connect it to the Retail POS (S-Series) app to begin using it. Before getting started, make sure the Clover device and your Lightspeed Retail iPad register are on the same internet network.

    Please note that the Clover device can only be connected to one Lightspeed Retail iPad register at a time.

    1. In BackOffice, customize your paper receipt with a 'Store Name'. Learn how to set up receipts here.

      The ‘Store Name’ displays on the Clover Flex’s ‘Welcome’ screen after it is connected to the Retail POS (S-Series) app.

      Click to Enlarge
    2. In the Retail POS (S-Series) app, open the Main Menu and Get Updates from BackOffice.

      Receiving an error when you get updates? Visit our troubleshooting guide for help.

      Click to Enlarge
    3. Tap 'Integrated Hardware'.
      Click to Enlarge
    4. On the 'Card Readers' screen, tap the Clover device.

      Don’t see the Clover device? Visit our troubleshooting guide for help.

      Click to Enlarge
    5. Tap 'OK' on the pop-up to install the required certificate.

      The Retail POS (S-Series) app will automatically close and the Safari app will open.

    6. In Safari, tap 'Install Certificate'.
      Click to Enlarge
    7. Tap 'Allow'.
      Click to Enlarge
    8. Tap ‘Close’, then open the Settings app.
      Click to Enlarge
    9. In Settings, tap ‘General’ and select ‘Profiles & Device Management’.
      Click to Enlarge
    10. Tap ‘Clover Prod Terminal Server Root’.
      Click to Enlarge
    11. Tap ‘Install’, then tap ‘Install’ again.
    12. Tap 'Install' to confirm the installation.
      Click to Enlarge
    13. Tap 'Done'.
      Click to Enlarge
    14. Reopen Safari, then follow step 2 displayed in the browser.
      • This step in Safari must be completed.
      • Failure to complete this step will prevent the Clover device from connecting to the Retail POS (S-Series) app.
      Click to Enlarge
    15. After completing the Safari step above, tap 'Return to register', then 'Open'.

      This automatically opens the Retail POS (S-Series) app.

    16. In the Retail POS (S-Series, tap the Clover device.
      Click to Enlarge
    17. On the Clover device, enter the passcode created during device activation.
    18. On the Clover device, enter the pairing code displayed in the Retail POS (S-Series) app.

      Not receiving a pairing code in Retail POS (S-Series) app? Return to Safari and complete step 9 from above.

    19. In the Retail POS (S-Series) app, wait for a checkmark to appear.
      Click to Enlarge
    20. Tap 'Printers'.
      Click to Enlarge
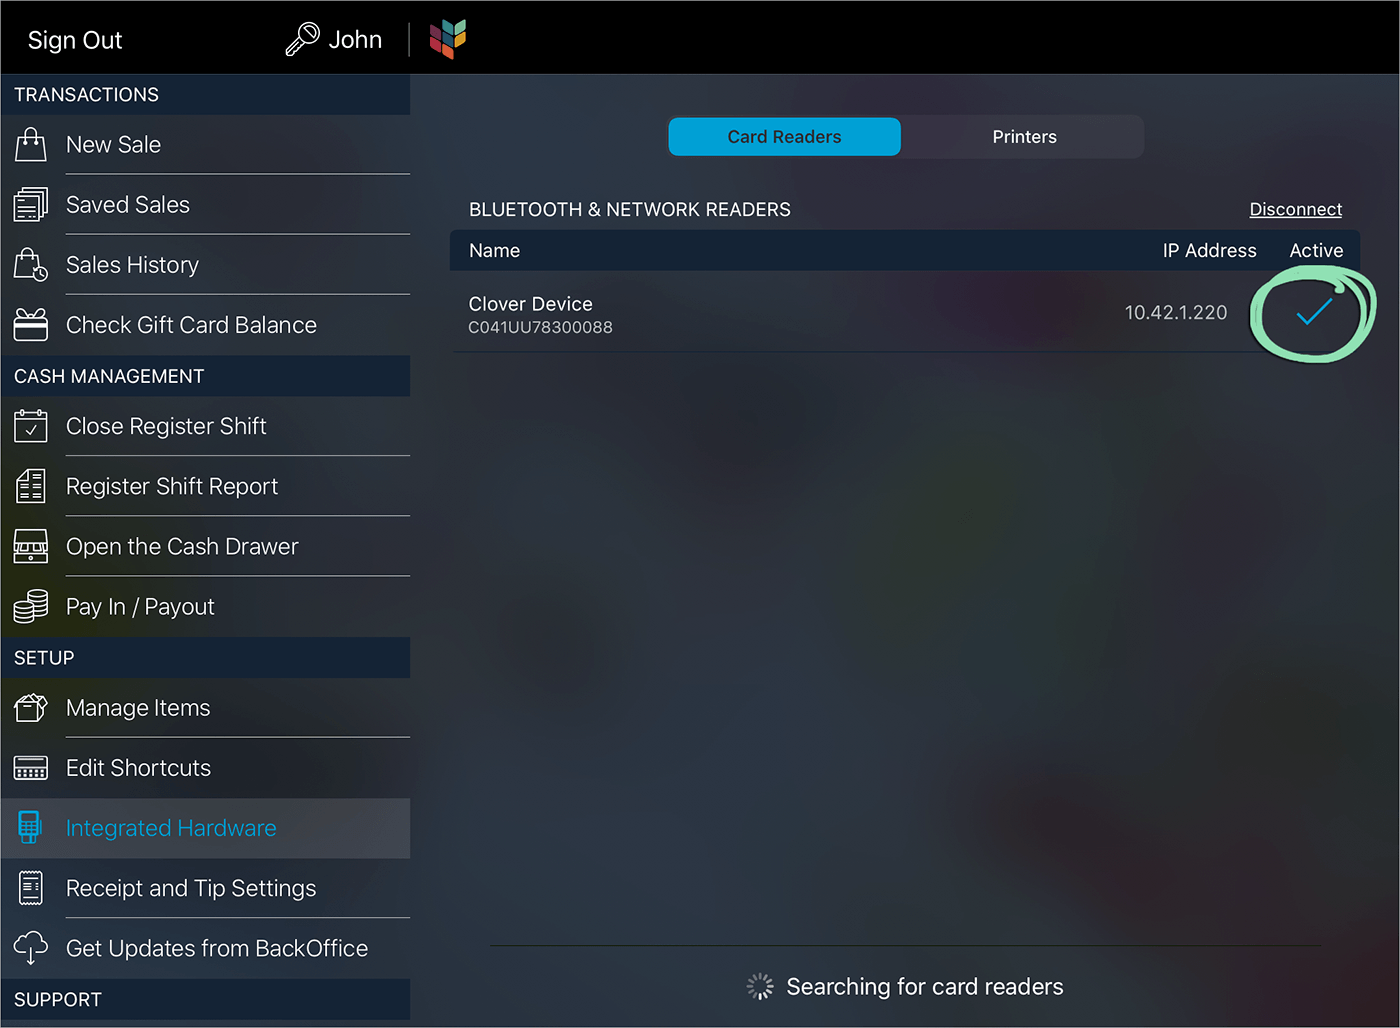
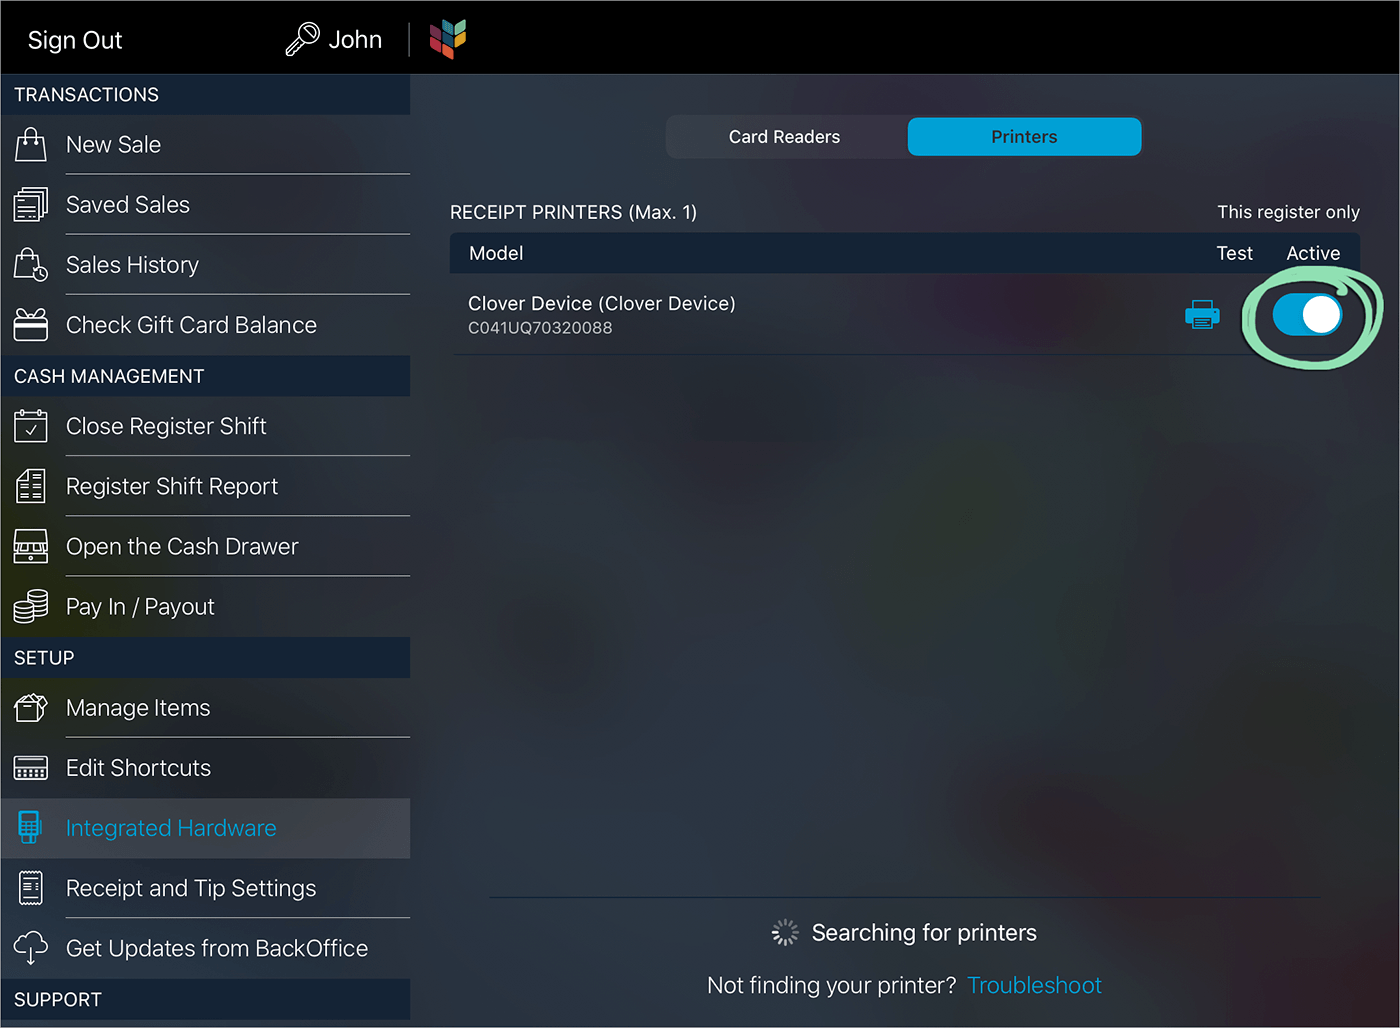
    21. Toggle the switch next to the Clover device to use it as the receipt printer for this register.
      Click to Enlarge
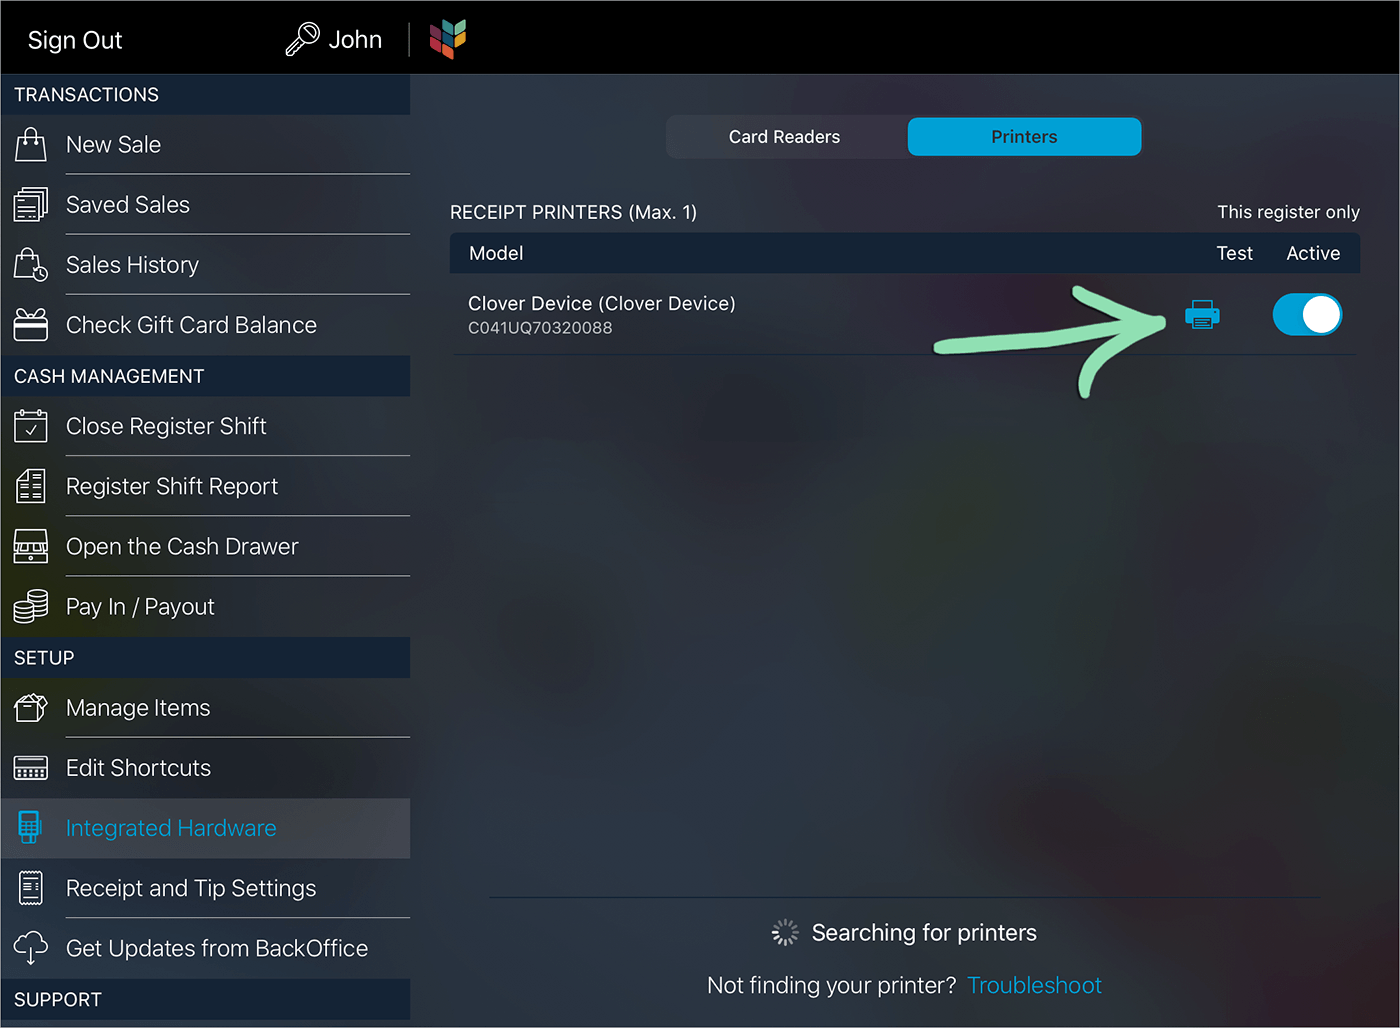
    22. (Optional) Tap the printer icon to test the connection between the Retail POS (S-Series) app and the device.

      If successful, this prints a slip of paper with the device’s name, MAC address, and the date and time. If the test print is unsuccessful, check out our troubleshooting guide.

      Click to Enlarge

    Privacy Guard Installation

    Attach the optional privacy guard to shield the screen as customers enter their personal information.

    1. Align the privacy guard with the screen of the Clover Flex.
    2. Press down on the guard until it snaps into place.