The Epson TM-m10 and TM-m30 Bluetooth printers connect wirelessly via Bluetooth to print receipts (iOS and Android) and kitchen tickets (iOS only) in the Retail POS (S-Series) app. Follow this guide to learn how to set up the printer, pair it with a register device, and connect it to the Retail POS (S-Series) app.
If setting up a Star Micronics Bluetooth 650II receipt printer, visit this article instead.
Watch our setup video below:
Table of Contents
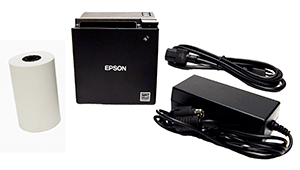
In the Box
The Epson TM-m10 and TM-m30 Bluetooth Printers ship with the parts listed below.
Complete the basic steps of connecting the printer to power and loading paper to prepare the printer to be connected to your register.
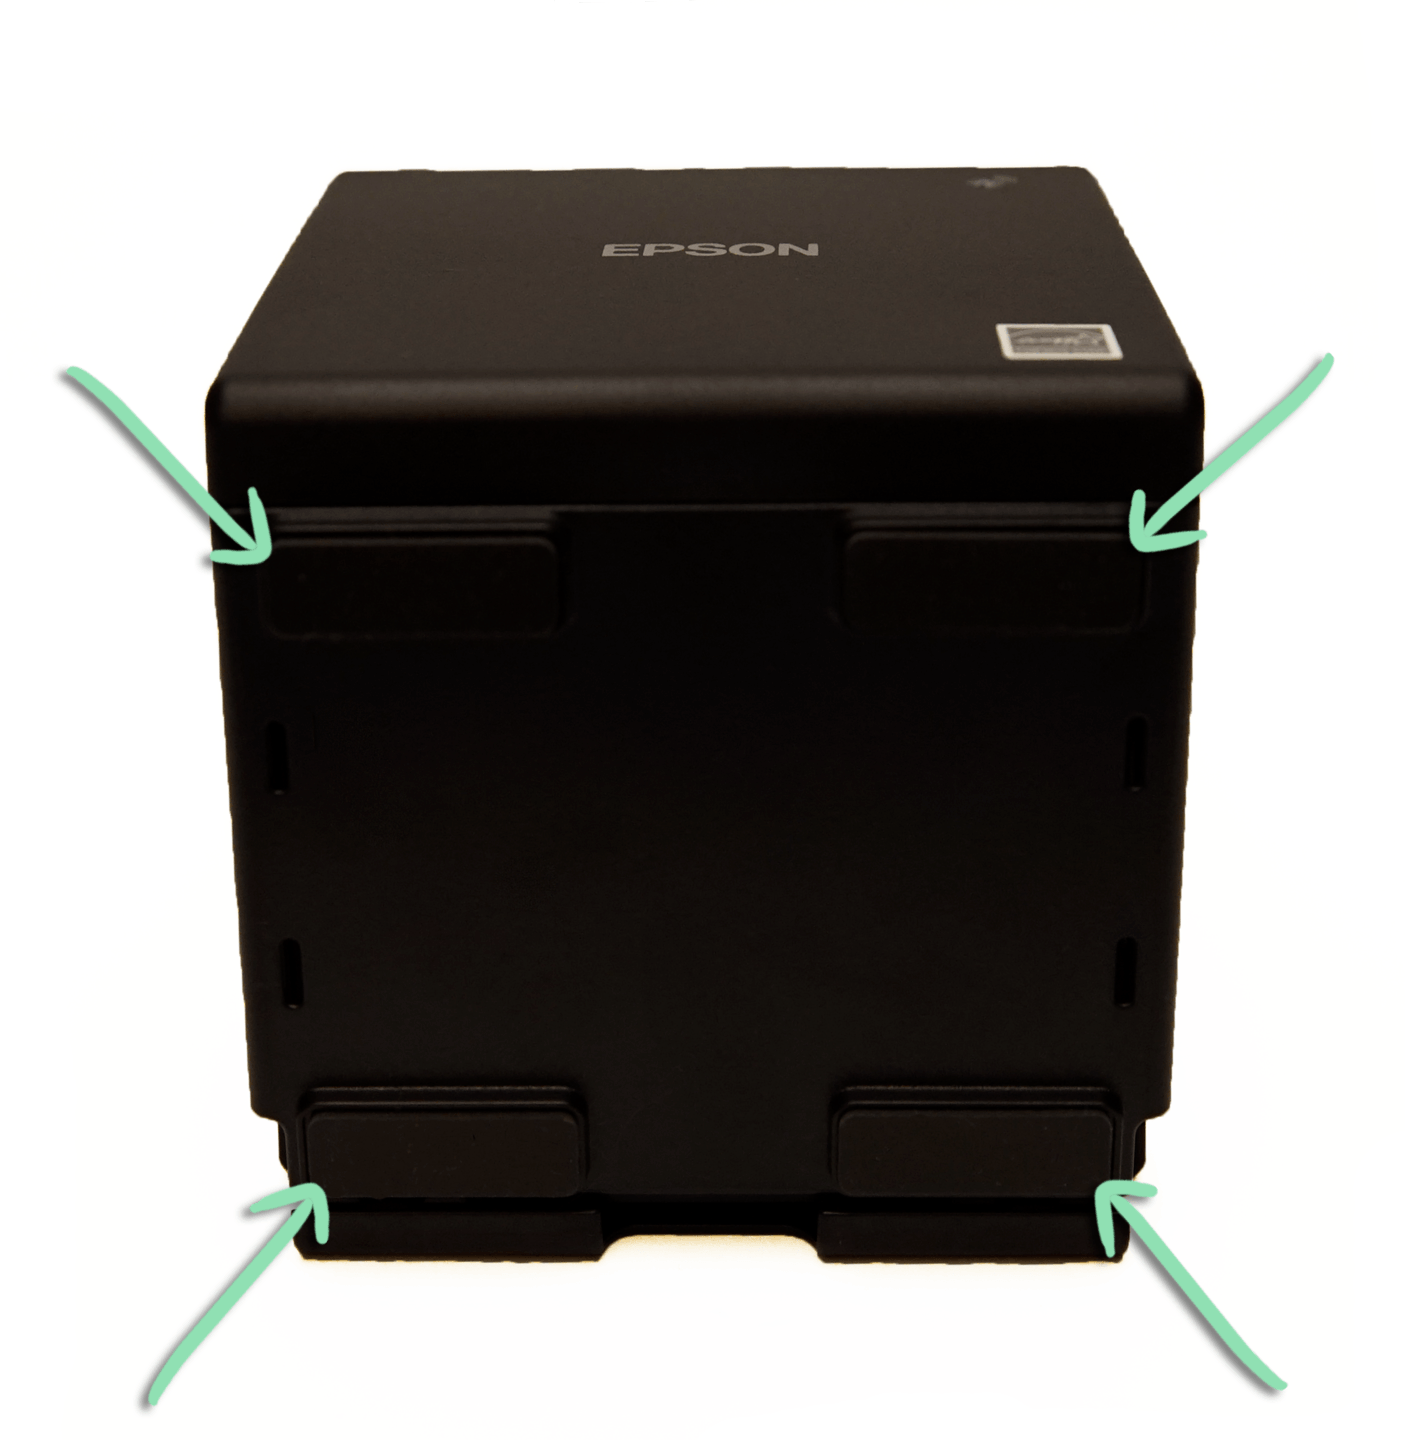
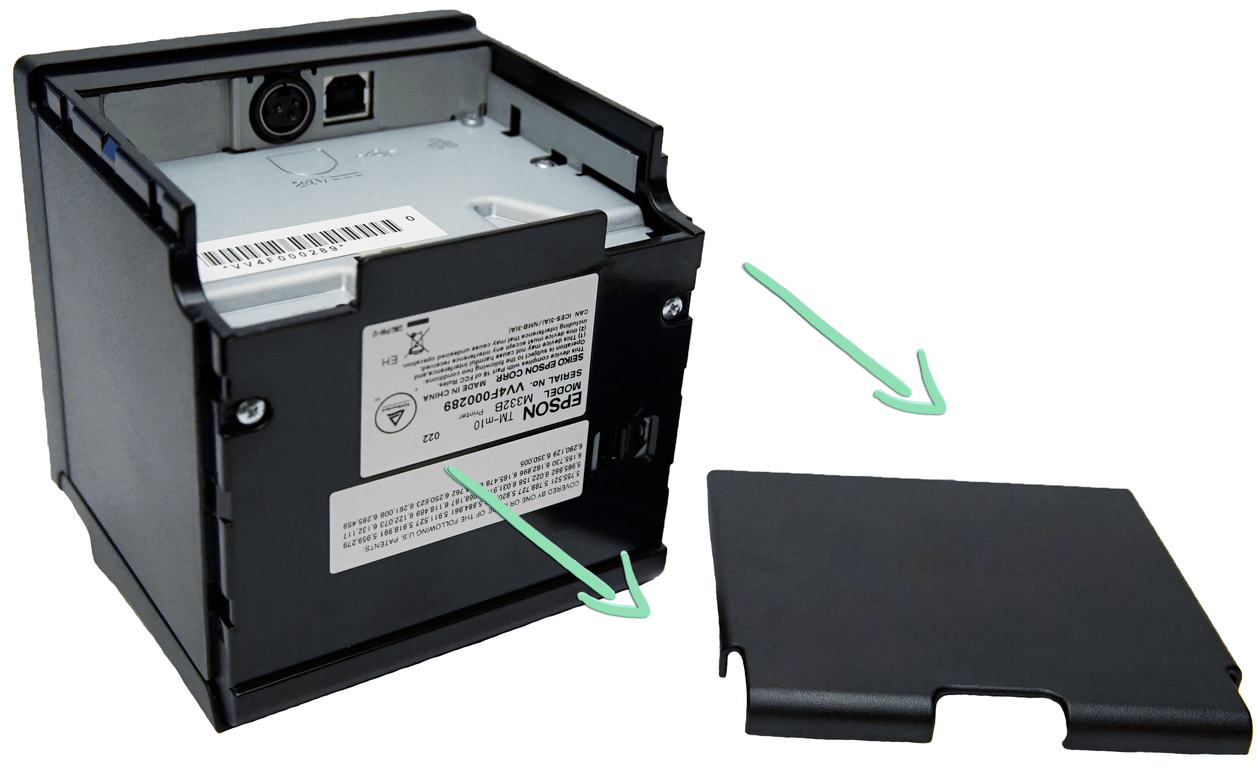
Locate the bottom panel on the printer with four rubber feet.
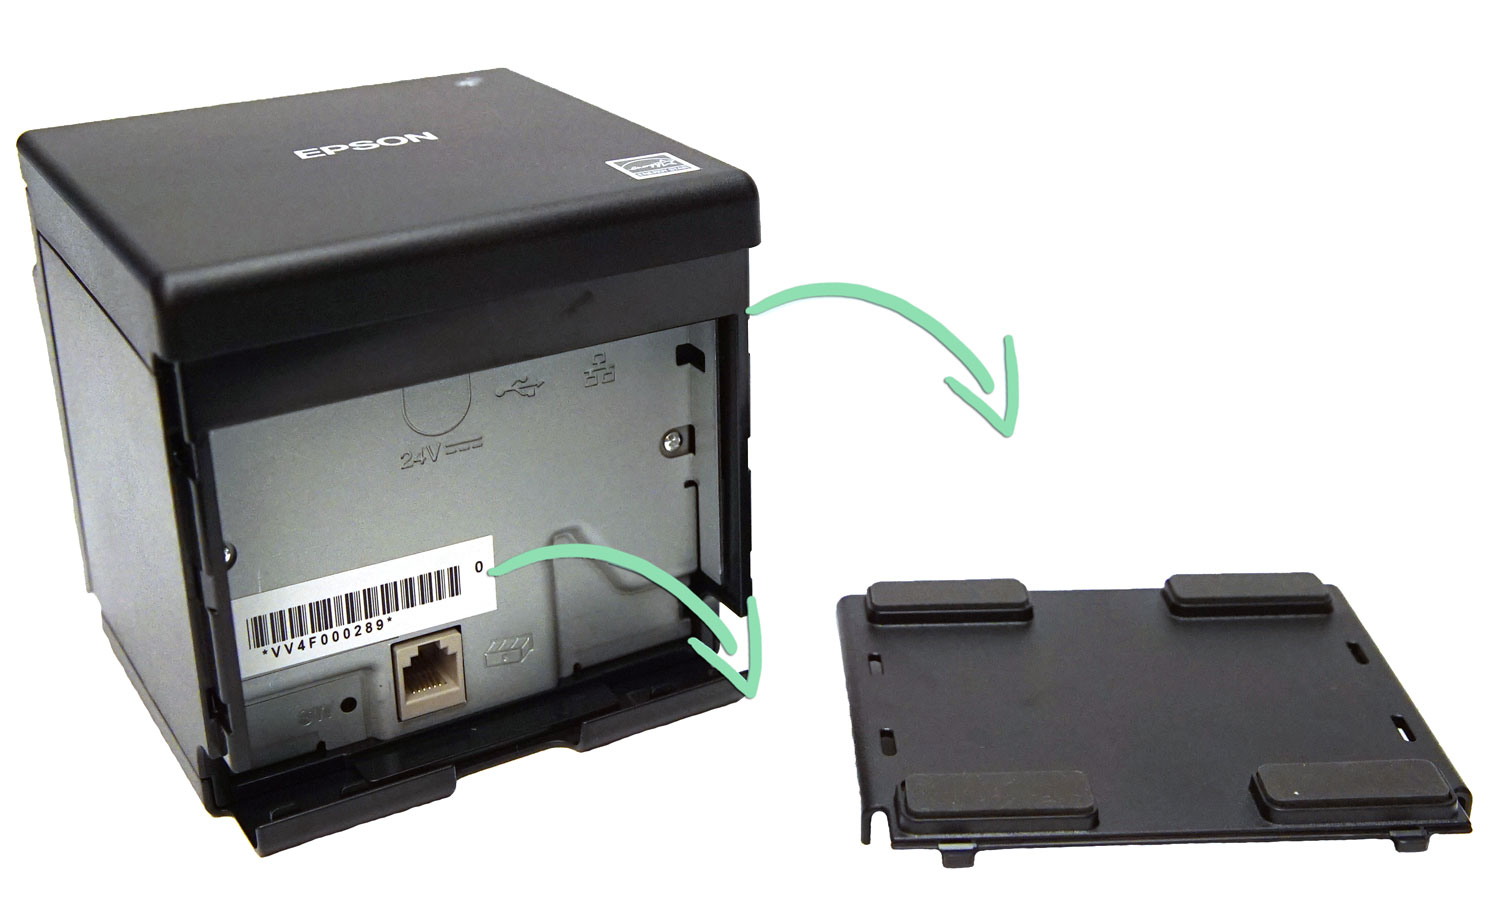
Remove the bottom panel by squeezing its sides and pulling it away from the printer, then remove the other panel.
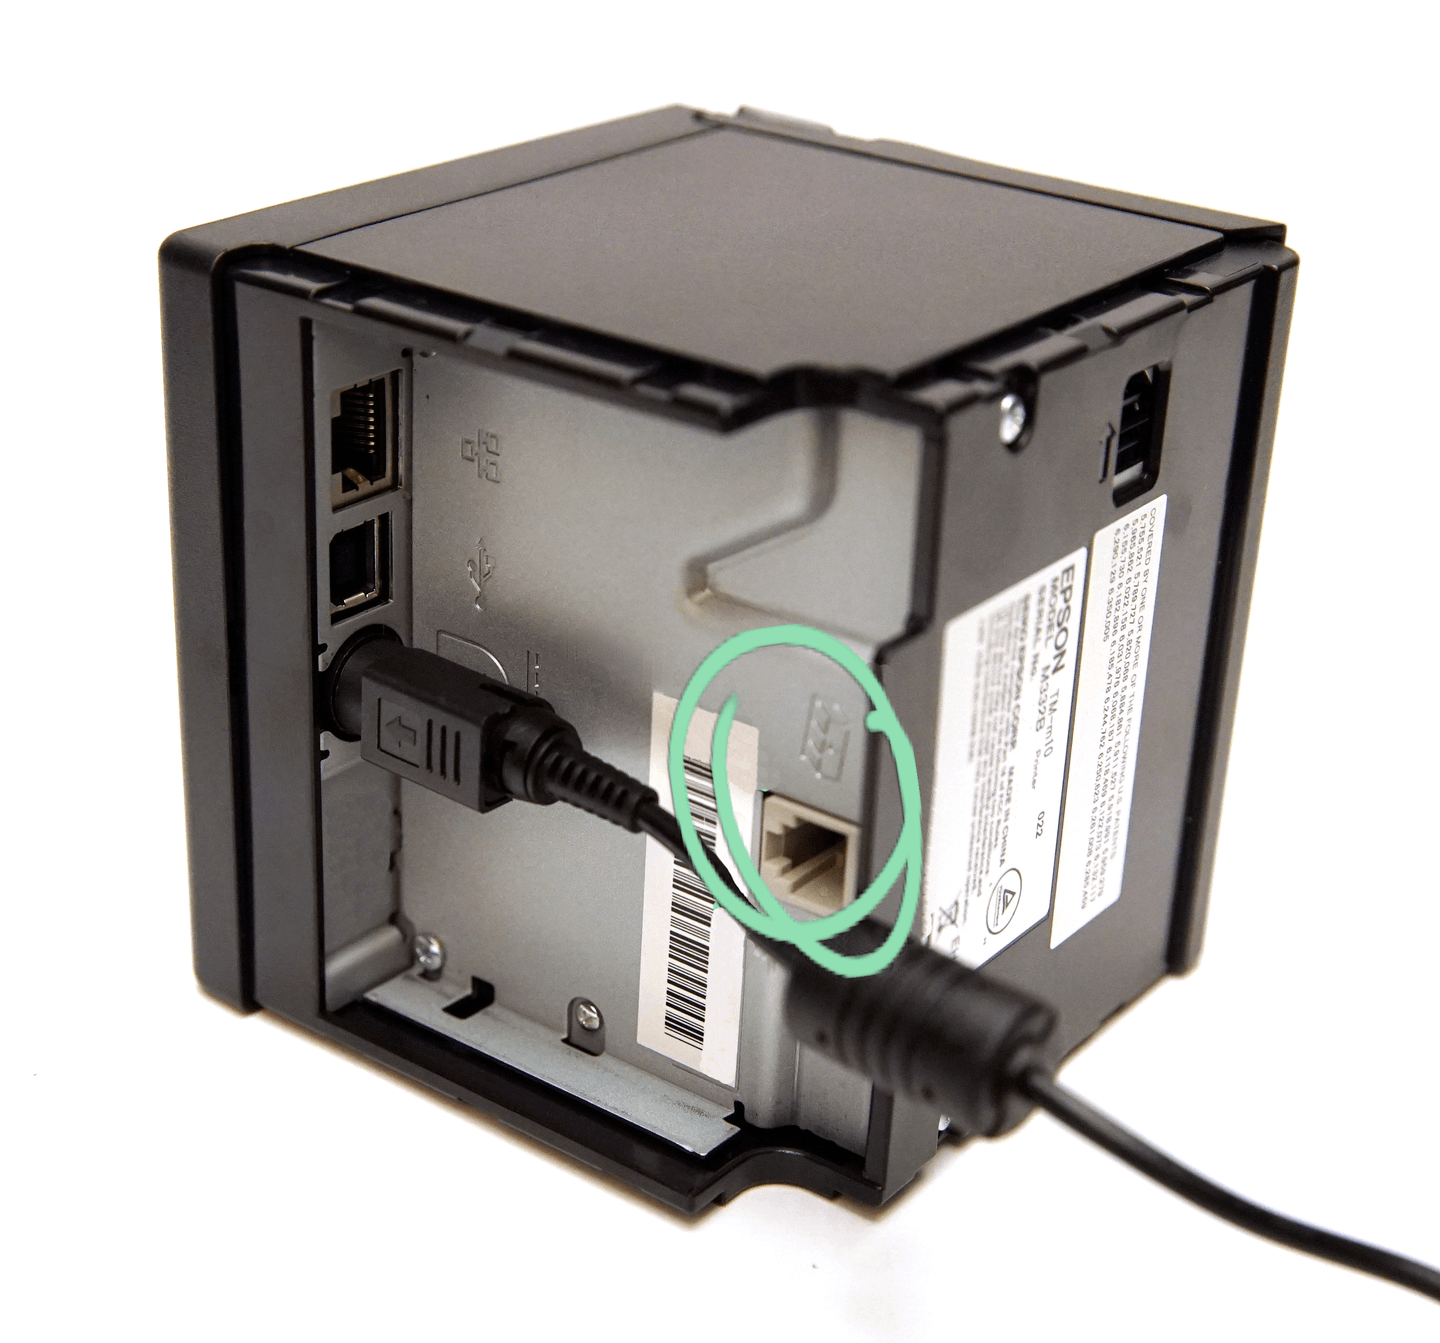
Plug the power adapter cable into the round power port.
(Optional) Connect a cash drawer to the printer.
aPlug the smaller end of the cable included with your cash drawer into the printer’s cash drawer port.
bPlug the larger end of the cable into the bottom of the cash drawer.
Snap the bottom panel back into place on the printer, then reattach the side panel.
The panels are interchangeable, so attach them in whatever orientation is preferred.
Connect the power cable to the wall adapter, then plug the wall adapter into a power outlet.
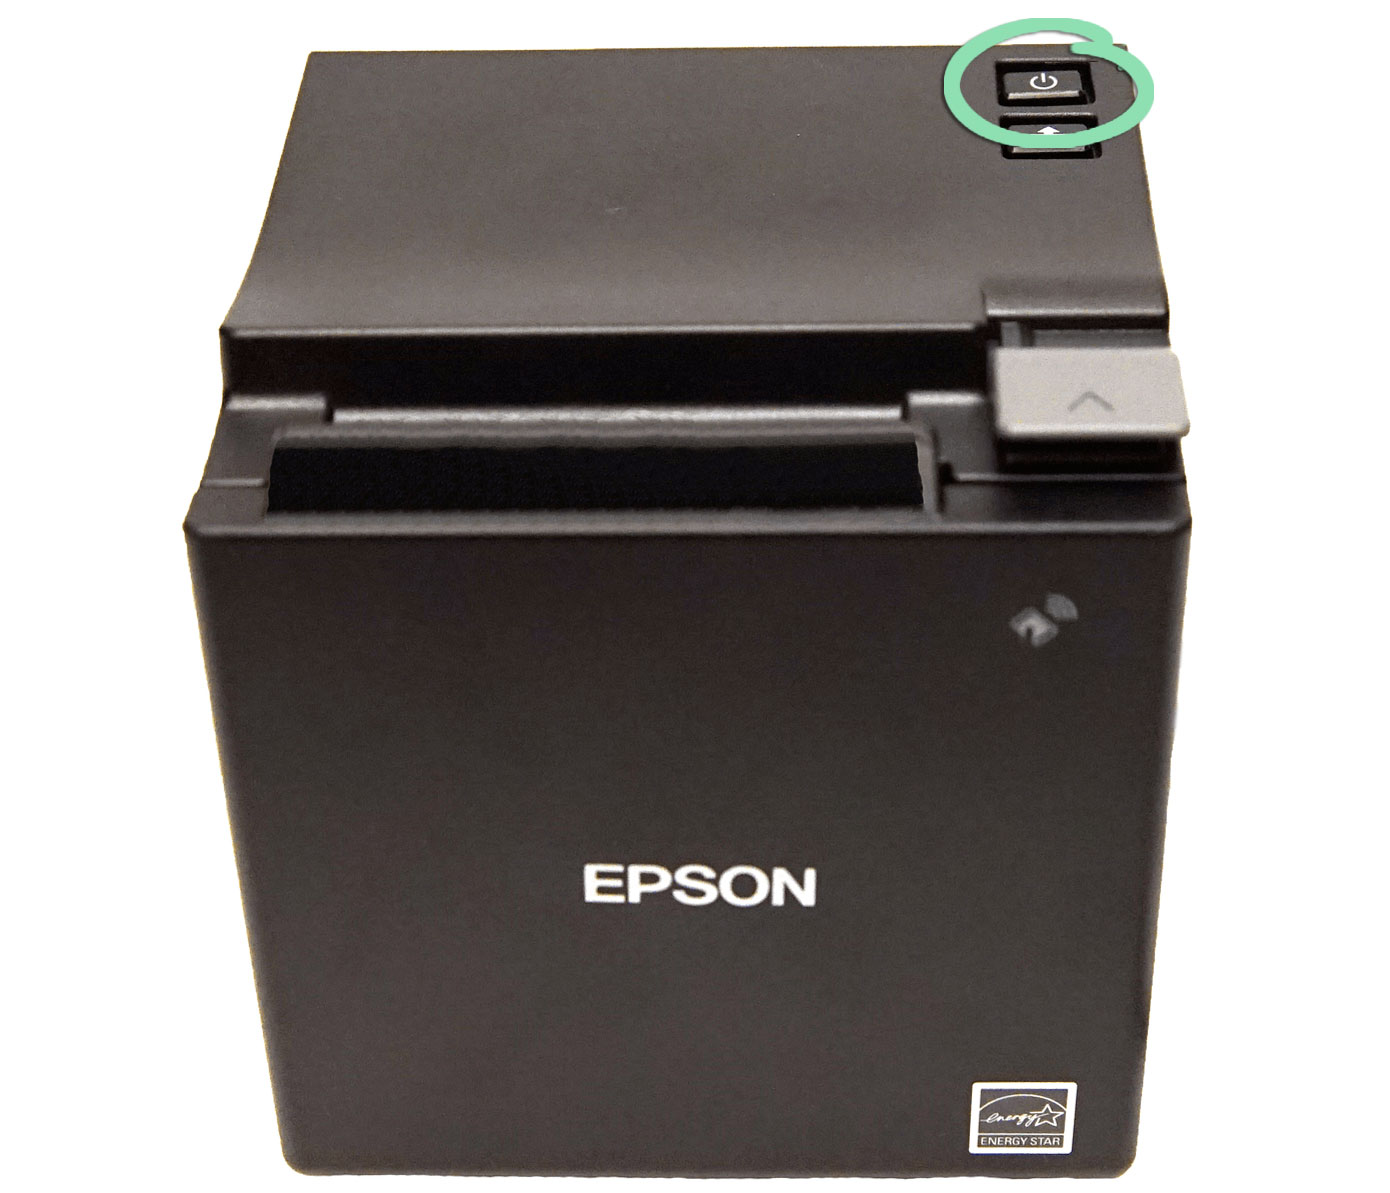
Press the power button to turn on the printer.
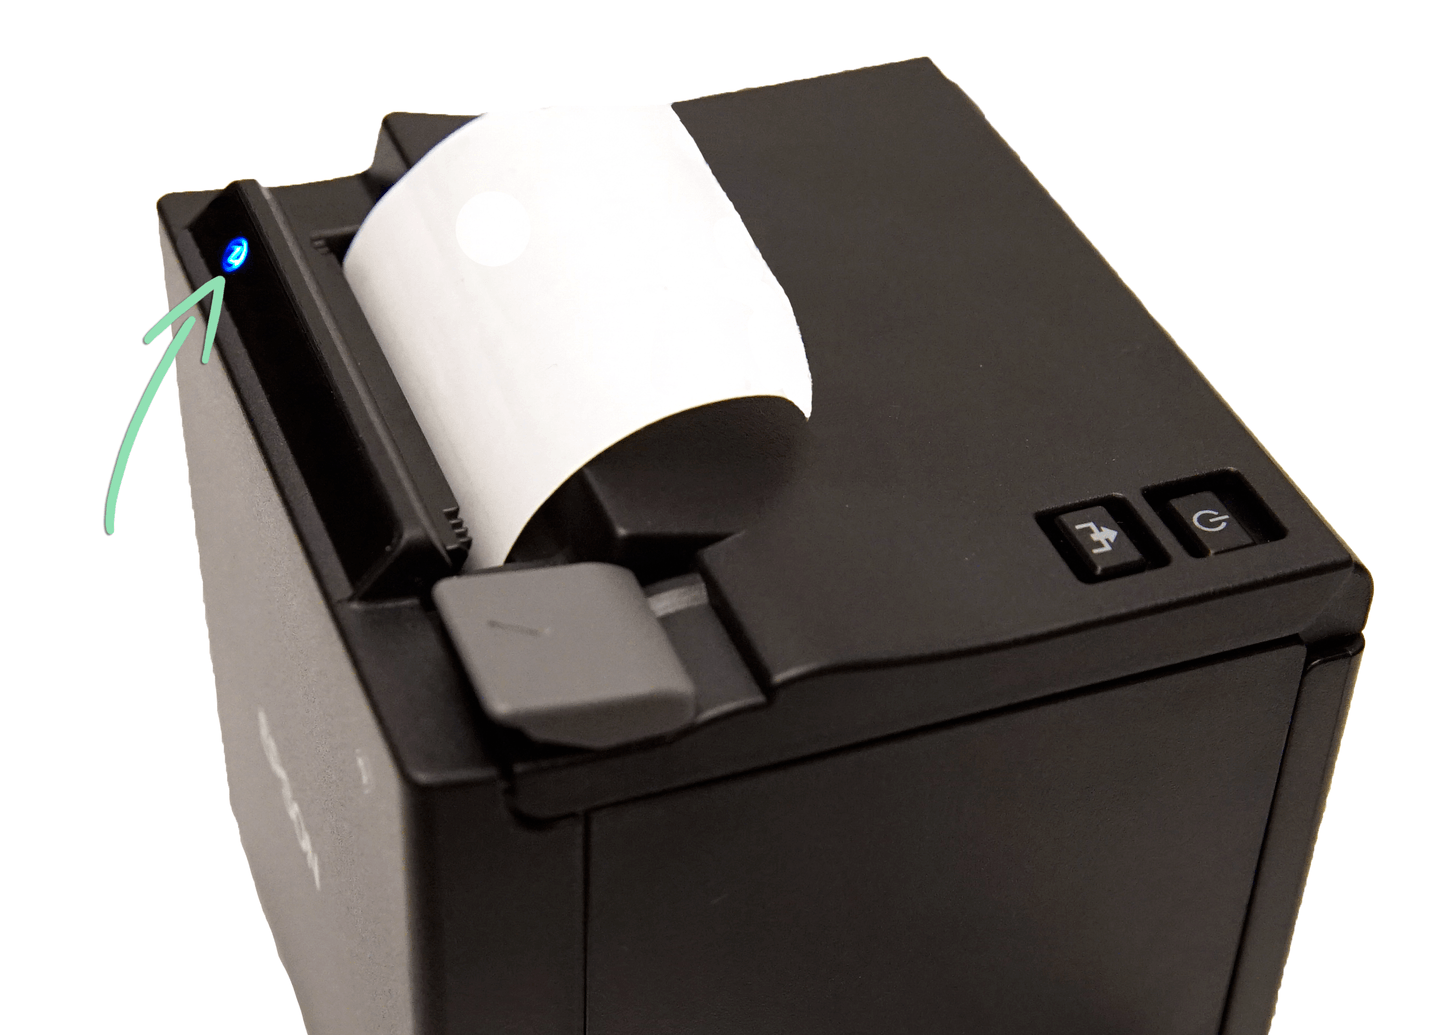
Lift the gray latch to open the cover, load the paper, and close the cover on the paper.
The paper must feed from the bottom of the roll as shown below.
Wait for the status light to turn solid blue and for the other lights to turn off.
Follow the steps in the next section to pair the printer with your iPad or Android tablet.
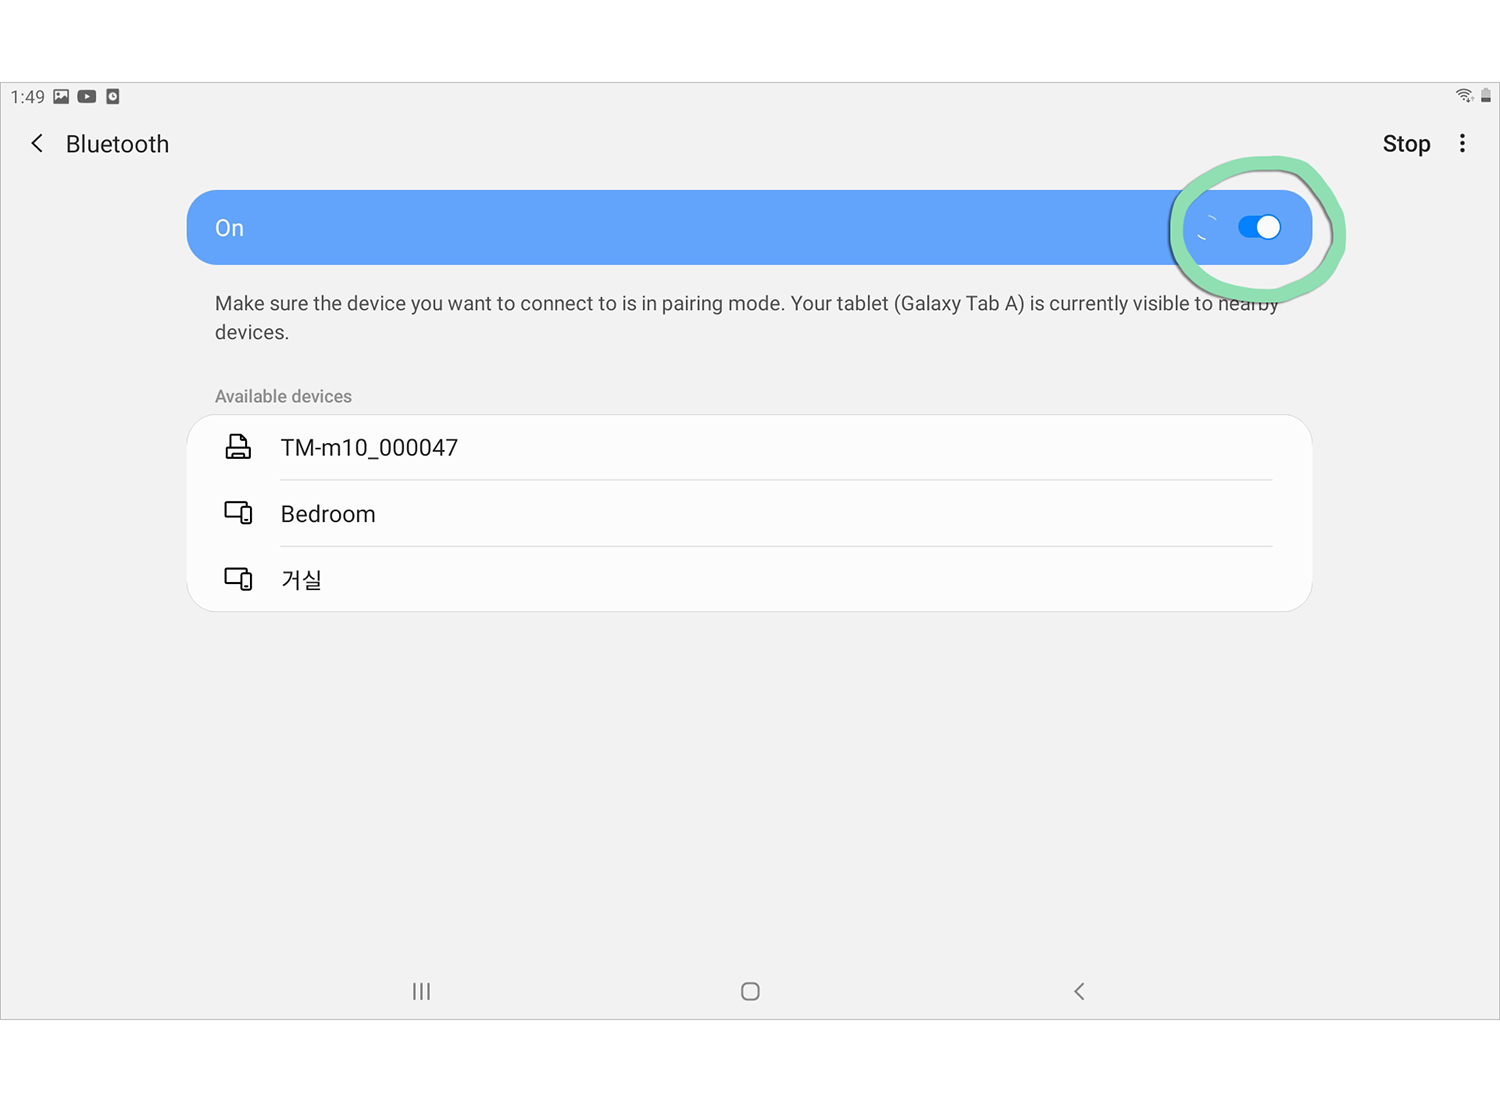
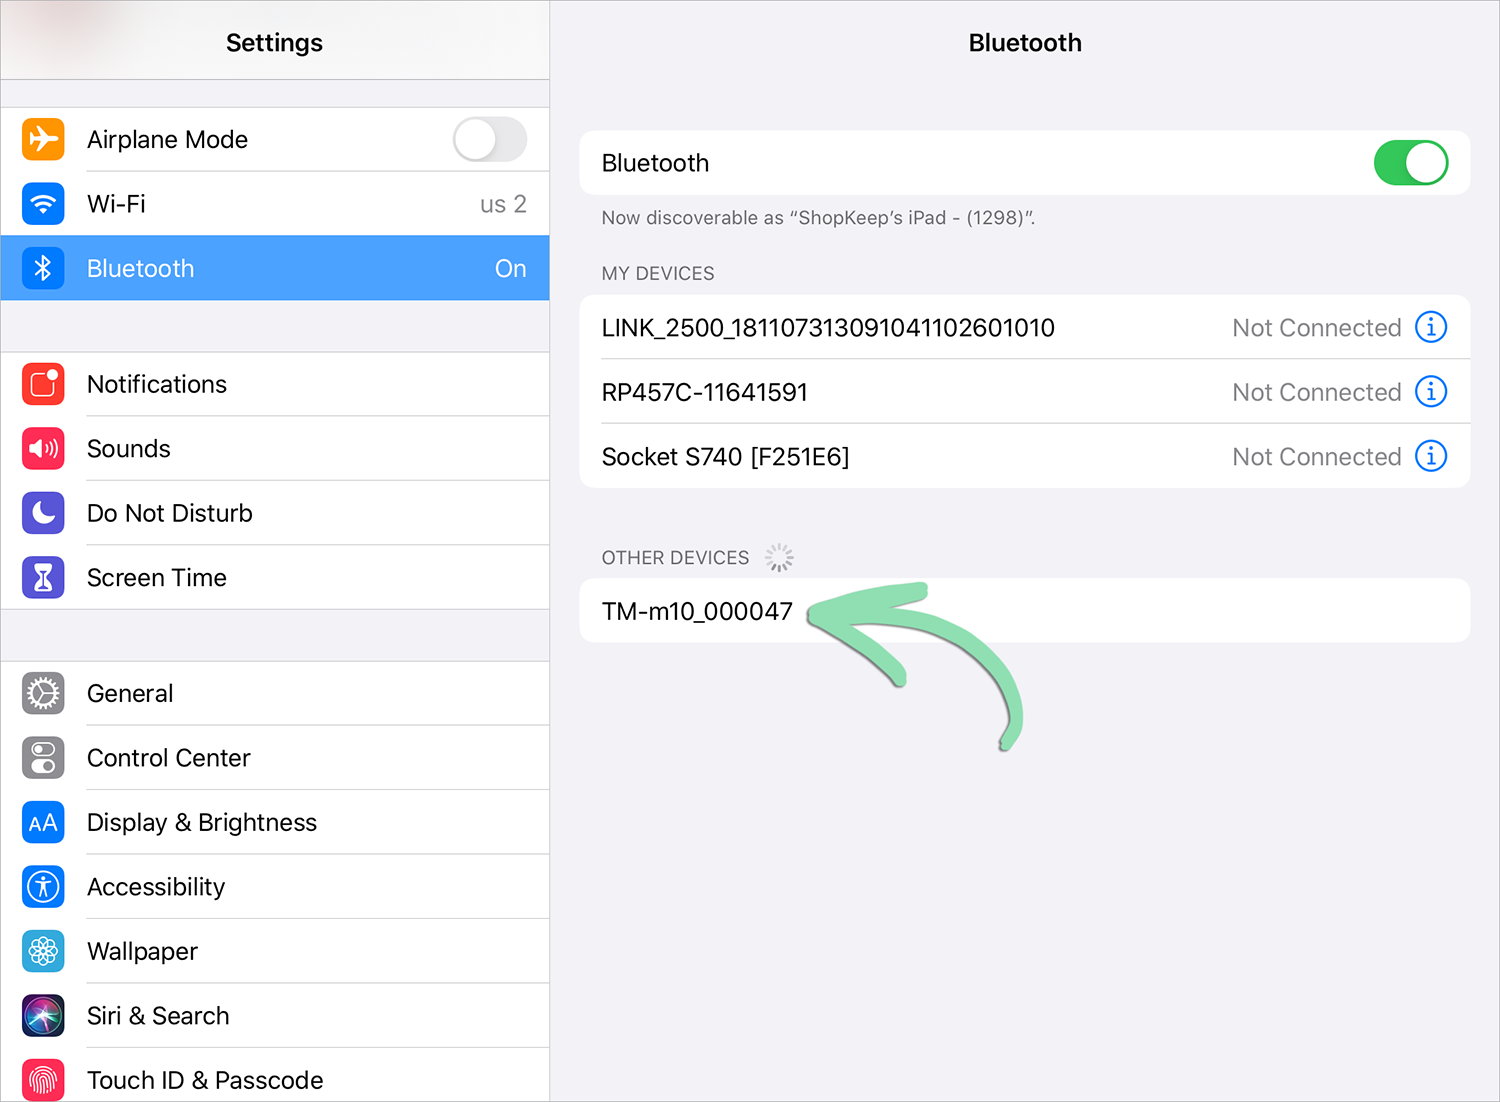
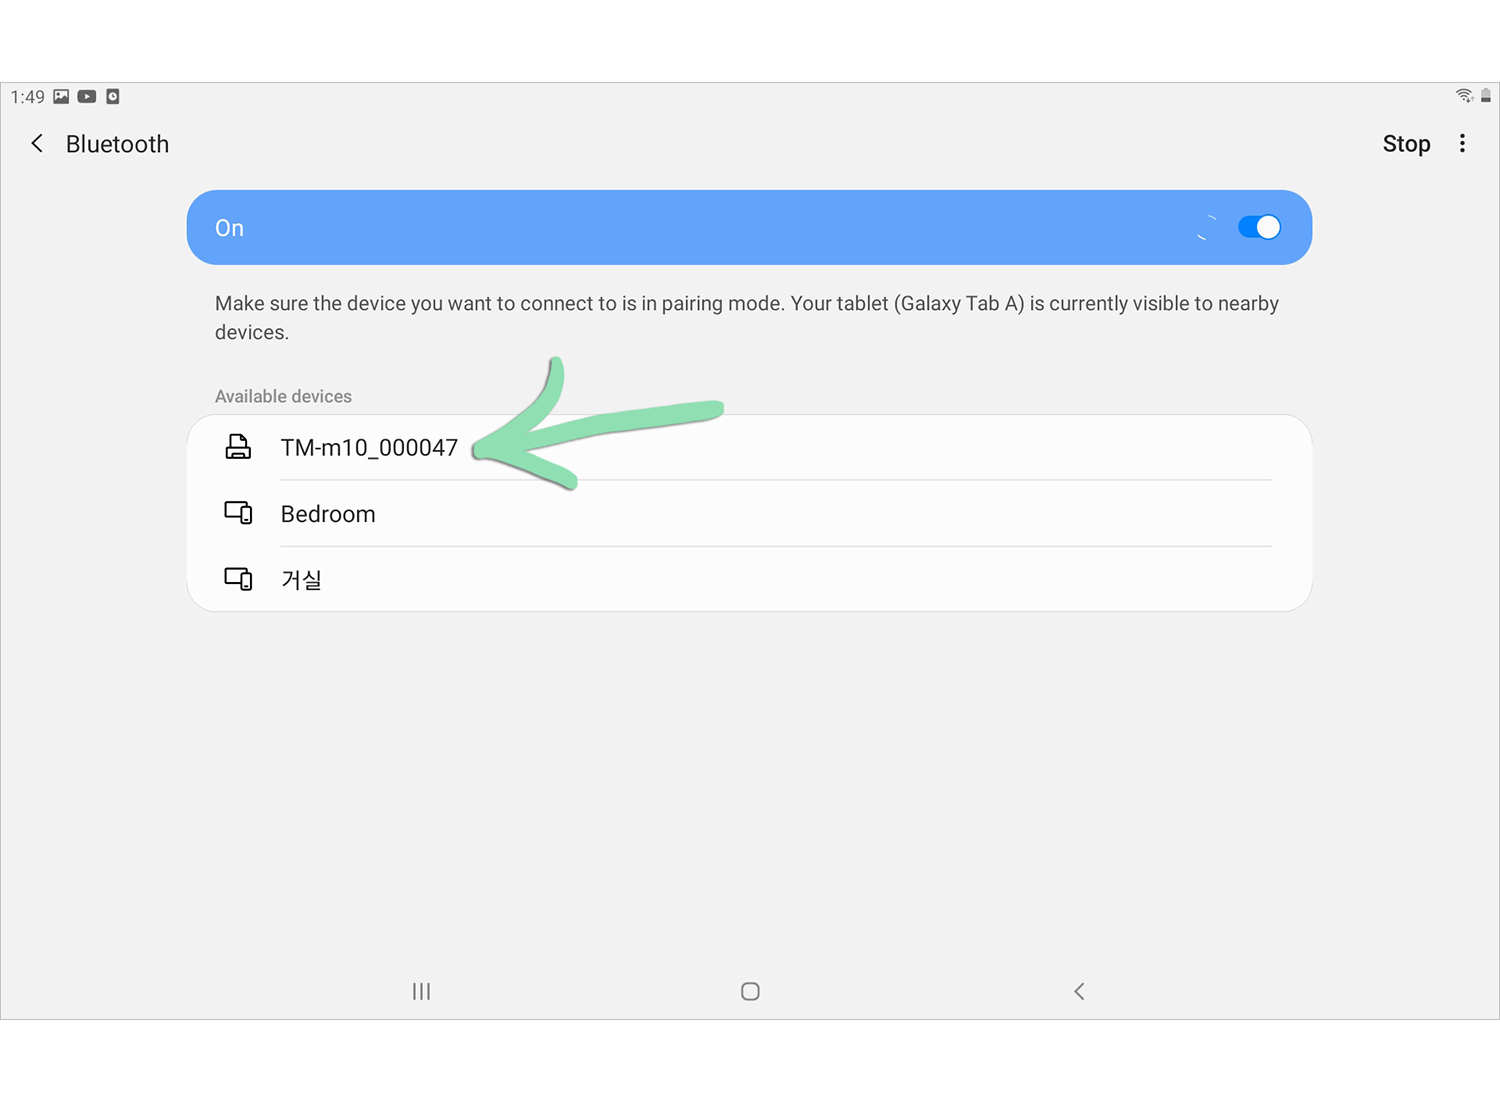
Pair the Printer
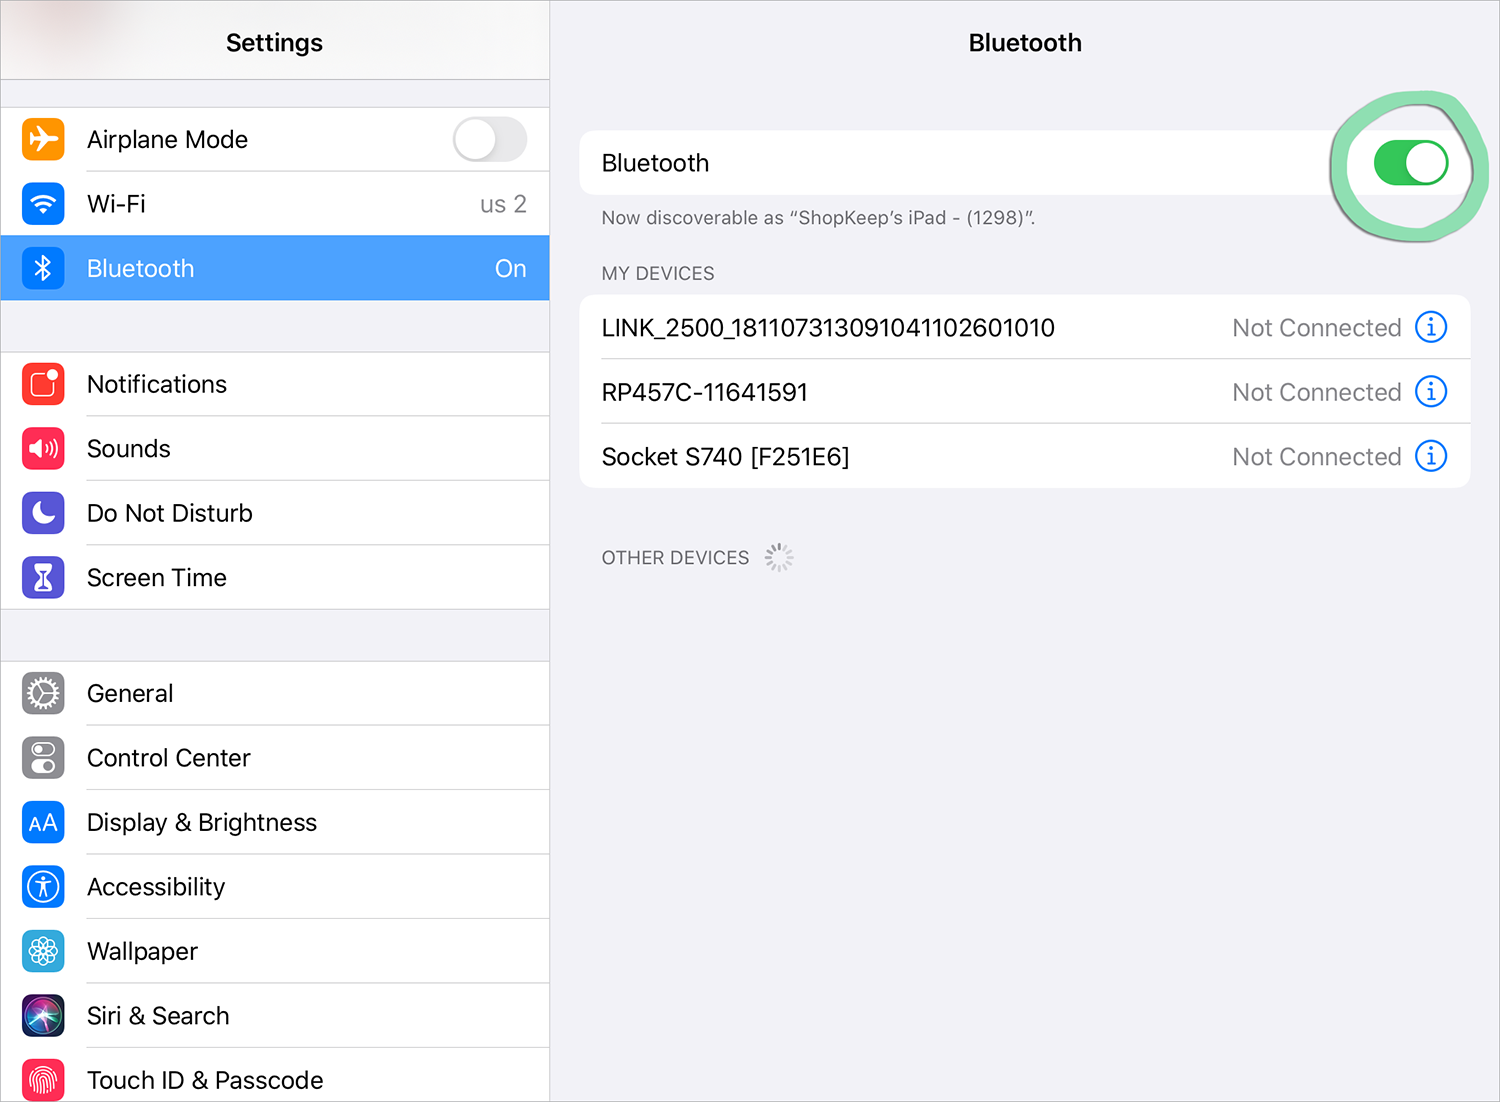
After setting up the printer hardware, pair the printer with your iPad or Android tablet via Bluetooth so it can be connected with the Retail POS (S-Series) app.
Follow the steps in the next section to connect the printer to the Retail POS (S-Series) app.
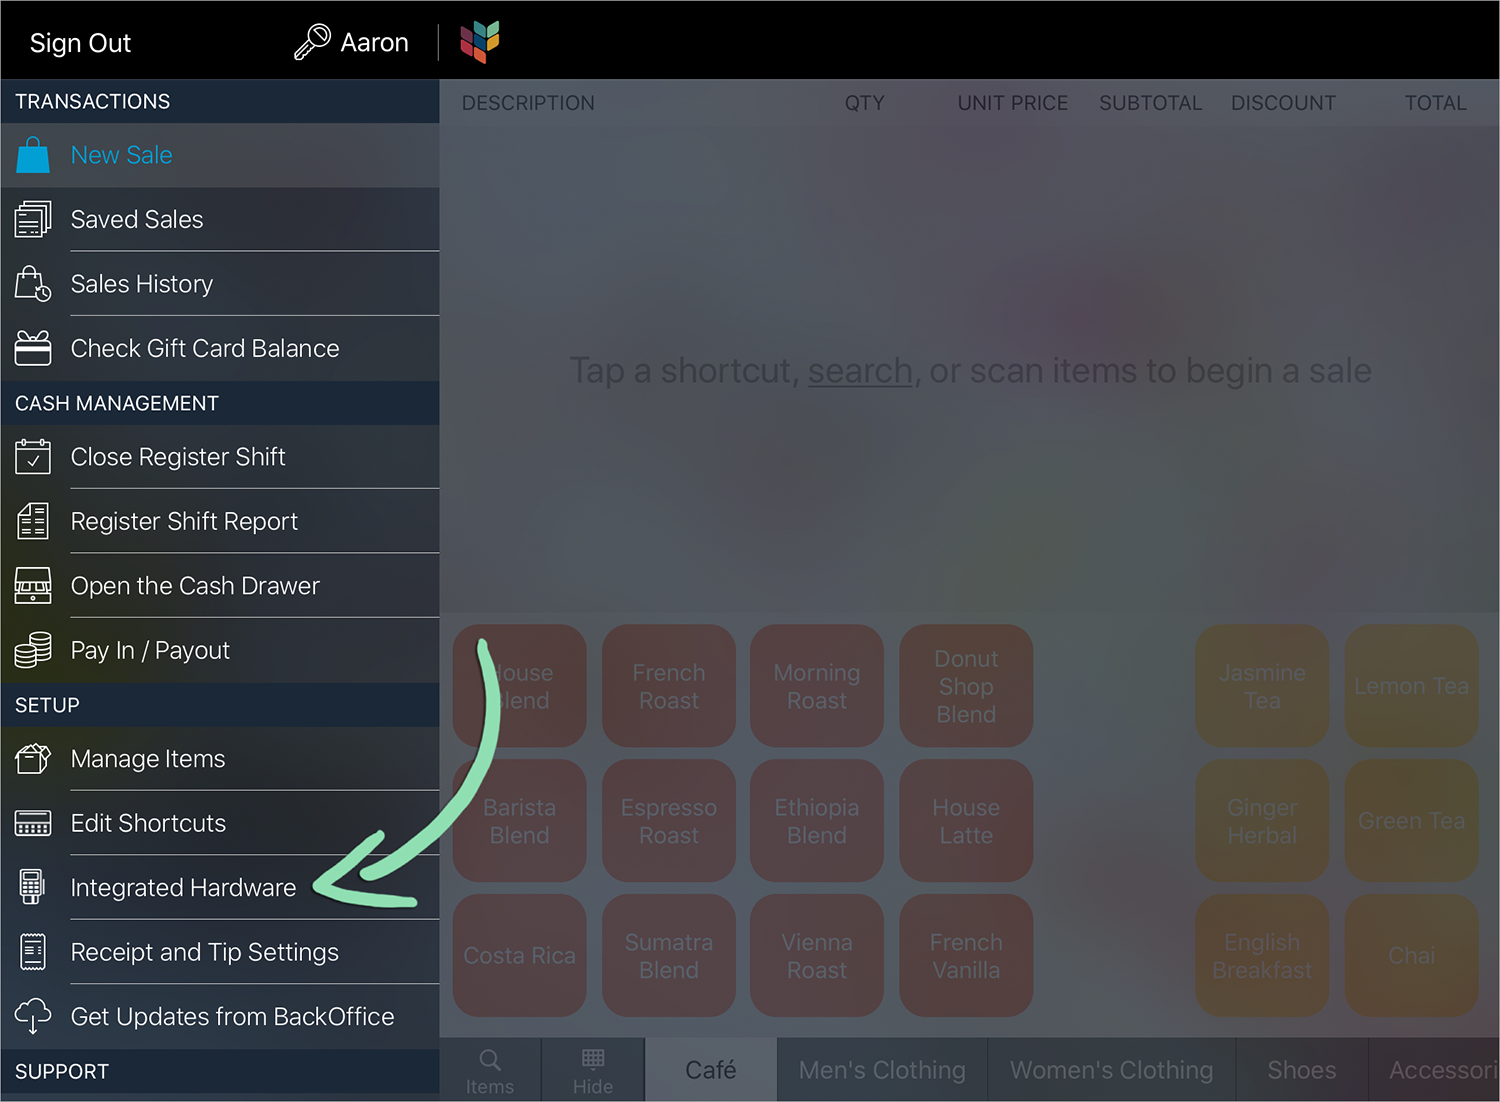
Connect to Lightspeed
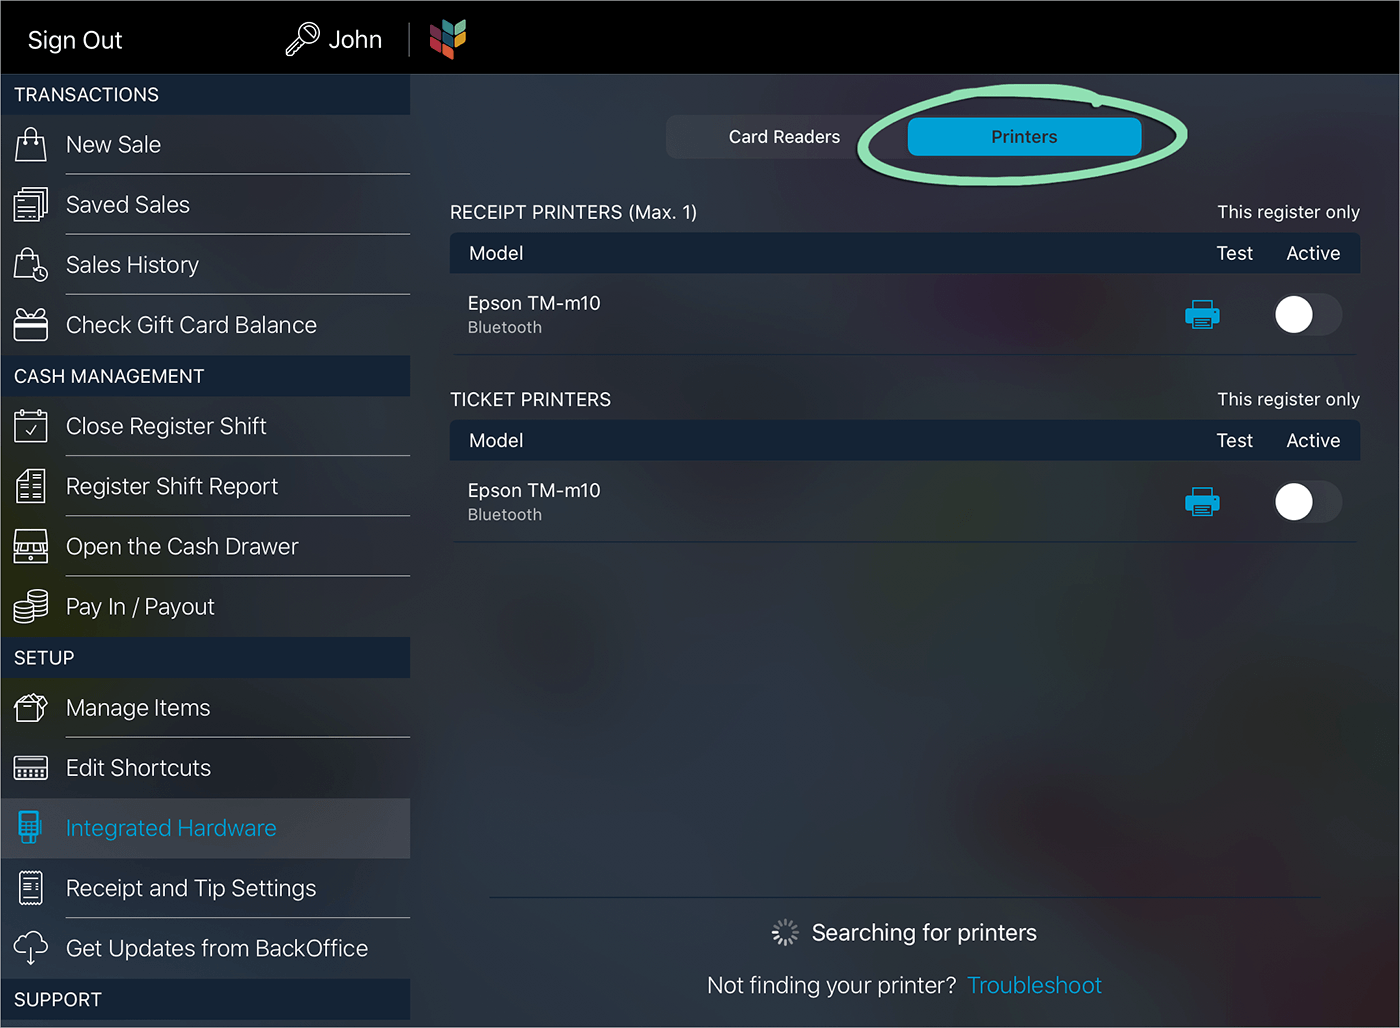
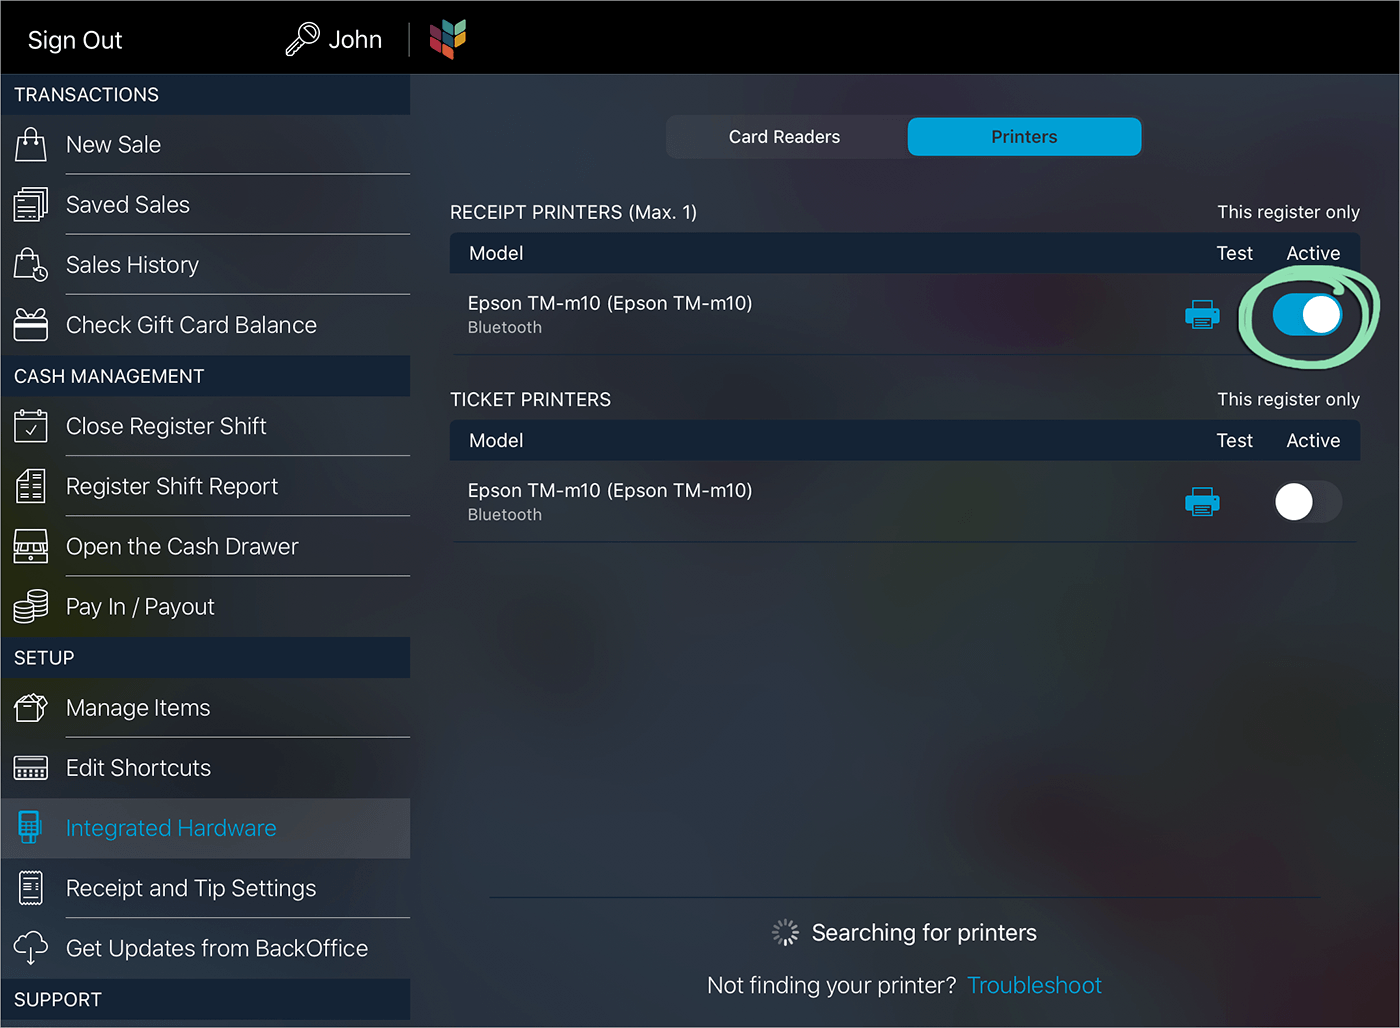
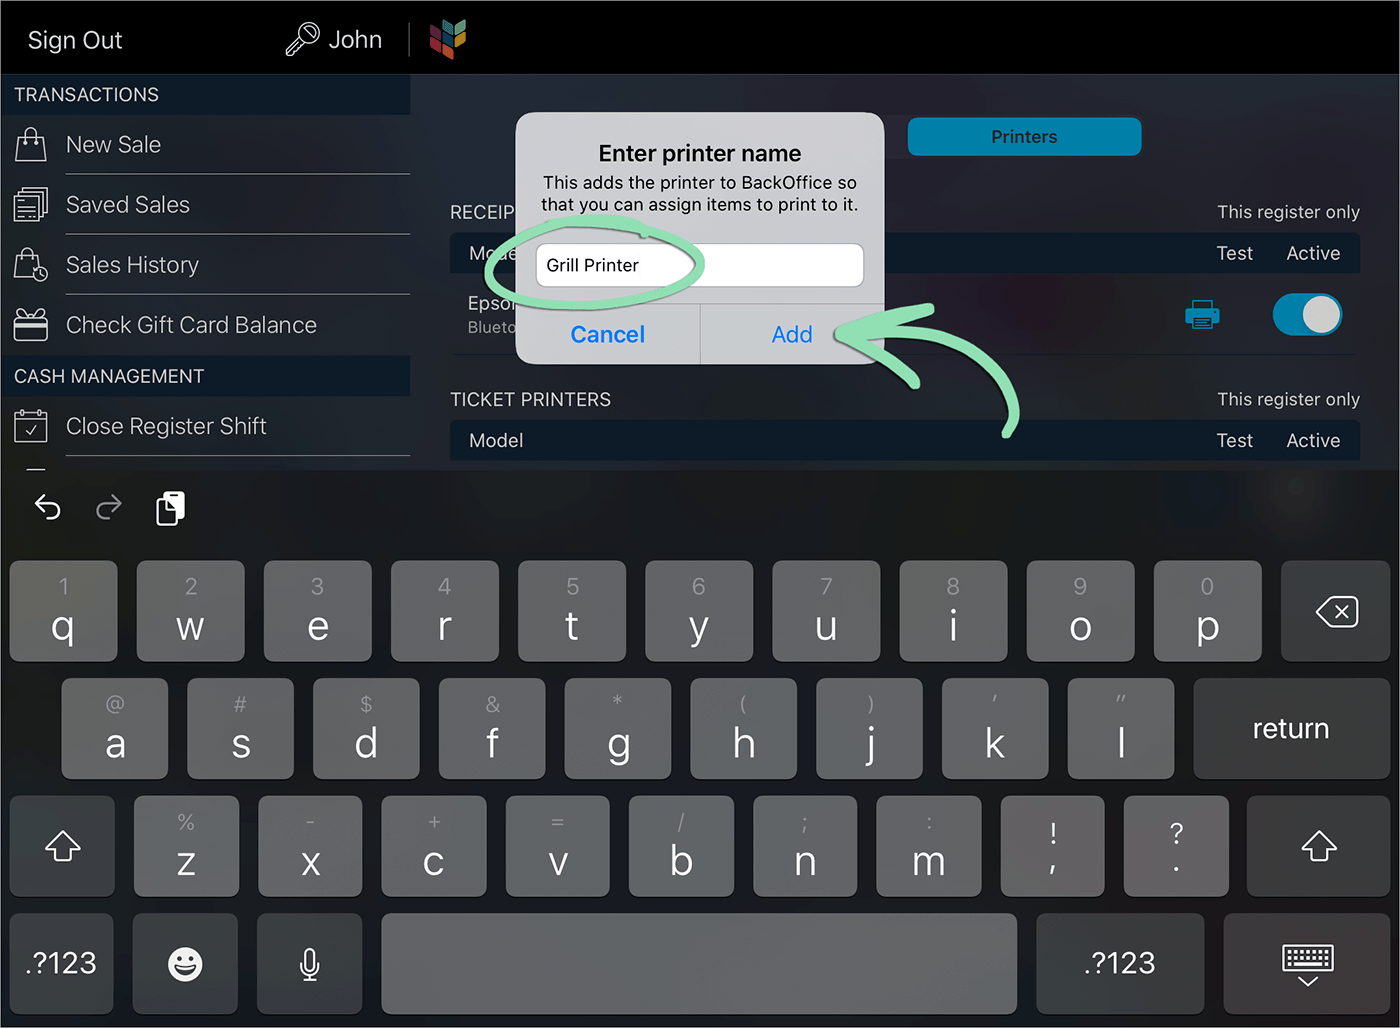
With the printer powered on and paired with the iPad or Android tablet, connect it to the Retail POS (S-Series) app to begin using it to print at the register.
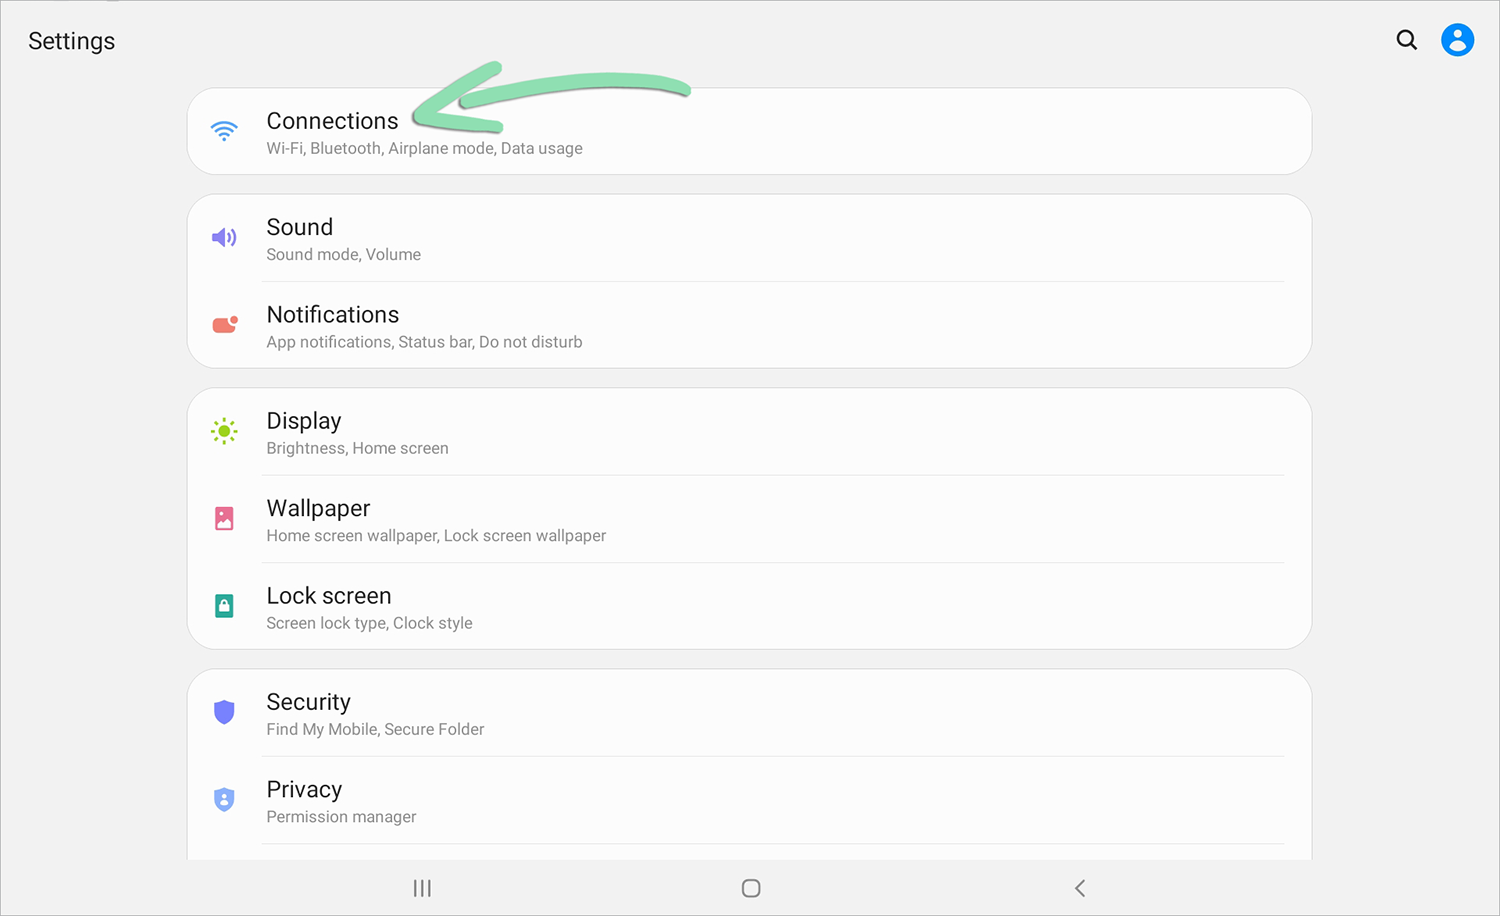
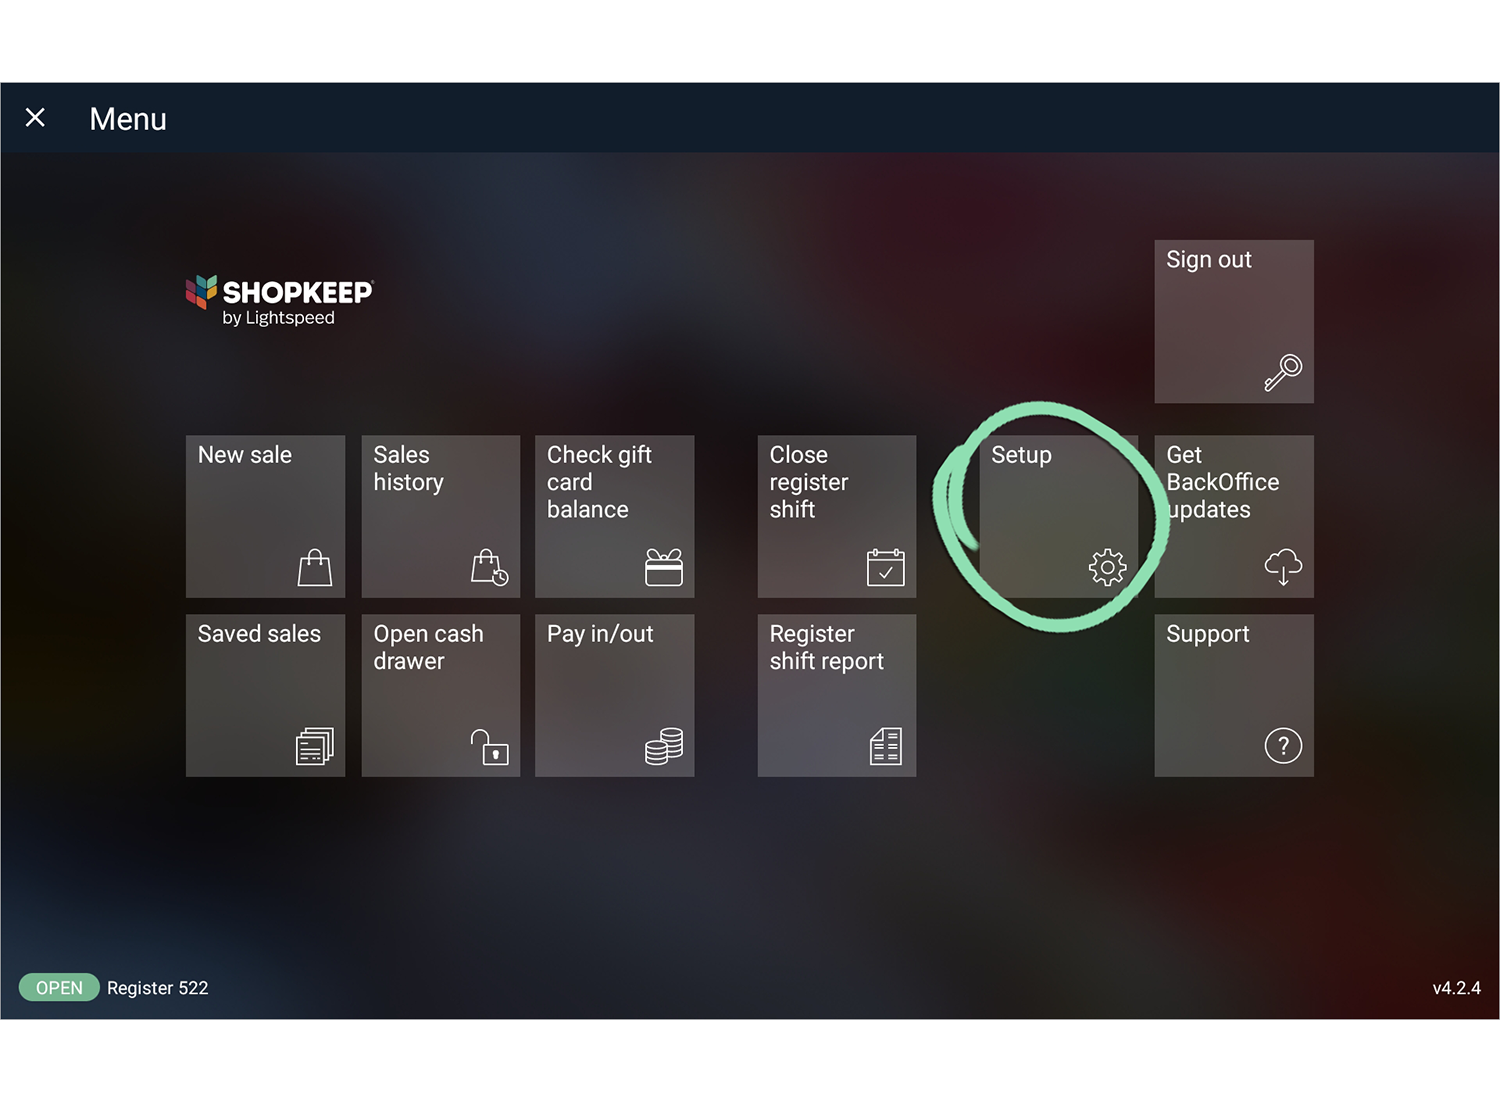
In the Retail POS (S-Series) app, open the Main Menu (iOS) or register menu (Android), and tap 'Integrated Hardware' (iOS) or 'Setup' (Android).


 b Plug the larger end of the cable into the bottom of the cash drawer.