The Ingenico Link/2500 Bluetooth Credit Card Reader connects wirelessly to the Lightspeed Retail POS (S-Series) app for iOS to process swiped, EMV, and contactless credit payments, allowing flexibility to carry the device with your register on the go. After charging the reader’s rechargeable battery, pair the reader with your iPad via Bluetooth, then connect it to the Lightspeed Retail POS to use it to accept credit cards.
Watch our setup video below:
Table of Contents
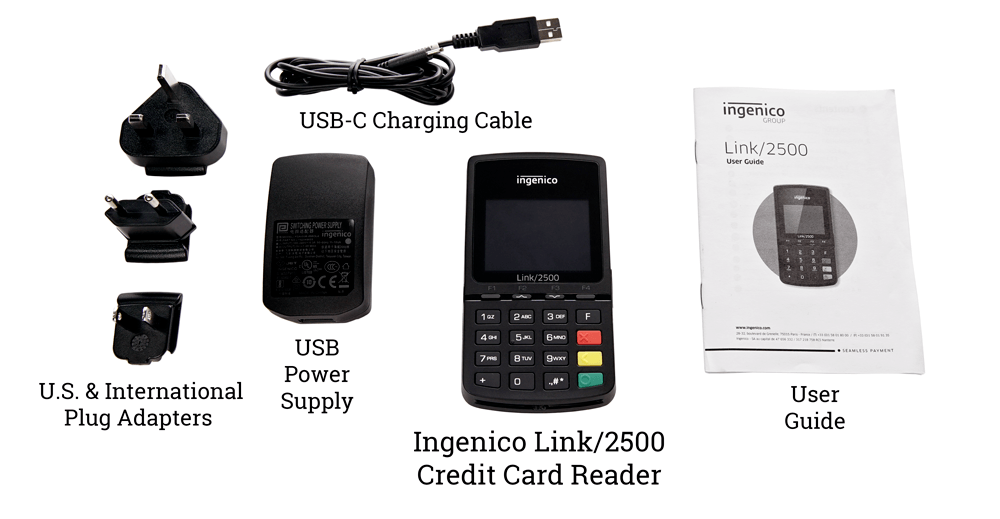
In the Box
The Link/2500 Bluetooth Credit Card Reader ships with the parts listed below.
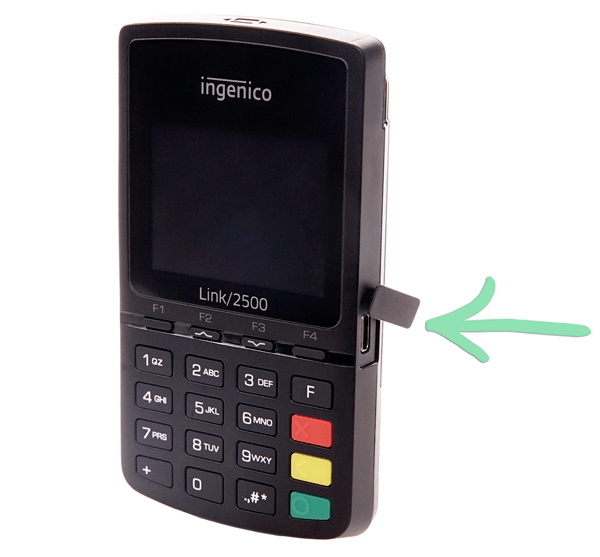
The Link/2500 operates on battery power and needs to be charged to function. Plug the Link/2500 in to charge before using it the first time and whenever its battery is running low.
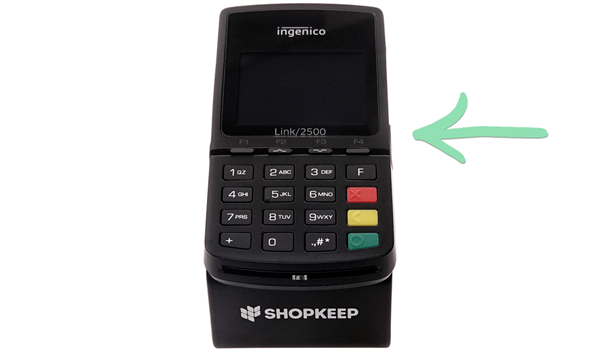
Lift the flap on the side of the Link/2500 covering the charging port.
Click to Enlarge
The Link/2500 also acts as a customer facing display to show transaction details as a cashier uses the register. Learn below about the features of the customer facing display and how to toggle the display off or back on.
Display Features
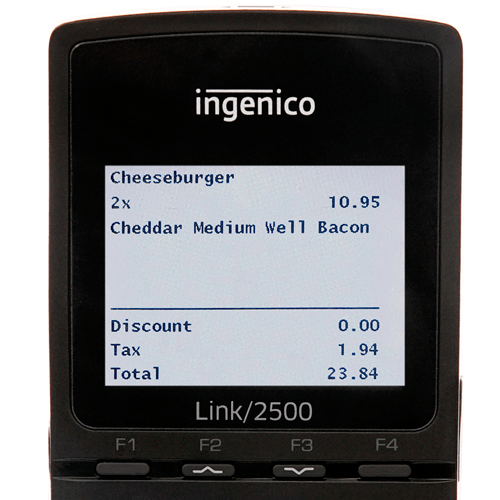
View below what customers see on the Link/2500 as a cashier moves through a sale.
The reader shows the last item added or edited along with its quantity, its modifiers or variants, and the sale’s discounts, tax, and total. This information appears for both sales and returns.
‘Item Removed’ indicates the cashier deleted that item from the sale.
When the cashier tenders a sale to ‘Credit’, customers see their total and a message to swipe, tap, or insert a card.
When opening a saved sale, the reader displays discounts, tax, and the total due until items are added or edited.
Display Settings
The customer facing display feature is enabled by default, but you can toggle it off or back on as desired.
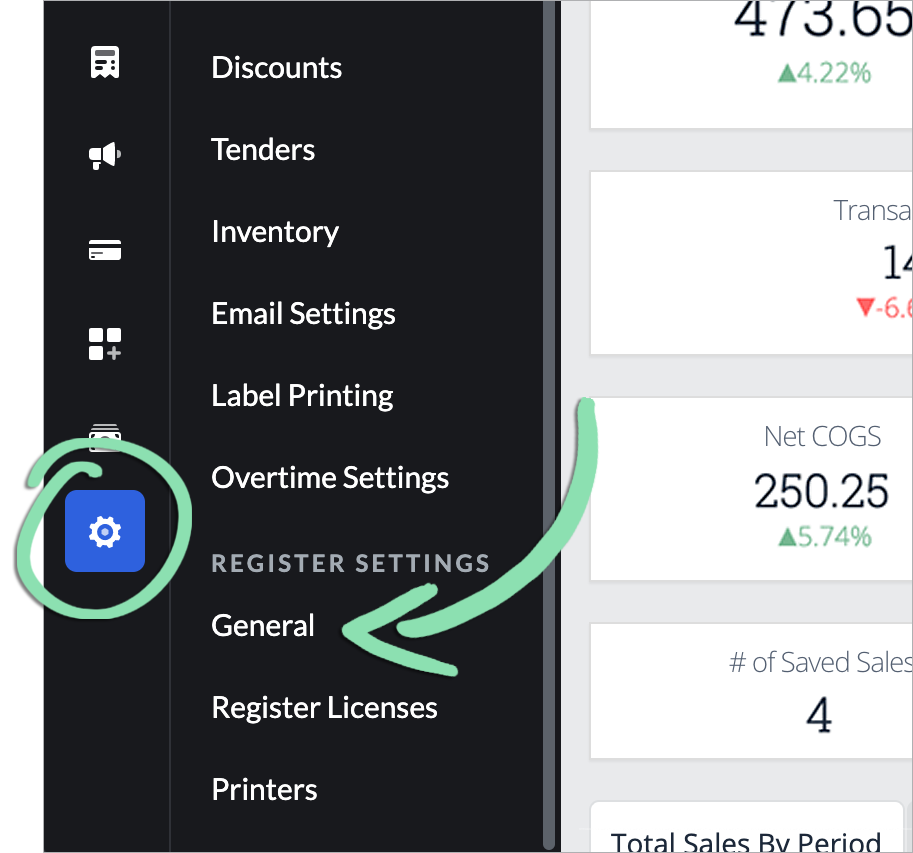
In BackOffice, click 'Settings' and select 'General'.
Click to Enlarge
To disable the display, uncheck the 'Enable' box and click 'Save'.
On the Lightspeed Retail POS, tap 'Get Updates from BackOffice' from the Main Menu, then 'Get Updates'.
If you receive an error while getting updates, visit our troubleshooting guide for help.
Link/2500 Stand Setup
The optional stand for the Link/2500 keeps the reader secure and accessible in the checkout area. It arrives almost out-of-the-box ready with just a few setup steps to complete.
The stand ships with the following parts: stand, an alcohol wipe, and a setup guide.
Clean the back of the Link/2500 with the included alcohol wipe and wait for it to dry.
Remove the backing from the top of the stand to expose the adhesive.
Click to Enlarge
Position the Link/2500 on the adhesive, then press down firmly.
Click to Enlarge
Check that cards can easily be swiped and inserted into the Link/2500, adjusting the reader if needed.
Wait 12 - 24 hours for the adhesive to cure.
Failure to complete this step may cause the reader to separate from the stand when in use.
(Optional) Adhere the stand to a countertop.
aClean the counter with an alcohol wipe.
bRemove the backing from the bottom of the stand.
c(Optional) Drill a hole in the counter to align with the hole in the stand.
This allows you to run the charging cable under the counter, through the hole, and to the Link/2500.
dPosition the stand on the counter, then press down firmly.
eWait 12 – 24 hours for the adhesive to cure.
Accepting Credit Cards
The Link/2500 supports multiple types of credit payments. Follow the steps below to learn the basics of accepting EMV chip cards, swiped credit cards, and contactless payments.
Before accepting credit cards, your Lightspeed Retail account must be boarded for credit card processing. Learn how to set up credit card processing here.
Tip and signature settings control how customers leave tips and sign for credit sales: on the screen of the register or on a paper receipt. Learn how to change these settings here.
When the screen on the reader indicates payment is approved, remove the card.
Continue closing the sale.
Swipe
When a customer has a card with only a magnetic stripe or if you are not set up to accept EMV, process a swiped credit card sale.
In the Retail POS (S-Series) app, ring up a sale and select 'Credit'.
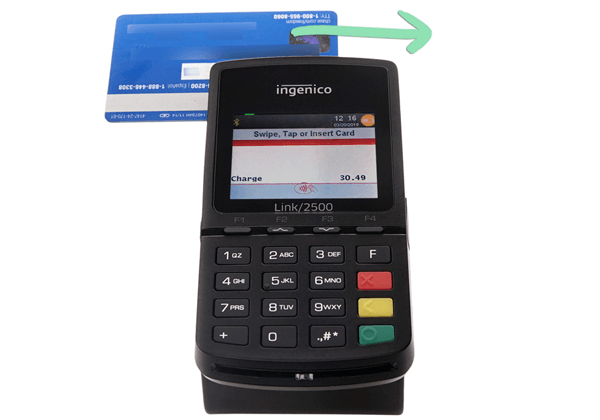
With the card stripe facing up, slide the card through the top slot on the reader.
Click to Enlarge
Wait for payment to be approved.
Continue closing the sale.
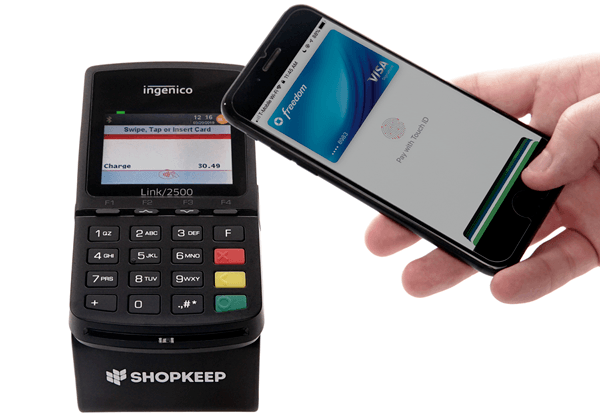
Contactless
For customers who wish to use a contactless payment method, the Link/2500 supports Apple Pay, Apple Pay Cash, EMV contactless credit cards, and other types of NFC payments.
This feature is currently only available to merchants with EMV payments enabled.
In the Retail POS (S-Series) app, ring up a sale and select 'Credit'.
Customer holds their card or device near the screen of the reader.
Click to Enlarge
Cashier waits for payment to be approved.
Continue closing the sale.
Turn the Reader Off and On
Turn the Link/2500 off to conserve battery power when it will not be used for an extended period of time. When the reader is needed again, turn it back on.
Unplug the Link/2500 from power, if connected.
To turn off the Link/2500, hold the ‘.,#*’ and yellow buttons until the screen says 'Shutdown in progress'.
Click to Enlarge
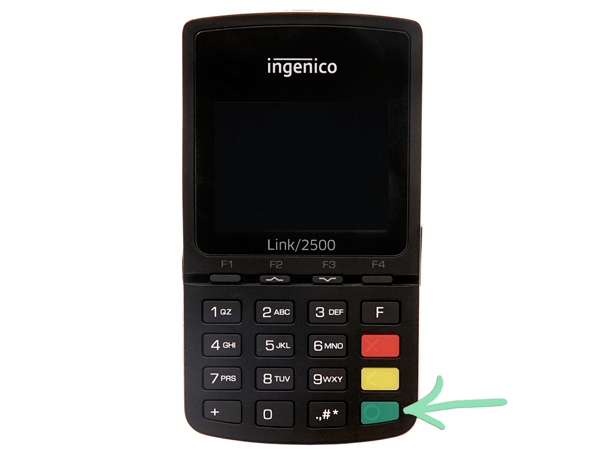
To turn on the Link/2500, hold the green button until the screen lights up.
Click to Enlarge