R7000 Nighthawk Smart Wireless Router
The R7000 Nighthawk Router takes your existing internet connection and makes it wireless so you can enjoy WiFi access in your business. Follow this guide to learn how to set up the Nighthawk step by step.
Watch our setup video below:
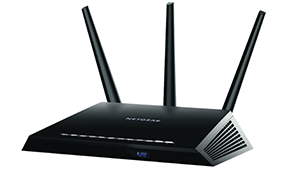
Table of Contents
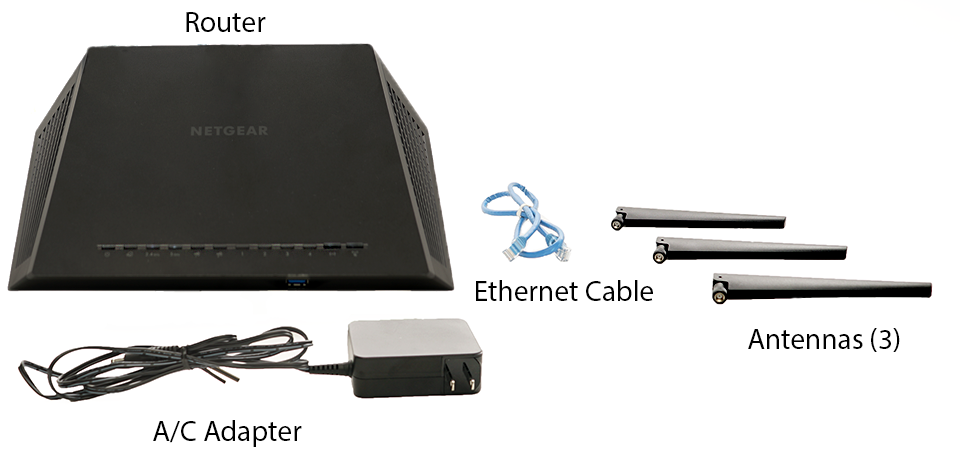
In the Box
The R7000 Nighthawk Wireless Router ships with the parts listed below.
Router Setup
Complete the basic steps of setting up the Nighthawk by connecting it to your modem, plugging it into power, and completing the router’s setup wizard.
Visit our Best Practices guide for tips on where to place the router and for general network recommendations.
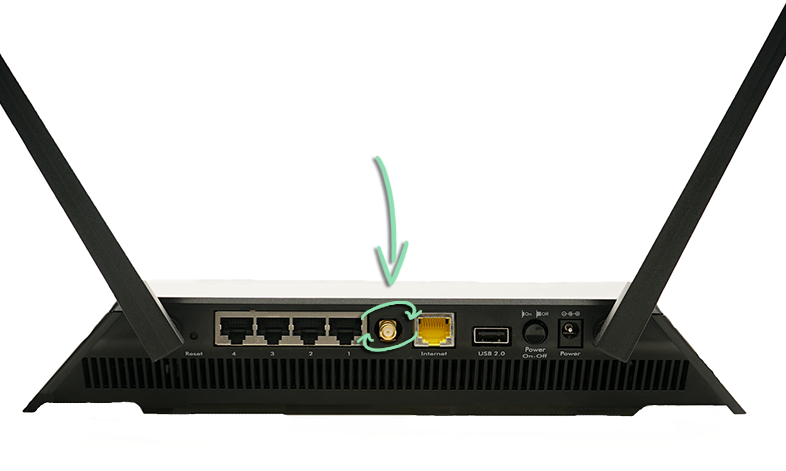
- Remove the cap from each antenna, then screw the antennas into the posts on the back of the router.
Place the outside antennas at 45° angles and position the center antenna vertically.
Click to Enlarge - Unplug your modem from power to turn it off.
If the modem has a battery backup, remove the battery from the device.
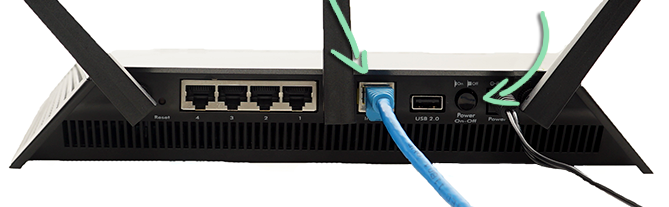
- Connect the ethernet cable to the yellow port on the back of the router.
- Connect the other end of the ethernet cable to the modem.
- Plug the modem into power to turn it back on.
- Press the power button on the router to turn it on.
Click to Enlarge - Wait for the router's power light to turn solid white.

- On an iPad or other device, connect to the router's WiFi network.
The network name (SSID) and password (network key) are printed on the bottom of the Nighthawk.

- Open a web browser and wait for the NETGEAR genie to automatically load.
If the genie does not load, visit www.routerlogin.net
- If prompted, log in with the admin username and password.
The default username is admin and the default password is password. The NETGEAR genie will prompt you to change this information during step 11.

- Follow the on-screen prompts to finish setting up the Nighthawk.
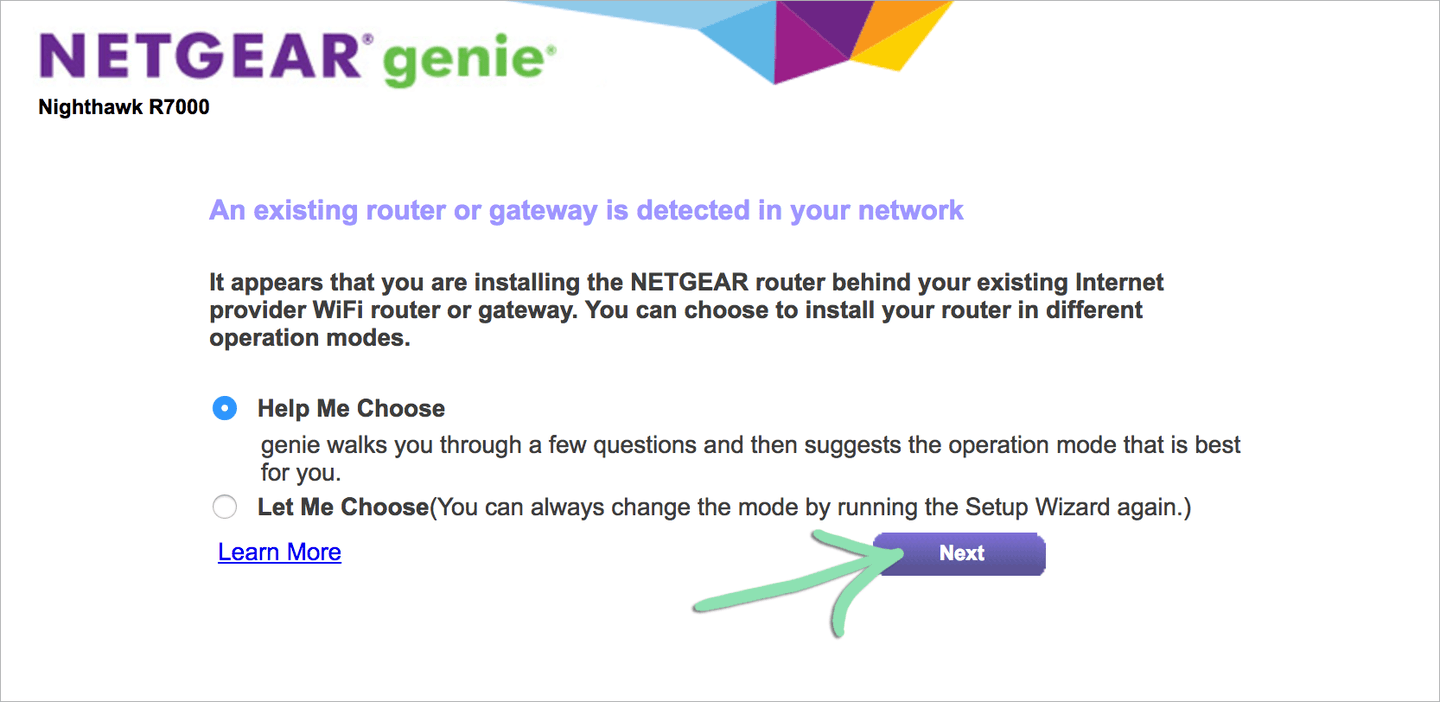
Click to Enlarge
Having trouble with setup? Check out the Nighthawk’s manual or visit Netgear Support for help.
Router Settings
After initial setup, log in to the router to change the network name, create a guest network, and configure other router settings.
- Connect to the router's WiFi network from an iPad or other device.
- Open a web browser and visit www.routerlogin.net.
- Enter the admin username and password.
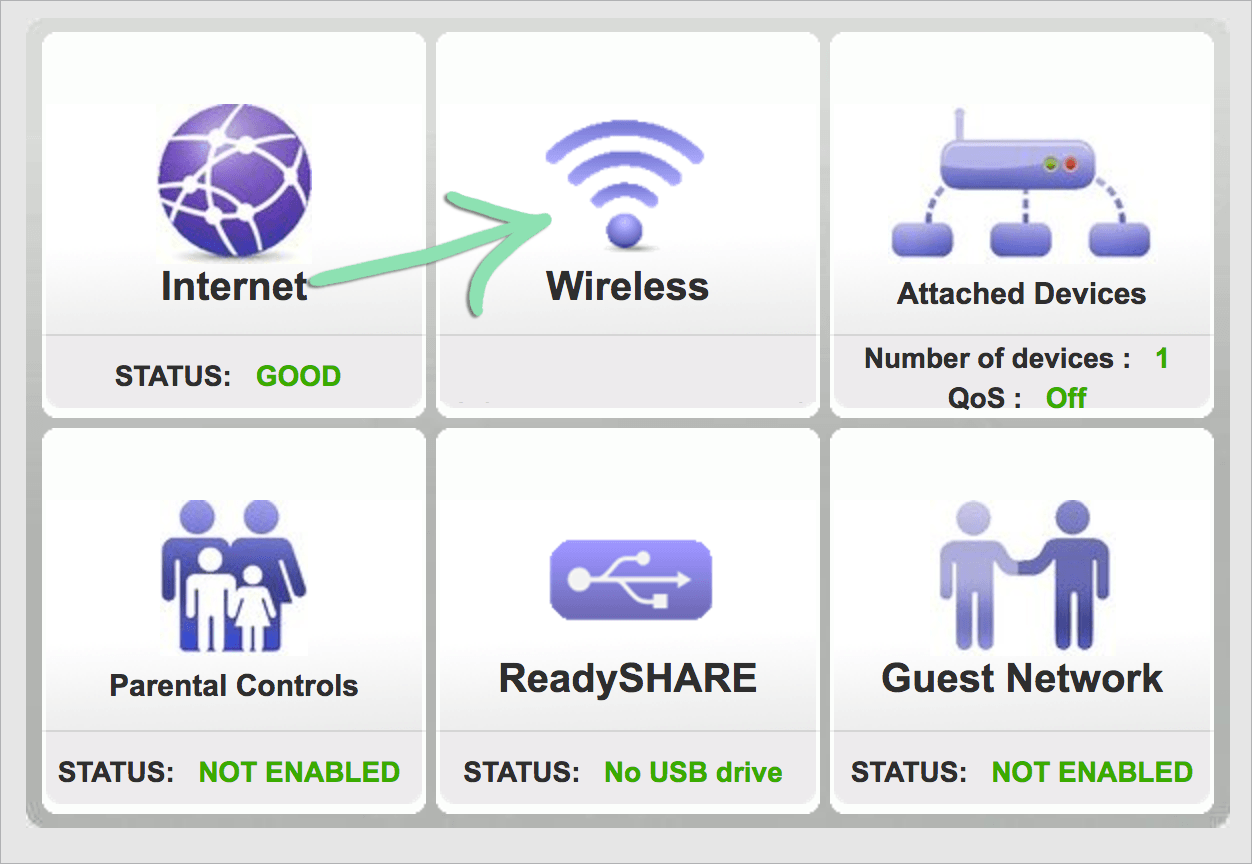
- Select an option on the Basic homepage to configure the router's settings.
- This is where to update network names and passwords, set up a guest network, and manage other Nighthawk settings.
- Go to Advanced > Administration > Set Password to change the admin username and password.

Click to Enlarge
Need help with the router’s settings? Check out the Nighthawk’s manual or visit Netgear Support for help.
Network Names & Passwords
Change the names and passwords of the Nighthawk’s WiFi networks so you can easily identify them and connect your registers.
- On the Basic homepage, tap 'Wireless'.
Click to Enlarge - Enter a name, select a security type, and choose a password for the router's 2.4GHz network.

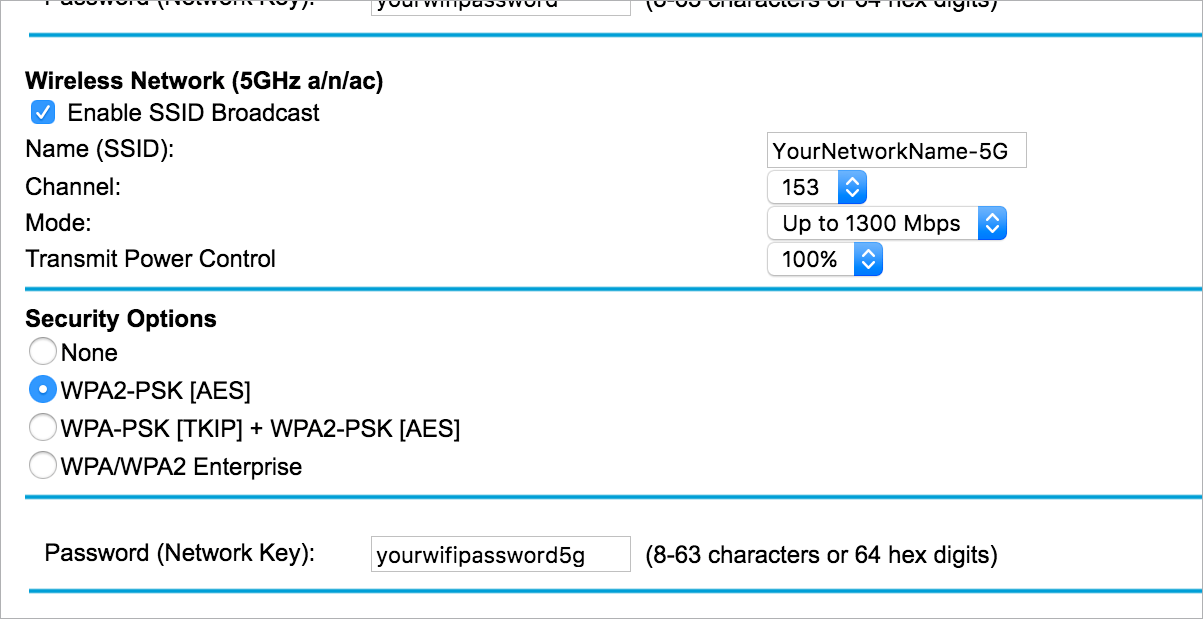
Click to Enlarge - Scroll down and repeat step 2 for the 5GHz network.
Click to Enlarge - Tap 'Apply' to save changes.

Click to Enlarge - Reconnect to the WiFi network.
Create a Guest Network
If you want to offer internet access to customers, create a guest network. That way, customers can connect without accessing your secure private network.
- On the Basic homepage, tap 'Guest Network'.

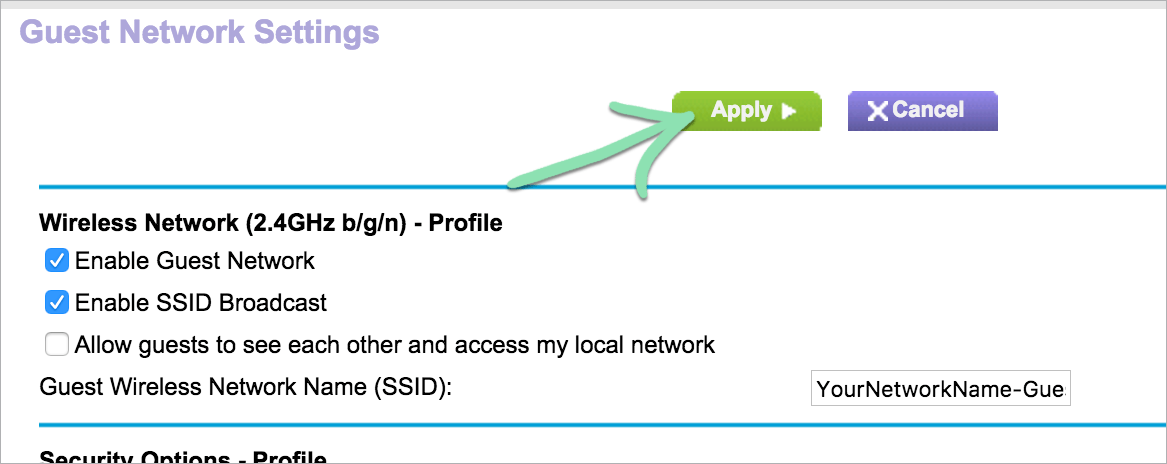
Click to Enlarge - Check 'Enable Guest Network' and enter a name for the network.

Click to Enlarge - (Optional) Choose a security type and enter a password.
Leave security set to ‘None’ if you do not want guests to have to enter a password.

Click to Enlarge - Tap 'Apply' to save changes.
Click to Enlarge
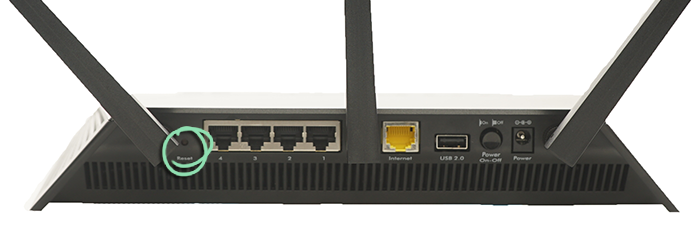
Reset the Router
If you run into problems while setting up or using the Nighthawk, you can reset it to factory settings.
Resetting the Nighthawk reverts the network names and passwords, admin login, and all other settings back to factory defaults.
- Use a paperclip to hold the 'Reset' button for at least seven seconds.
Click to Enlarge - Release the reset button when the power light begins blinking orange.
- Wait until the router reboots and the power light turns solid white.
If you have trouble resetting the router, check out the Nighthawk’s manual or visit Netgear Support for help.