An item’s cost helps determine inventory value and affects other reporting metrics, such as margins. Enter an item’s initial cost when you create it, automatically update the cost to a weighted average as you receive inventory, and manually adjust the cost if it is incorrect. To stop calculating cost based on a weighted average, disable the weighted average cost feature.
Table of Contents
Understanding Item Cost in Lightspeed Retail
Review the basics of item cost and how it impacts your business. Learn why tracking item cost is important, what affects cost in Lightspeed Retail, and how weighted average cost is computed.
Cost and Value
Item cost is what a business pays to acquire an item. Value is the item’s cost multiplied by its quantity. By tracking item cost, a business can properly calculate inventory value and correctly measure profits. Cost also affects cost of goods sold (COGS), margins, and markups.
Cost in Lightspeed Retail
An item’s initial cost is entered when the item is created in BackOffice or at the register. After that, cost updates automatically as you receive inventory. When an item is received, its cost updates by default to a weighted average of the current cost and the new receiving cost.
How Average Cost is Calculated
The average cost of an item is based on the number of units in inventory at an existing cost and the number of units received at a new cost.
Adding Items
An item’s initial cost can only be entered when you first add the item to inventory. See an overview of adding items below or visit our Add Basic Items or Add an Item with Variants articles for a complete walkthrough.
Visit the Item List in BackOffice or from the Retail POS (S-Series) app (employees with BackOffice permissions only.
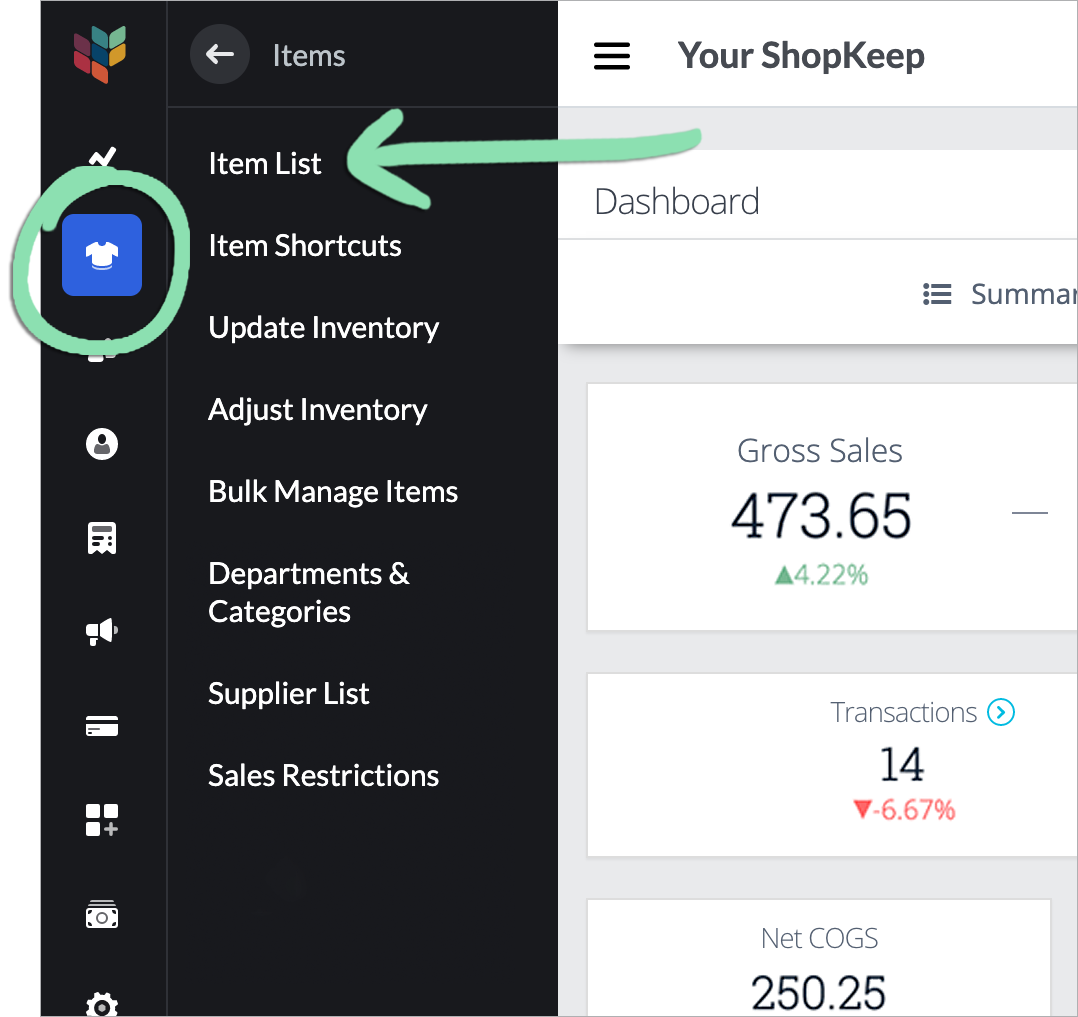
In BackOffice, click ‘Items’ and select ‘Item List’.
In the Retail POS (S-Series) app for iOS, tap ‘Manage Items’ on the Main Menu. For the Retail POS (S-Series) app for Android, tap ‘Setup’ on the register menu, then select ‘Manage Items’.
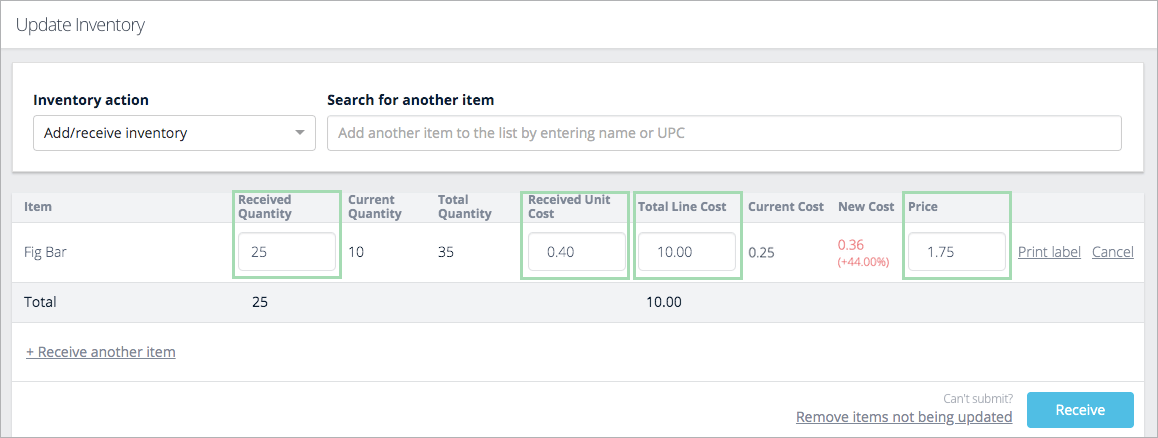
By default, an item’s cost automatically updates to a weighted average when you receive inventory. See a brief overview of the inventory receiving process below or visit our Update Inventory article for a complete walkthrough.
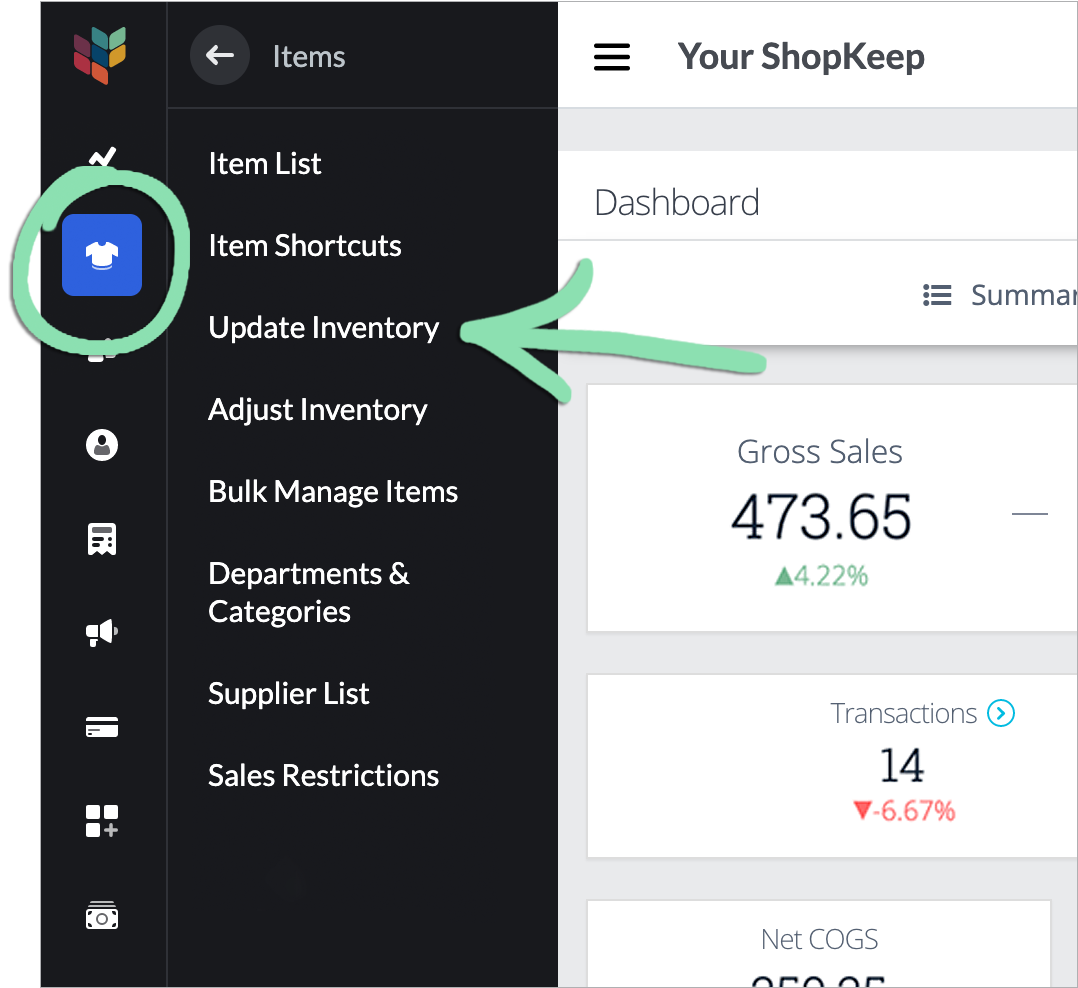
In BackOffice, click 'Items' and select 'Update Inventory'.
Click to Enlarge
Select ‘Add/receive inventory’ from the drop-down.
Click to Enlarge
Search for an item by name or UPC and click on it.
Click to Enlarge
If the item has a negative quantity, update it to the correct quantity on hand using the ‘Count inventory’ action before receiving the item.
Get updates on the iOS or Android register to sync the new cost of the item to the register.
If you receive an error while getting updates, visit our troubleshooting guide for help.
Fixing Incorrect Costs
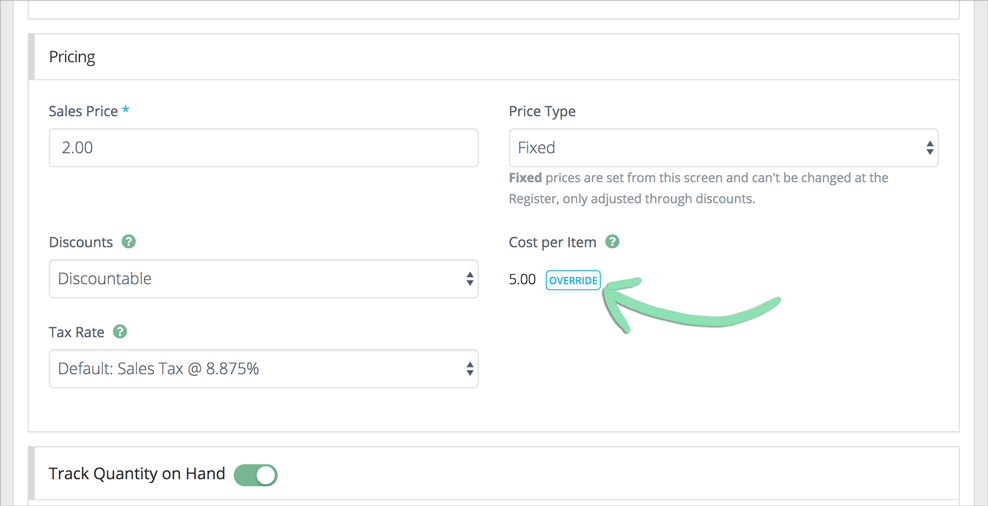
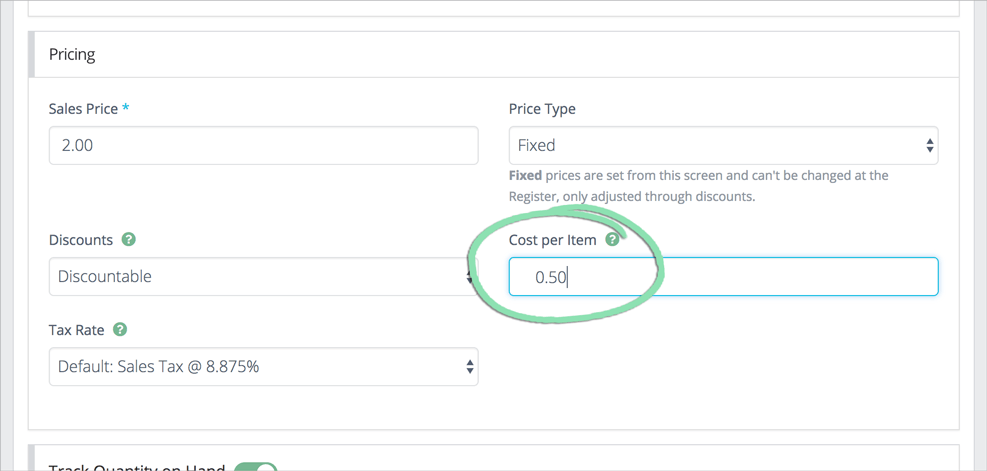
If you enter the wrong cost or quantity when adding or receiving inventory, fix the mistake by overriding item costs and adjusting quantities. Fix costs from the Item List if there are only a few items to edit or use Bulk Management for large quantities of items.
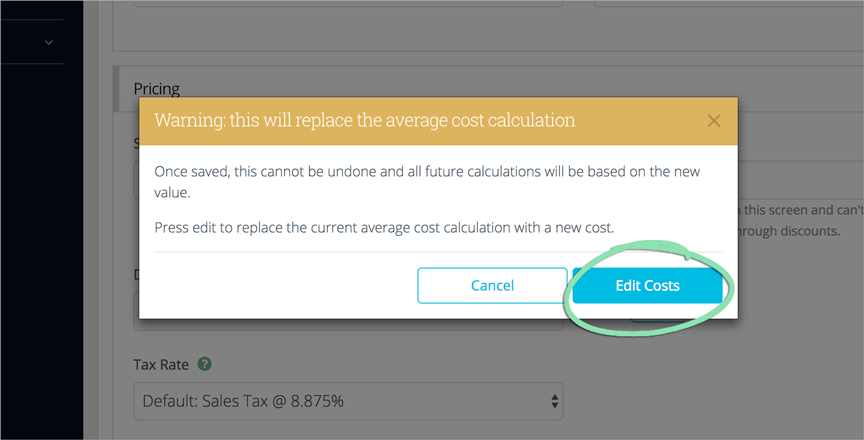
Overriding an item’s cost will assign the item a new cost, nullifying its existing weighted average cost calculation.
From the Item List
Fix incorrect costs from the Item List if there are only a few items to be corrected.
(Optional) Check the Item List to verify the items’ updated costs and quantities.
Get updates on the iOS or Android register to sync the new costs of the items to the register.
If you receive an error while getting updates, visit our troubleshooting guide for help.
Disabling Weighted Average Cost
If you prefer to use the last receiving cost entered to value inventory, disable weighted average cost. Then when you receive an item, its cost will update to the per-unit cost being received.
In BackOffice, click 'Settings' and select 'Inventory'.
Click to Enlarge