The Table Layout feature of the Retail POS (S-Series) app allows you to create a floor plan of your restaurant or bar, view open and seated tables according to how they are arranged in your restaurant, and start orders directly from the table layout.
In BackOffice, enable the table layout to be able to customize and use the layout at the register. On each register, enable Table Layout Sync to synchronize the layout across all registers and back it up to the cloud.
Table of Contents
Enable the Table Layout
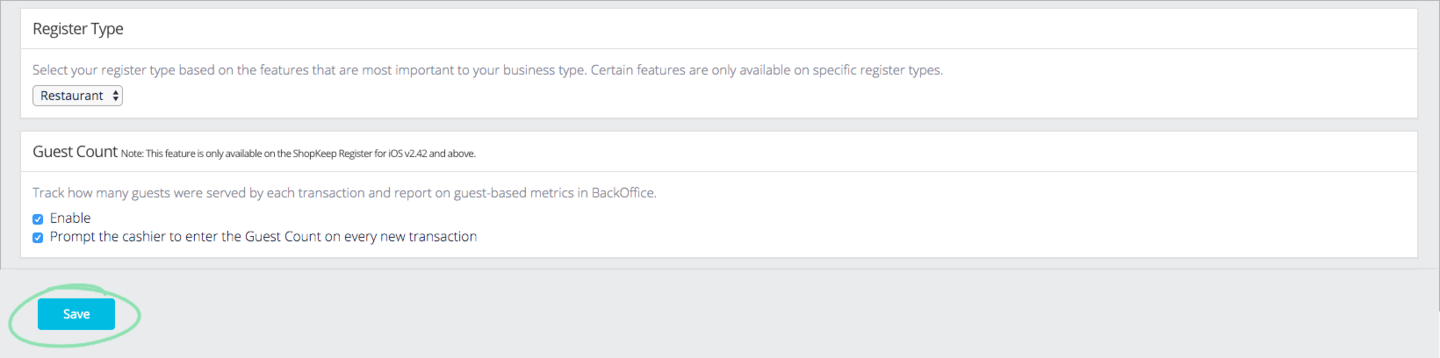
For the table layout to appear on your register, enable it from BackOffice.
In BackOffice, go to 'Settings', then click 'General'.
Click to Enlarge
Click the 'Enable' check box in the 'Tables' section.
Click to Enlarge
(Optional) Select 'Tables' in the 'Default Home Screen' section.
The Default Home Screen feature is only supported on the Retail POS (S-Series) app for iOS. Read our Default Home Screen article to learn more.
Scroll to the bottom of the page and click 'Save'.
Click to Enlarge
Get updates on the iOS or Android register to set the Table Layout feature live on the register.
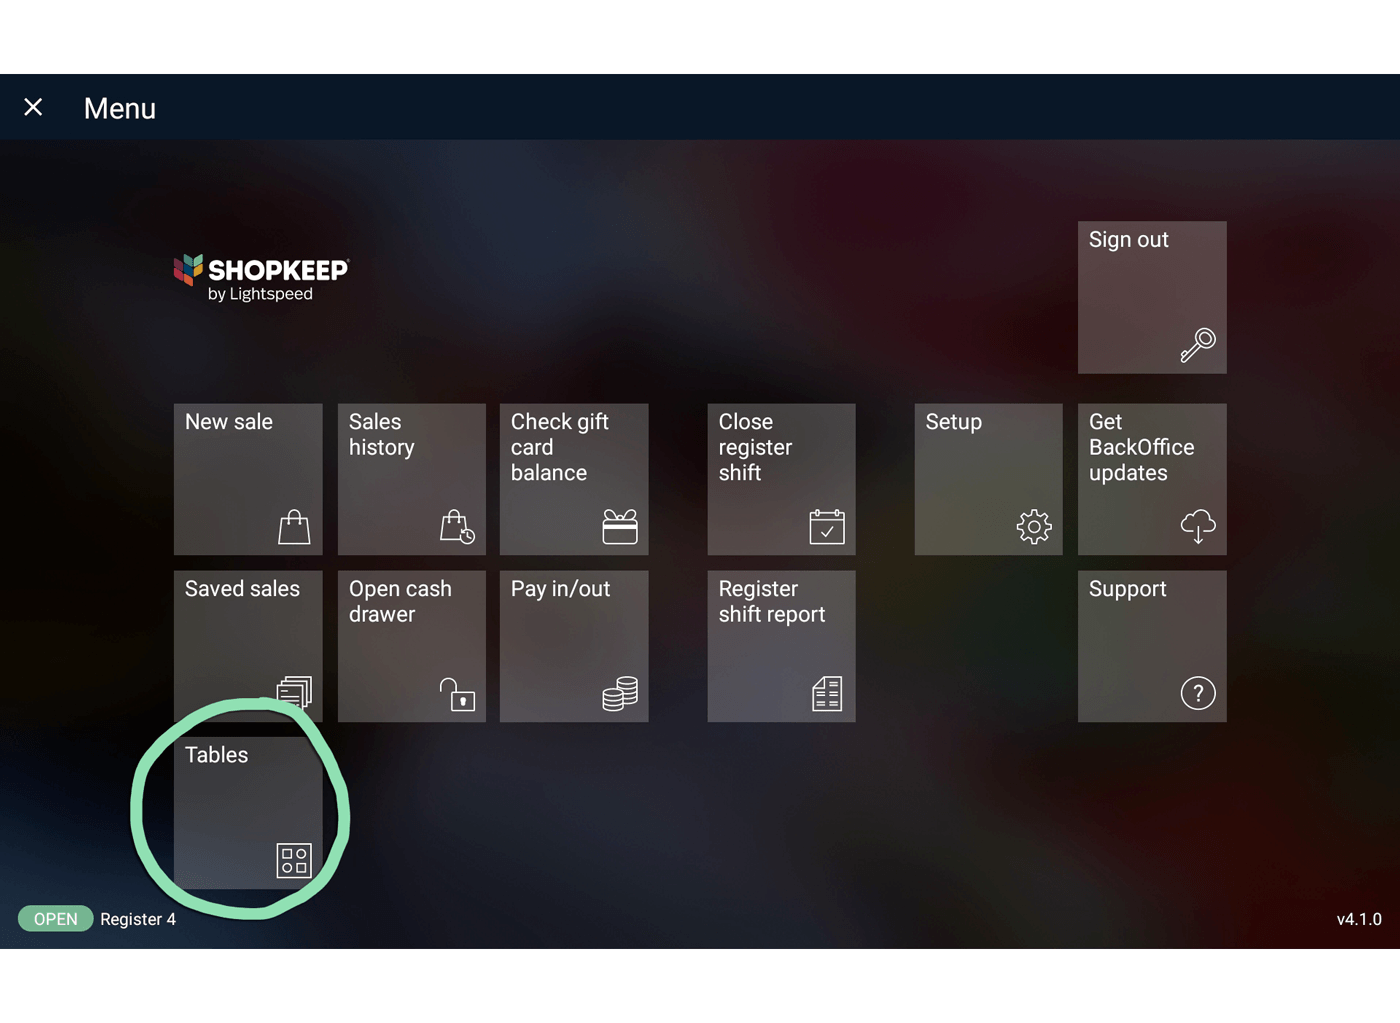
Set Up the Table Layout
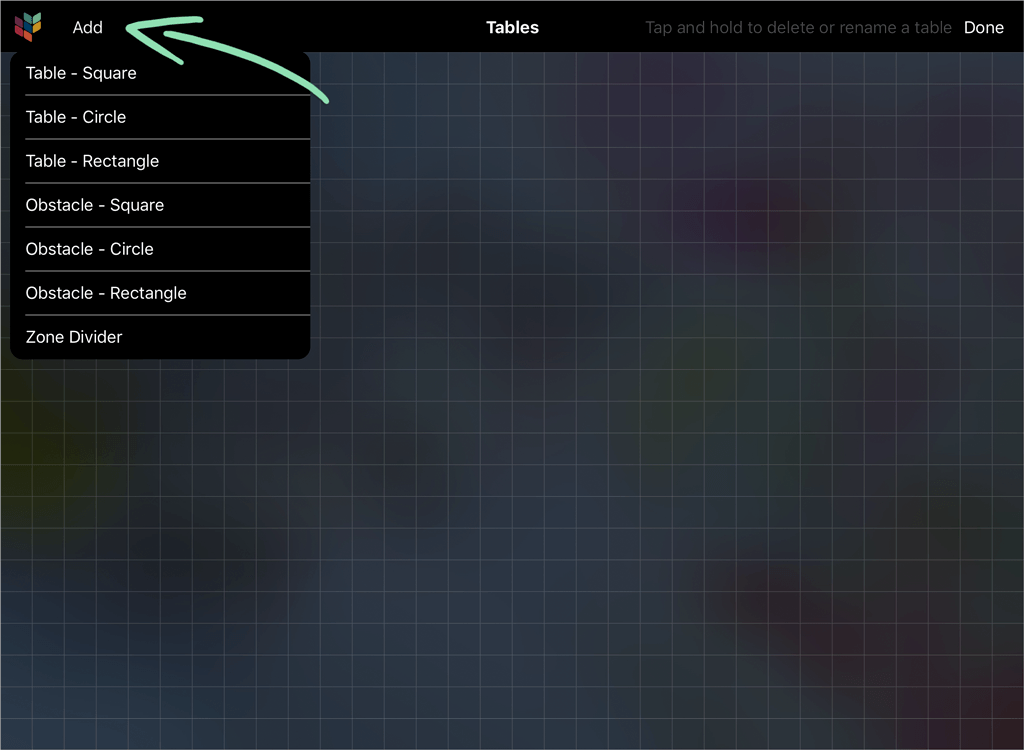
From the Retail POS (S-Series) app, manually set up the table layout of your restaurant or bar based on its floor plan. Add, move, resize, rotate, and delete tables, obstacles, and zone divisions to create a floor plan to your exact specifications.
If using the Retail POS (S-Series) app for iOS, open a register shift.
To move: drag and drop into the desired position. To resize: pinch and zoom with two fingers to increase or decrease the size. To rotate: rotate with two fingers to the desired position.
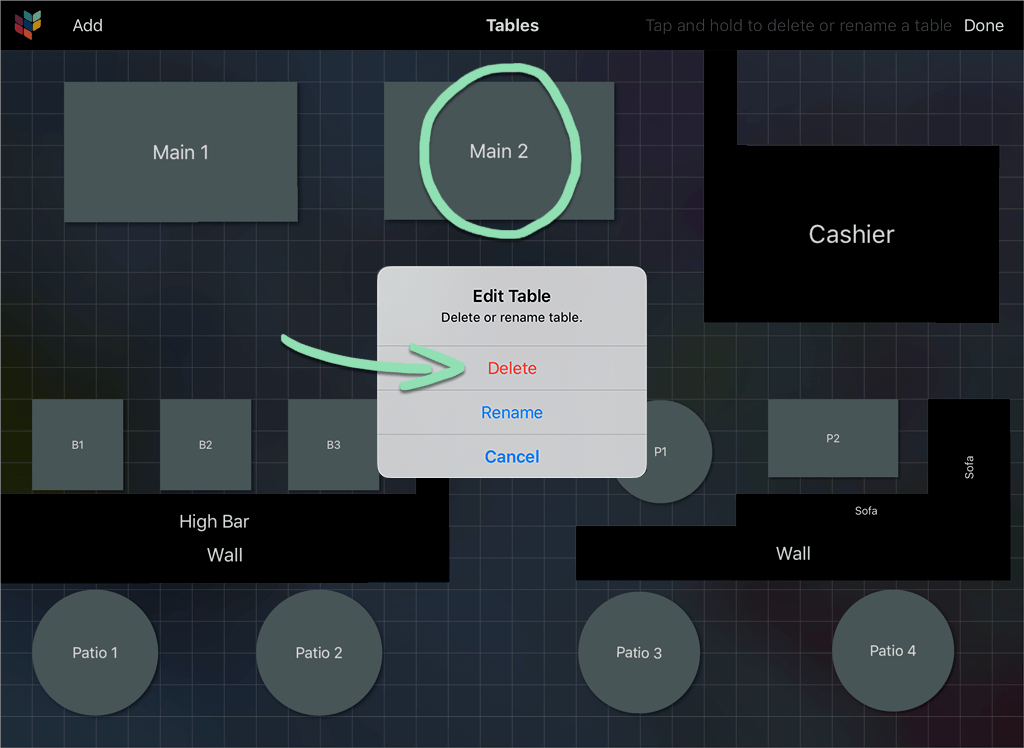
(Optional) To delete an object, press and hold the object then tap ‘Delete’ (iOS), or tap the ‘x’ above the object (Android).
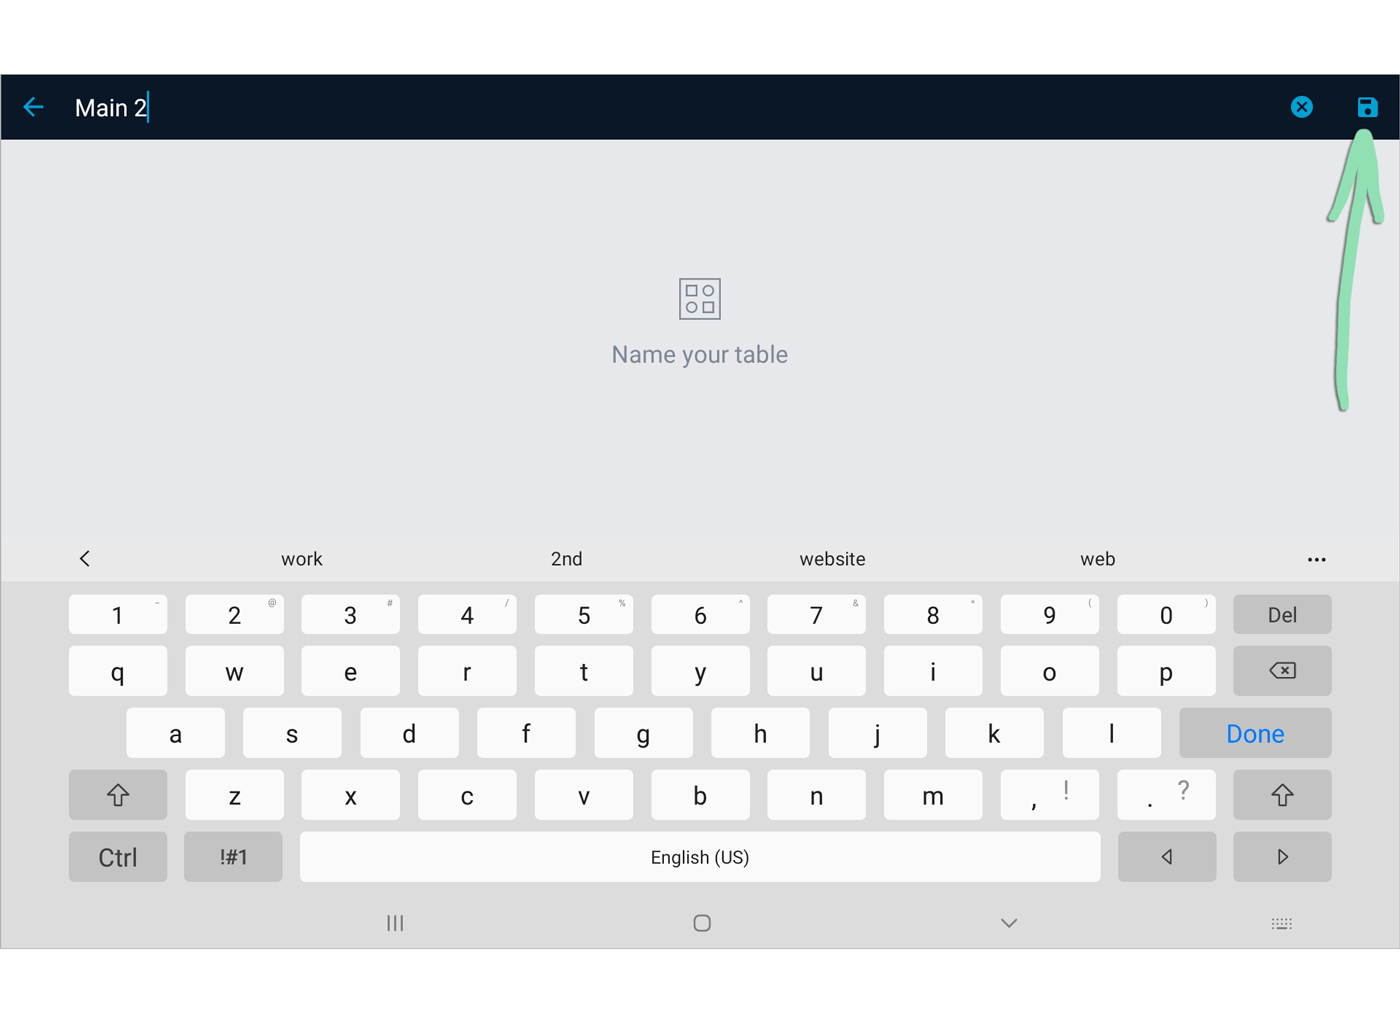
Tap 'Done' (iOS) or the disk icon (Android) to save the layout.
Click to Enlarge
(Optional) Follow the steps in the section below to enable Table Layout Sync.
If you do not enable this feature, the table layout will only be accessible from the register where it was created.
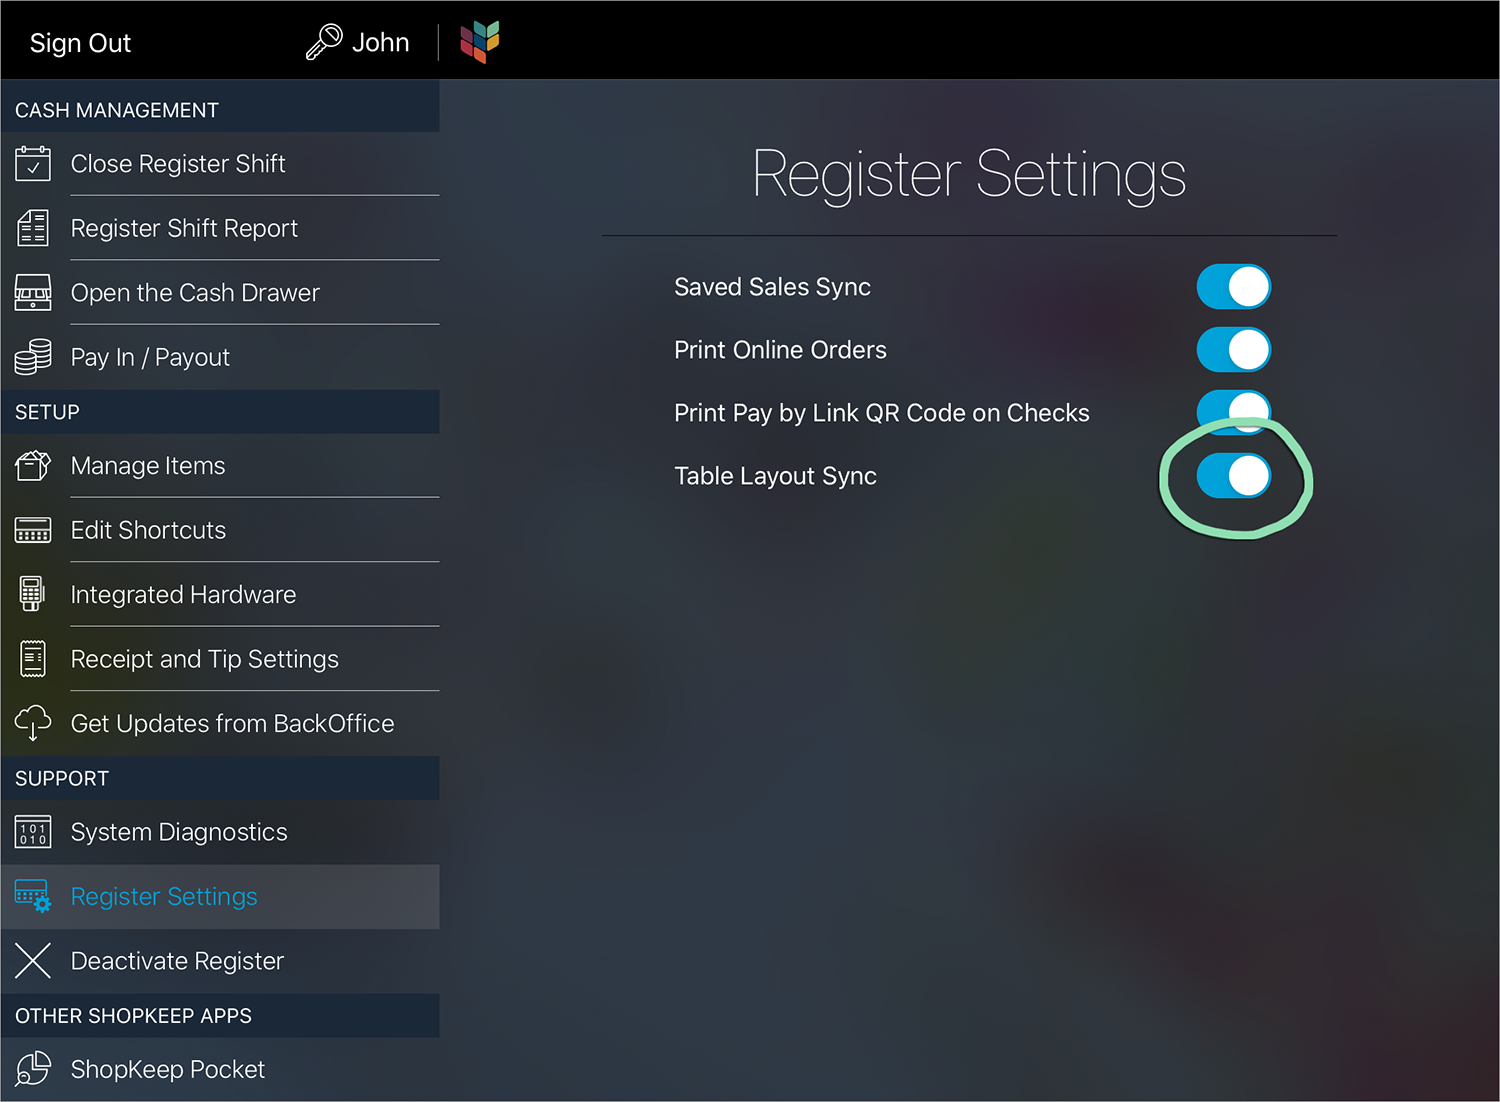
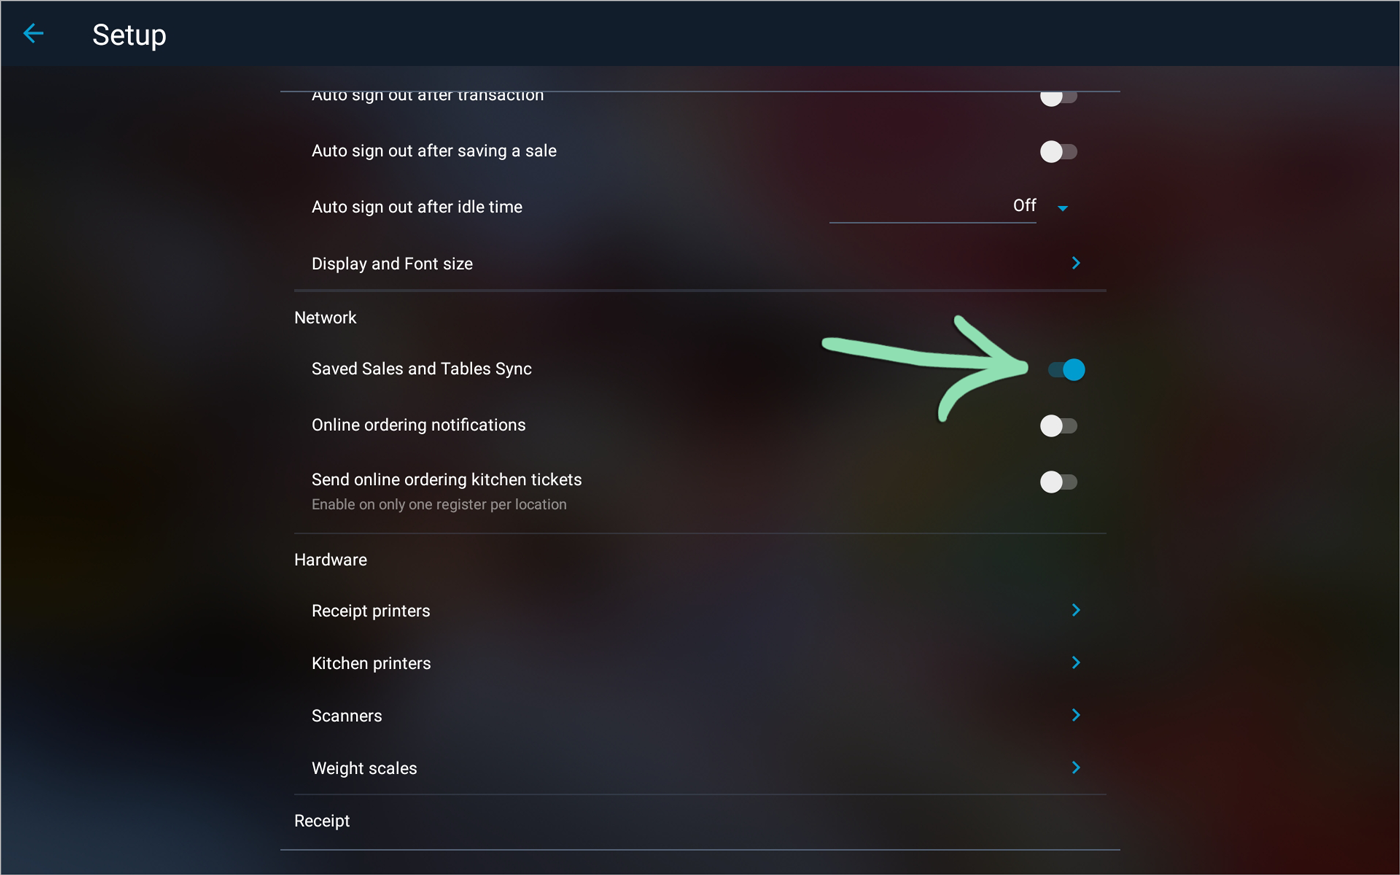
Enable Table Layout Sync
Enable Table Layout Sync to use one table layout across all registers at your business with an active internet connection. This feature automatically backs up the table layout to the cloud, allowing it to be managed from any register activated on the same Lightspeed store.
The specific steps to enable Table Layout Sync will vary based on whether you use the iOS or Android version of the Retail POS (S-Series) app.
Toggle on the switch next to ‘Table Layout Sync’.
Click to Enlarge
Review the message, then select whether to upload or delete tables set up on the current register.
Tap ‘Upload then Enable’ if Table Layout Sync is not enabled on other registers or the current register contains tables not present on other registers that you want to keep.
Tap ‘Delete then Enable’ if Table Layout Sync is enabled on other registers and the current register contains the same tables as the other registers or unneeded tables.
Saved Sales Sync allows a business’s saved sales to be managed from any of its registers. Without this feature enabled, tables with orders may appear empty on some registers.
Repeat steps 1 - 3 on each additional Android register.
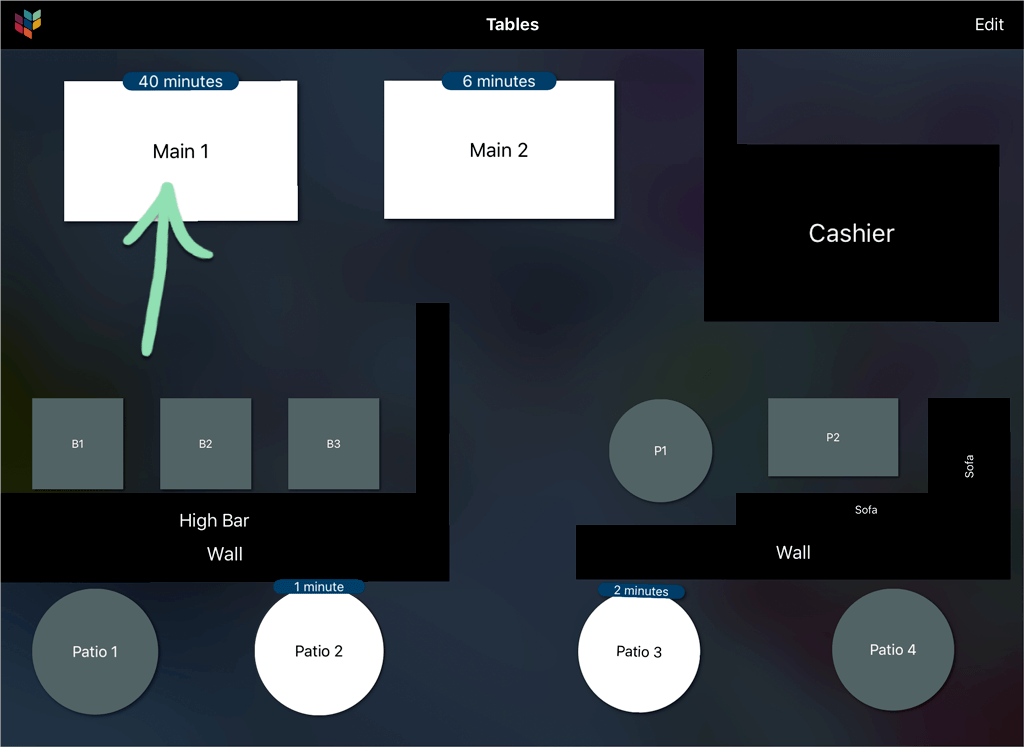
Use the Table Layout
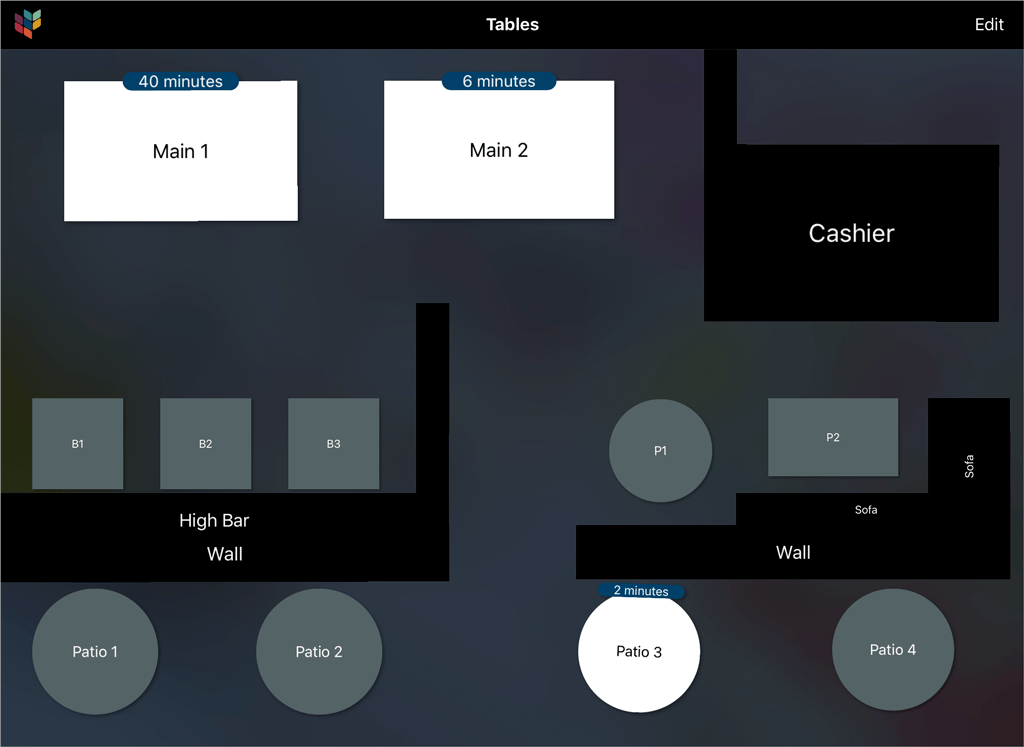
On the Table Layout screen, staff can easily view open and seated tables, start a new order for a table, and add items to saved sales for a selected table.
Tap a grey table.
Grey tables are tables with no guests and no saved sales assigned to them, while white tables have seated guests and a saved sale. Before starting a new saved sale at an occupied table, the existing saved sale must be closed and, if necessary, its tip must be entered.
Items that are assigned printer groups will automatically be sent to the ticket printer. Each table can only hold one saved sale at a time. When using split tenders a new saved sale will be shown on the Saved Sales screen but not on the Tables screen. The original saved sale will remain assigned to the table.
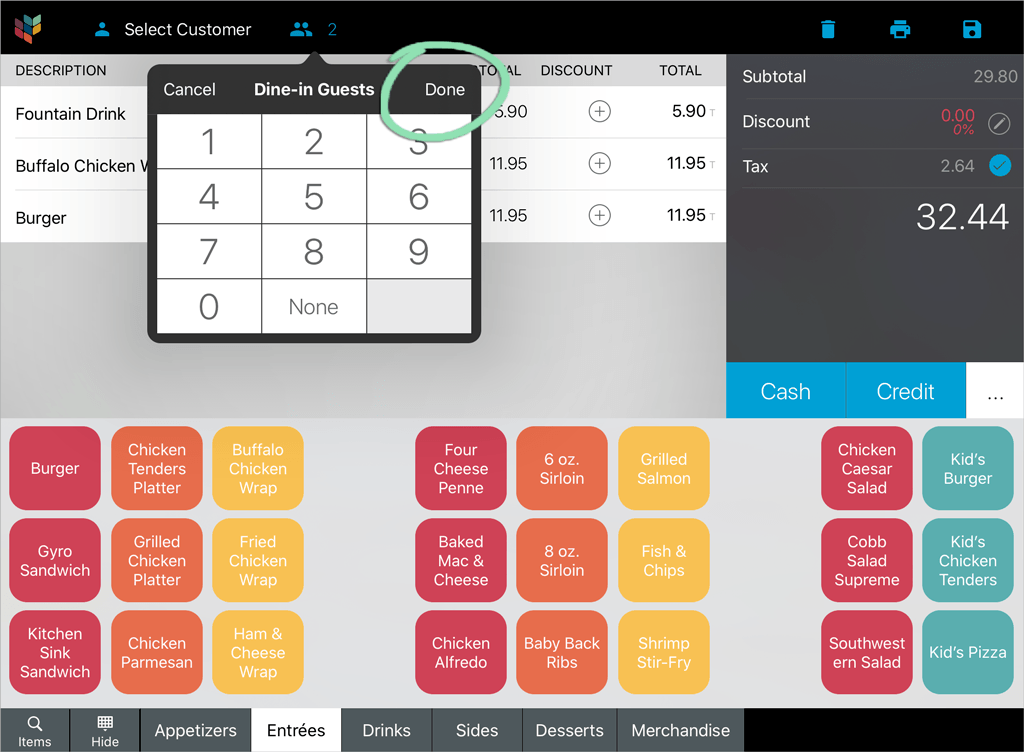
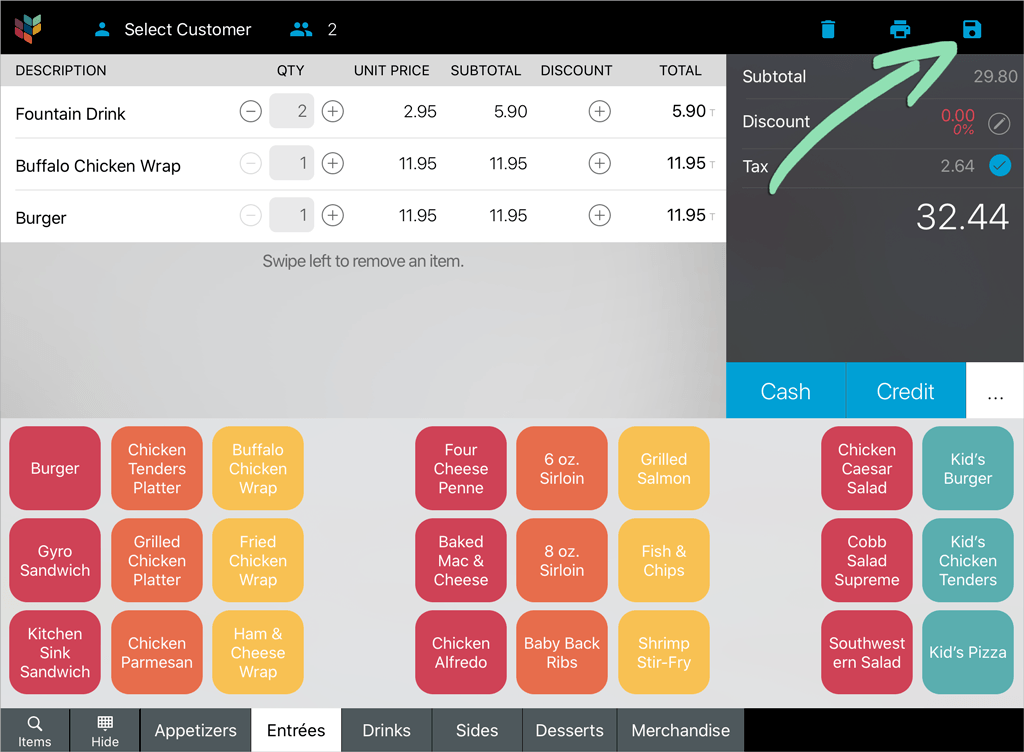
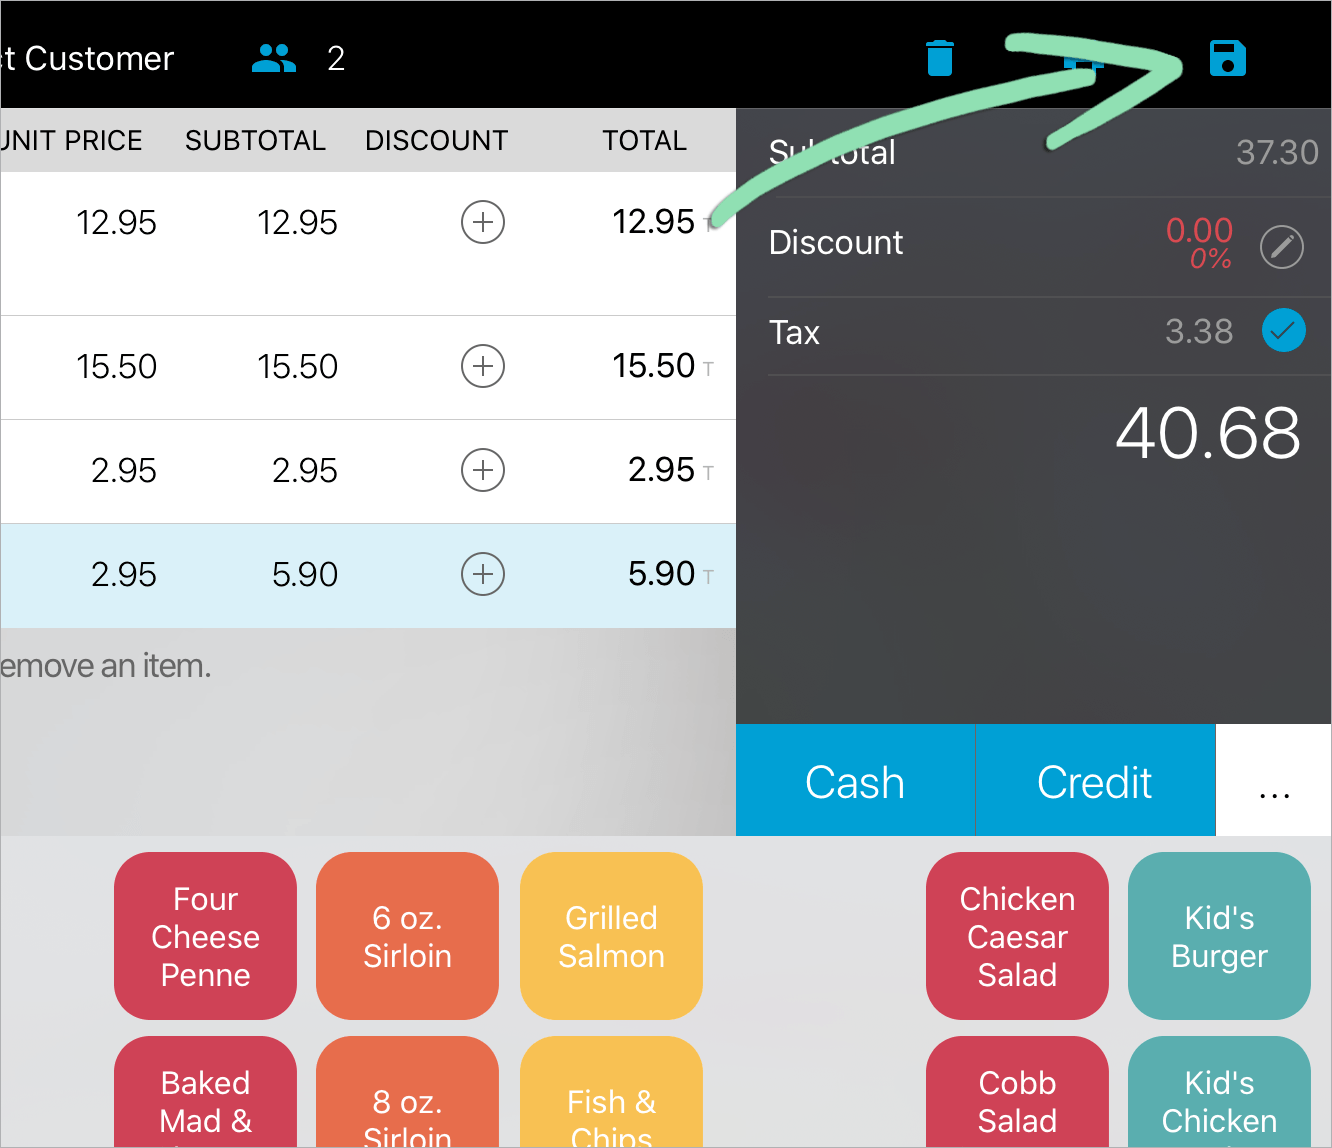
Tap 'Save' (iOS) or the disk icon (Android) to name the saved sale.
Saved sales are automatically assigned the name of the table and the time the saved sale was created. The name of the saved sale can be updated if necessary.
cTo close the saved sale, select the customer’s payment tender and follow the prompts.
If multiple customers are sharing the bill, use Split Tender to divide payment up to 9 ways, or split the saved sale before tendering it to separate its items into multiple different sales.