With Tip Later, the cashier authorizes a credit card and comes back to the order at a later point to enter the gratuity. This frees up the register and simplifies the customer interaction.
Table of Contents
Enable Paper Receipts
Tip Later is only available when customers sign and tip on paper receipts for credit card sales. Learn how to enable paper receipts for credit card transactions to begin using Tip Later at the register.
Sign into BackOffice as an employee with the relevant permissions or the Retail POS (S-Series) app as the Business Owner and open receipt settings.
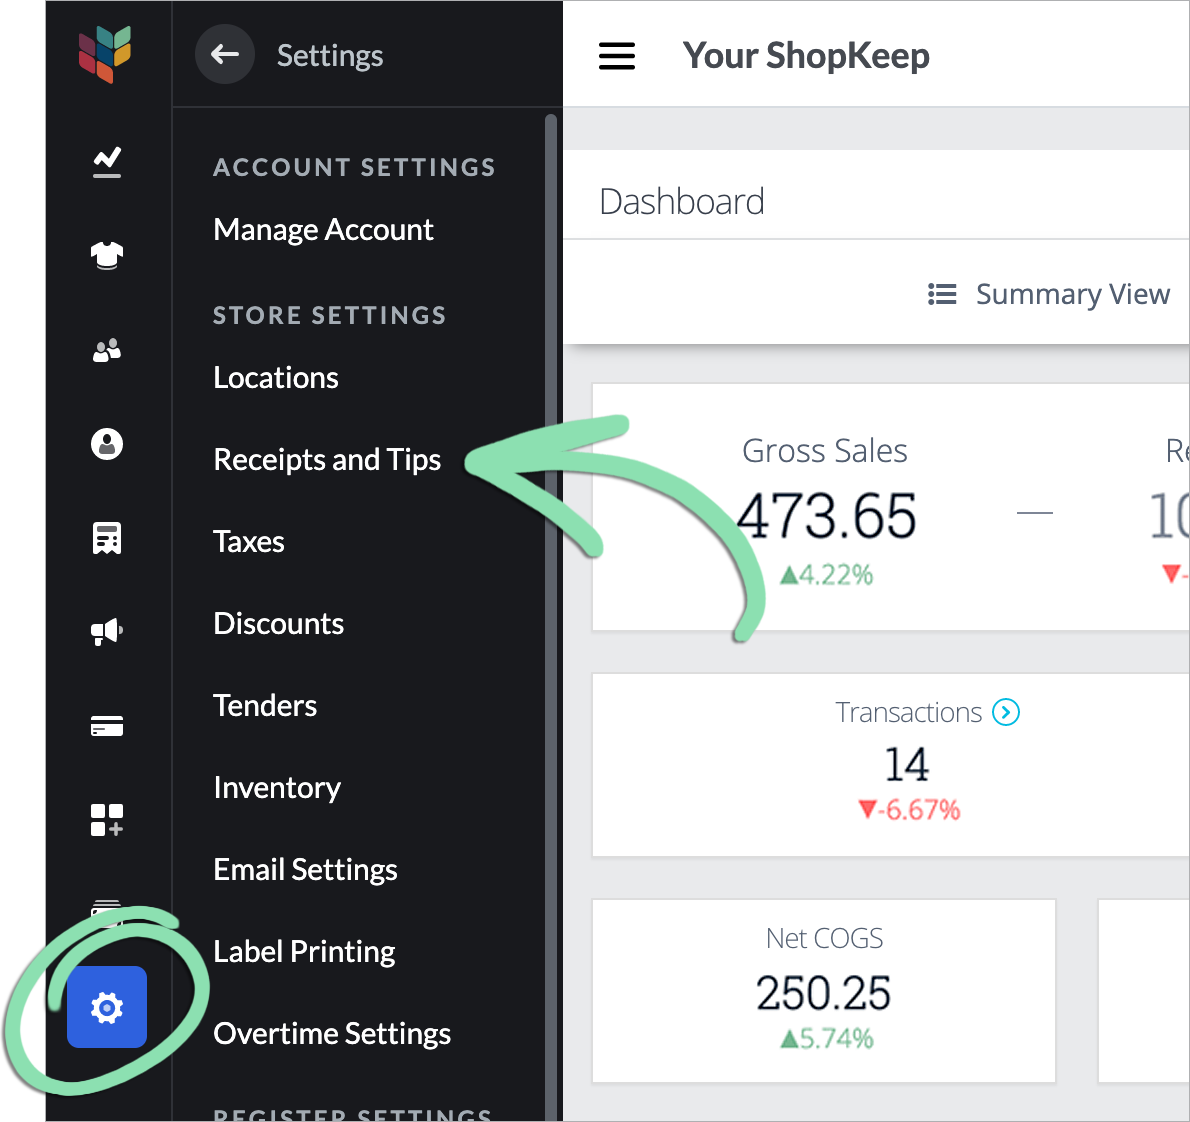
In BackOffice, click ‘Settings’ and select ‘Receipts and Tips’. Don’t see ‘Receipts and Tips’? Visit our troubleshooting guide for help.
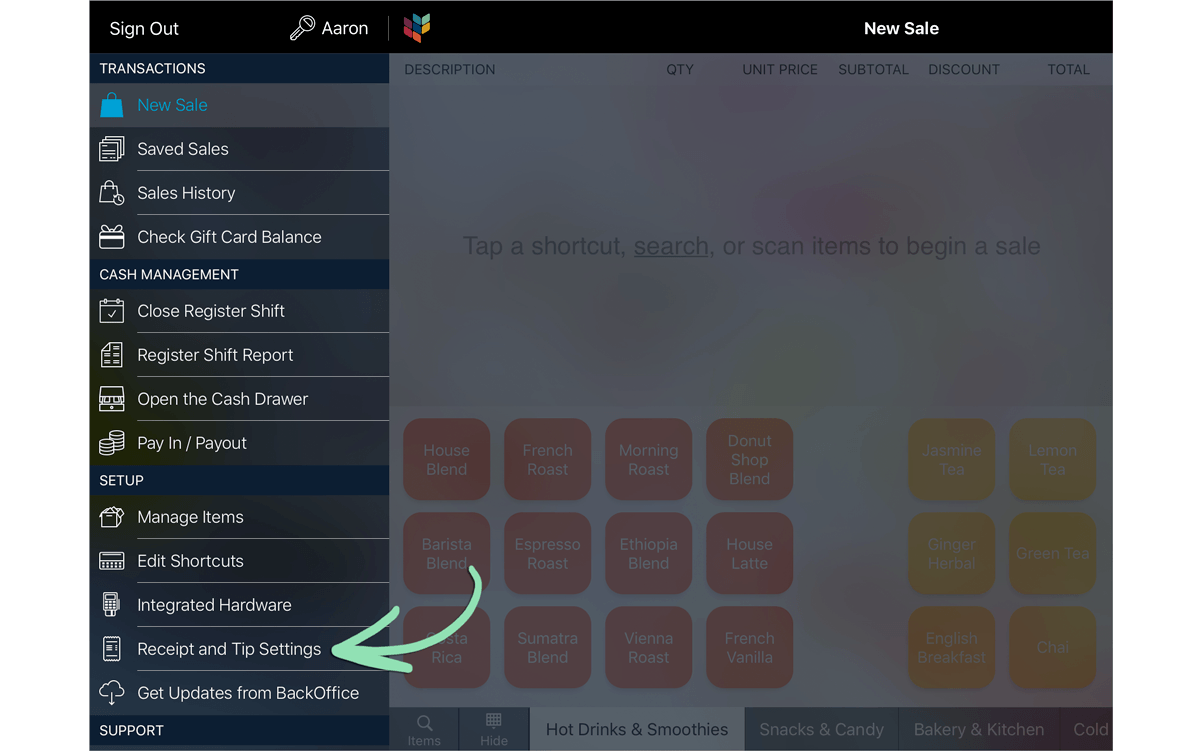
In the Retail POS (S-Series) app for iOS, tap ‘Receipt and Tip Settings’ on the Main Menu. For the Retail POS (S-Series) app for Android, tap ‘Setup’ on the register menu, then select ‘Receipt and Tip Settings’.
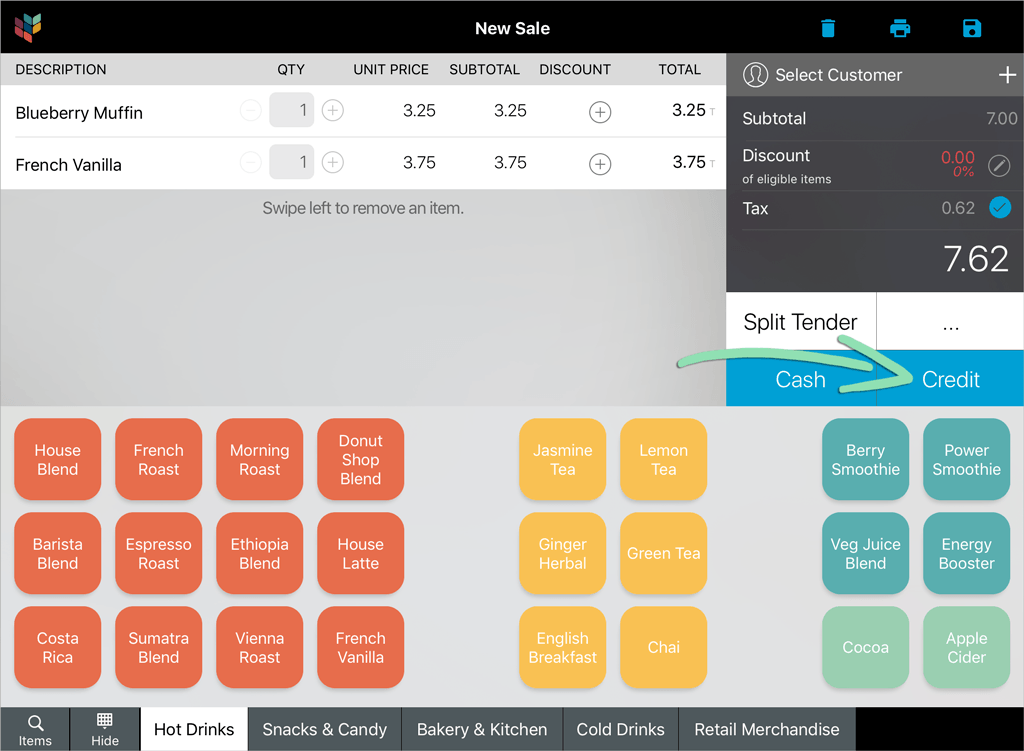
Once a customer places their order and the cashier processes their card, use Tip Later to return to the order after the customer signs the receipt to enter their tip.
To learn how to use Tip Later on the Retail POS (S-Series) app on The Mini or The Station, visit our help article here.
Enter a name for the sale (optional) and tap 'Save'.
By default, the sale’s name is set to the name of the customer tagged to the sale. If no customer is selected, the name defaults to Walk-in plus the current time.
After the customer signs the receipt, open the Main Menu and tap 'Saved Sales'.
To learn more about the Saved Sales screen, visit our Saved Sales article.
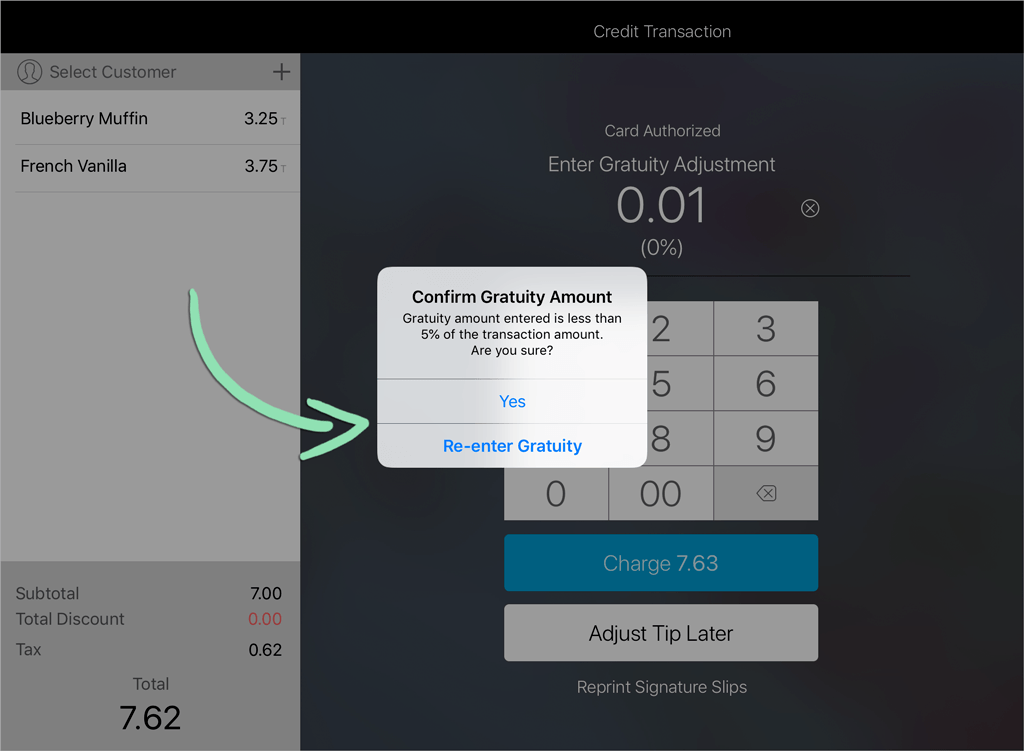
Enter the tip amount from the receipt and tap 'Charge'.
The tip amount cannot be changed at the register after tapping ‘Charge’. ShopKeep Payments by Lightspeed merchants can request adjustments for incorrectly entered tips. Read our Tips and Gratuity article to learn more.
If prompted, the cashier either taps ‘Yes’ to confirm the gratuity amount or ‘Re-enter Gratuity’ to enter a different amount.
This warning appears when the gratuity entered is less than 5% or more than 50% of the sale total.