BackOffice is where you set up your business in Lightspeed Retail. Add your staff to track their sales, add your items to sell them at the register, and print labels for items to ring them up with a barcode scanner. Explore other topics selected for retail businesses such as receipt setup, gift cards, customer management, and discounts.
Table of Contents
Add Staff
“Staff” is Lightspeed Retail’s term for anyone who works in your store. It is important to add all employees to be able to track their sales and time clock punches and control who has access to what.
Visit our Manage Staff article to learn how to edit or remove existing employees.
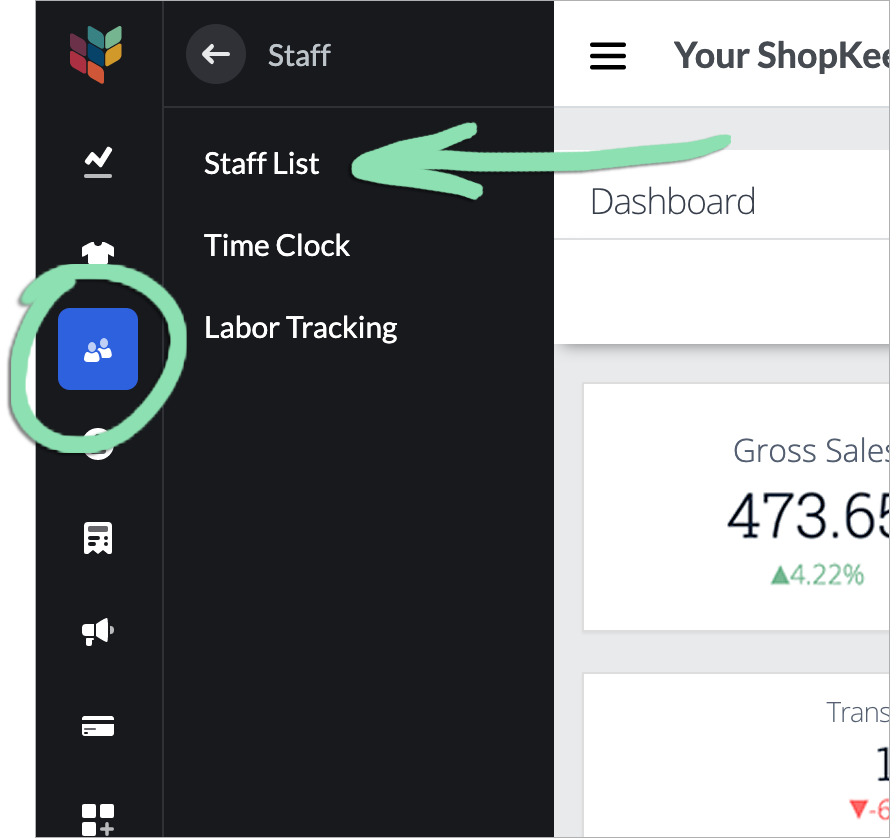
In BackOffice, click 'Staff' and select 'Staff List'.
Click to Enlarge
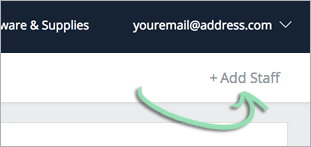
Click 'Add Staff'.
If prompted, set a new register code for the Business Owner and tap 'Enable PIN'.
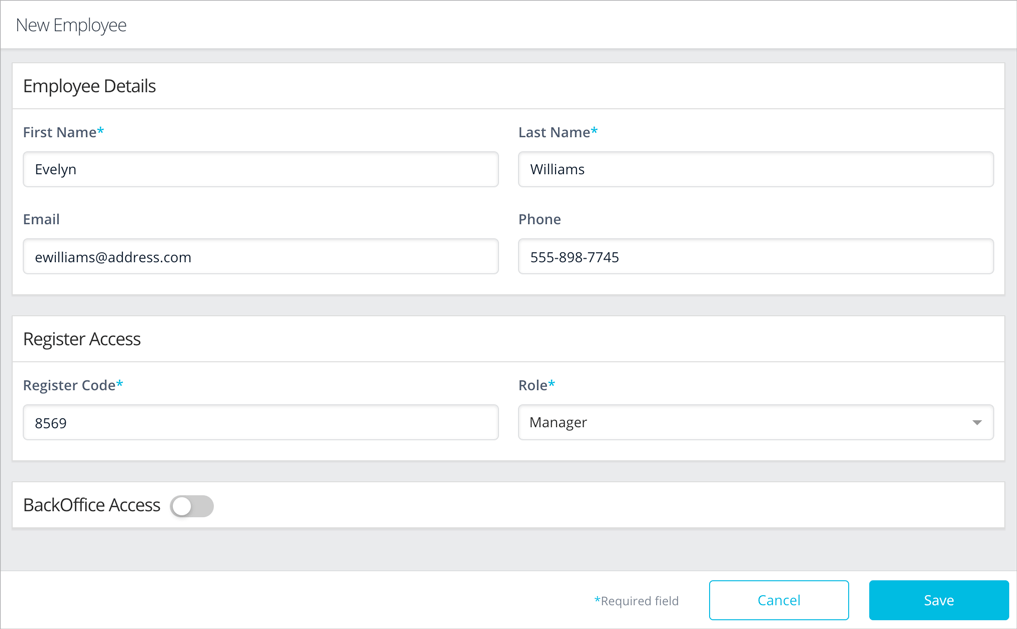
Enter at least a first name, last name, register code, select a role, and click 'Save'.
Click to Enlarge
Register Code | 4-digit code that allows an employee to clock in and out and sign into the register. Role | Select ‘Cashier’ or ‘Manager’. Cashiers can run sales, returns, and perform other cashier functions at the register. Managers can perform cashier functions and manager functions, such as opening the register shift and cash drawer. BackOffice Access | Select a level of BackOffice access to give to an employee. Visit our Manage Staff article to learn about the different types of BackOffice permissions. Don’t see ‘BackOffice Access’? Visit our Staff Troubleshooting guide for help.
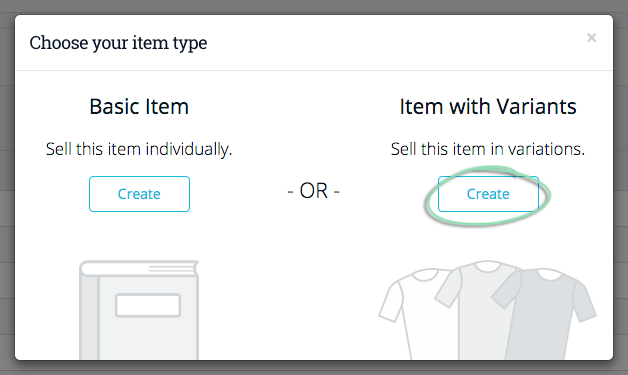
Retail businesses often sell specific items in different sizes, colors, etc. Adding an item with variants makes it easy to enter all of the variations of a product at once. Employees with the relevant BackOffice permissions also have the ability to create items from the Retail POS (S-Series) app.
If you have questions about adding or managing items, visit our Inventory FAQ.
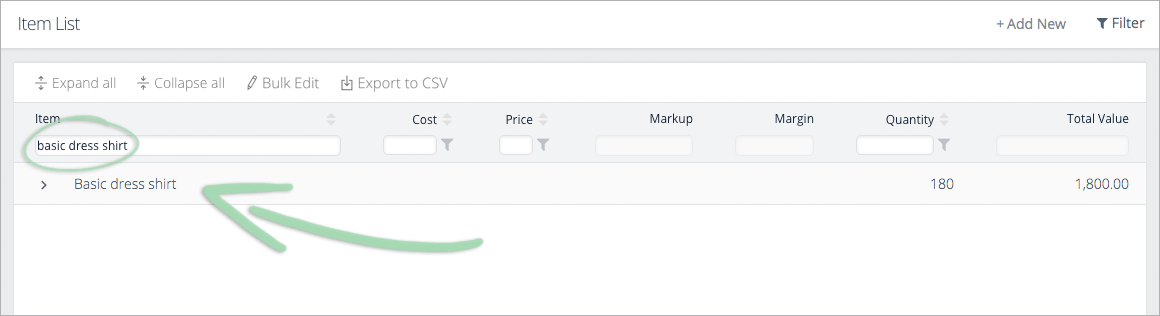
Visit the Item List in BackOffice or from the Retail POS (S-Series) app (employees with BackOffice permissions only).
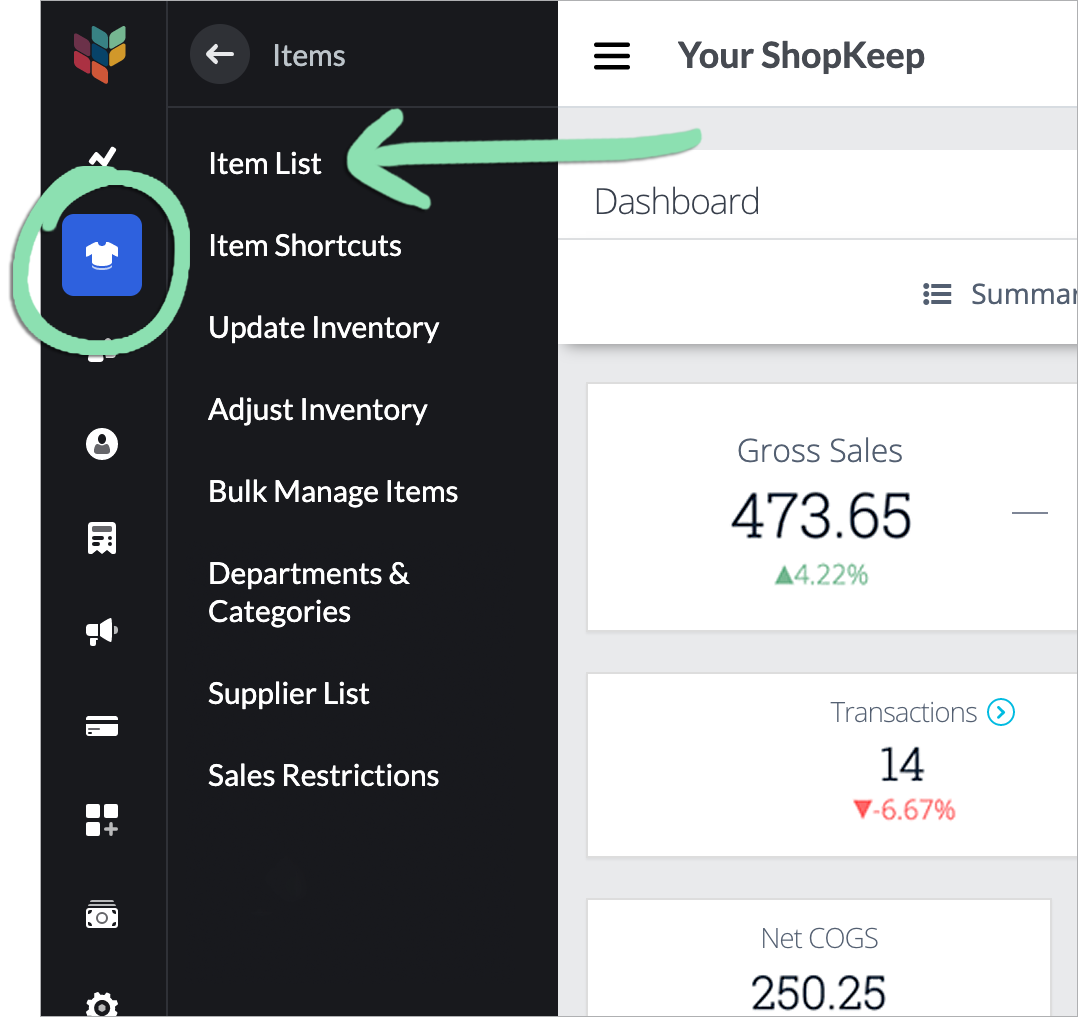
In BackOffice, click ‘Items’ and select ‘Item List’.
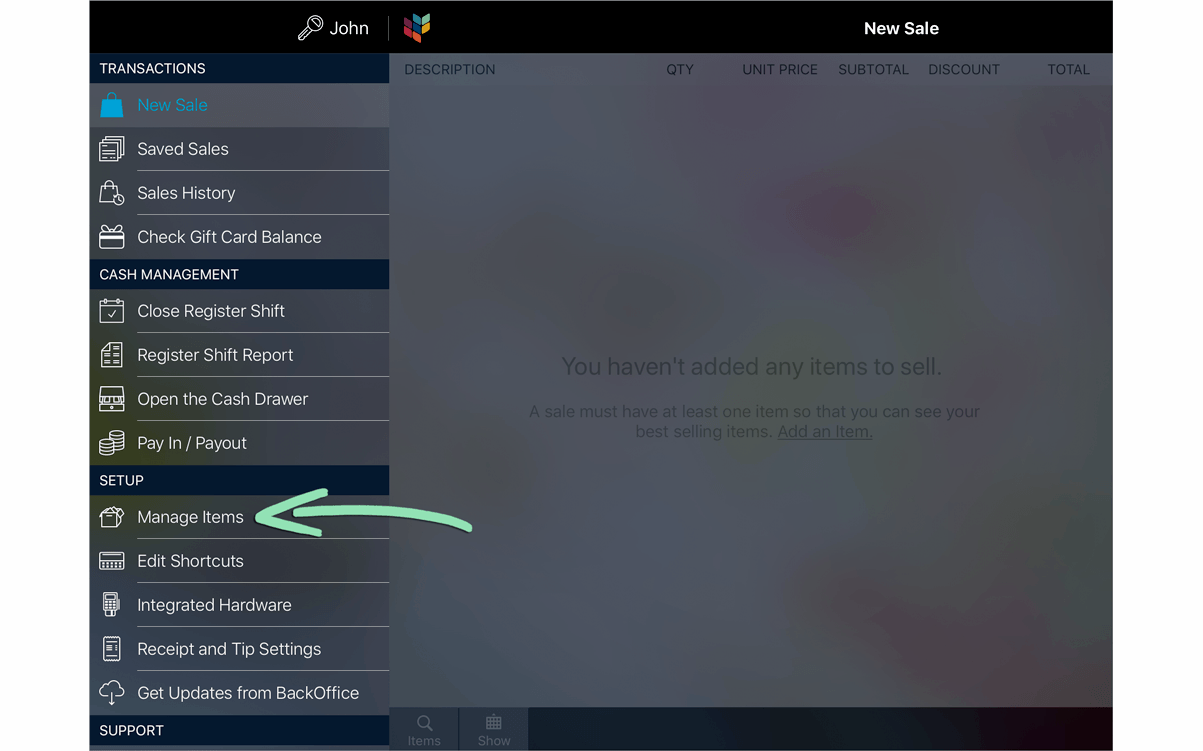
In the Retail POS (S-Series) app for iOS, tap ‘Manage Items’ on the Main Menu. For the Retail POS (S-Series) app for Android, tap ‘Setup’ on the register menu, then select ‘Manage Items’.
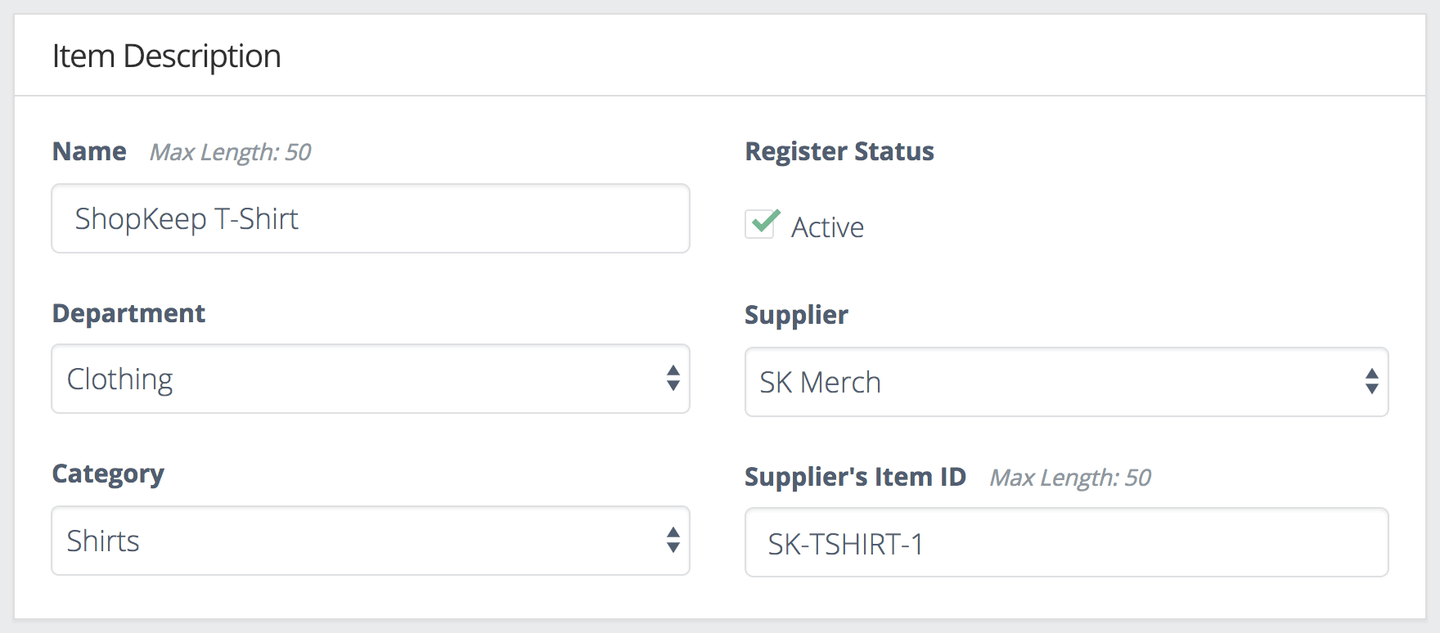
Name | What the item is called. Appears on the item shortcuts panel, receipts, and BackOffice reporting. Department | General grouping used for item organization and reporting. Category | Subgroup within a Department also used for organization and reporting. Register Status | If checked, cashiers can sell the item at the register. If unchecked, they cannot. Supplier | Who the business acquires the item from. Suppler’s Item ID | Reorder code or part number that the supplier uses for the item.
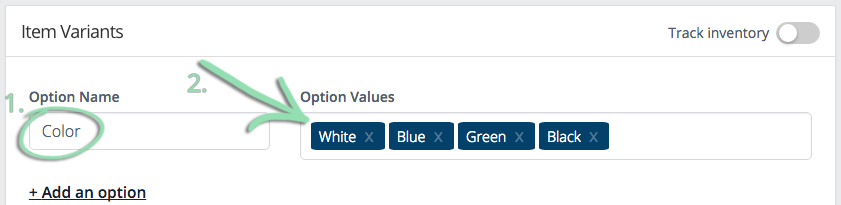
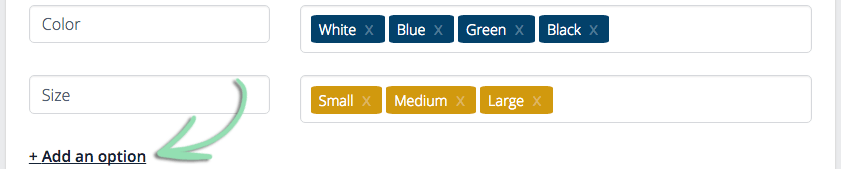
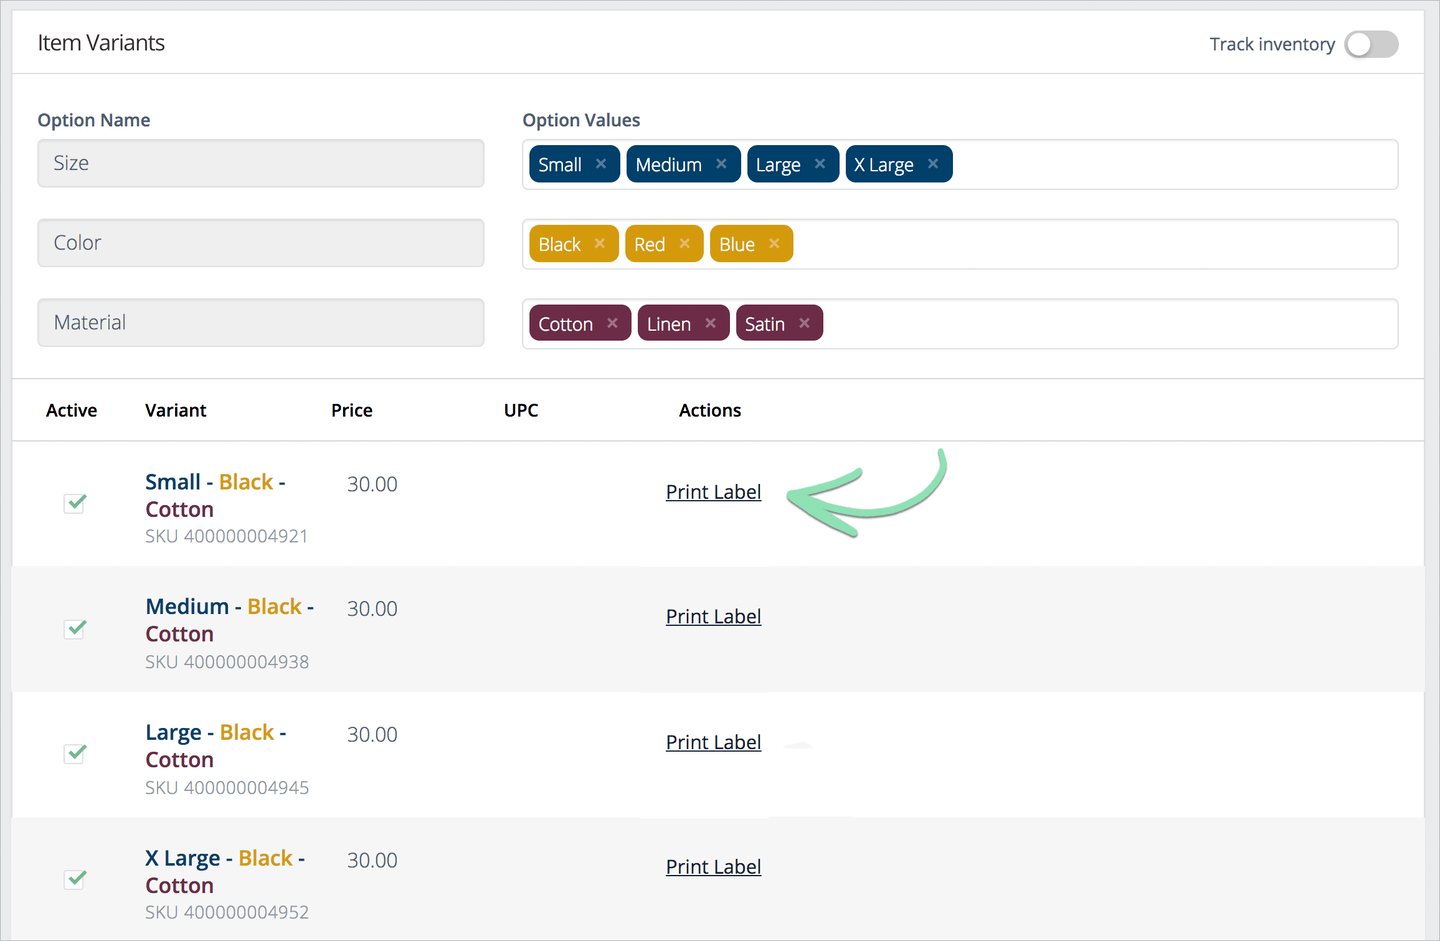
Enter the item's first option and its values.
Options are the traits that distinguish between an item’s variations and option values are the specific types of options. Use a comma to end one option value to begin typing another.
(Optional) Click 'Add an option' to enter more options.
Click to Enlarge
(Optional) Enable 'Track Inventory' to track variant cost and quantity.
Click to Enlarge
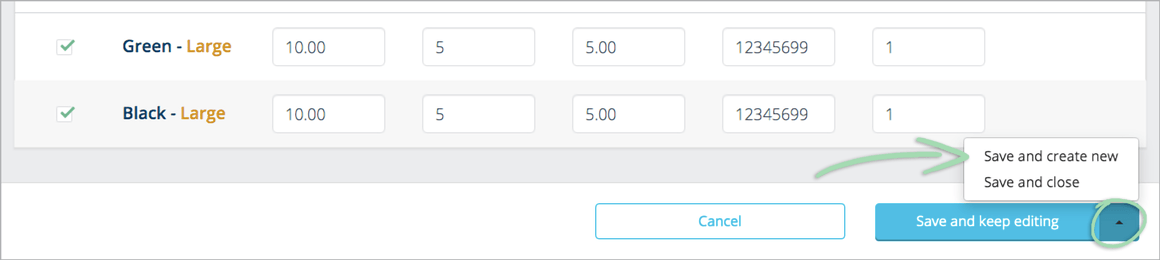
Enter as many details as desired for each variant.
Price | Amount customers pay for the variant at the register. Quantity | How many of the variant are in stock. Cost | What the business pays to acquire the variant. Cost cannot be edited after saving the item. UPC | If the variant has a barcode, enter it here to be able to scan it at the register. UPCs must be 2 – 55 digits long and cannot contain letters. Reorder Trigger | Low quantity amount that, when reached, prompts the variant to appear on the Reorder Report.
Click the default save option to finish creating the item or click the arrow to select another save option.
Save and create new | Save the current item and create a new basic item. Save and keep editing | Save the current item and remain on the details page to make adjustments. Save and close | Save the current item and return to the Item List.
The last used selection will be remembered as the default save option.
Options cannot be added or edited after saving the item. Option Values, however, can be.
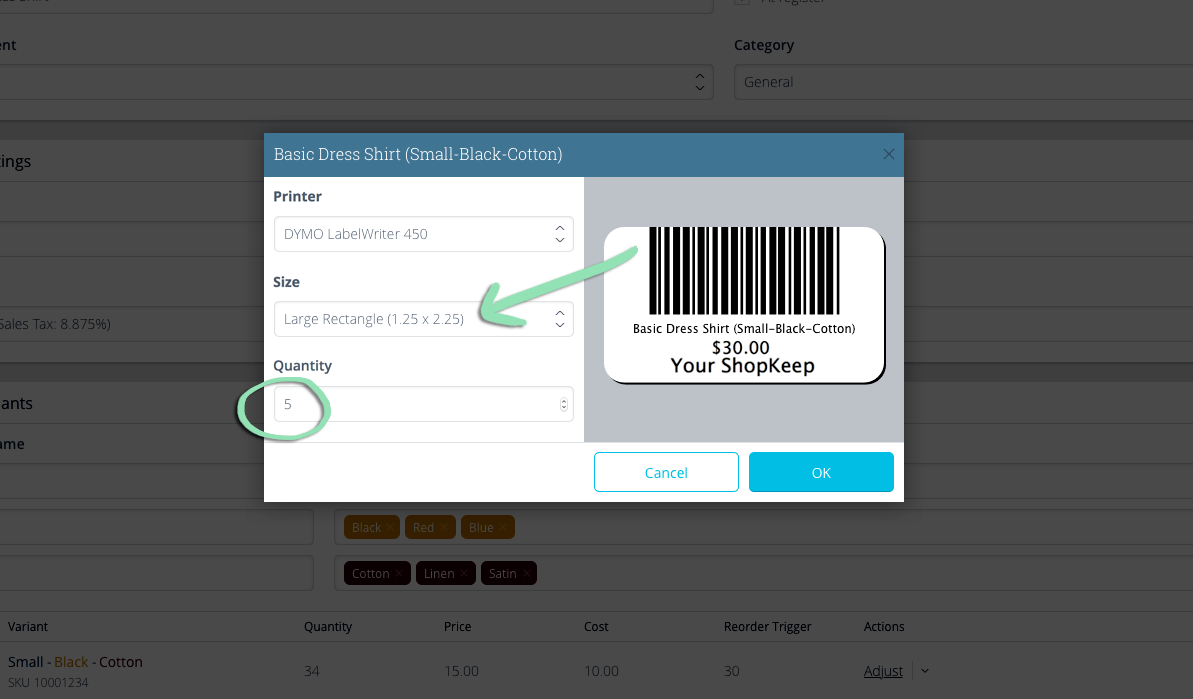
Print labels for your inventory items using Lightspeed Label Printing. Scan the label barcodes at the register with a barcode scanner to drastically speed up the checkout process.
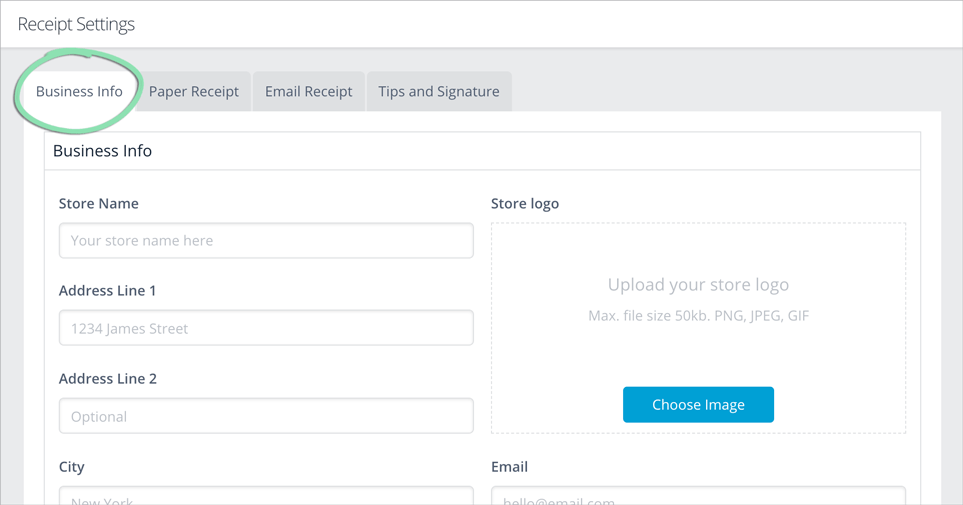
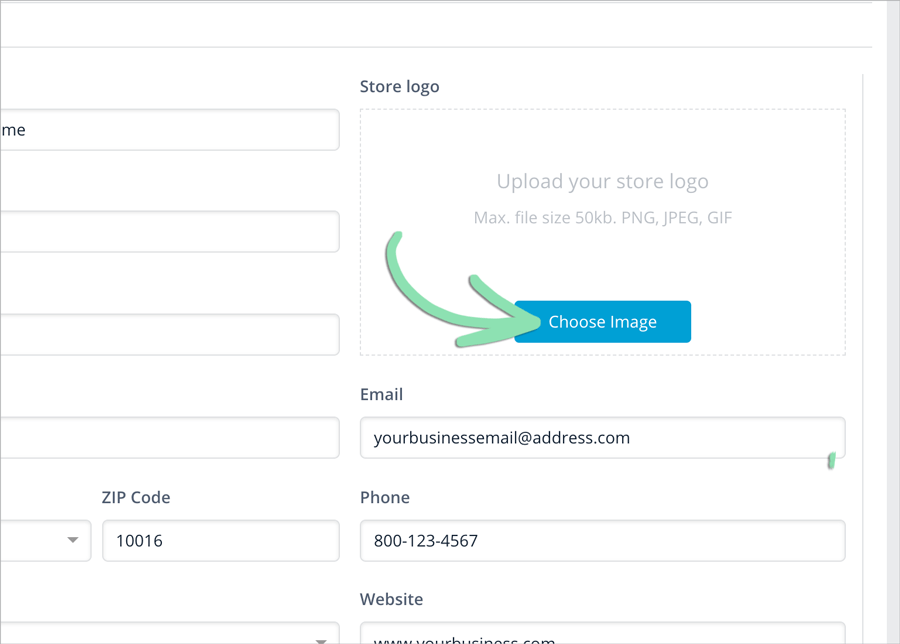
Paper receipts can be easily customized with your business location, contact information, and store logo in BackOffice or from the Retail POS (S-Series) app (Business Owners only).
After setting up your paper receipt, learn how to customize your email receipt here.
Sign into BackOffice as an employee with the relevant permissions or the Retail POS (S-Series) app as the Business Owner and open receipt settings.
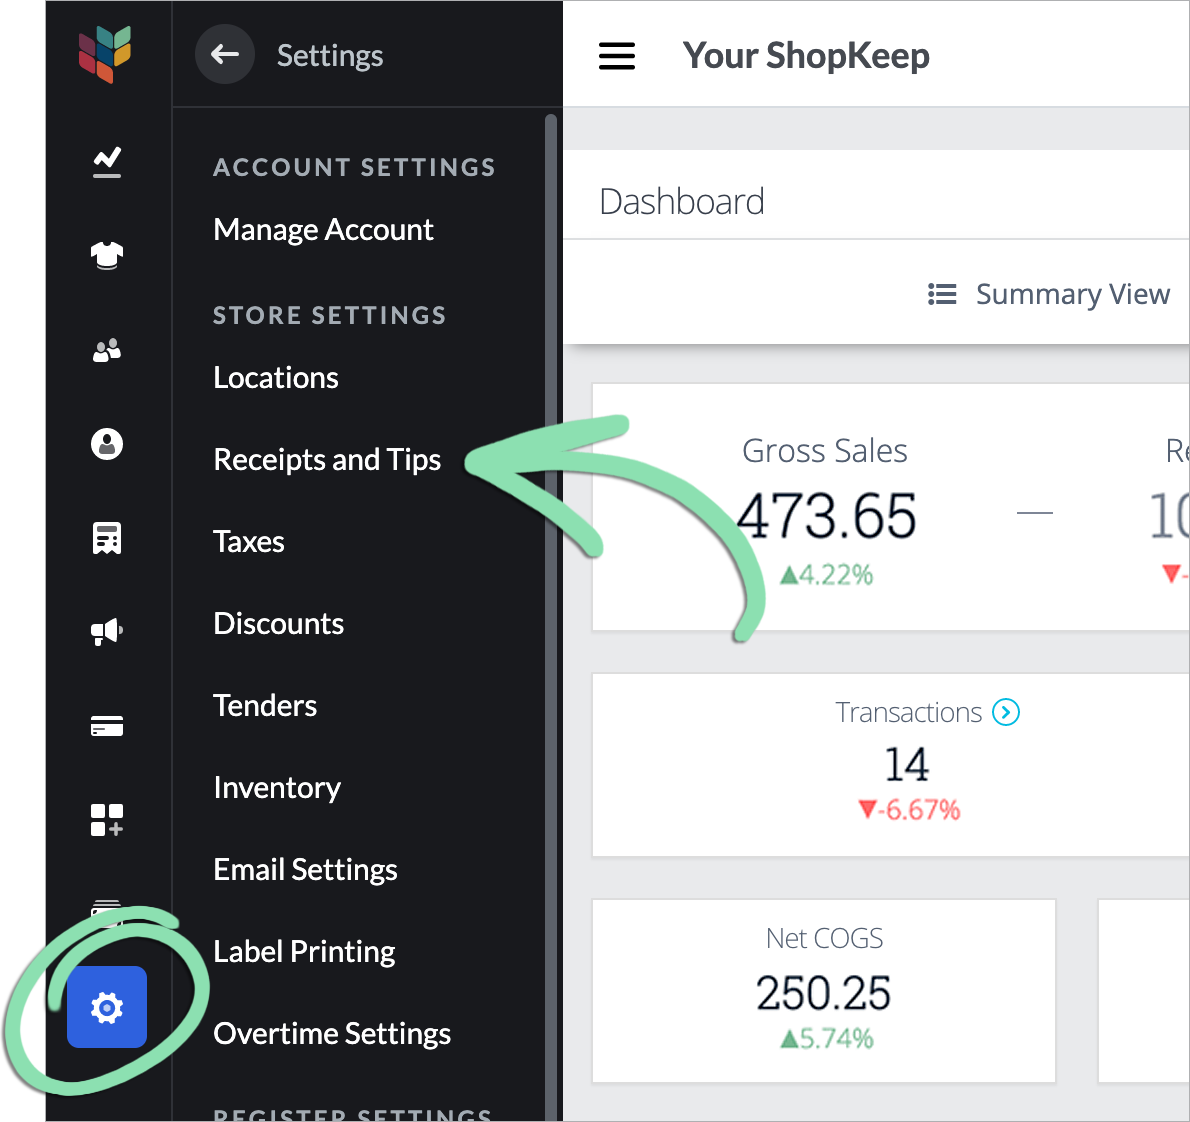
In BackOffice, click ‘Settings’ and select ‘Receipts and Tips’.
In the Retail POS (S-Series) app for iOS, tap ‘Receipt and Tip Settings’ on the Main Menu. For the Retail POS (S-Series) app for Android, tap ‘Setup’ on the register menu, then select ‘Receipt and Tip Settings’.
Interested in tracking customer data or offering special discounts? We can help you set these up so your staff can manage everything with just a few taps.
Add Customers
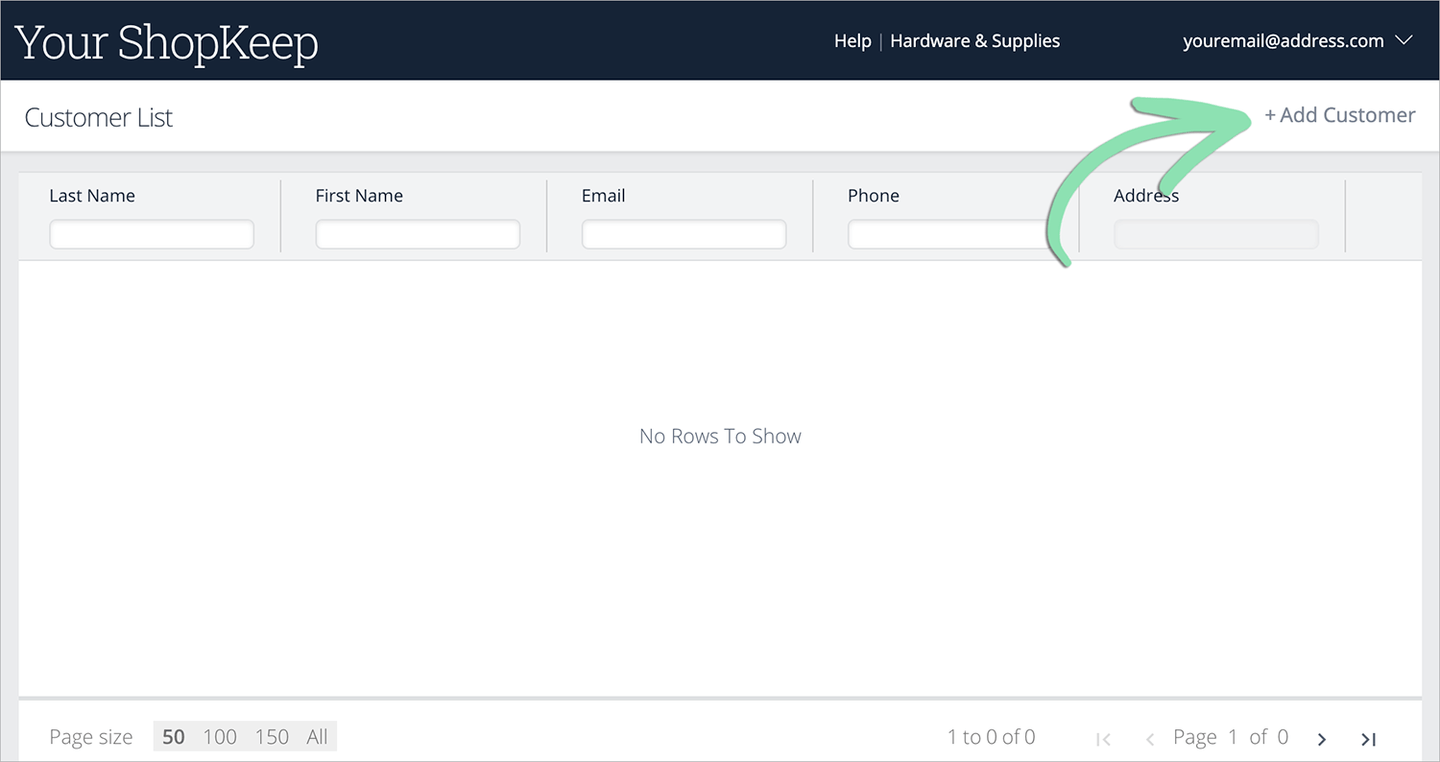
As customers make purchases, save their contact details at the register so you can email receipts, track purchases, and send promotional information. When away from the register, you can add customers to the customer list from BackOffice.
If you have questions about adding customers, visit our BackOffice FAQ.
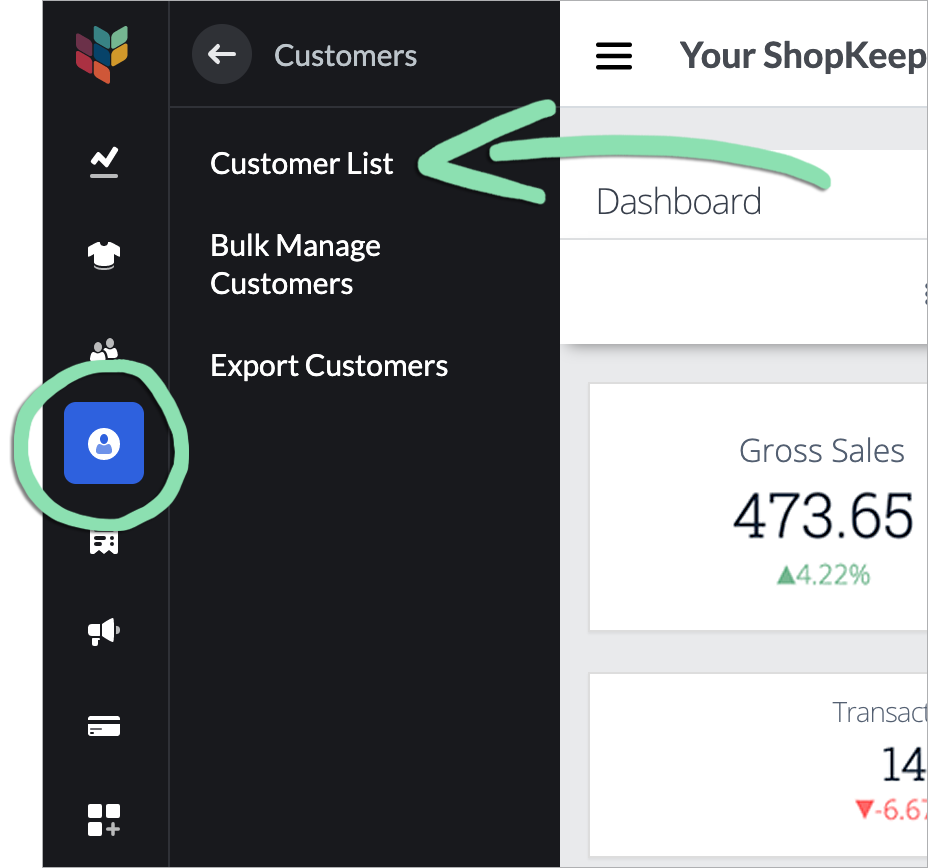
In BackOffice, click 'Customers' and select 'Customer List'.
Click to Enlarge
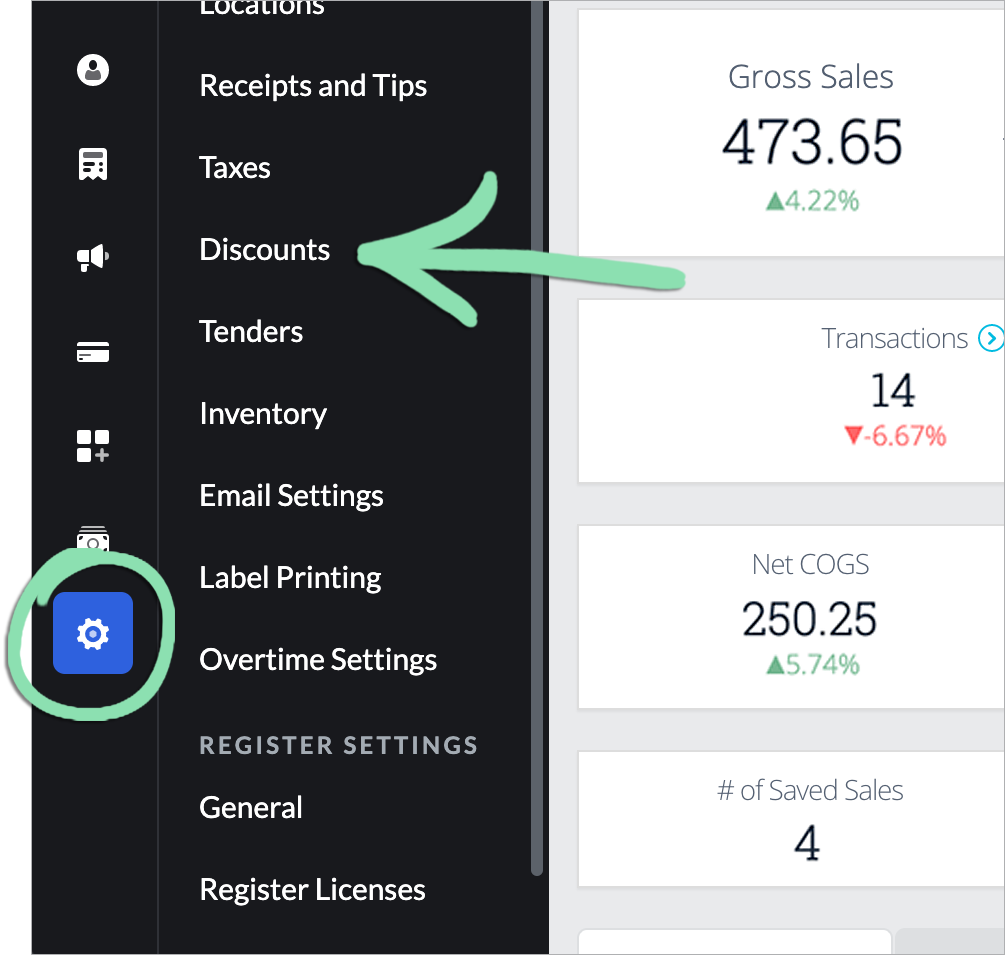
Create specific discounts, such as a senior or employee discount, to track how often they are used at the register and the total amounts they deduct.
In BackOffice, click 'Settings' and select 'Discounts'.
Click to Enlarge
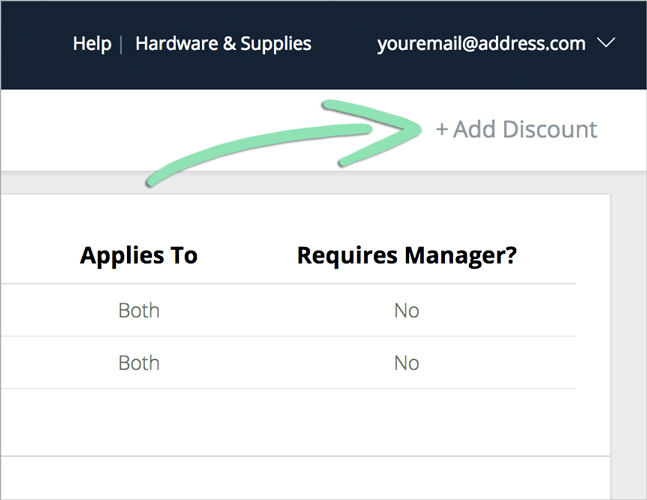
Click 'Add Discount'.
Fill in the discount's details and click 'Save'.
Click to Enlarge
Name | Name of the discount as it appears on the register and in BackOffice reporting. Receipt Description | Name of the discount as it appears on receipts. Leave blank to use the Name entered above. Type | Select whether the discount is a dollar amount or a percent. Open | Check this box to allow cashiers to enter an amount/percent at the register when applying the discount to a sale. If checked, the Amount/Percent field is disabled. Applies to | Set whether the discount can be applied to individual items, to transactions, or to both. Requires Manager | Check this box to require a manager code before cashiers can apply the discount.
Visit the Discounts article to learn how to apply discounts at the register.