BackOffice Login and Overview
Log into BackOffice to manage stock items, staff, settings, and all other aspects of a Lightspeed Retail account and to view sales reporting. Read our overview below to learn how to navigate BackOffice and where to find each of its features.
Watch our BackOffice Login video below:
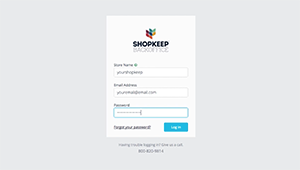
Table of Contents
Log Into BackOffice
Log into BackOffice to add inventory, set up permissions and settings, view reporting, and manage your Lightspeed Retail store.
- Visit ShopKeepApp.com from a supported device and web browser.
Bookmark this page in your browser so it is easier to find later.
- Enter your BackOffice login information.
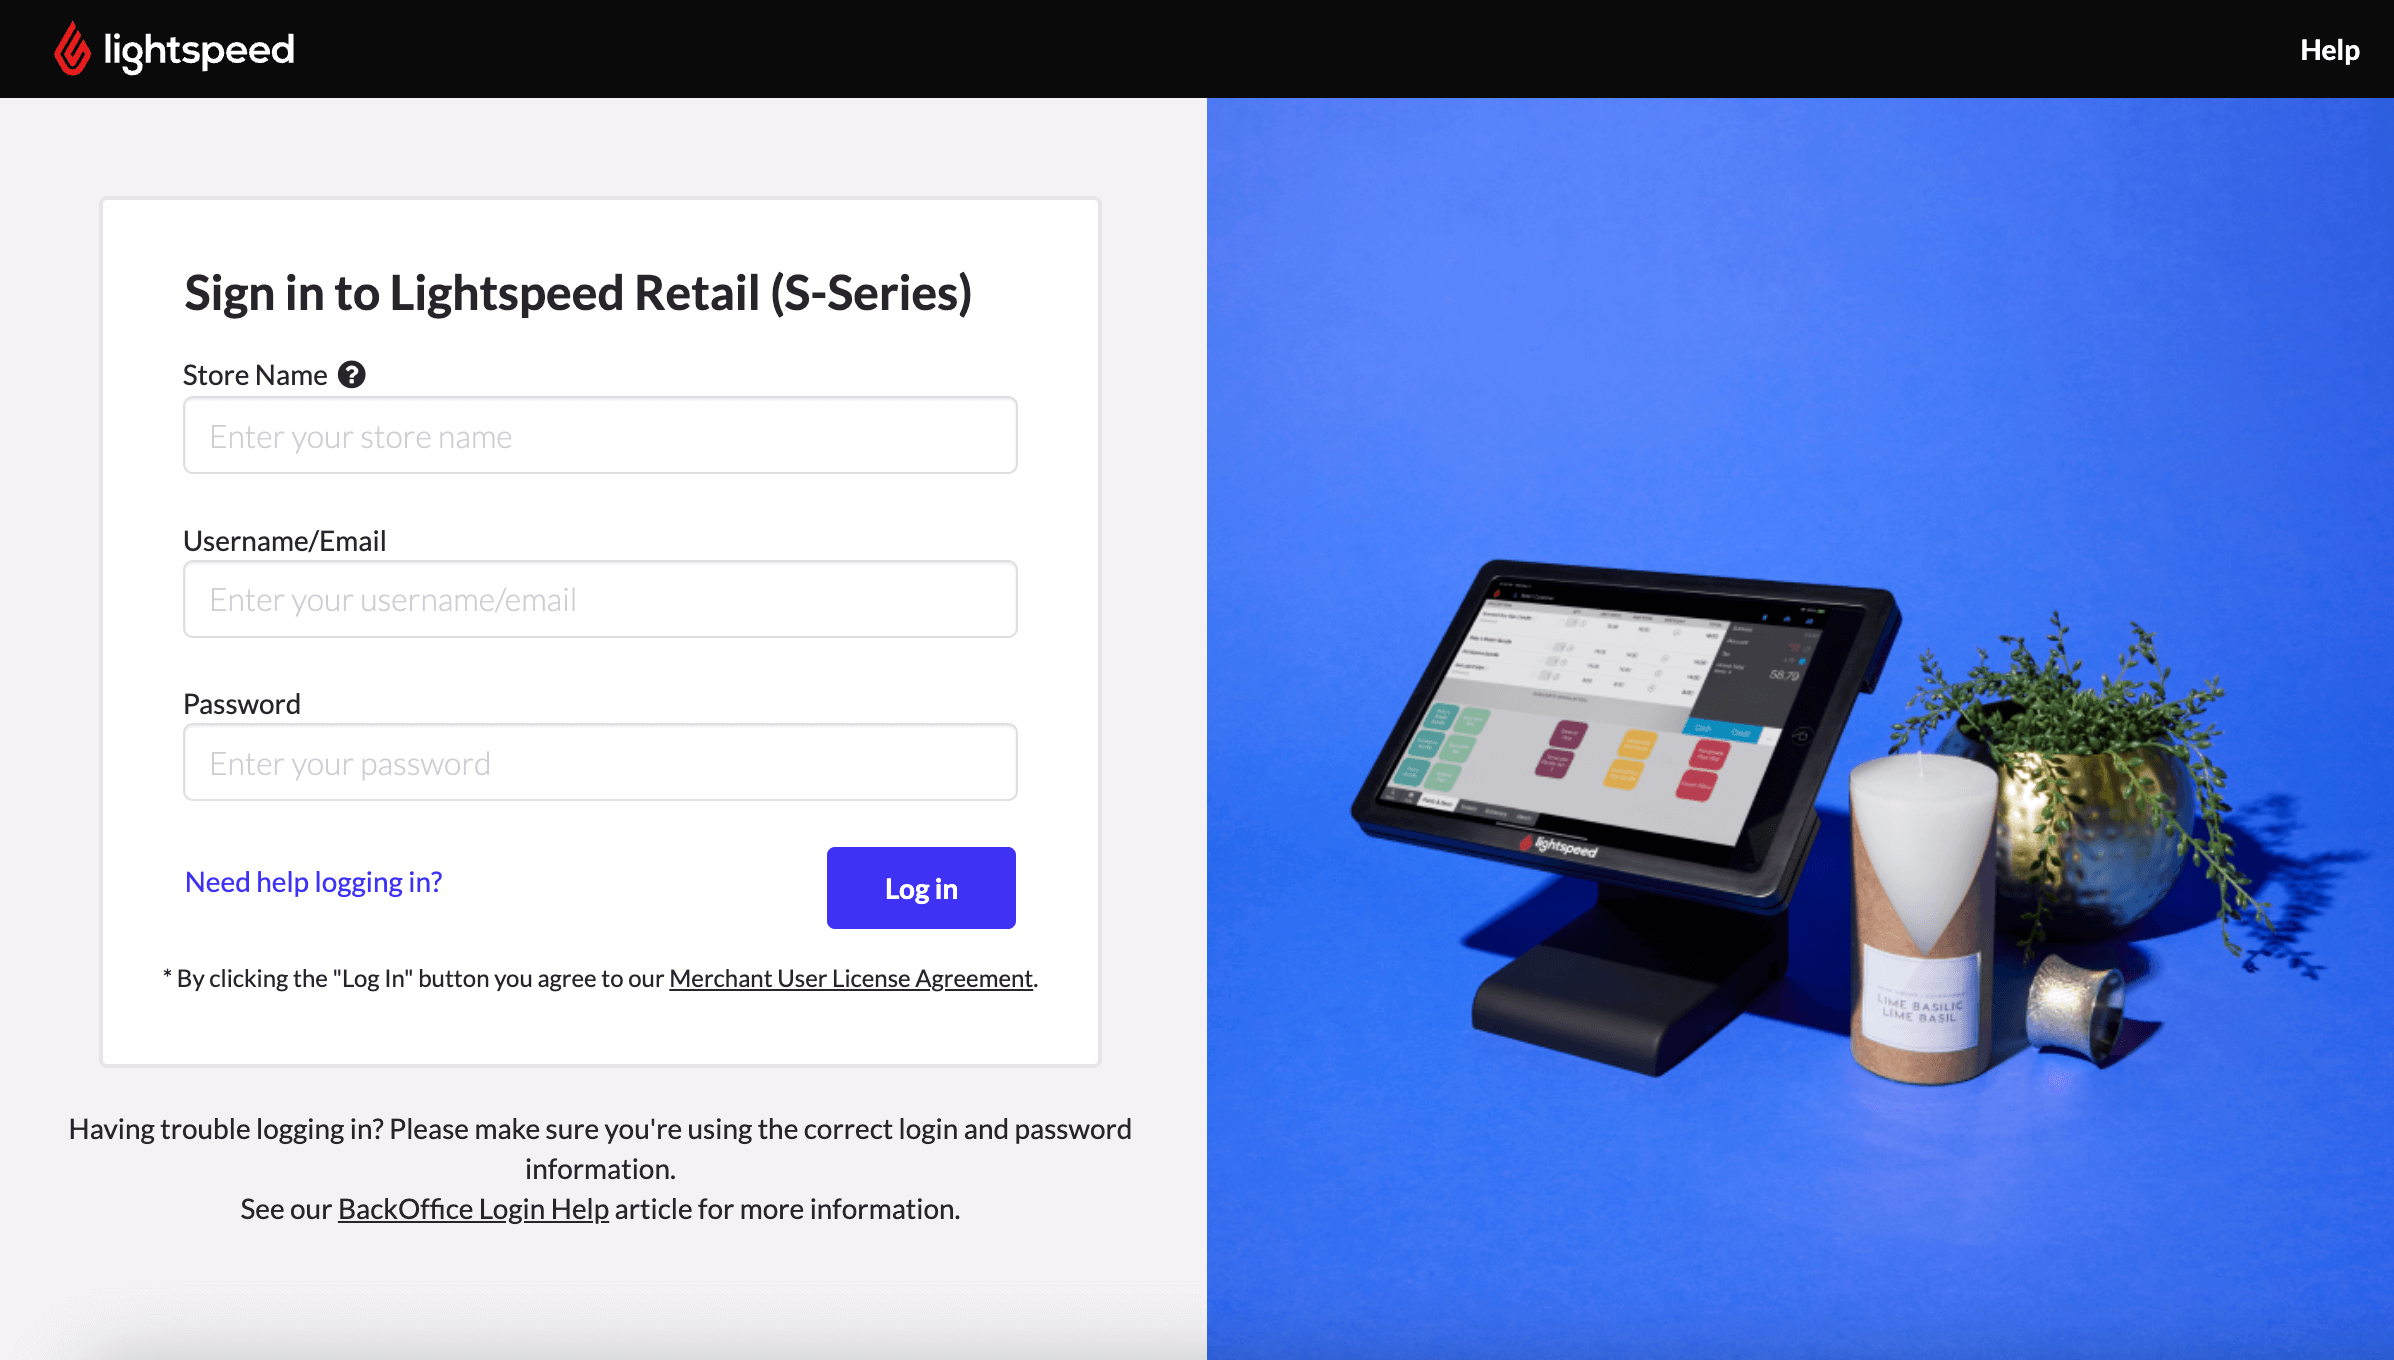
- Click 'Log in' to access BackOffice.
Unable to log into BackOffice? Visit our Login & Access Troubleshooting guide for help.
Visit our BackOffice Settings and Password article to learn how to change your login or password.
BackOffice Overview
BackOffice is your one-stop resource for store management. Learn below about the different BackOffice elements you will see after logging in.
Dashboard
The Dashboard loads as the homepage of BackOffice and provides an overview of all register activity. Learn more about the Dashboard here.
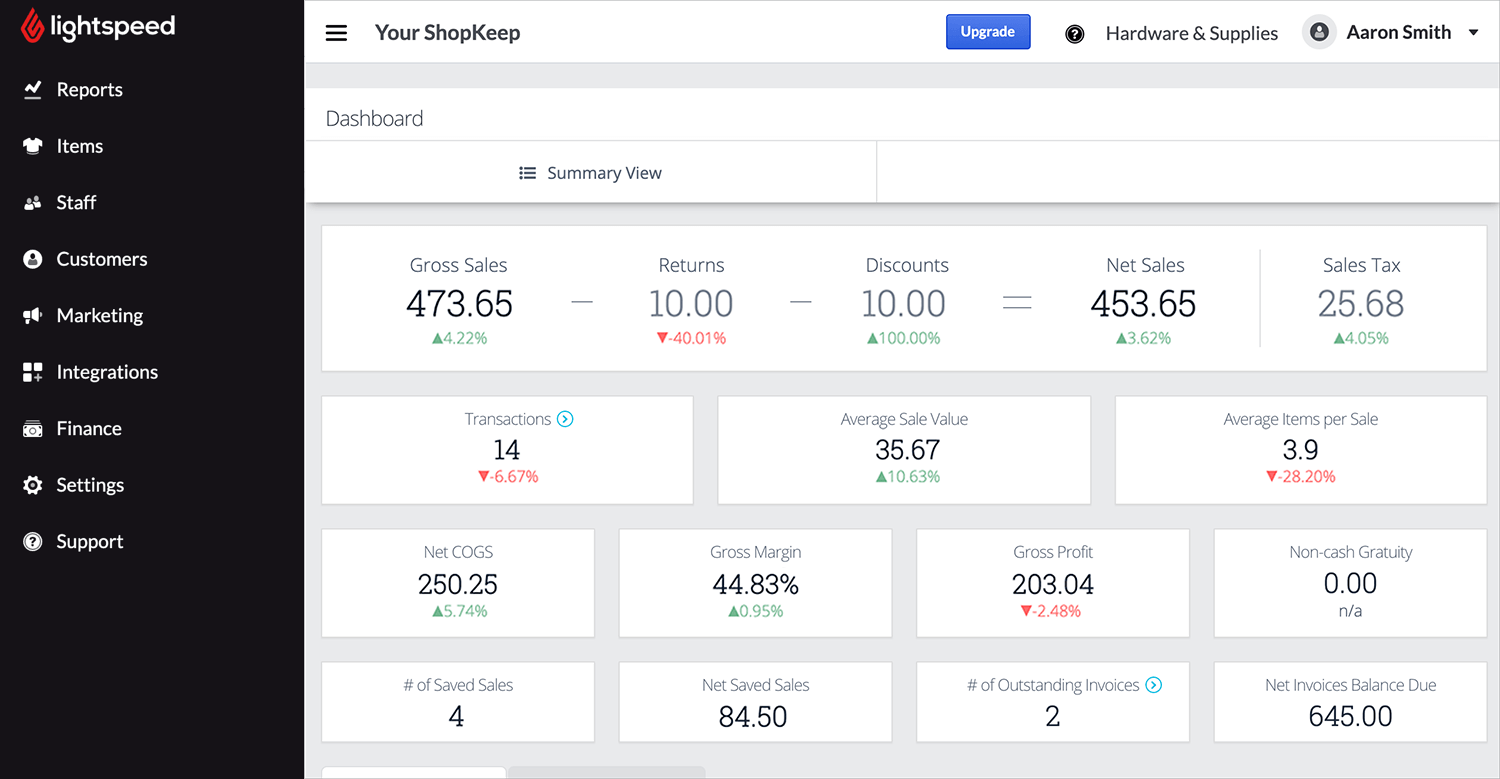
Top Banner
The top banner displays your store name and convenient links for getting help.

Menu Button
Use this button to toggle the left side navigation menu between full and minimized views.
Store Name
Nickname of the Lightspeed Retail store as entered in location settings.
Upgrade
Upgrade the pricing package for your account to unlock additional features, such as eCommerce and online ordering integrations.
Question Mark (?)
View articles and videos on our support site and learn how to contact Customer Care.
Hardware & Supplies
Go directly to our online store to purchase supported hardware.
Employee Name
The user currently logged into BackOffice. Click to send us feedback or log out.
Side Navigation Bar
The side navigation bar is the primary means of moving through the different areas of BackOffice.
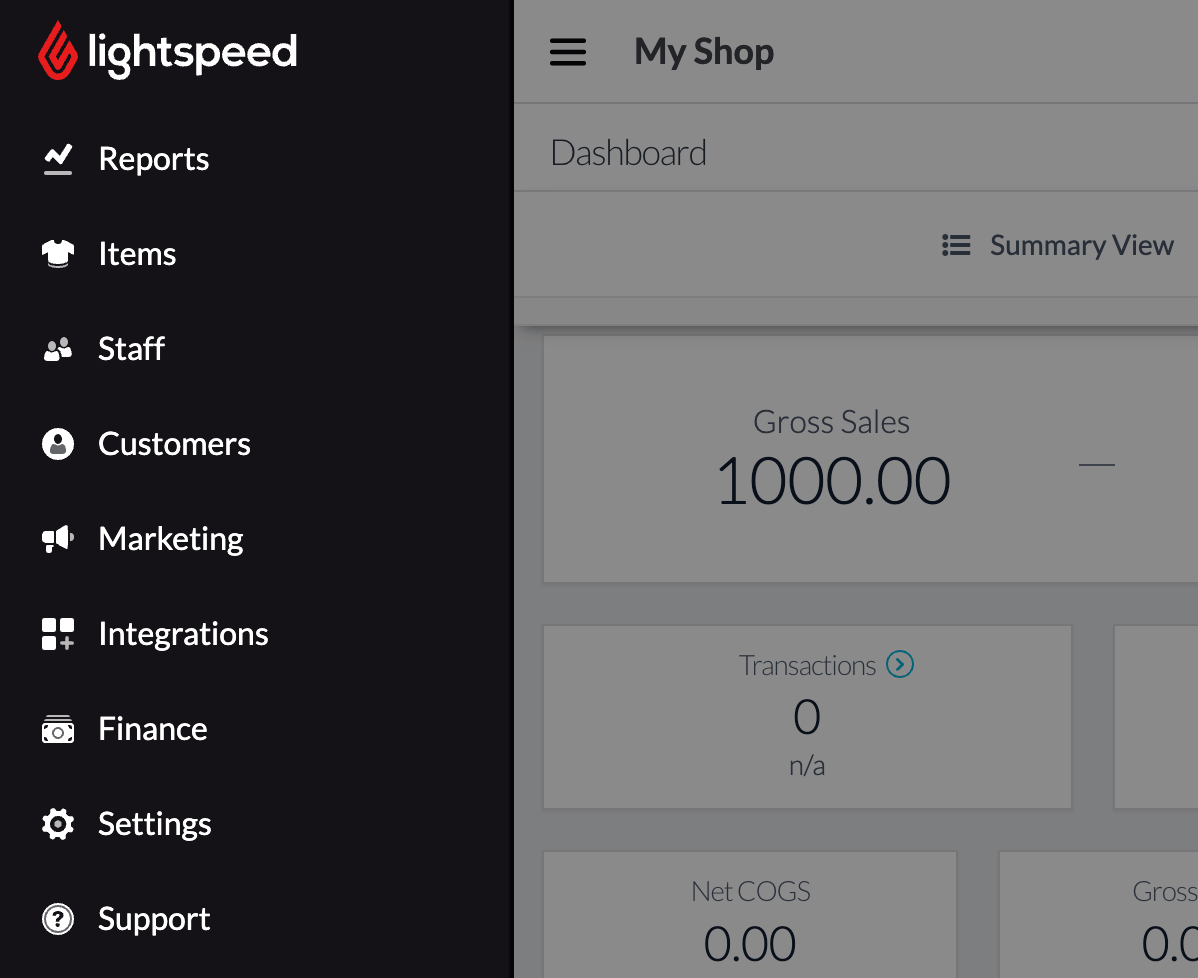
Reports
Where to find reports of transactions, sales, register activity, inventory, and exports.
Items
Where to view the Item List and manage all inventory.
The Item List can also be accessed from the Retail POS (S-Series) app.
Staff
Where to add or edit employees, set up BackOffice users, view Time Clock information, and run the Labor Tracking Report.
Customers
Where to view the Customer List, manage customers, and export customers from BackOffice.
Marketing
Where to see an overview of customer engagement and set up features such as Online Ordering and Lightspeed Spotlight.
Integrations
Where to manage third-party services, such as QuickBooks, that integrate with your Lightspeed Retail account.
Card Payments
Where to set up online and mobile credit card processing for paid Lightspeed Retail accounts and in-store credit card processing for free accounts. Navigate to Capital to request funds for improving your business.
Invoices
Where to create, manage, and track invoices. This feature is only available for Lightspeed Retail merchants on select pricing packages.
Settings
Where to update billing information, customize receipts, set up tax rates, and manage other aspects of your Lightspeed Retail account.
Receipt and tip settings can also be accessed by the Business Owner from the Retail POS (S-Series) app. This feature is available for Lightspeed Retail accounts created on or after July 23, 2019.
Tax rates can be assigned to individual items by employees with the relevant BackOffice permissions when managing items on the Retail POS (S-Series) app.
Support
View articles and videos on our support site and learn how to contact Customer Care.
Have questions about BackOffice? Visit our BackOffice FAQ for help.