Bluetooth printers connect wirelessly to the iPad. This section focuses on Bluetooth connection issues between the Epson TM-m10 / TM-m30 Bluetooth Printer and your register.
My printer will not pair with the iPad.
If your printer has trouble pairing with the iPad, follow these steps to troubleshoot the pairing process.
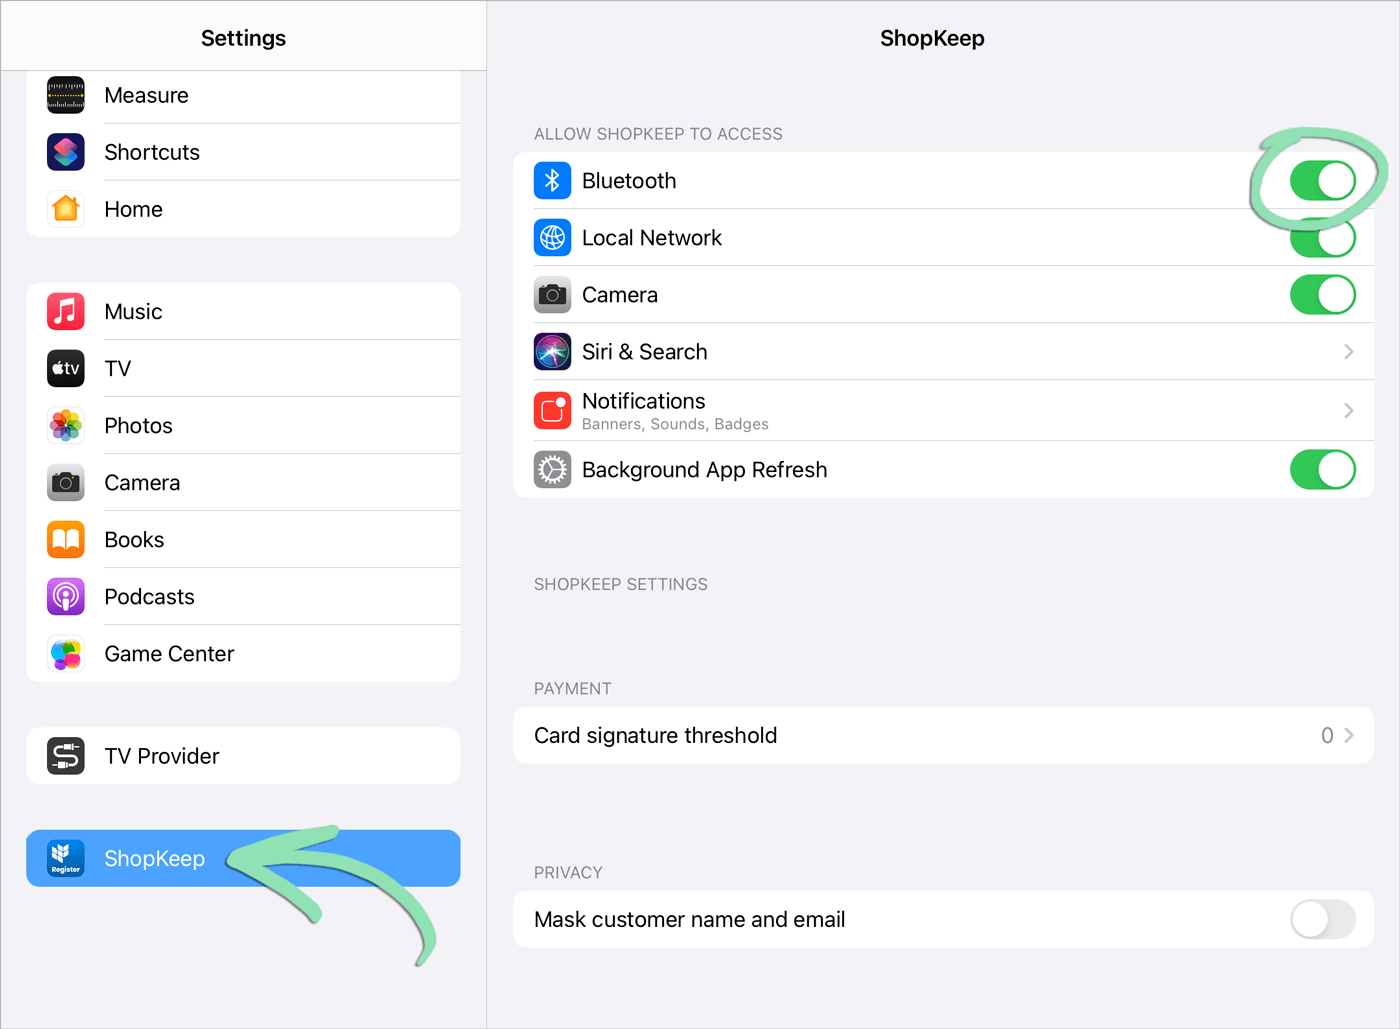
In the iPad's Settings app, tap 'Bluetooth' and look for 'TM-m10' or 'TM-m30' listed as a device.
If the printer is listed, tap the blue 'i' and select 'Forget This Device'.
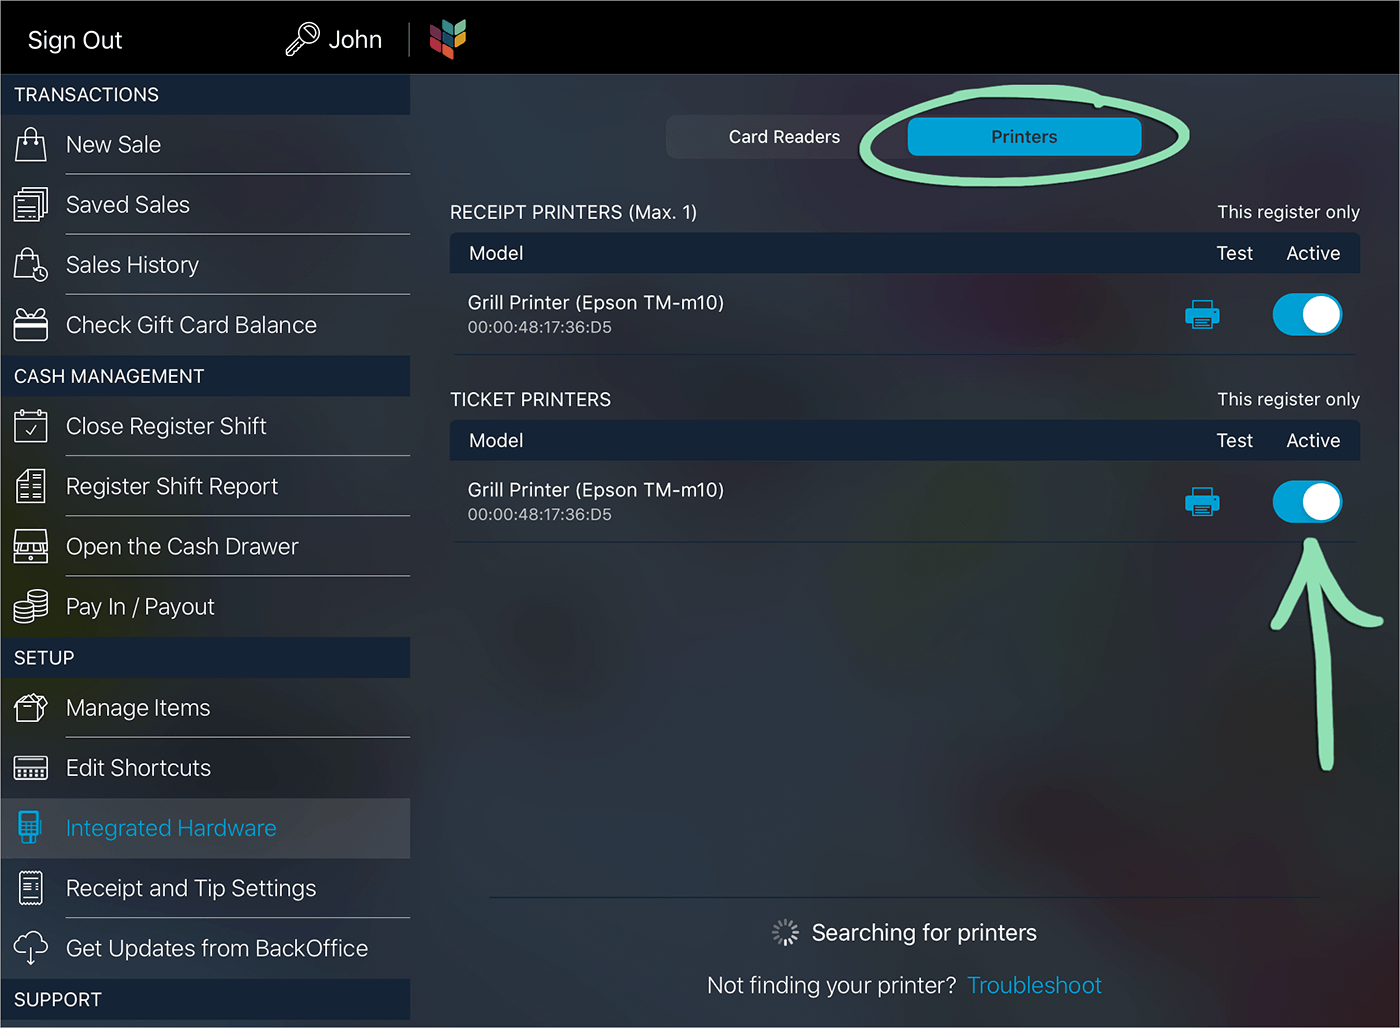
In the Retail POS (S-Series) app, check the 'Printers' screen to make sure the printer is switched ON.
Networking Issues
This section focuses on issues related to the network connection between your Epson TM-m10 / TM-m30 Ethernet Printer, router, and iPad.
My printer is not listed on the 'Printers' screen. / "No Printers Found"
There are a few reasons why this problem can occur. The printer may be disconnected, the iPad may be connected to the wrong network, or there could be a hardware issue.
Follow the steps below to troubleshoot this issue. After each step, check if the problem is resolved.
Check that the printer is connected to power, plugged into your router, and turned on.
Make sure the power and ethernet cables are plugged into the correct printer ports as outlined here. If the printer does not power on, follow these steps to troubleshoot.
Verify the printer's orange ! and paper lights are not lit.
If either light is not working properly, follow the troubleshooting steps for the relevant issue:
Make sure the iPad is connected to the Wi-Fi network for the router the printer is plugged into.
Open the Settings app and tap ‘Wi-Fi’. If the iPad is NOT connected to the right network, tap the correct network name to connect. Then, follow these steps to forget all other networks.
If using a dual band router, try connecting the iPad to each of the router’s Wi-Fi networks.
Force quit and re-open the Retail POS (S-Series) app.
Visit our iPad Troubleshooting guide to learn how to force quit the Retail POS (S-Series) app.
Try using a different ethernet cable and router port.
Unplug the ethernet cable from the printer and router, then connect a new cable.
Turn off the printer, wait 10 seconds, and turn the printer back on.
Restart your router.
Unplug the router from power, wait about 10 seconds, and plug it back in.
Once your router is back online, turn the printer off, wait about 10 seconds, and turn it back on.
If the printer is connected to an extender or switch, try plugging it directly into your router.
Turn off the printer and unplug its ethernet cable from the extender or switch.
Plug the ethernet cable directly into the router, then power the printer back on.
Hardware Issues
Here you can find issues specific to the hardware of the Epson TM-m10 / TM-m30 Bluetooth and Ethernet Printers. This assumes your iPad is communicating with the printer but still not printing correctly.
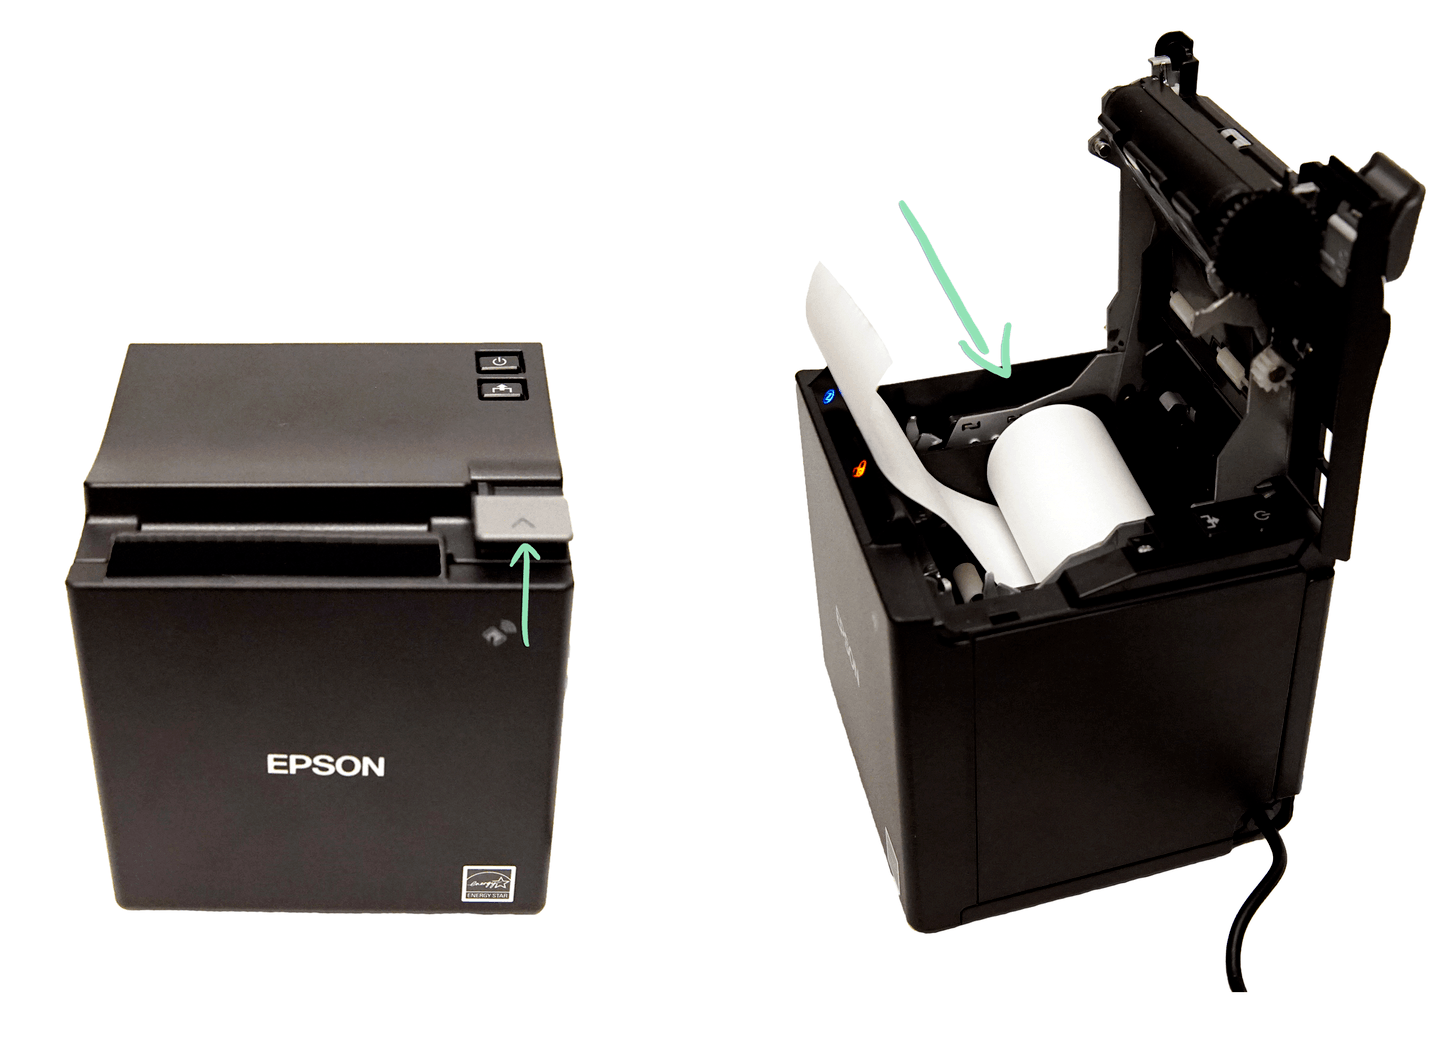
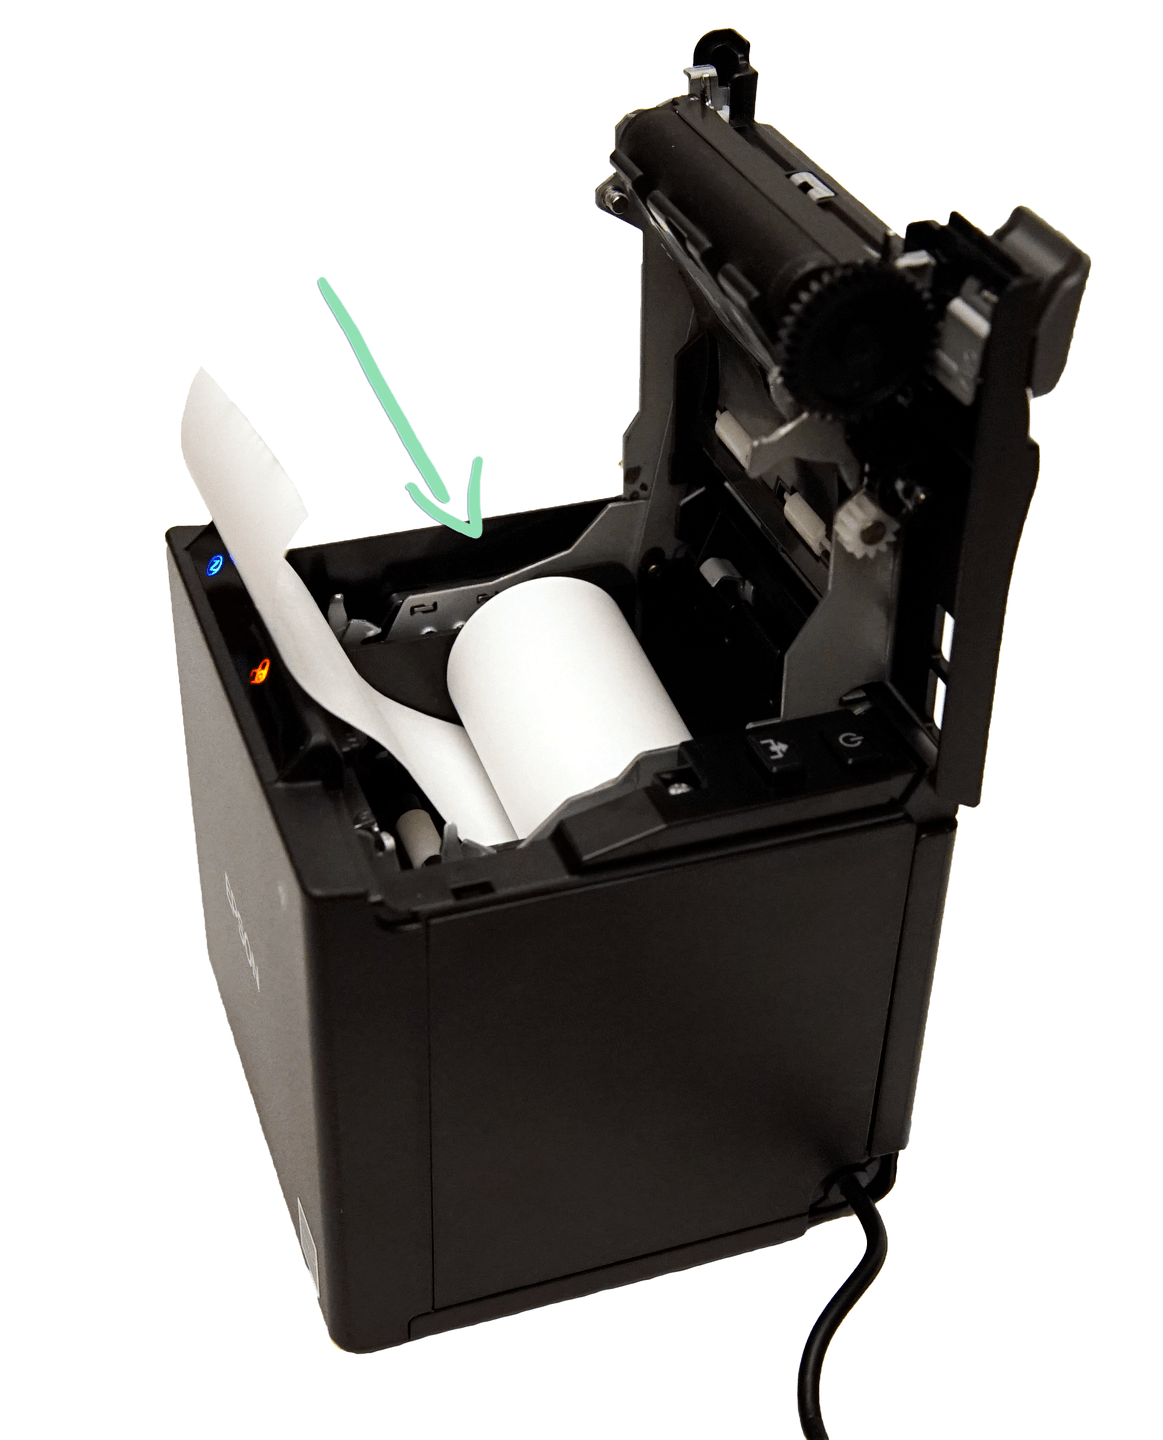
The orange ! light is solid or flashing.
If the printer’s orange exclamation light is lit, it usually means there is a paper jam or the cover is open.
Open the printer's cover and make sure the paper is not jammed.
If the printer does not turn on after plugging the power cable into an outlet, it is most likely not receiving power. After each step below, check to see if the problem is resolved.
Unplug the adapter cable from the wall adapter, then plug it back in.
Unplug the adapter cable from the printer, then plug it back in.
Unplug the power cable from its power outlet, then plug it into a different power outlet.
Make sure to use a known working outlet.
Miscellaneous Issues
This last part covers miscellaneous issues unrelated to the sections above.
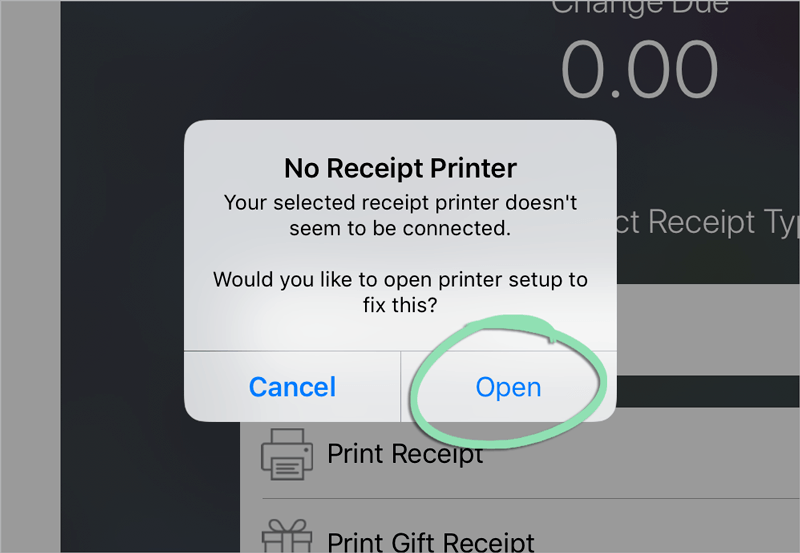
"No Receipt Printer"
This error appears when you try to print or reprint a receipt, but the printer was never set up properly or it disconnected from the register.
This error message appears on the Retail POS (S-Series) app when there is a problem communicating with the printer. Follow the steps below to resolve this issue.
This error appears when the register is unable to print a QR code for a Pay by Link sale. The printer may be disconnected from the register, out of paper, or there may be a physical problem with the printer.
Follow the steps here to make sure the printer is enabled on the Printer Setup screen.
If the printer does not appear in Printer Setup, follow the steps here to troubleshoot.
Make sure there is paper loaded in the printer.
Examine the lights on the printer.
If anything is flashing, find the relevant issue in this troubleshooting guide to resolve the situation.
If unable to resolve the printer issue, select ‘Display QR Code’, or ‘Share’ to share the payment link with the customer.
Display QR Code | Show a QR code on the register screen that, when scanned, opens the payment link. Share | Open the iOS ‘Share’ menu to select a method of sharing the payment link. Available sharing options will vary based on the specific apps installed and set up on the iPad but may include the abilities to email, copy, and AirDrop the payment link.
Suggested tips do not print on my receipts.
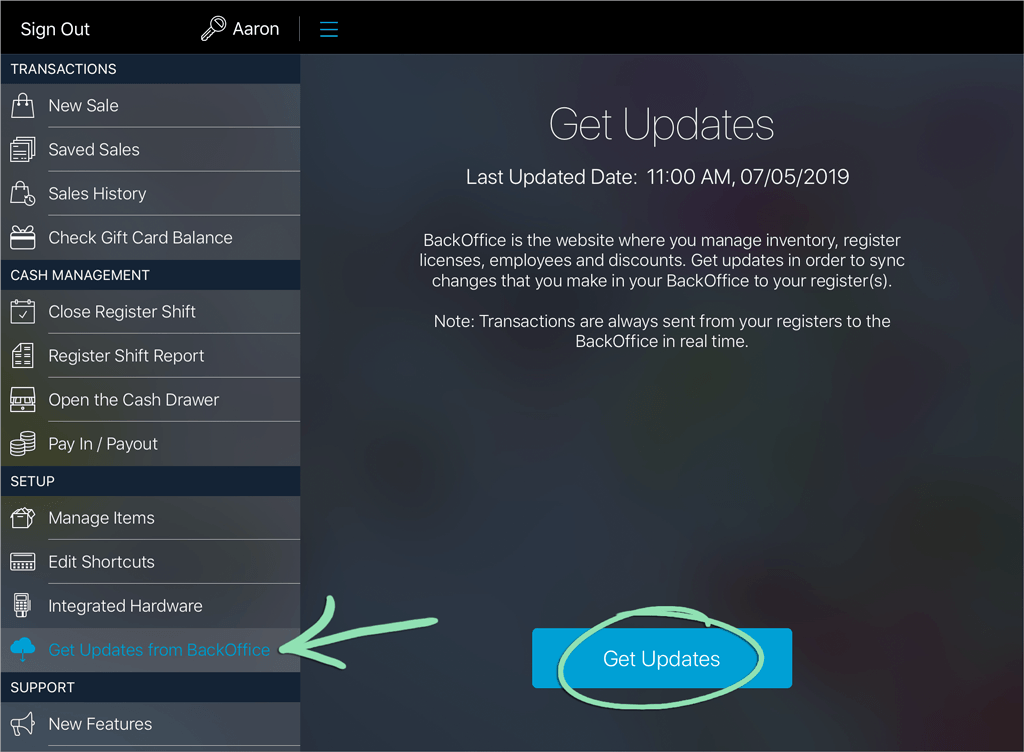
This issue occurs if the suggested tips setting is not enabled, the register needs to sync with BackOffice, or the Retail POS (S-Series) app is out of date.
Visit receipt settings from BackOffice or the Retail POS (S-Series) app.
From the ‘Tips and Signature’ tab, enable ‘Show tip suggestions on paper receipts’.
Click to Enlarge
This issue occurs if a logo has not been uploaded, the ‘Show Logo on Printed Receipt’ setting is not enabled, the register needs to sync with BackOffice, or the Retail POS (S-Series) app is out of date.
Visit receipt settings from BackOffice or from the Retail POS (S-Series) app.
From the ‘Business Info’ tab, check if a store logo is uploaded.
Click to Enlarge
If there is no logo, tap ‘Choose Image’ to upload one.
We recommend following these tips to optimize the logo for printing.
Click the ‘Paper Receipt’ tab.
Enable ‘Show Logo on Printed Receipt’, then click ‘Save’.
Click to Enlarge
My business logo on printed receipts looks different than my email receipt logo.
Logos printed on paper receipts look different than logos on email receipts due to the limitations of thermal printers. For best results, optimize your logo for printing, then upload that new version to update the logo used for paper receipts, email receipts, and invoices.
Follow these tips to optimize your logo for paper receipts.