Bulk Management: Customer Imports

Use Bulk Customer Management to add, modify, or delete entire groups of customers at once using spreadsheets in BackOffice.

Table of Contents

Start a New Job

Whether you are adding, modifying or deleting customers, the first step is to start a new Bulk Customer Management job.

  1. In BackOffice, click ‘Customers’ and select ‘Bulk Manage Customers’.
    Click to Enlarge
  2. Click ‘New Job’.
    Click to Enlarge
  3. Choose ‘Add’, ‘Modify’, or ‘Delete Customers’ and click ‘Next’.
    Click to Enlarge
  4. Follow the steps in one of the sections below to complete the Bulk Management job.

If you have any questions about managing customers, visit our BackOffice FAQ.

Add New Customers

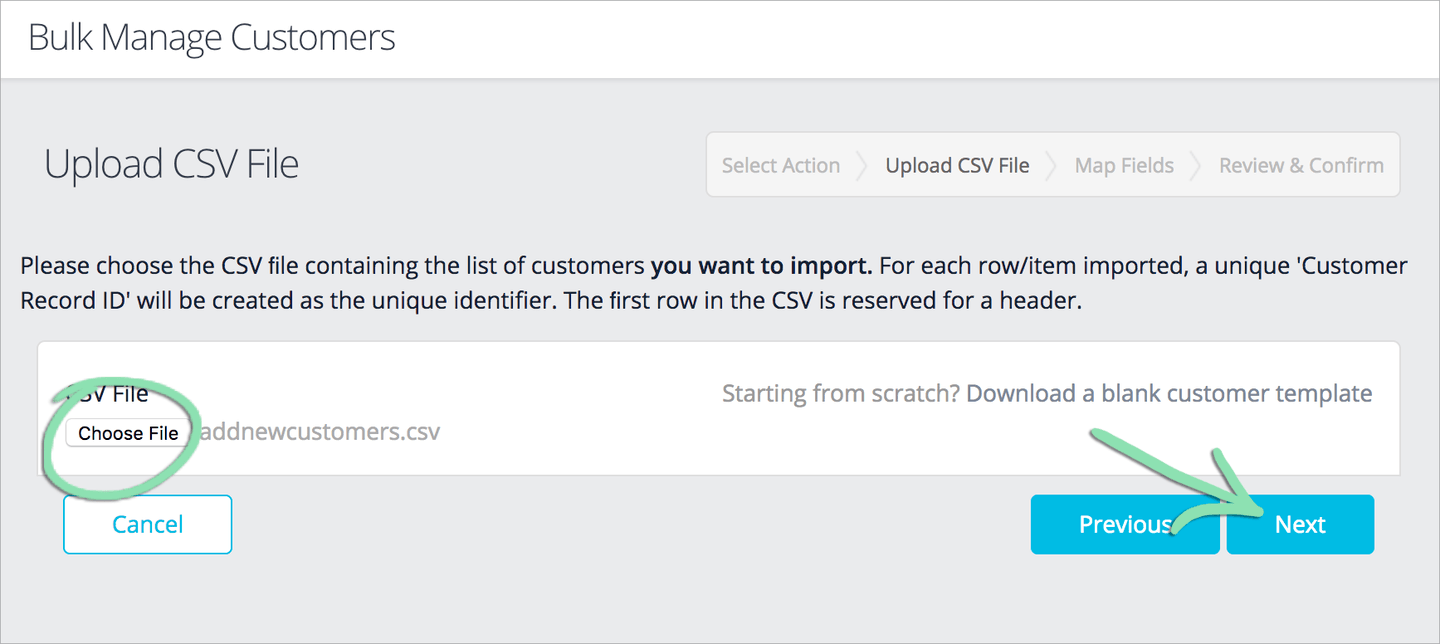
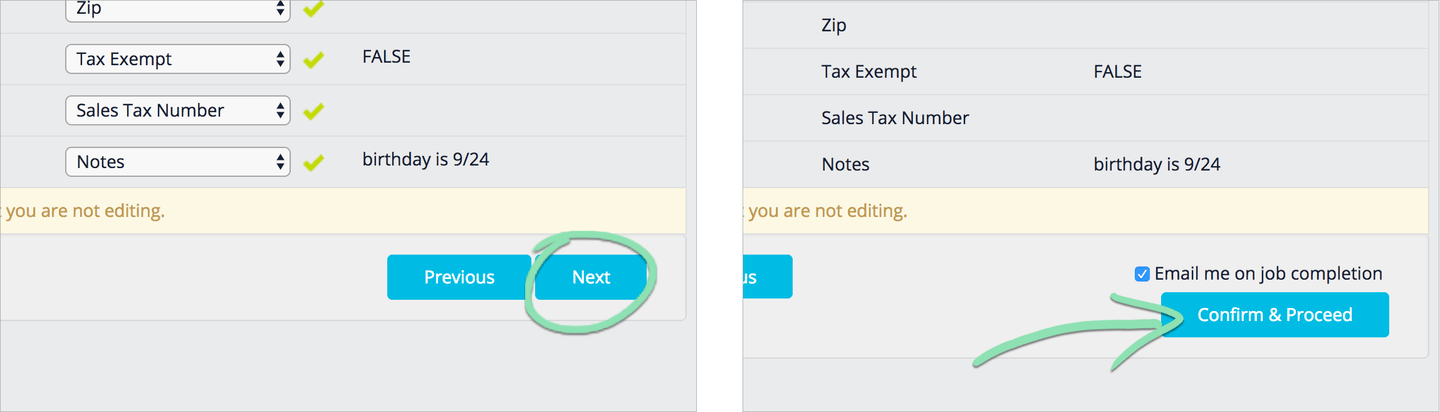
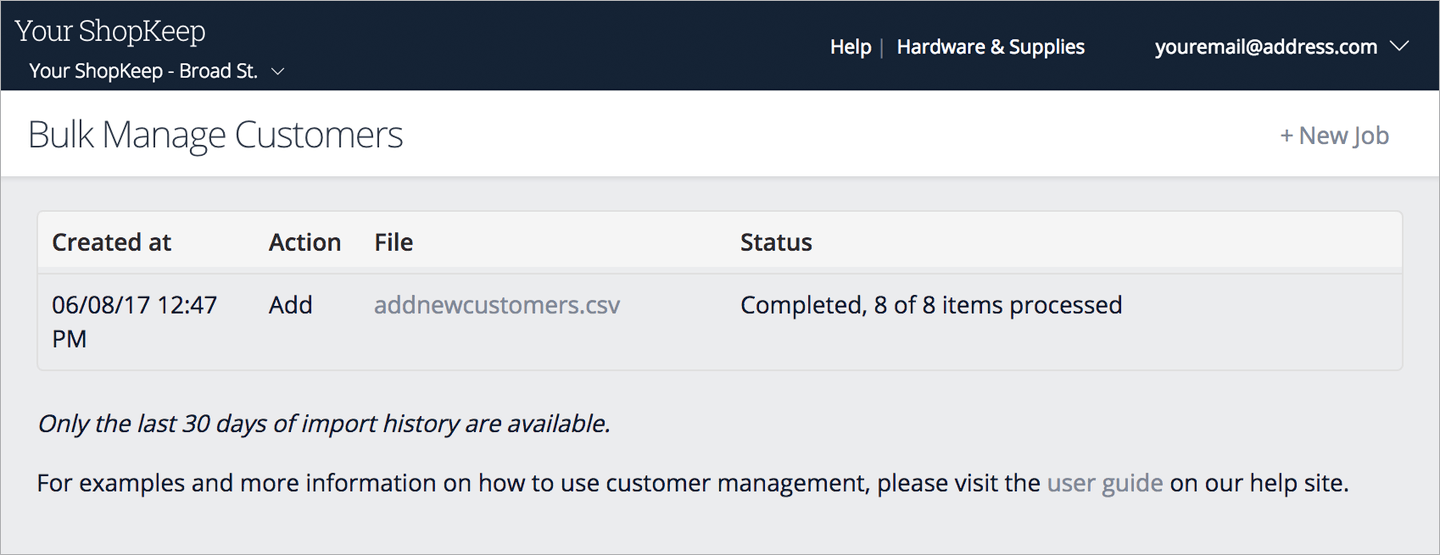
If you have many customers to add to BackOffice, maybe from a prior system, use Bulk Customer Management to import them all at once. Learn how to prepare our template and upload it to BackOffice.

Download & Prepare the Template

  1. After starting a new job, click ‘Download a blank customer template’.

    Or click here to download the template.

    Click to Enlarge
  2. Open the template in any spreadsheet software.
  3. Enter your customers' information into the template.

    Each customer must have at least a first name, last name, email, or phone number.

    Click to Enlarge
    For an explanation of what goes into each column, visit the Template Columns section.
  4. Save the spreadsheet as a .CSV file.

    Visit our Spreadsheets for Bulk Imports article for help saving the file.

Upload the Spreadsheet

  1. In BackOffice, click ‘Choose File’, select the saved template, and click ‘Next’.
    Click to Enlarge
  2. Check that all ‘Customer Fields’ are mapped to the correct ‘CSV Headers’.

    Set any columns you did not use to ‘unassigned’.

    Click to Enlarge
  3. Click ‘Next’, then select ‘Confirm & Proceed’.
    Click to Enlarge
  4. Refresh the page to check the status of the import.

    If you get any errors, visit our Customer Management Troubleshooting guide for help.

    Click to Enlarge
  5. In the Retail POS (S-Series) app, Get Updates from BackOffice to sync the new customers to the register.
    Click to Enlarge

With your customers imported, here are some things you can do with customers in Lightspeed Retail:

  • Track the growth of your Customer List over time with the Marketing Dashboard.
  • Learn how to tag customers to sales so you can track their purchases.
  • Identify your top customers with the Sales by Customer report.
  • Set up Mailchimp Integration to start sending automated marketing emails.
  • Modify Customers

    From updating emails to adding customer notes, Modify Customers allows you to make bulk changes to your existing customer list. Learn how to export your customer list, update it, and upload the changes.

    Export Customers

    1. After starting a new job, click ‘Export your existing customers to a CSV’.
      Click to Enlarge
    2. Open the customer export in any spreadsheet software.
    3. Update customer information on the spreadsheet as needed.

      If you need to change someone’s tax exempt status, add a ‘Tax Exempt’ column.
      Changing the name of a customer will also update it in some historical reporting. To learn more, visit the article for a specific report from our BackOffice support page.

      Click to Enlarge
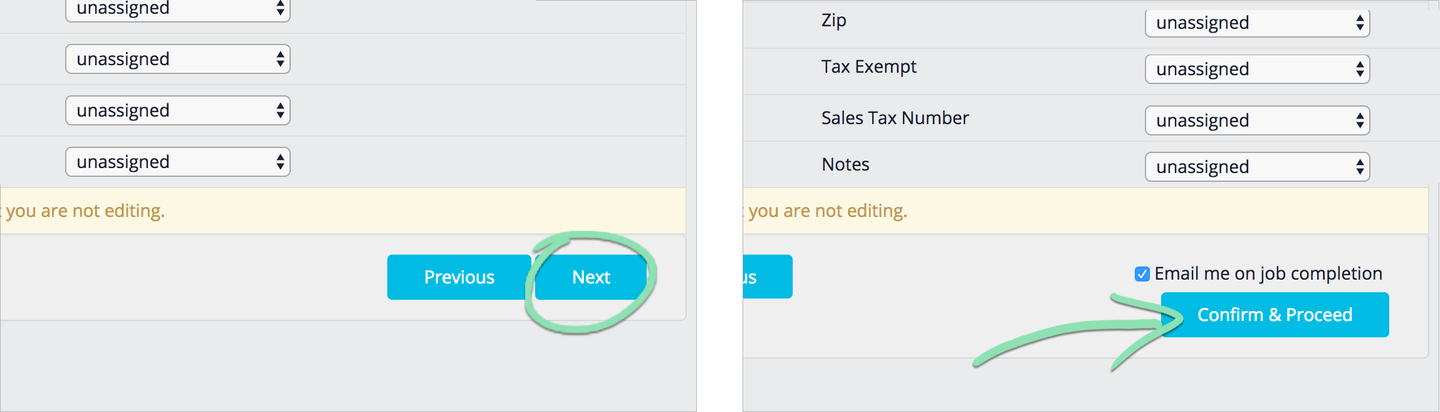
      Do not change ‘Customer Record ID’, this number is required to complete the import. For an explanation of what goes into each column, visit the Template Columns section.
    4. Save the spreadsheet as a .CSV file.

      Visit our Spreadsheets for Bulk Imports article for help saving the file.

    Upload the Spreadsheet

    1. In BackOffice, click ‘Choose File’, select the updated spreadsheet, and click ‘Next’.
      Click to Enlarge
    2. Check that 'Customer Record ID' and any fields being updated are mapped to the correct 'CSV Headers'.

      Set any fields not being updated to ‘unassigned’.

      Click to Enlarge
    3. Click ‘Next’, then select ‘Confirm & Proceed’.
      Click to Enlarge
    4. Refresh the page to check the status of the import.

      If you get any errors, visit our Customer Management Troubleshooting guide for help.

      Click to Enlarge
    5. In the Retail POS (S-Series) app, Get Updates from BackOffice to sync the updated customer information to the register.
      Click to Enlarge

    Delete Customers

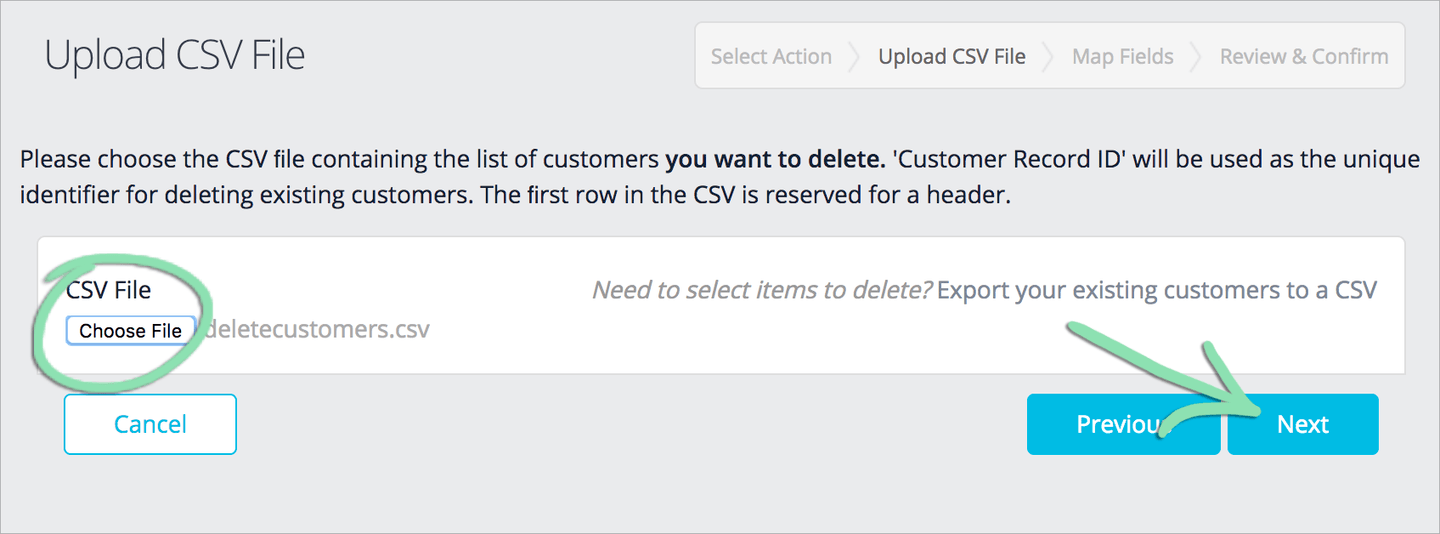
    Delete Customers enables you to remove multiple customers at once from BackOffice. Learn how to export your customers, modify the export, and upload a spreadsheet of customers to remove.

    After deleting customers, you can no longer view their purchase histories from the Customer List. Deleted customers still appear on the Sales by Customer report, but you cannot filter by their names.

    Export Customers

    1. After starting a new job, click ‘Export your existing customers to a CSV’.
      Click to Enlarge
    2. Open the customer export in any spreadsheet software.
    3. Remove from the spreadsheet the customers you do not want to delete from BackOffice.

      IMPORTANT: All customers left on the spreadsheet will be deleted.

      Click to Enlarge
    4. Save the spreadsheet as a .CSV file.

      Visit our Spreadsheets for Bulk Imports article for help saving the file.

    Upload the Spreadsheet

    1. In BackOffice, click ‘Choose File’, select the updated spreadsheet, and click ‘Next’.
      Click to Enlarge
    2. Check that ‘Customer Record ID’ is mapped to the correct 'CSV Header'.
      Click to Enlarge
    3. Click ‘Next’, then ‘Confirm & Proceed’.
      Click to Enlarge
    4. Refresh the page to check the status of the import.

      If you get any errors, visit our Customer Management Troubleshooting guide for help.

      Click to Enlarge
    5. In the Retail POS (S-Series) app, Get Updates from BackOffice to remove deleted customers from the register.
      Click to Enlarge

    Template Columns

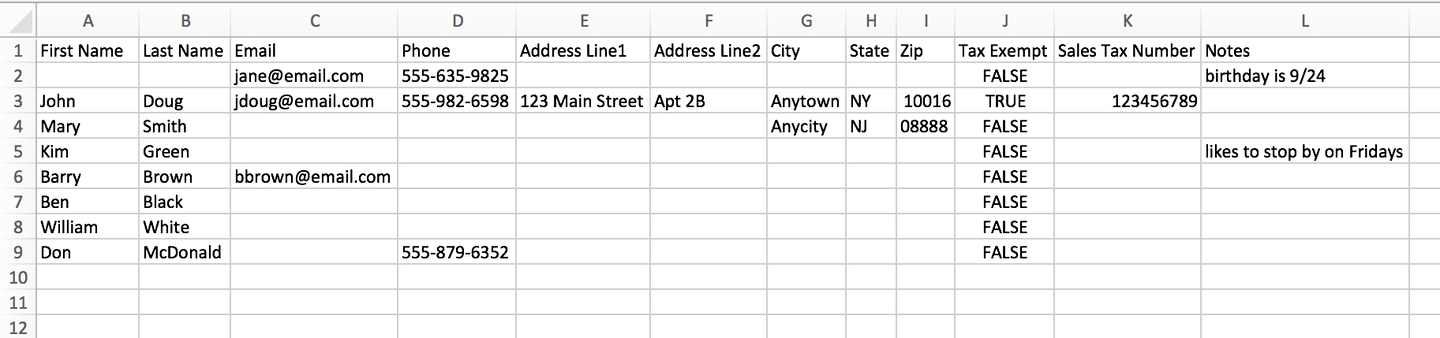
    Confused about what to enter in the import template’s columns? This section explains what each column means and what information is required for a successful import.

    First/Last Name | The customer’s first and last name. Each customer must have at least a first name, last name, email, or phone number.

    Email | The customer’s email address in [email protected] format. Each customer must have at least a first name, last name, email, or phone number.

    Phone | The customer’s phone number. Each customer must have at least a first name, last name, email, or phone number.

    Address Line, City, State, Zip | The customer’s location information.

    Tax Exempt | TRUE or FALSE. If TRUE, the customer will not be charged sales tax. You must enter a ‘Sales Tax Number’ for tax exempt customers.

    Sales Tax Number | Any tax number associated with the customer. This is required for tax exempt customers.

    Notes | Enter any notes you want to record about the customer (e.g. a customer’s birthday or favorite table).