The Labor Tracking Report allows BackOffice managers to monitor each employee’s overtime, double time, and total hours worked in one report. Once overtime settings are initially configured for the business in compliance with state and regional laws, managers verify employee clock punches in the Time Clock each pay week to make sure records are correct, then run the Labor Tracking Report for an overview of all hours worked, including overtime and double time.
Table of Contents
Set Up Overtime Settings
Initial setup of overtime settings in BackOffice must happen before running the Labor Tracking Report for the first time. These settings determine the start of your pay week and how the report will calculate overtime and double time hours. Settings take effect at the start of the following pay week and apply to hours worked from that point forward.
Not performing the steps in this section will prevent you from running the Labor Tracking Report.
In BackOffice, click ‘Settings’ and select ‘Overtime Settings’.
Click to Enlarge
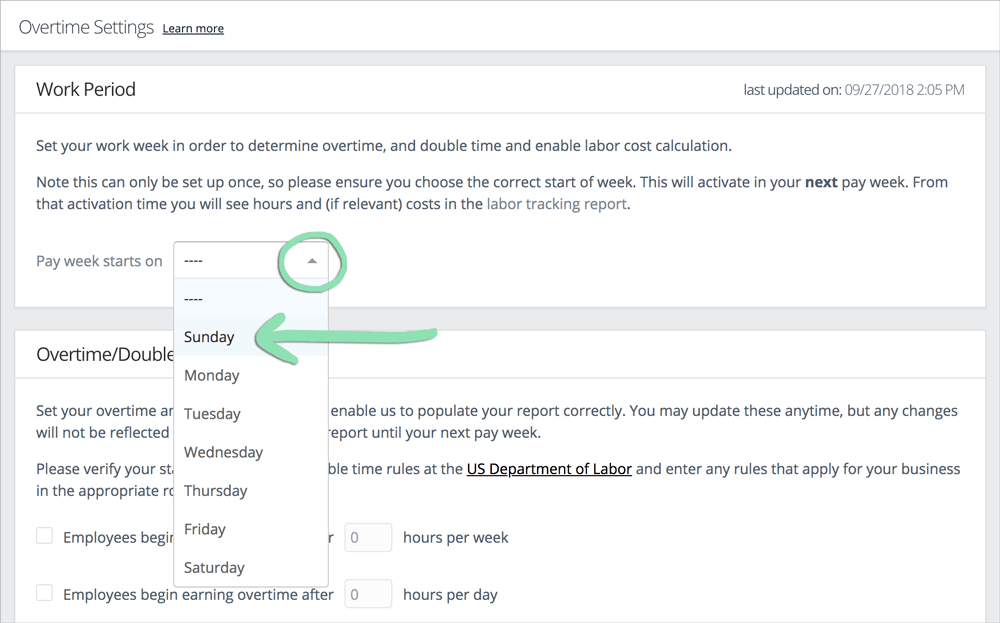
Set the start of the pay week.
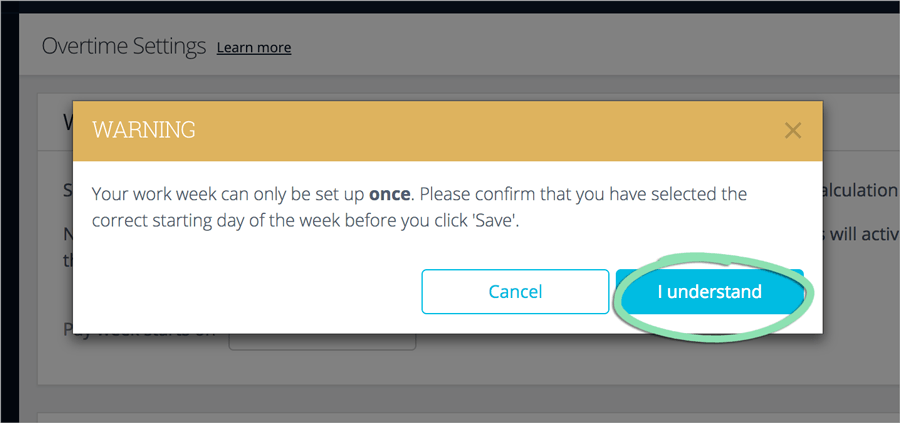
This is the day that begins your pay period. Pay weeks are used to determine weekly overtime and double time hours on the Labor Tracking Report. Once saved, this day cannot be changed.
aFrom the drop-down, select the first day of your pay week.
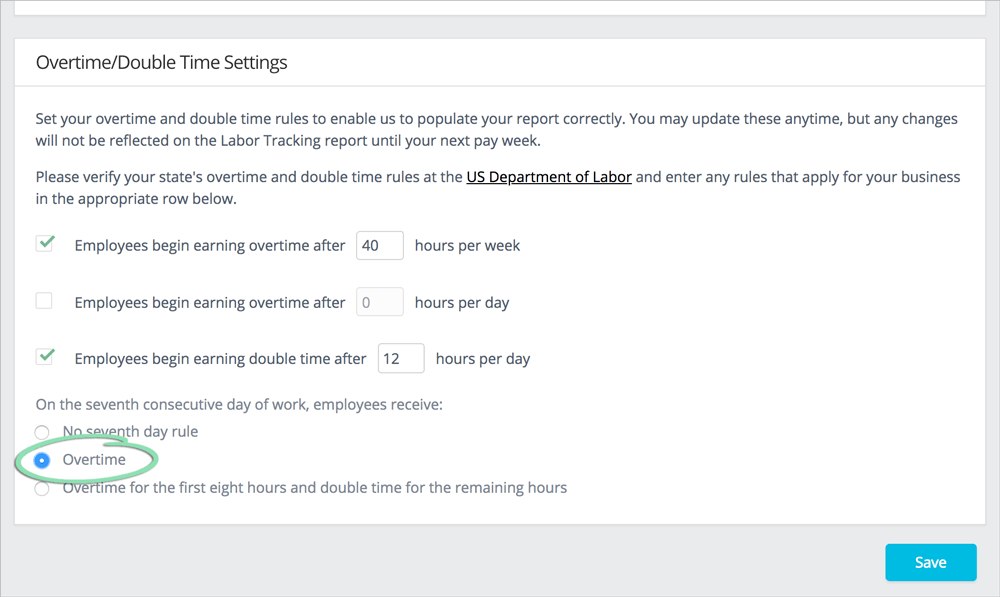
Set rules for when overtime and double time hours are earned.
Apply overtime after an employee works a specific number of hours in a day or pay week or apply double time after they work a certain number of hours in a day.
Settings activate at the start of the following pay week and apply to hours worked from then forward. After saving, a banner will confirm when your overtime settings take effect.
Verify Employee Hours
Verify employee time clock punches each pay week before running the Labor Tracking Report to ensure the report will display the correct data. If clock punches are missing or incomplete, the report will not reflect the actual hours employees worked.
Visit our Time Clock article to learn how employees clock in and out at the register.
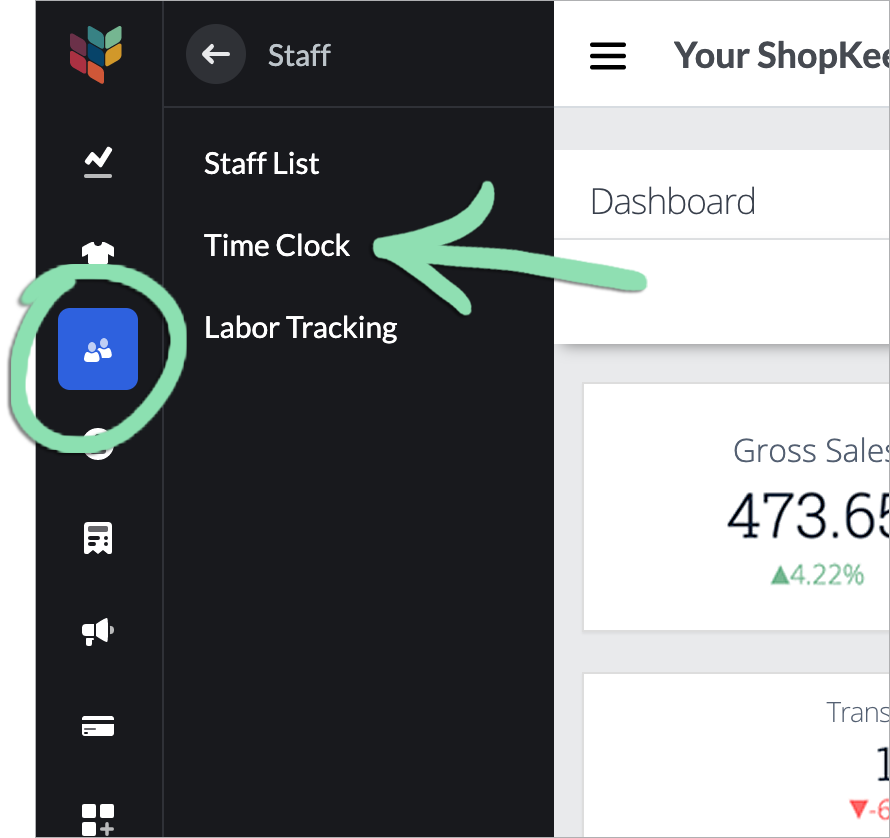
In BackOffice, click ‘Staff’ and select ‘Time Clock’.
Click to Enlarge
Click the date icon to choose a preset or custom range, then click ‘Retrieve’.
Click to Enlarge
Review the report to make sure all employee hours are correct.
Click to Enlarge
The Labor Tracking Report in BackOffice gives a view of employee overtime, double time, and total hours worked based on clock punches recorded in the Time Clock and the overtime settings configured.
Run the Report
From BackOffice, run the Labor Tracking Report for an overview of the hours each employee worked. The report provides data for any number of pay weeks occurring after overtime settings have gone into effect, however historical data from before overtime settings were activated is not available.
Before running this report for the first time, you must set up overtime settings and wait for them to take effect.
You must verify employee hours every time you run the report to ensure it will display correct information.
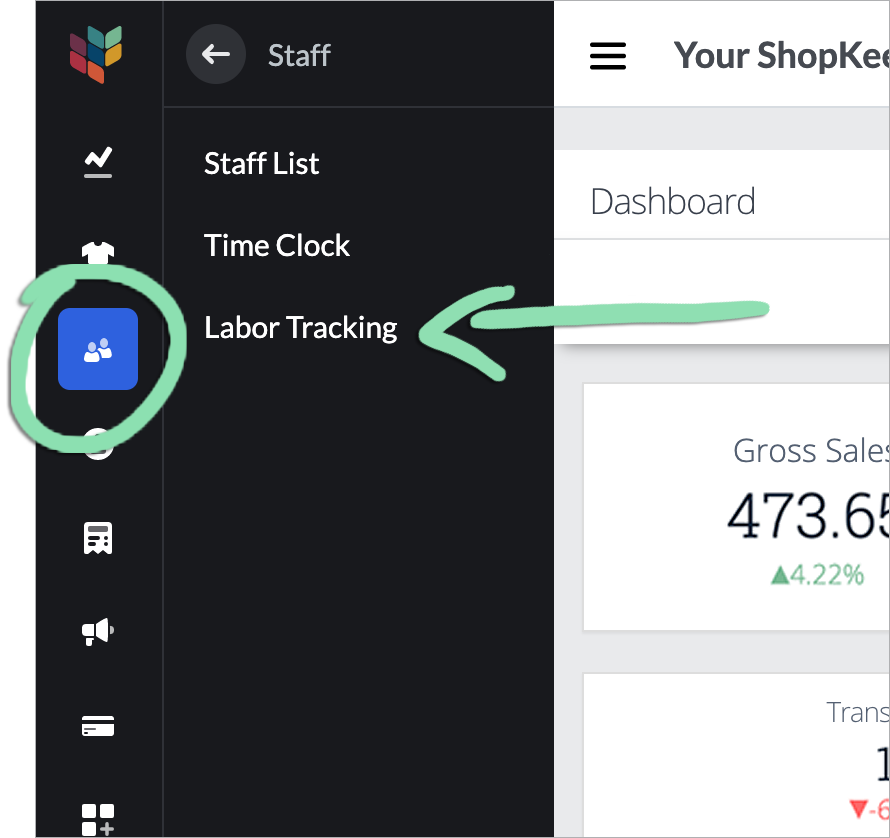
In BackOffice, click ‘Staff’ and select ‘Labor Tracking’.
Click to Enlarge
Click the date icon to select a range, then click 'Retrieve'.
The report supports ranges of one or more pay weeks occurring after overtime settings have taken effect. Historical data from before overtime settings were activated is not available.
A partial week range can only be selected for the current pay week.
If your overtime settings have not yet gone into effect, you will be unable to select a date range. A banner will show when the report will be available to run.
Read the Report
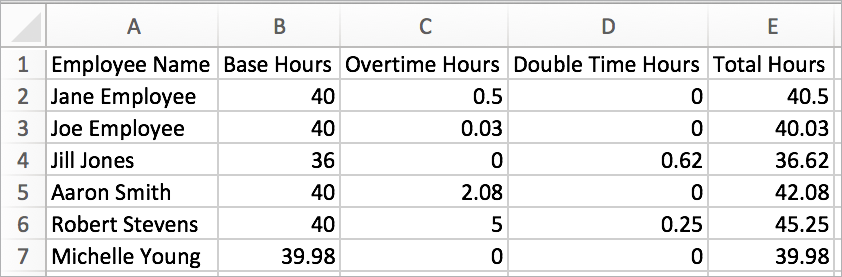
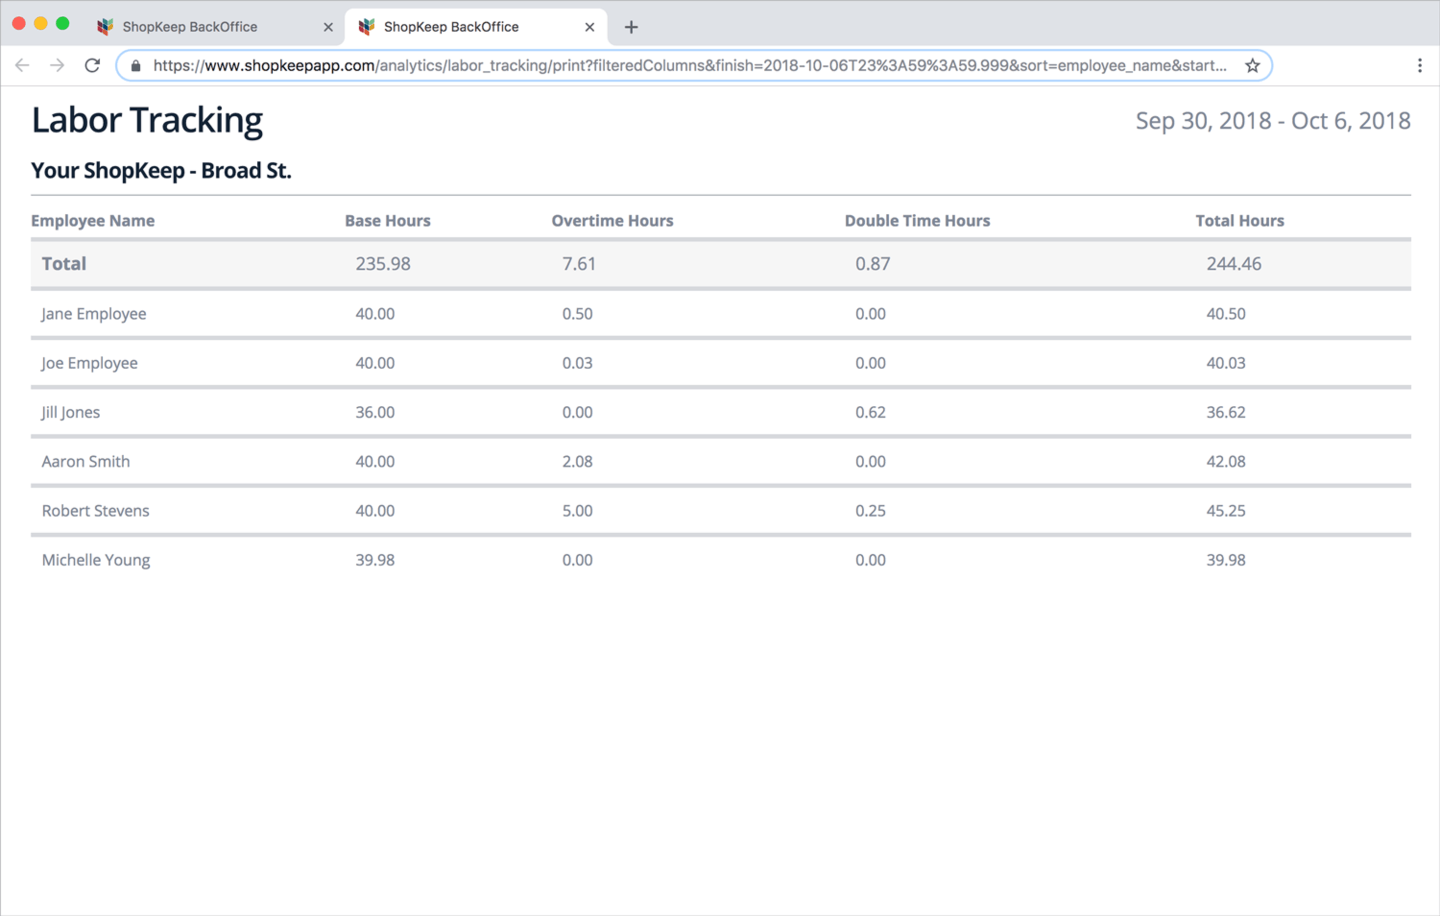
The Labor Tracking Report is grouped by employee and shows each person’s overtime, double time, and total hours worked in decimal* format for a range of pay weeks.
*Note: Decimals represent fractions of an hour, NOT total minutes. For the number of minutes, multiply the decimal by 60. For example, 8.1 hours is 8 hours and 6 minutes (0.1 x 60).
Total (top row) | Total for each column of the report. Employee Name | Name of staff member as it is currently entered in BackOffice. Base Hours | Number of hours worked by the employee not subject to overtime or double time. This is Total Hours minus Overtime Hours and Double Time Hours. Overtime Hours | Number of daily and weekly overtime hours accrued by the employee based on the overtime settings in effect when those hours were worked.
Daily overtime is calculated first, then weekly overtime. Weekly overtime is determined by subtracting total daily overtime and double time hours from ‘Total Hours’, then subtracting the weekly overtime threshold. If the result is positive, it is counted as weekly overtime.
Double Time Hours | Number of double time hours accrued by the employee based on the overtime settings in effect when those hours were worked. Total Hours | Total number of hours worked by the employee.
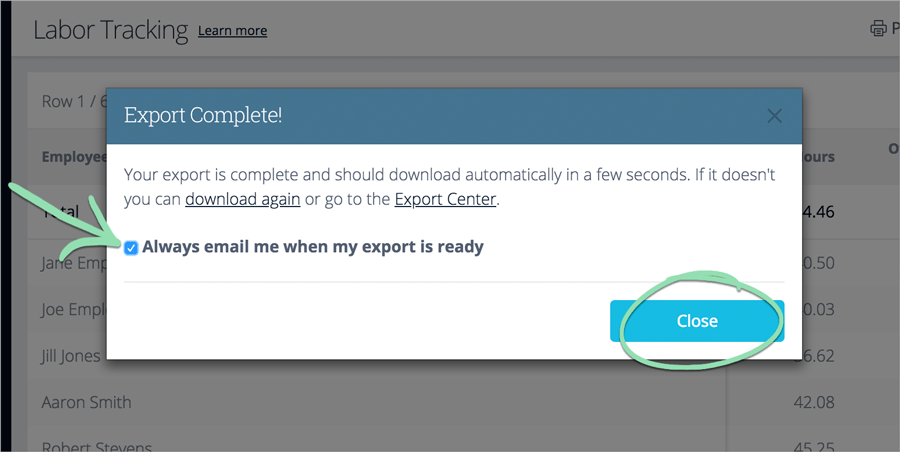
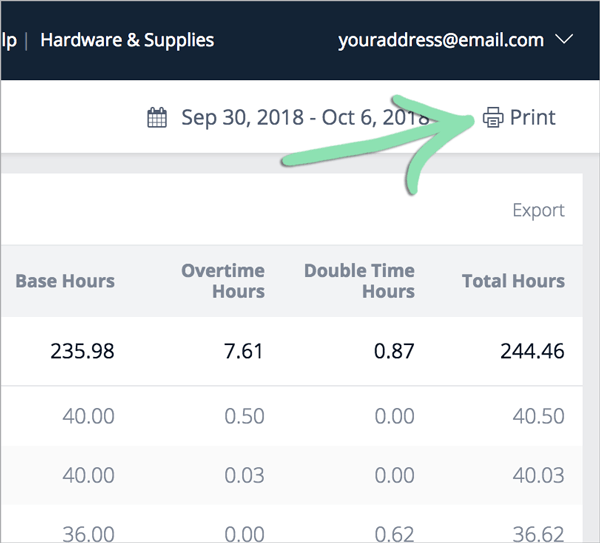
Export and Print
View Labor Tracking Report data outside of BackOffice by either exporting it to analyze in your own spreadsheet software or printing it in our printer-friendly format that can be printed or saved.