BackOffice is the online portal where you manage your business in Lightspeed Retail. Log in to BackOffice to add items to inventory, set sales restrictions on relevant products, add employees, and customize receipt, tax, and tender settings before running sales at the register.
Store Name | Lightspeed Retail account name with no spaces or punctuation. Username/Email | Email used to create the Lightspeed Retail account. Password | Password entered when creating the Lightspeed Retail account. Forgot your store name or password? Click here for login assistance.
Inventory items are the various goods and services a business sells. Set up your items in BackOffice so cashiers can ring them up at the register. Employees with the relevant BackOffice permissions also have the ability to create items from the Retail POS (S-Series) app for Android.
JUUL® devices and JUULpods™ do not need to be set up as they have been automatically added to your account.
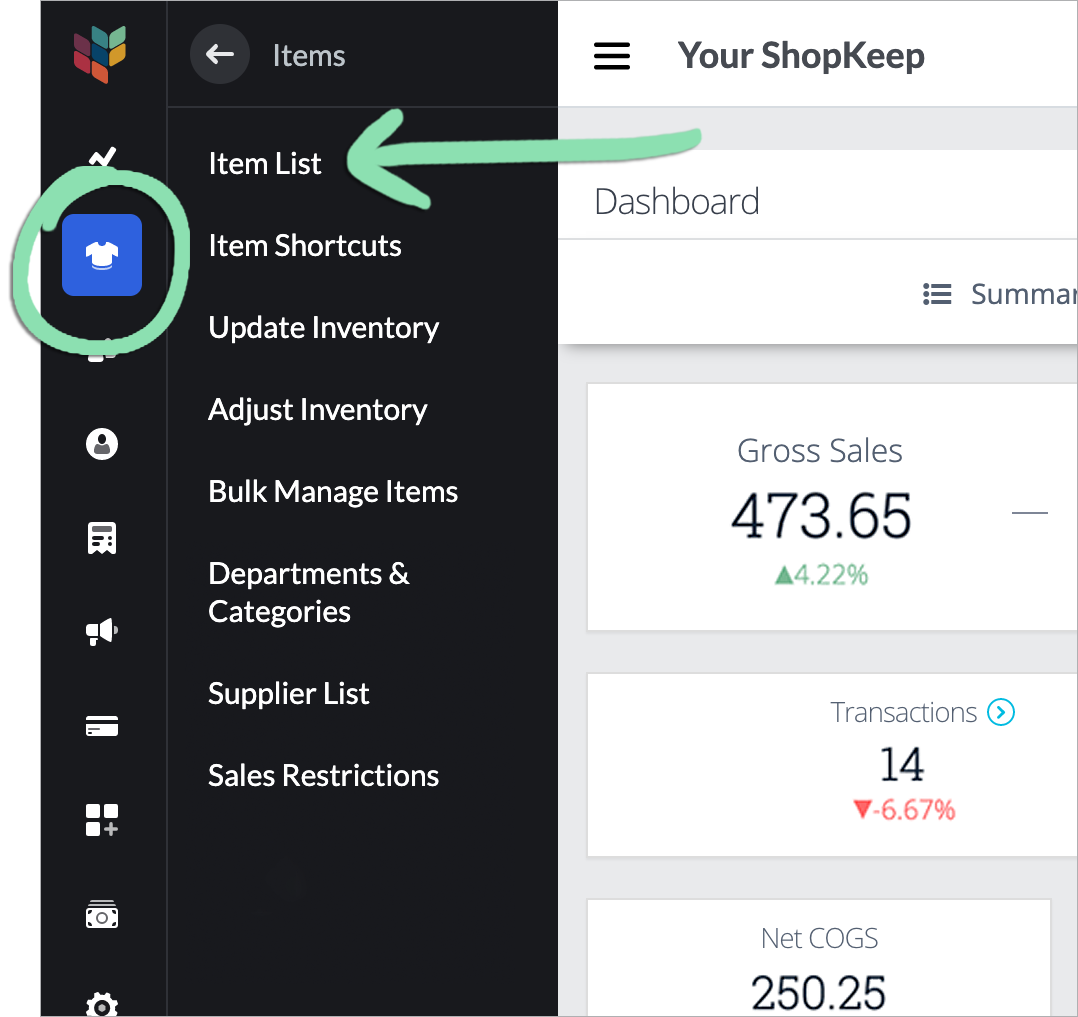
Visit the 'Item List' from BackOffice or the Retail POS (S-Series) app for Android (employees with BackOffice permissions only).
In BackOffice, click ‘Items’ and select ‘Item List’.
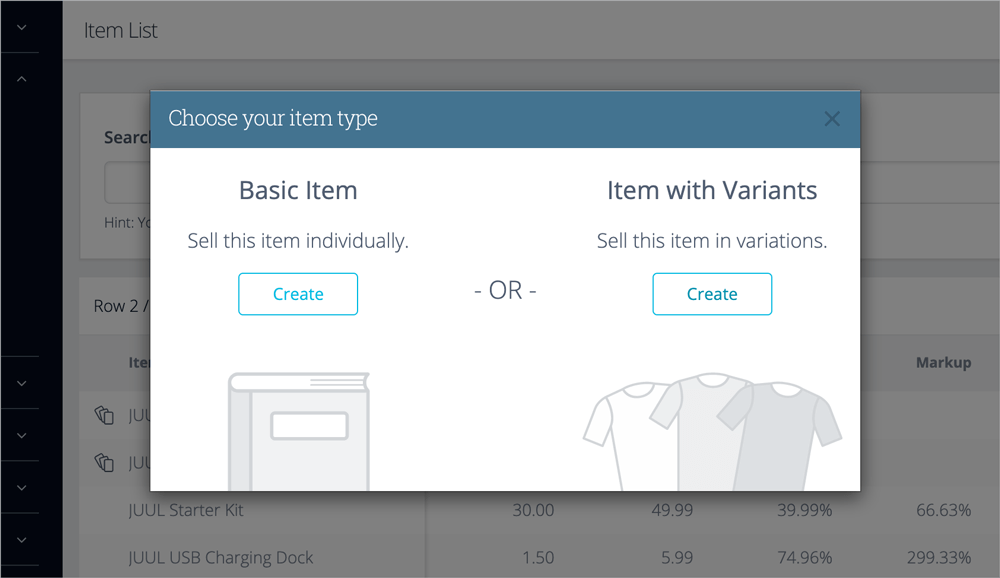
If creating a basic item, quickly add the item by entering an ‘Item Name’ and ‘Item Price’, then clicking ‘Save’. If more details such as a UPC code, Department, or Supplier are required, tap ‘More fields…’ and follow the steps below.
Click to Enlarge
After adding items, create register shortcuts to easily access them at the register.
Create Sales Restrictions
Sales restrictions allow businesses to regulate the purchase of specific items, such as alcohol and vape products, by age or quantity. Set up sales restrictions for any items you sell that have a minimum purchase age or maximum purchase quantity.
JUUL Labs™ products already have sales restrictions set up, so add restrictions for other items as needed.
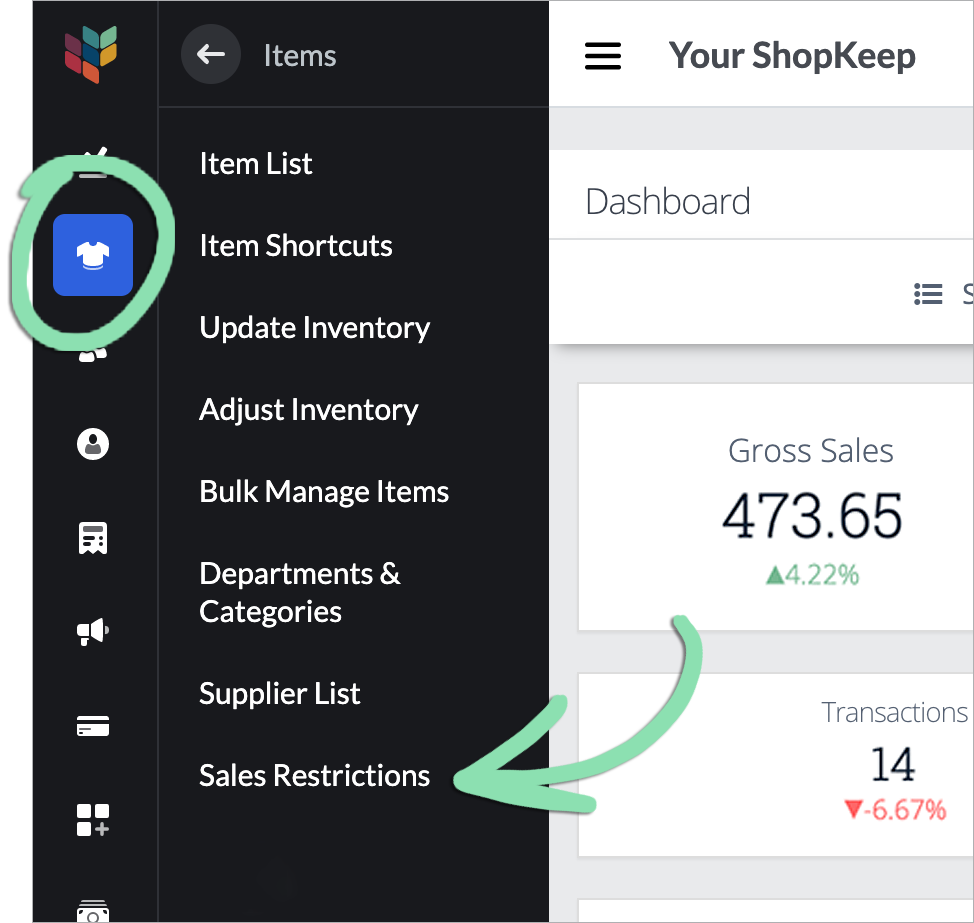
In BackOffice, click ‘Items’ and select ‘Sales Restrictions’.
Click to Enlarge
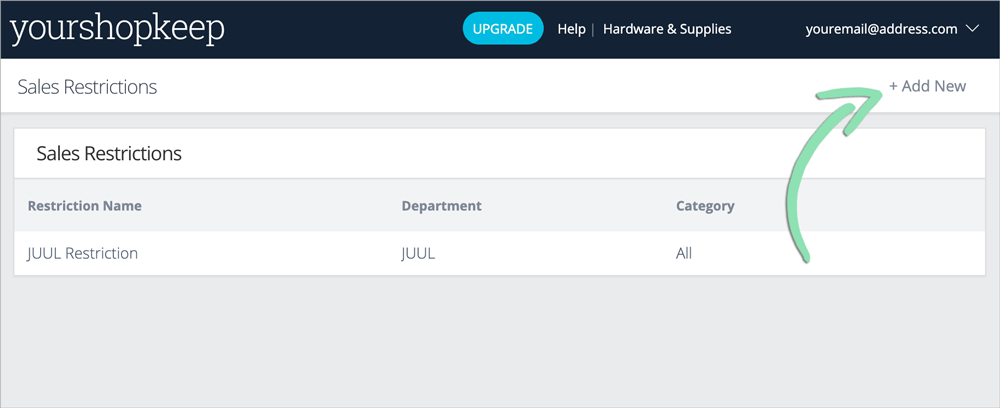
Restriction Name | How the restriction is identified on the BackOffice ‘Sales Restrictions’ page. Department | Select a department of items to restrict. Category | Select a category of items within the ‘Department’ to restrict or leave as ‘All categories’. Sales restrictions created for specific categories will override a department-level restriction in place for those categories, including if the department-level restriction has both an age and transaction limit but a category-level restriction has only one. Learn how to assign items to departments and categories here.
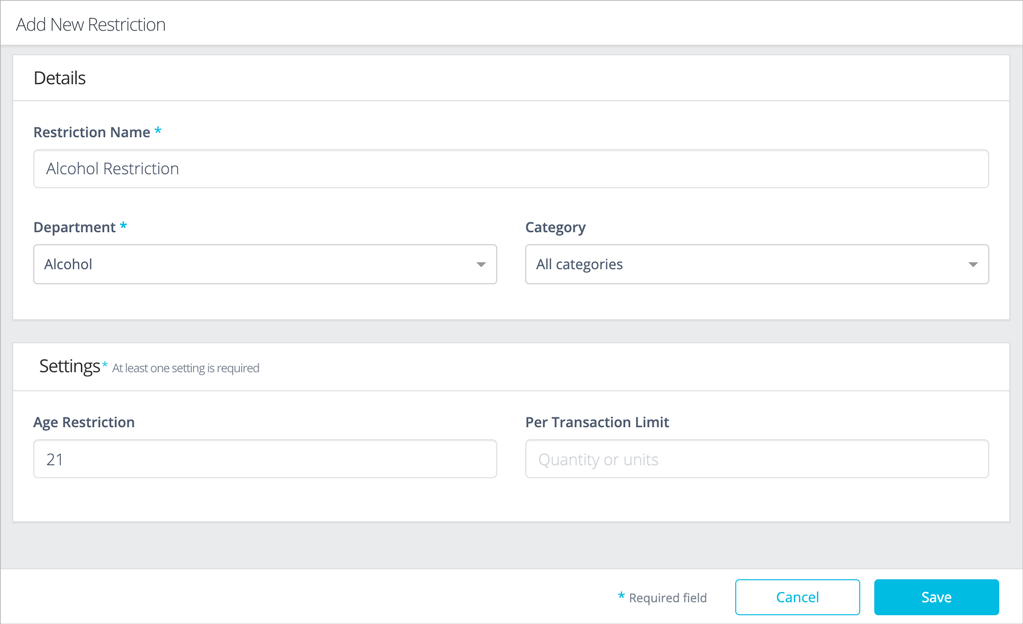
Sales restrictions must have either an ‘Age Restriction’ or ‘Per Transaction Limit’ set but can also have both. Age Restriction | Minimum age a customer must be to purchase items from the selected ‘Department’ and ‘Category’. Per Transaction Limit | Maximum quantity of items from the selected ‘Department’ and ‘Category’ allowed on one sale.
Click ‘Save’.
Learn how sales restrictions work at the register here.
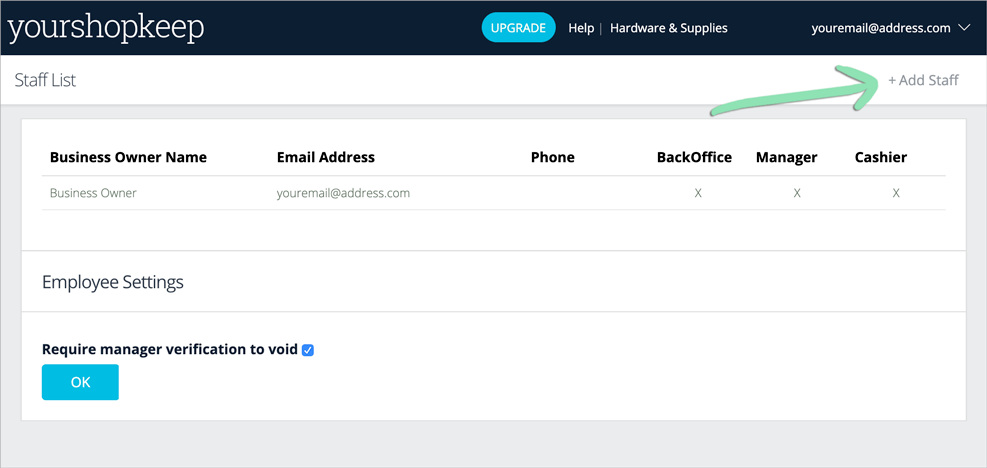
Add Staff
“Staff” refers to anyone who works at your business. Add employees to the staff list to be able to track their sales and time clock punches and control who can access the register and BackOffice.
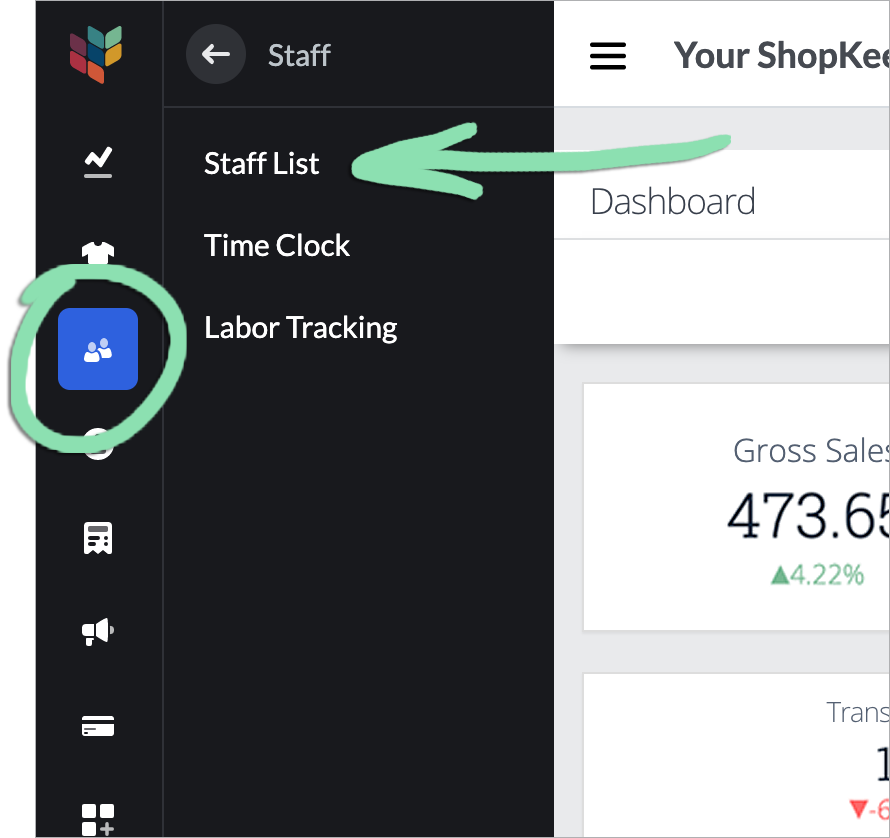
In BackOffice, click 'Staff' and select 'Staff List'.
Click to Enlarge
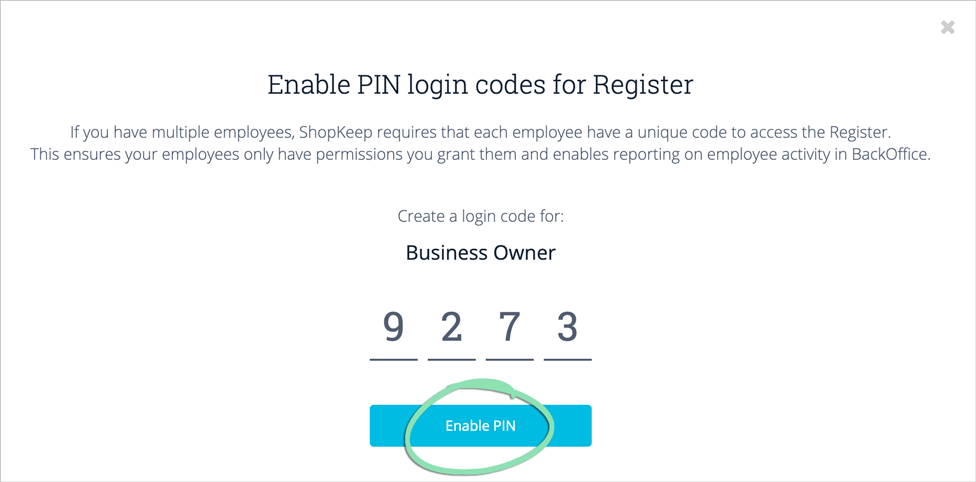
Register Code | 4-digit code that lets employees use the time clock and sign into the register. Role | Select ‘Cashier’ or ‘Manager’. Cashiers can run sales, returns, and perform other cashier functions at the register. Managers can perform cashier functions and manager functions, such as opening the register shift and cash drawer. BackOffice Access | Select a level of BackOffice access to give to an employee. Visit our full Manage Staff article to learn the difference between each option.
Click 'Save'.
Email Receipt Setup
Email receipts are convenient for customers and enable you to collect email addresses to use for marketing purposes. Customize email receipts with business information, a logo, banner, and social media links. Business Owners also have the ability to set up email receipts from the Retail POS (S-Series) app for Android.
The ‘Store Name’ set for receipts will also appear on the customer-facing touchscreen of the Sunmi T2 Lite register.
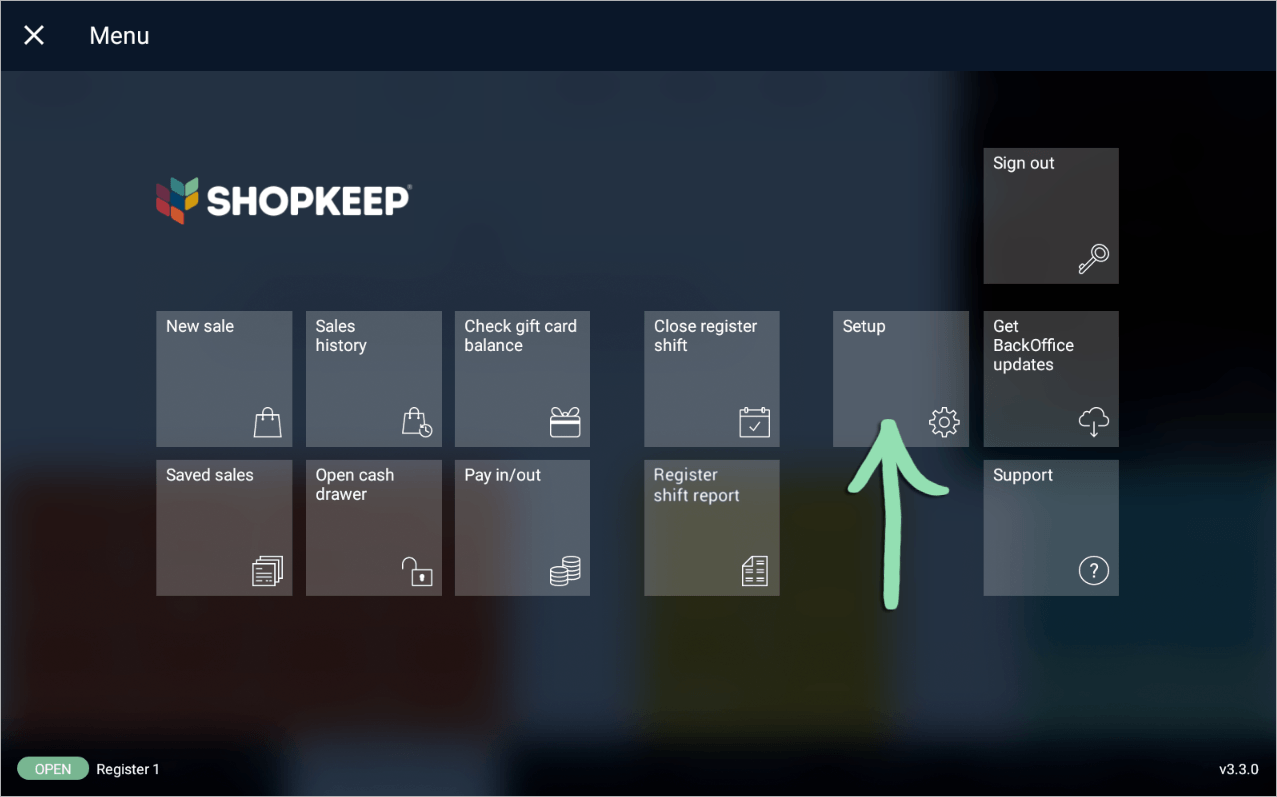
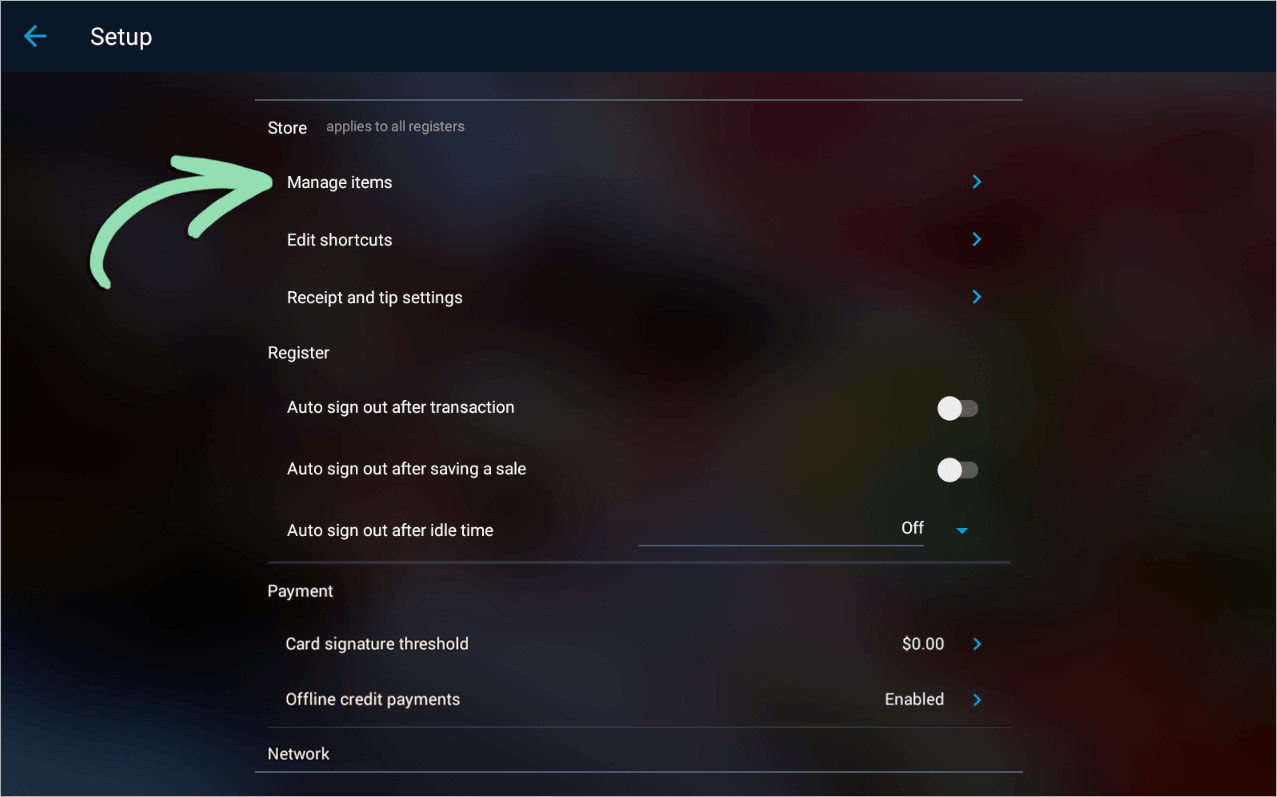
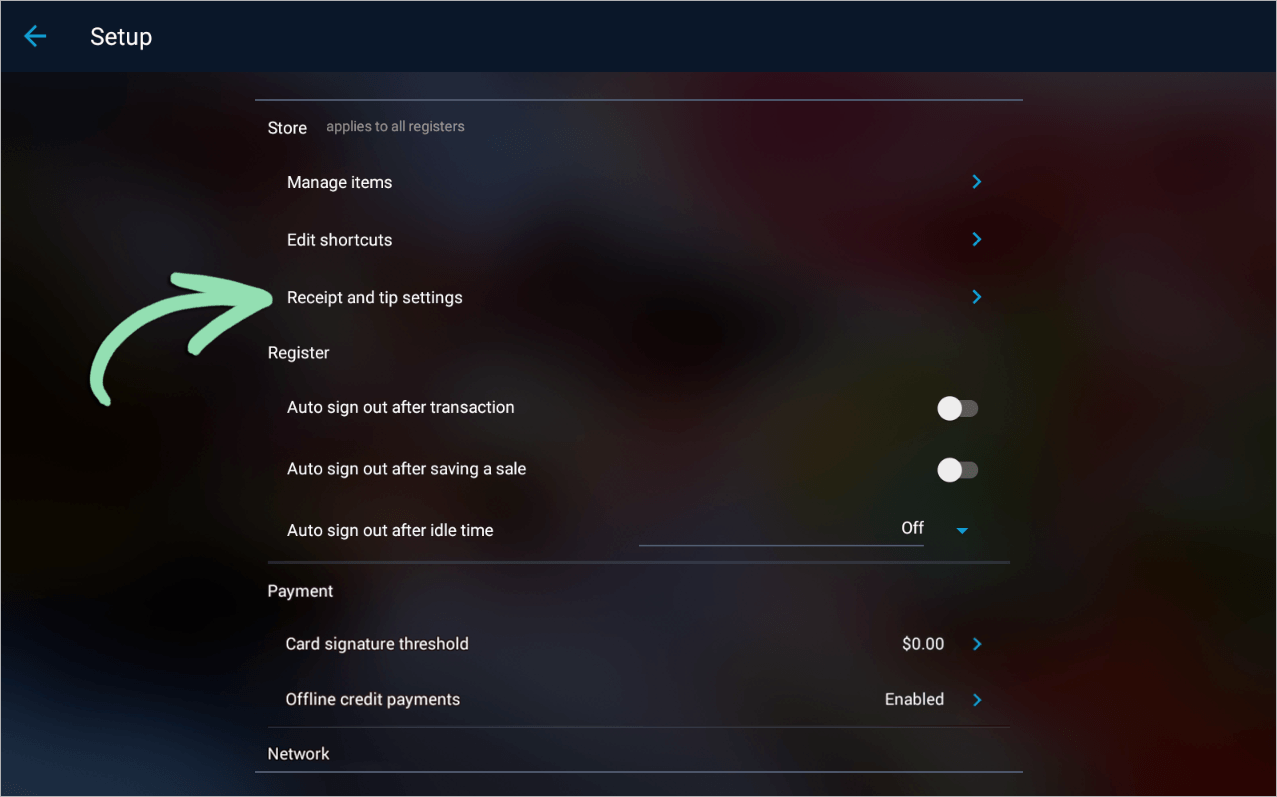
Sign into BackOffice as an employee with the relevant permissions or the Retail POS (S-Series) app for Android as the Business Owner and open receipt settings.
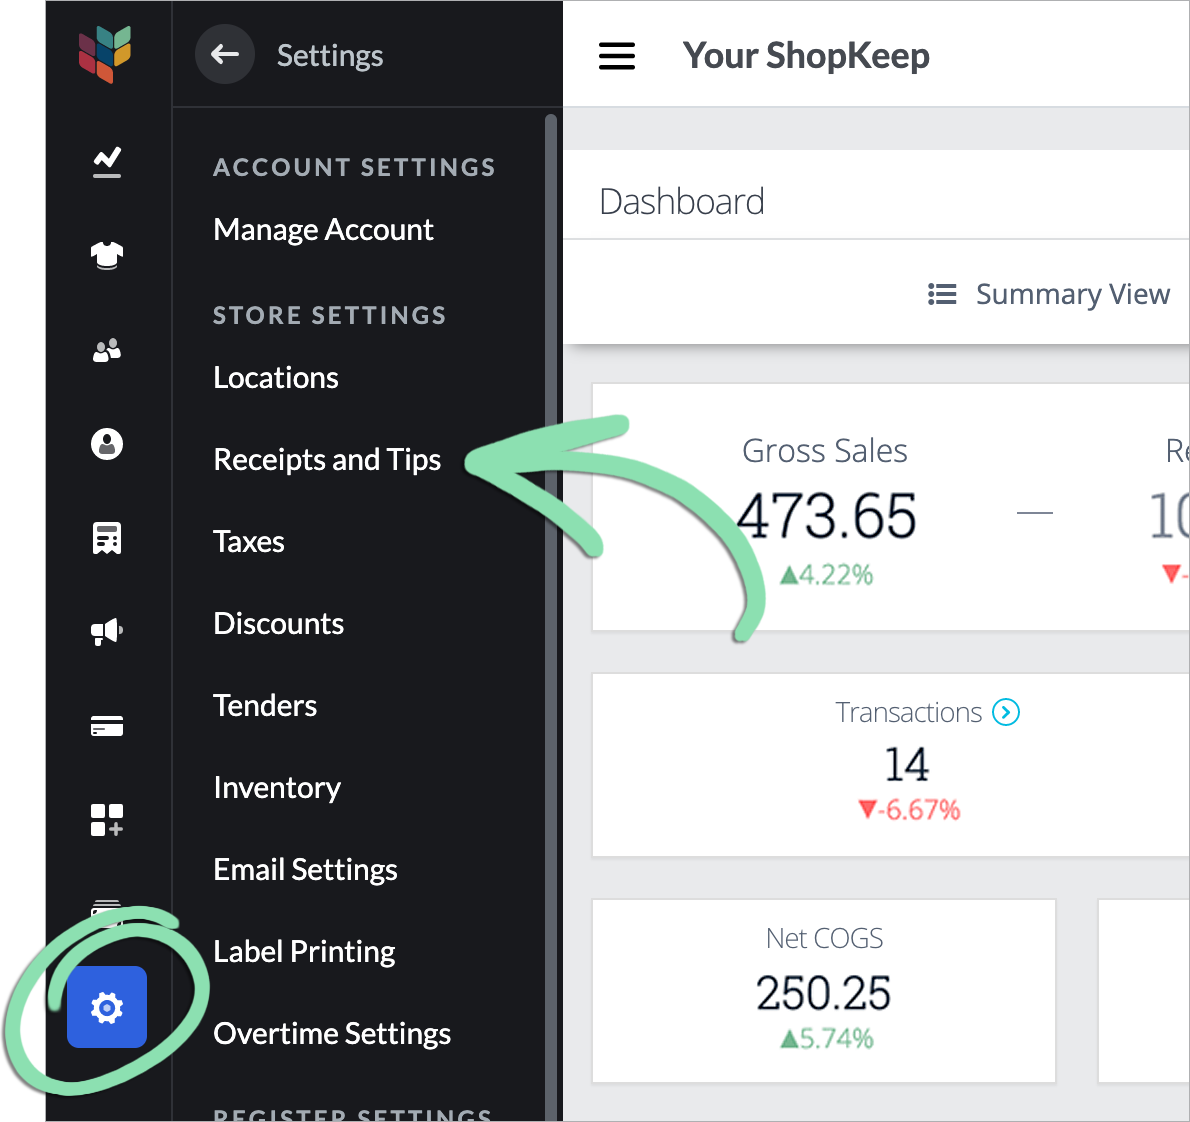
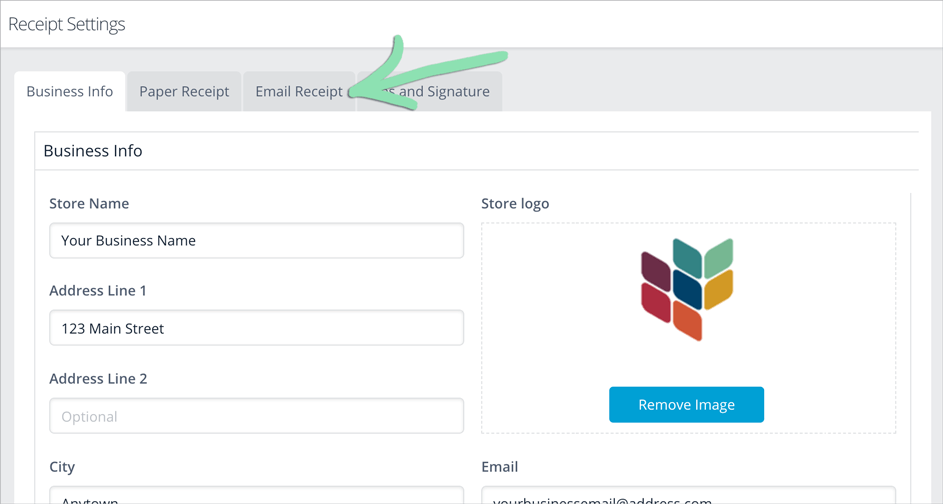
In BackOffice, click ‘Settings’ and select ‘Receipts and Tips’.
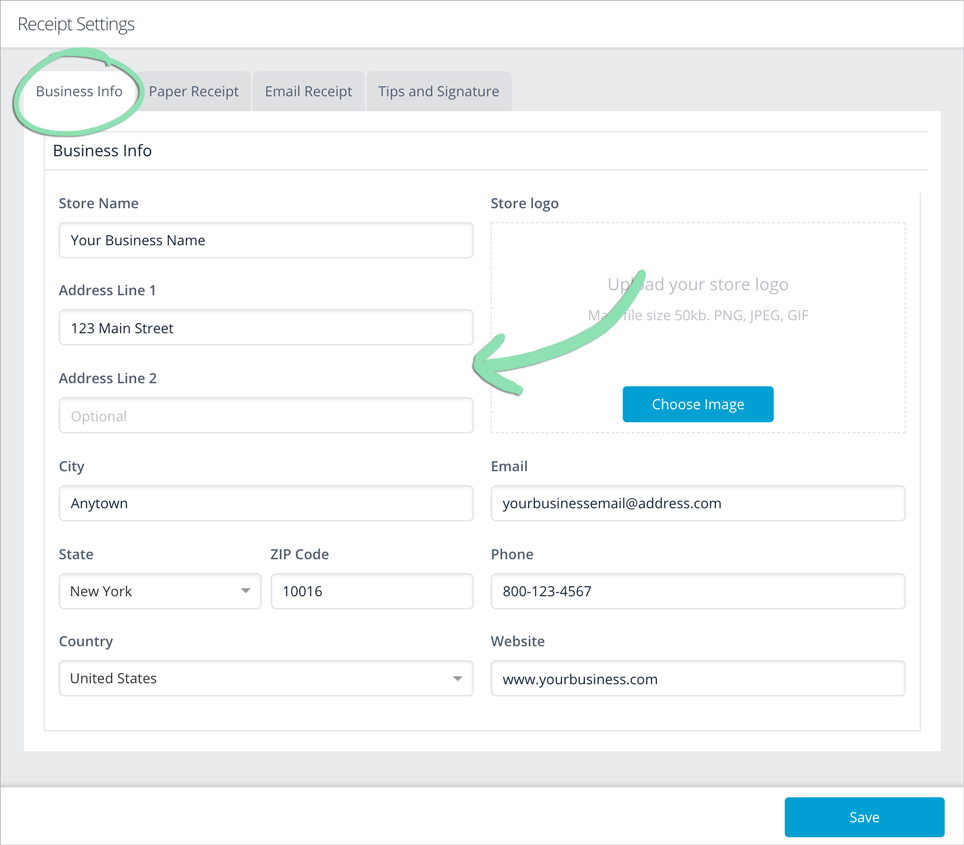
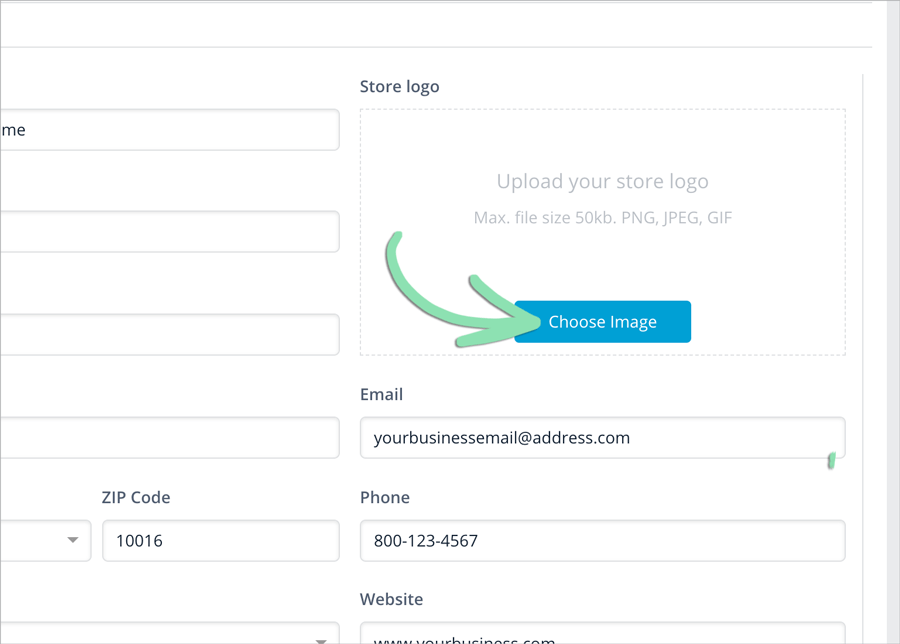
(Optional) Click ‘Choose Image’ to upload a business logo for the top of the email receipt.
Click to Enlarge
Click 'Save' to save changes.
Click 'Email Receipt' to add a message, banner, and/or social media links to email receipts.
Click to Enlarge
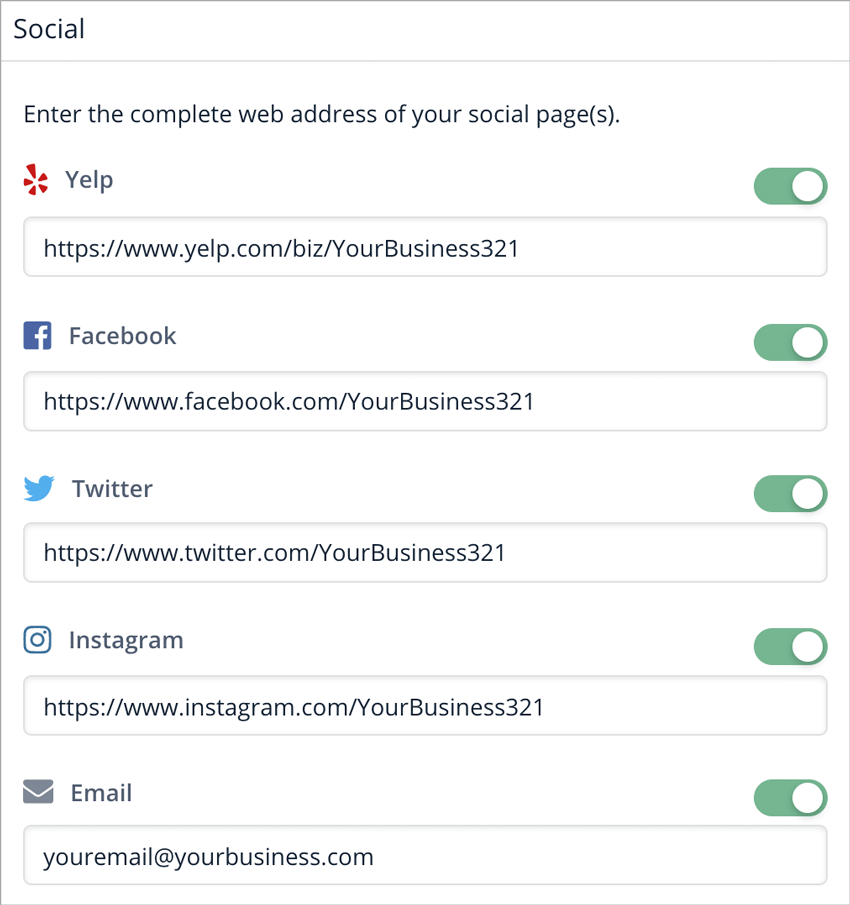
Fill in as much information as desired to appear on email receipts.
Click to Enlarge
Logo Link | Enter a URL to make the store logo a clickable link. Heading | A heading that appears under the logo. Message | A message that appears under the Heading.
None / Image / Text | Upload an image or enter text to appear above your social media links. For ‘Image’, tap ‘Choose Image’ to upload an image file. Banner images must be in .PNG, .JPG, or .GIF format and cannot exceed 70kB in size. For ‘Text’, enter a message. Message Link | Enter a website URL to send customers to when they click the image or text banner.
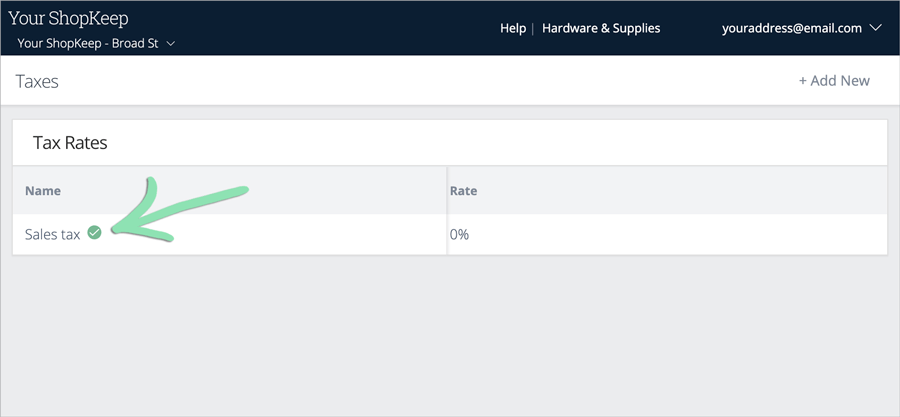
Maybe everything you sell is taxed the same or maybe you sell other goods (e.g. alcohol) that require a different rate. Enter the default tax rate that will be automatically applied to taxable items, then set up additional rates to override the default for specific items.
Click the default tax rate indicated by the checkmark.
Click to Enlarge
Enter the tax rate details, then click ‘Update’.
Click to Enlarge
Name | Name of the tax rate as it appears in BackOffice reporting (e.g. “Prepared Food Tax”). Receipt Name | Name that appears on receipts when the ‘Display tax rates on receipt’ setting is set to ‘Display each tax rate charged individually’ and multiple tax rates are charged on a transaction. If left blank, this will default to ‘Tax’. Rate | Percentage of tax charged for this tax rate (e.g. 7%, 8.875%, etc.). Set as Default | When checked, the tax rate becomes the default tax applied to all items not assigned to a tax rate.
(Optional) Follow the steps here to set up additional tax rates and assign items to taxes.
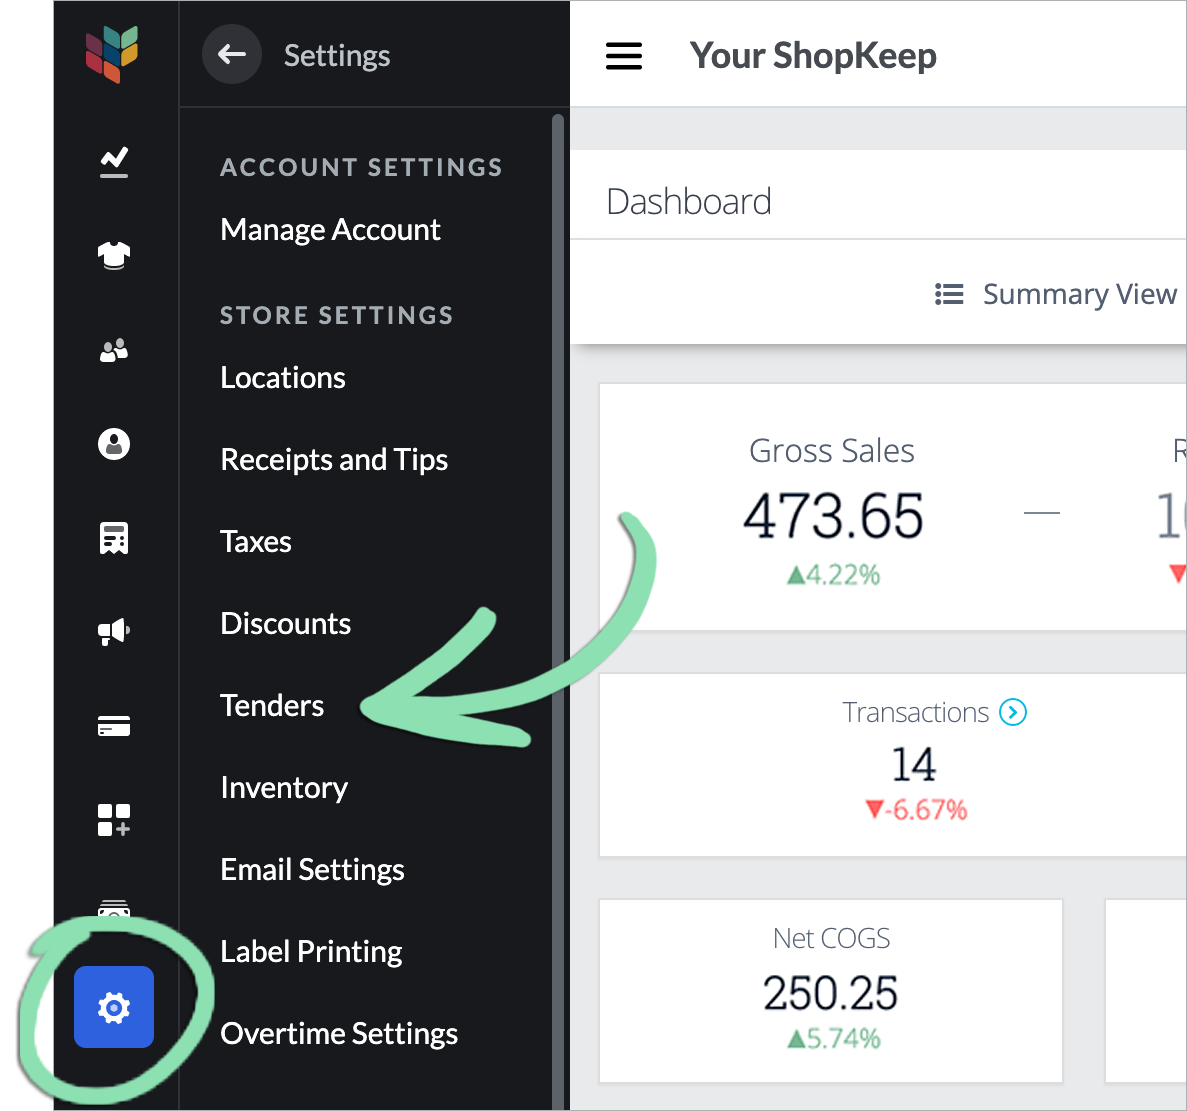
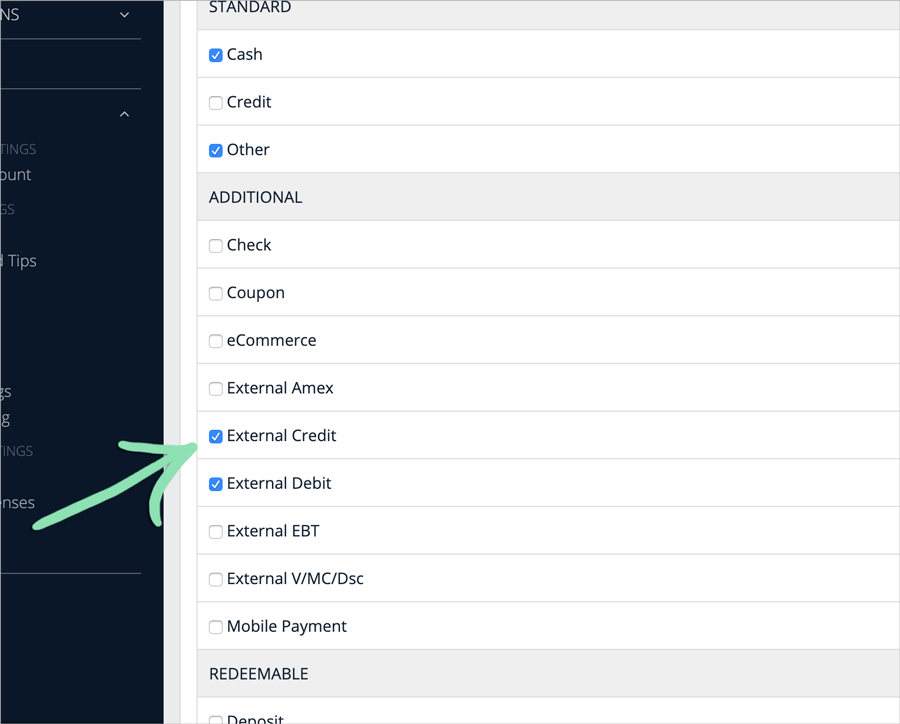
Configure Tender Settings
Do you accept credit or debit cards through an external terminal, personal checks, or any tenders other than cash and credit? Here’s how to enable those tenders and more for use at the register.
Here are some more BackOffice features included with your account that are designed to make running your business even easier.
Mailchimp® Integration
Mailchimp enables you to build email marketing campaigns and and send them to customers added in Lightspeed Retail. Visit our Mailchimp Integration article to learn more.
QuickBooks® Integration
Lightspeed Retail integrates with QuickBooks Online to automatically sync register totals to your QuickBooks account, simplifying how you balance the books. Visit our QuickBooks Integration Setup article to learn more.
Help us improve Lightspeed Support. Was this article helpful?