Liabilities enable you to issue store credit that customers can apply to a future sale at the register and to accept security deposits and partial deposits. After reading more below about how liabilities work in Lightspeed Retail, set up a liability item in BackOffice to get started. Learn how to issue and redeem liabilities at the register, handle deposits in different situations, and view reporting on liability usage.
For Integrated Gift Cards, follow the steps in our Integrated Gift Cards article instead to learn how to set up gift cards and use them at the register.
Table of Contents
What are Liabilities?
To understand how to use liabilities in Lightspeed Retail, let’s define what they are and examine how they work.
Liabilities are redeemable inventory items, such as gift cards, gift certificates, and deposits.
Revenue gained from issuing liabilities is kept separate from sales revenue in reporting.
The business is “on the hook for” issued liabilities until customers redeem them.
When a liability is redeemed, the redemption amount is then counted as sales revenue.
Deposit liabilities can be redeemed (e.g. partial deposits or down payments) or returned to the customer (e.g. security deposits). Visit the Deposits section below for specific examples of how to use deposit liabilities.
Balances for individual liabilities must be tracked manually outside of the Lightspeed Retail POS, unless using our Integrated Gift Cards.
Liability reporting in BackOffice shows the total amount of issued and redeemed liabilities, net liabilities waiting to be redeemed, and the amount of each issuance and redemption.
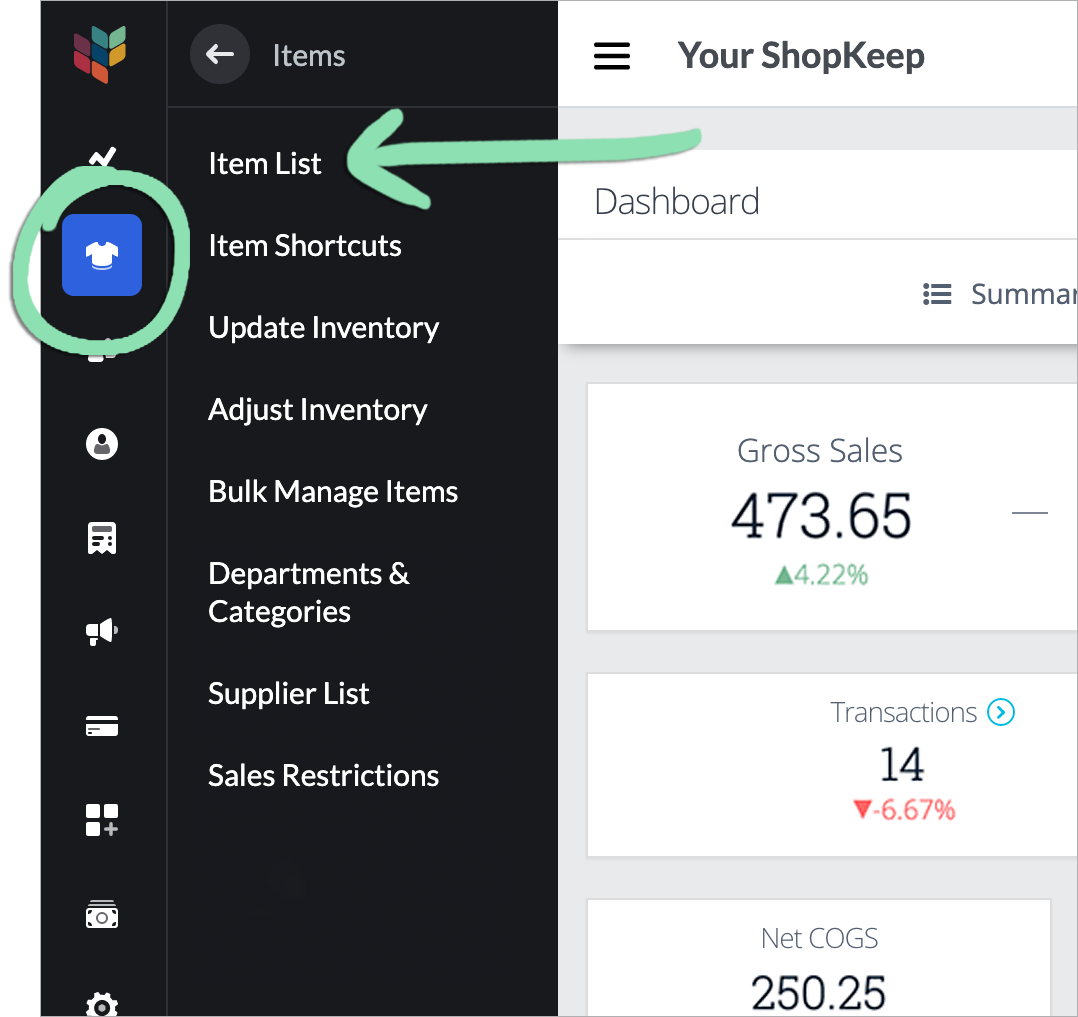
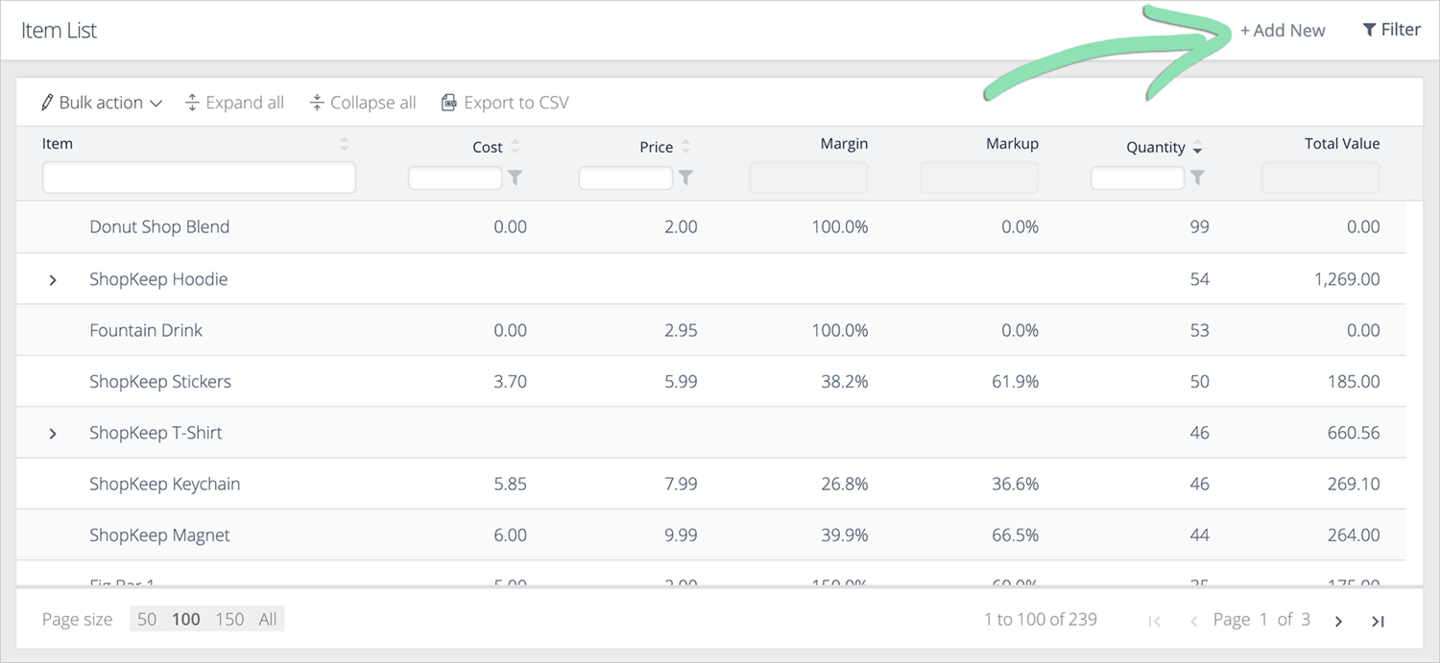
Enable a liability tender in BackOffice, then create an inventory item to represent that liability. Once created, the liability item will be used to issue the liability to customers at the register.
Using Integrated Gift Cards? Follow the steps in our Integrated Gift Cards article instead to set up gift cards for use at the register.
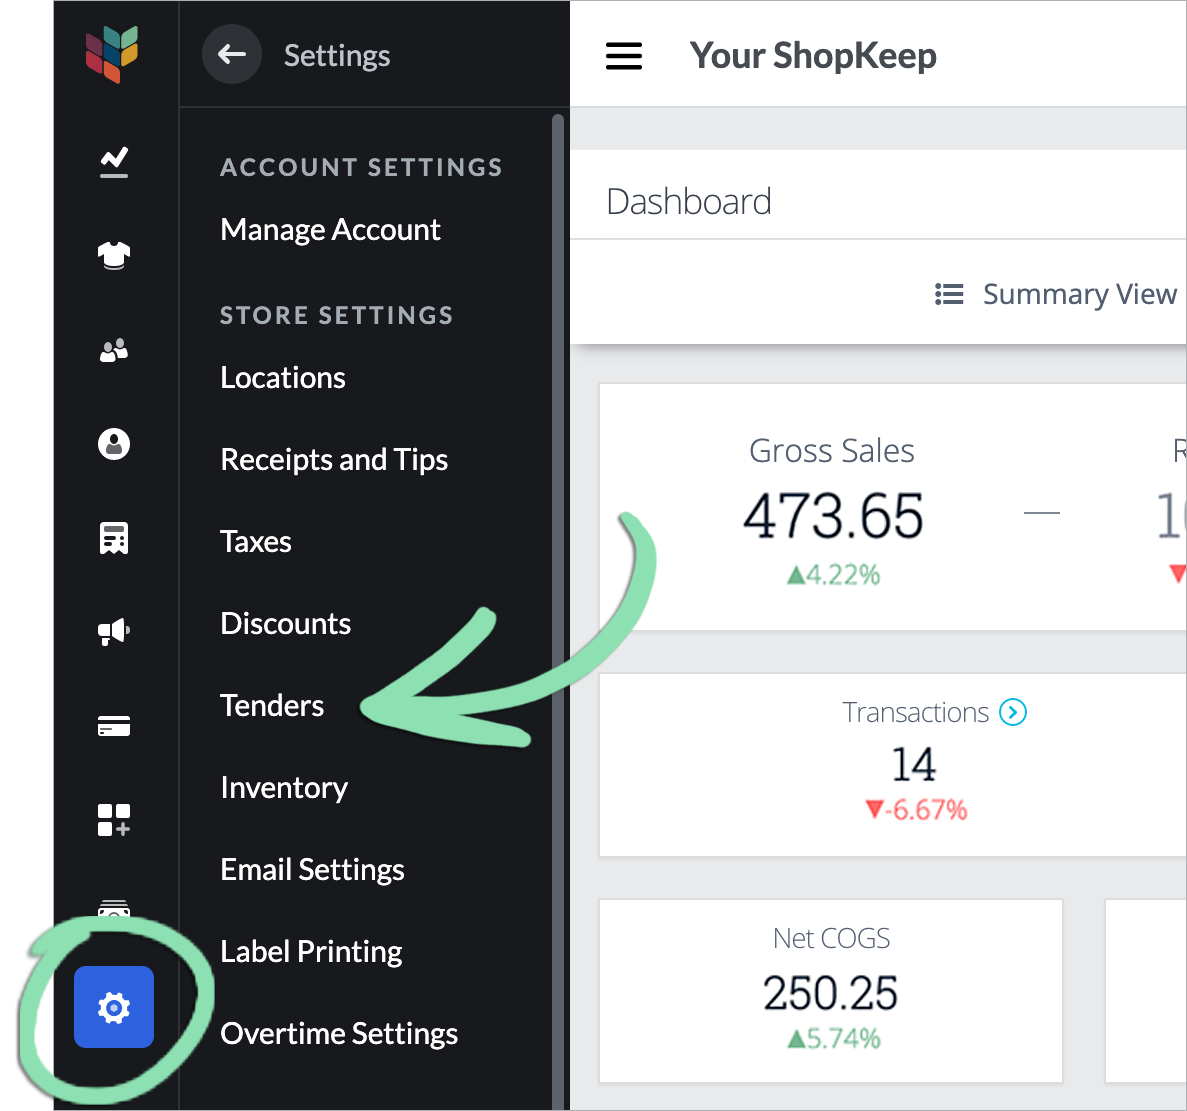
In BackOffice, click 'Settings' and select 'Tenders'.
Click to Enlarge
Under 'Redeemable', check the box to enable a liability tender.
Visit our Tender Settings article to learn about the ‘Standard’ and ‘Additional’ tenders listed on this page.
From the 'Liability Tender' drop-down, select a tender to associate with the item.
Available tenders will vary based on the option(s) enabled in step 2 above but can include ‘Gift Card’, ‘Gift Certificate’, and ‘Deposit’. Don’t see the drop-down? Visit our troubleshooting guide for help.
Issuing a liability gives a customer credit which can be applied to an in-store purchase or, in the case of some deposits, refunded. Sell a liability item at the register to issue a new gift card, gift certificate, or deposit liability.
Before issuing a deposit liability, review the Deposits section below to learn how to correctly use deposit liabilities in different scenarios, such as accepting security deposits or partial deposits.
In the Retail POS (S-Series) app, add a liability item to a sale.
Complete the sale as usual to finish issuing the liability.
Issuing new liabilities will increase the total outstanding liability amount for your store.
Balances for individual liabilities must be tracked manually outside of Lightspeed Retail, except when using our Integrated Gift Cards.
Redeem a Liability
Redeem a liability when a customer returns to use their gift card, gift certificate, or deposit. Liability redemptions work similarly to using other types of payment tenders to complete a sale.
Before redeeming a deposit liability, review the Deposits section below to learn how to correctly use deposit liabilities in different scenarios, such as returning security deposits or redeeming partial deposits.
In the Retail POS (S-Series) app, add items to a sale.
Tap '...', then select the liability tender being redeemed.
If the liability is less than the sale total, select ‘Split Tender’ instead to use an additional tender, such as cash or credit, to pay the difference. Visit our Split Tender article for help performing this type of sale.
Complete the sale as usual to finish redeeming the liability.
Redeeming liabilities will decrease the total outstanding liability amount for your store and increase sales.
Balances for individual liabilities must be tracked manually outside of Lightspeed Retail, except when using our Integrated Gift Cards.
Deposit Liabilities
This section covers common scenarios involving deposit liabilities to show how to accept refundable or non-refundable security deposits and partial deposits.
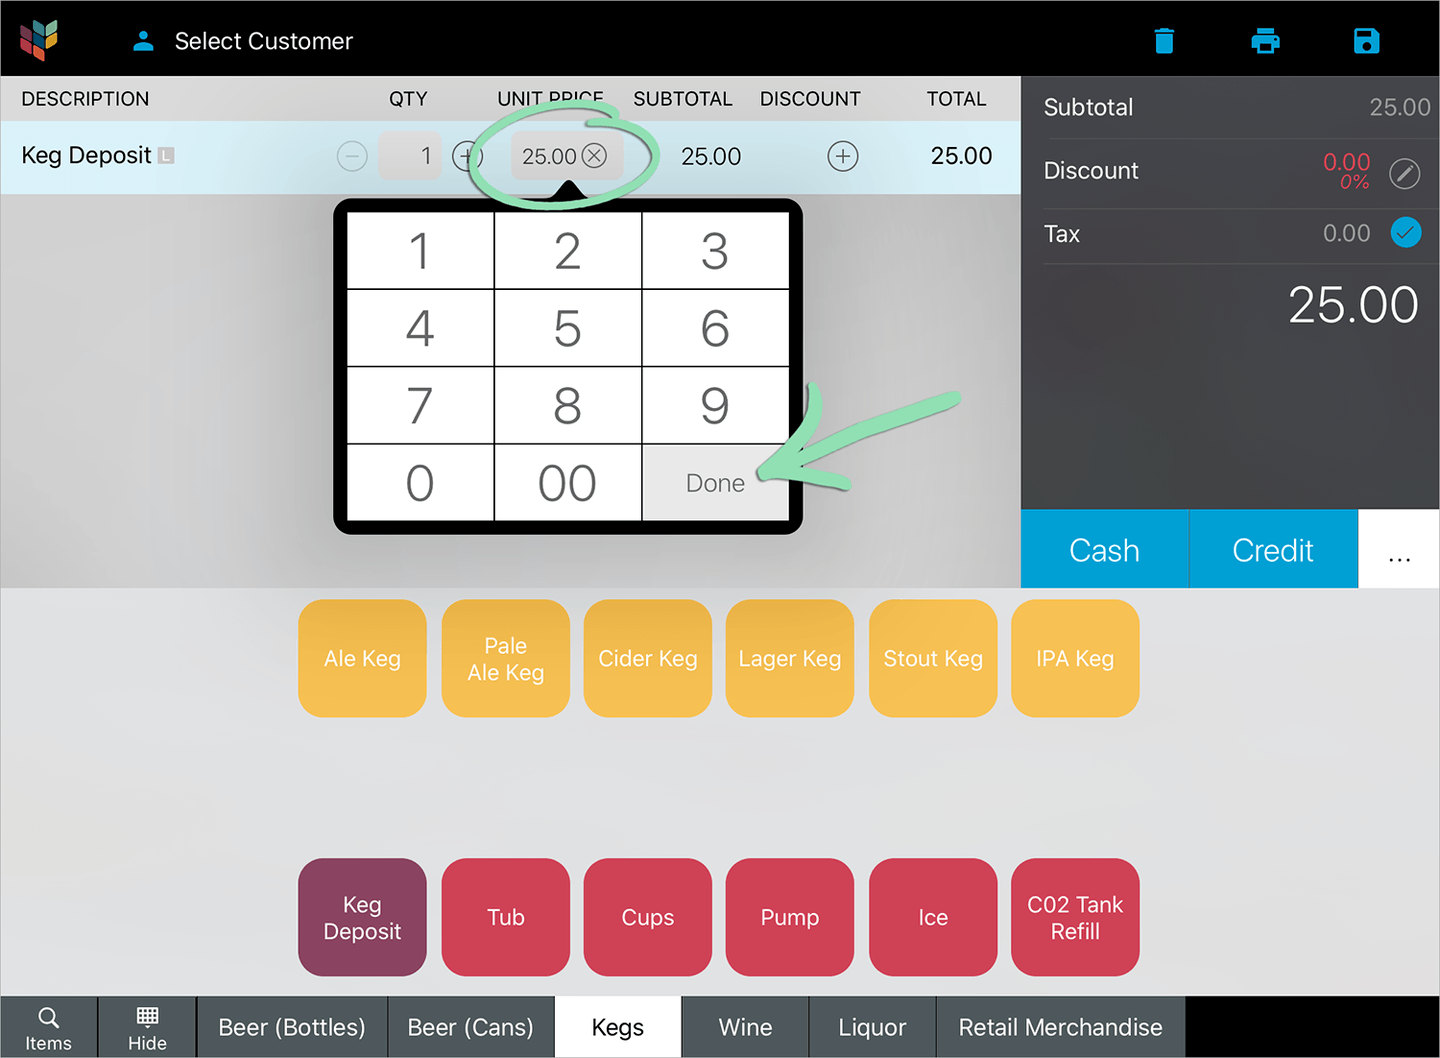
This example shows how to accept and refund security deposits at the register. In this scenario, kegs of beer are sold for $75 and require a $25 deposit that is refunded when the customer returns the keg.
Follow the steps above to enable the 'Deposit' tender and create a liability item called 'Keg Deposit'.
This item will be used to issue a new deposit liability at the register. Either set its price to $25, or change the ‘Price Type’ to ‘At the Register’ to be able to enter the price at the register.
Get updates on the iOS or Android register to sync changes to the register.
If you receive an error while getting updates, visit our troubleshooting guide for help.
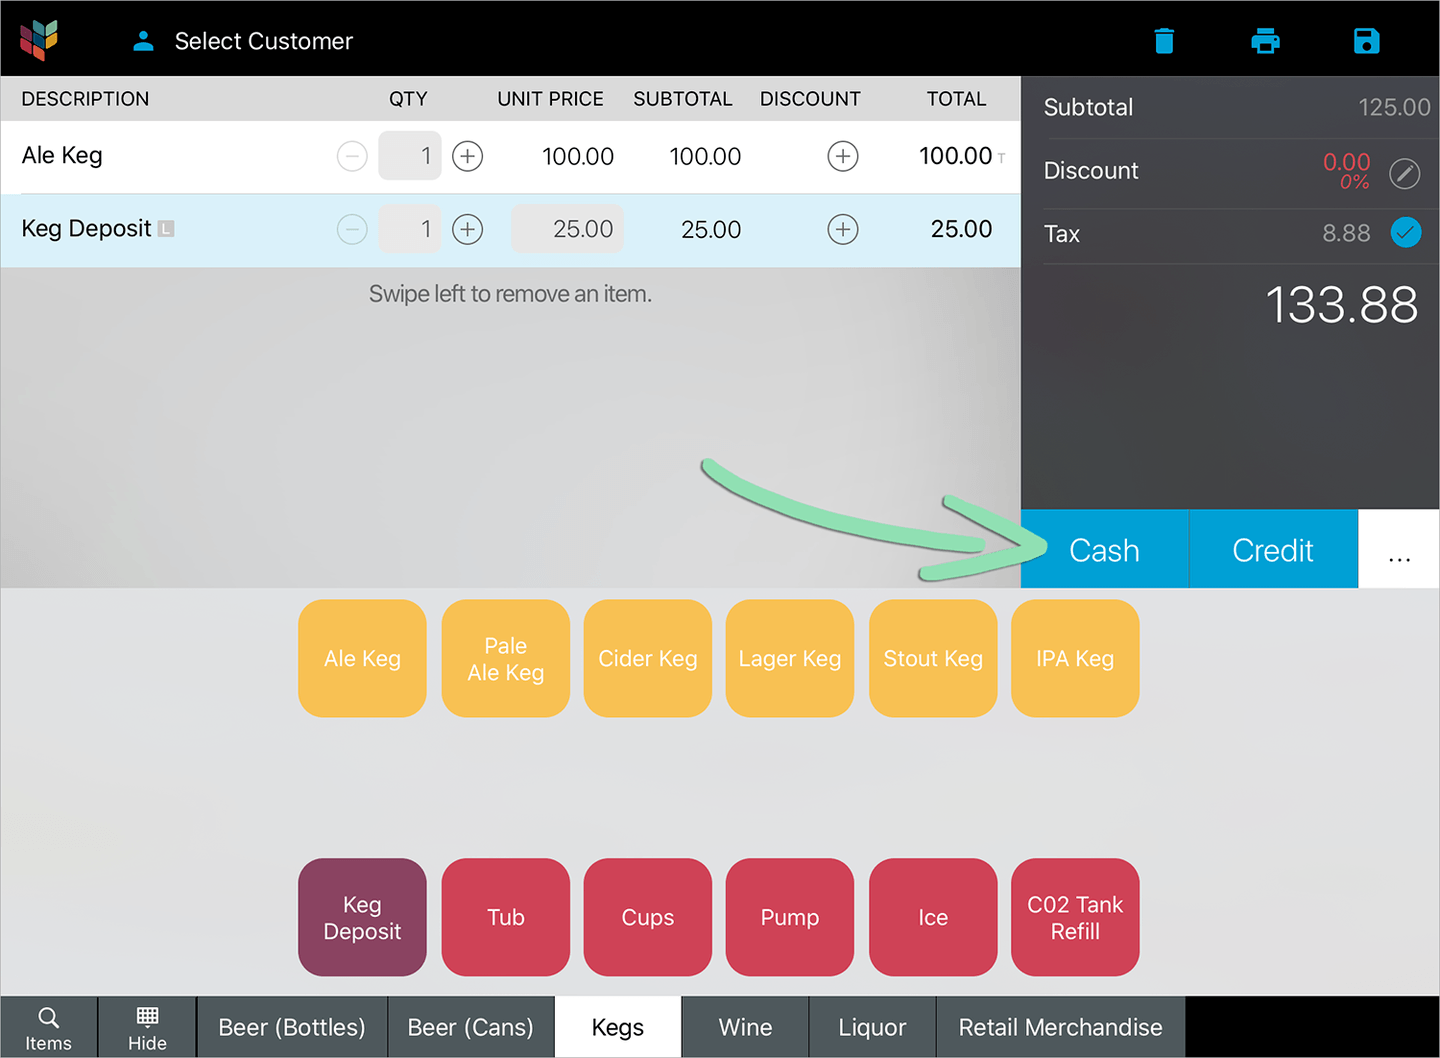
Ring up a sale for the keg and 'Keg Deposit' items.
Select a tender to accept payment for the sale.
Click to Enlarge
Complete the sale as usual.
Completing the sale will issue a new deposit liability (which increases outstanding liabilities by $25) and will increase sales revenue by the price of the keg.
When the customer returns the keg, perform a return for the keg deposit item.
Completing the return will reduce outstanding liabilities by $25 and refund the customer their deposit.
Scenario 2
Here we’ll look at what happens if a customer does not meet the conditions for return of their security deposit (e.g. they don’t return the keg within 30 days, or the keg is returned in poor condition).
This example builds off of scenario 1 above and converts the security deposit into sales revenue.
Complete a sale for the 'Keg' and 'Keg Deposit' items as shown in scenario 1 above.
Either set the item’s price to $25, or change the ‘Price Type’ to ‘At the Register’ to be able to enter the price at the register. This is not a liability item, so do not select a liability tender.
If the customer does not meet the requirements for return of their deposit, follow steps 3a - 3c below to convert their outstanding deposit liability into sales revenue.
aRing up a sale for the ‘Keg Deposit Not Refunded’ item.
bTap ‘…’, then select the ‘Deposit’ tender.
cComplete the sale as usual.
Completing the sale will redeem the customer’s existing deposit liability, which will decrease outstanding liabilities by $25 and increase sales revenue by the same amount. No money is collected at this point since you already received payment when the keg was purchased.
Partial Deposit
Scenario 1
This example covers how to accept a deposit at the register that will be applied to a future purchase. In this scenario, a customer orders a $5,000 wedding cake with a $1,000 refundable down payment required before making the cake. The deposit is redeemable at the time of final payment when the customer returns on the pick-up date.
Follow the steps above to enable the 'Deposit' tender and create a liability item called 'Cake Deposit'.
This item will be used to issue a new deposit liability at the register. Set its ‘Price Type’ to ‘At the Register’ to be able to enter the price at the register.
Get updates on the iOS or Android register to sync changes to the register.
If you receive an error while getting updates, visit our troubleshooting guide for help.
At the register, ring up a sale for the 'Cake Deposit' item in the amount of $1,000.
Select a tender to accept payment for the sale.
Complete the sale as usual.
Completing the sale will issue a new deposit liability, which increases outstanding liabilities by $1,000.
When the customer picks up the cake, follow steps 6a - 6d below to apply the deposit paid in step 3 to their purchase and collect the remaining balance.
aRing up a sale for the $5,000 ‘Wedding Cake’ item.
bTap ‘…’, then select ‘Split Tender’.
This enables you to apply the $1,000 deposit to the $5,000 cake total and add an additional tender, such as cash or credit, to collect the $4,000 remaining balance.
cTender $1,000 to ‘Deposit’ and the remaining $4,000 to the customer’s preferred payment method.
For help performing a Split Tender sale, visit our Split Tenders article.
dComplete the sale as usual.
Completing the sale will redeem the customer’s existing deposit liability (which decreases outstanding liabilities by $1,000) and will increase sales revenue by the $5,000 purchase price of the cake.
Scenario 2
Here we’ll look at what happens if a customer cancels their cake order on short notice. According to your business policy, cakes canceled 2 – 4 weeks before pickup receive a 50% refund of the deposit paid.
This example builds off of scenario 1 above and allows half of the deposit to be refunded to the customer and the other half to be converted into sales revenue.
Complete a sale for the 'Cake Deposit' item as shown in scenario 1 above.
Set the item’s ‘Price Type’ to ‘At the Register’ to be able to enter its price at the register. This is not a liability item, so do not select a liability tender.
When the customer cancels their order, follow steps 3a - 3c below to convert the non-refundable portion of their deposit into sales revenue.
aRing up a sale for the ‘Cake Deposit Non-Refundable’ item in the amount of $500 (the amount being converted to sales revenue).
bTap ‘…’, then select the ‘Deposit’ tender.
cComplete the sale as usual.
Completing the sale will redeem part of the customer’s existing deposit liability, which will decrease outstanding liabilities by $500 and increase sales revenue by the same amount. No money is collected at this point since you already received payment when the deposit was issued.
Follow steps 4a - 4d below to refund the remaining 50% of the deposit back to the customer.
(Optional) Click 'Export' to download a copy of the report.
Click to Enlarge
Read the Report
Learn to read the Gift Cards & Deposits report to understand the amount of new liabilities issued, the amount of liabilities redeemed, and the net liability amount still waiting to be redeemed.
Dashboard Tiles
The tiles at the top give a broad overview of liability activity.
New Liabilities | Total amount of liabilities issued over the selected date range, less any returned liabilities. Redeemed Liabilities | Total amount of liabilities redeemed over the selected date range. Net Liabilities | ‘New Liabilities’ minus ‘Redeemed Liabilities’.
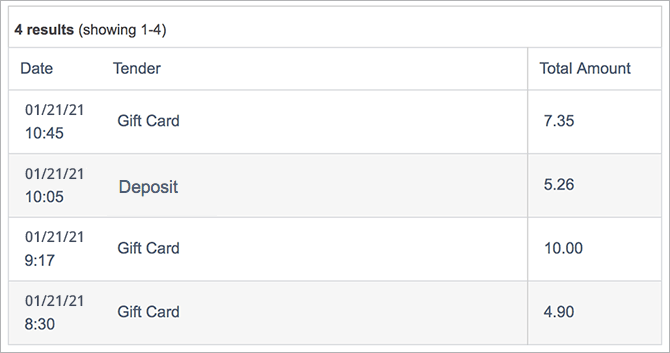
Redeemed View
The default reporting view shows details on redeemed liabilities.
Date | Date and time a liability was redeemed. Tender | Type of liability that was redeemed (gift card, gift certificate, or deposit). Total Amount | Amount of the liability that was redeemed.
Issued View
Switching to ‘Issued’ highlights how customers are purchasing liability items.
Date | Date and time a liability was issued. Item | Name of the item that was sold to issue the liability. Quantity | How much of the liability item was sold. Linked Tender | Type of liability that was issued (gift card, gift certificate, deposit). Total Amount | Amount of the liability that was issued (positive) or returned (negative).
Help us improve Lightspeed Support. Was this article helpful?