Learn what you need to know about the iPad itself, such as the location of the Home button, and how to download and update the Retail POS (S-Series) app on the iPad.
Check out our best practices guide to learn which iPad models are compatible with Lightspeed Retail.
Table of Contents
iPad Basics
From the iPad hardware and buttons to settings and apps, continue through the sections below to learn all the basics.
iPad Hardware
Get to know the buttons, ports, and plugs on the iPad.
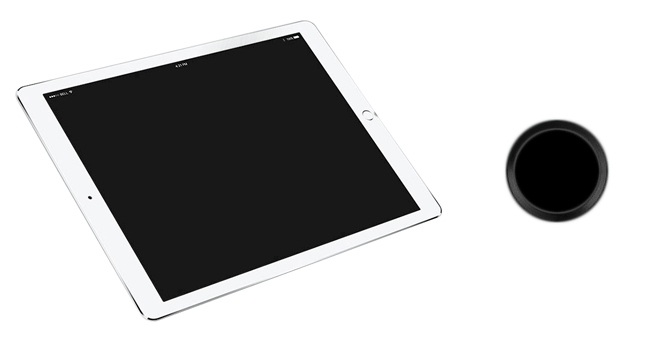
Home Button
The only physical button on the face of the iPad used to return the iPad to its main screen with the apps. Some iPads do not have a home button and instead use a swipe-up gesture to return to the home screen. For more information on each iPad model, visit Apple’s iPad page.
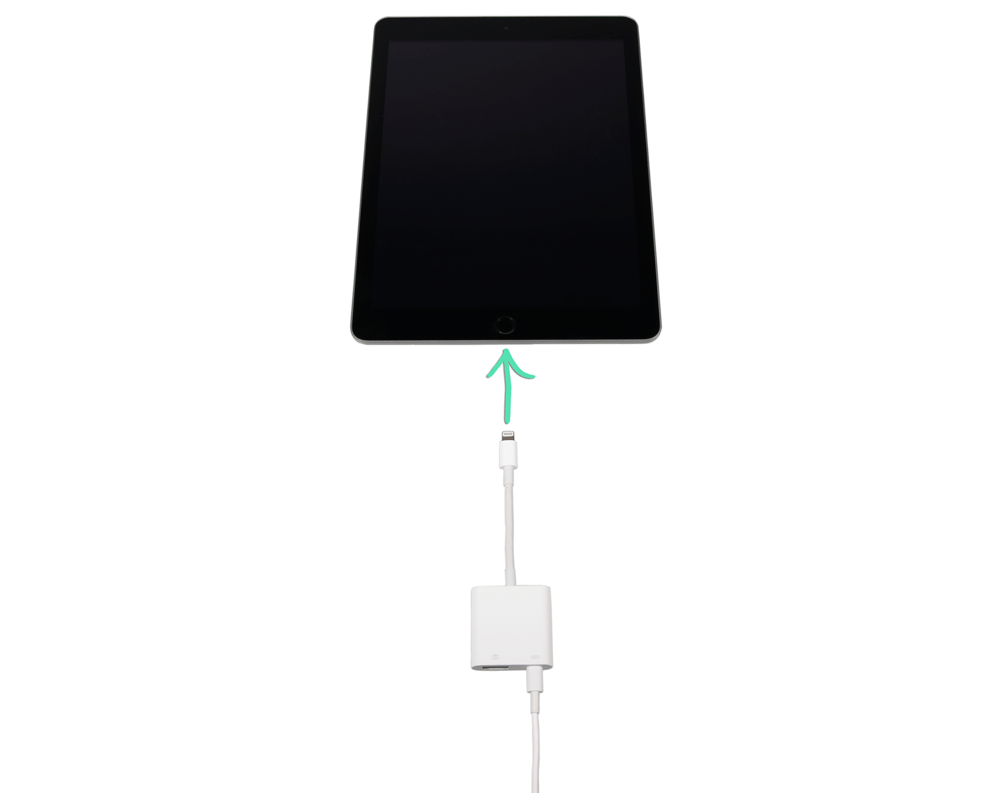
Lightning Connector
Apple’s standard cable and port for mobile devices. This connector appears on iPads, iPad Minis, some iPad Pros, and iPhones. Some iPads do not have a Lightning connector and instead use a USB-C connector. For more information on each iPad model, visit Apple’s iPad page.
Headphone Jack
Located on the side opposite the Lightning port is a standard 3.5mm headphone jack that works with headphones and speakers. Some iPads do not have a headphone jack. For more information on each iPad model, visit Apple’s iPad page.
Sleep / Wake (Power) Button
Flat button on the frame of the iPad. Press it to turn the screen off or on or hold it down to power off the iPad.
Connect the iPad to your network wirelessly via Wi-Fi or physically with an ethernet adapter and cable to download Lightspeed, sync transactions to BackOffice, and run credit cards.
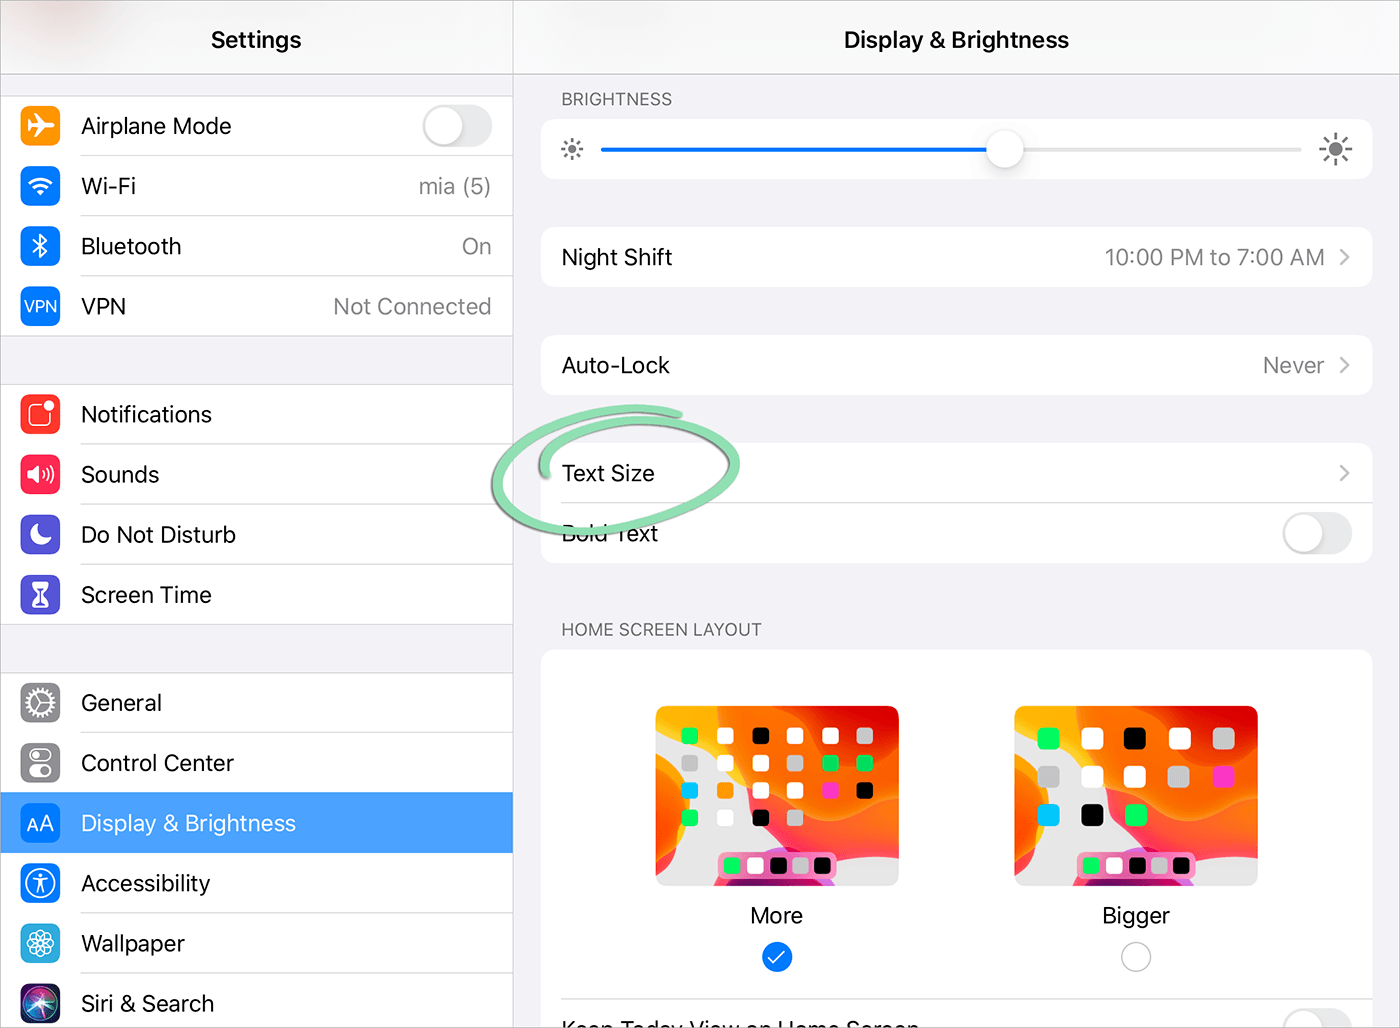
From the Settings app, increase or decrease the size of text on your iPad to make it easier to read in apps that support Dynamic Type. In the Retail POS (S-Series) app, this affects the font size used on item shortcuts.
Use the slider to adjust text to the desired size.
Click to Enlarge
iPad Apps
Apps are software that run on the iPad and allow it to perform various functions.
Apple’s App Store
The App Store is where apps can be downloaded and updated. Using the App Store requires an Apple ID.
Retail POS (S-Series) App
The Retail POS (S-Series) app is your register. Ring up customers, process returns, clock in and out, and lots more. Learn what’s new in the latest version by reading our Retail POS (S-Series) App for iOS Release Notes.
Lightspeed Pocket (S) App
Use Lightspeed Pocket (S) to check up on how the business is doing in real time from an iOS or Android device. See sales totals, review individual transactions, and more!
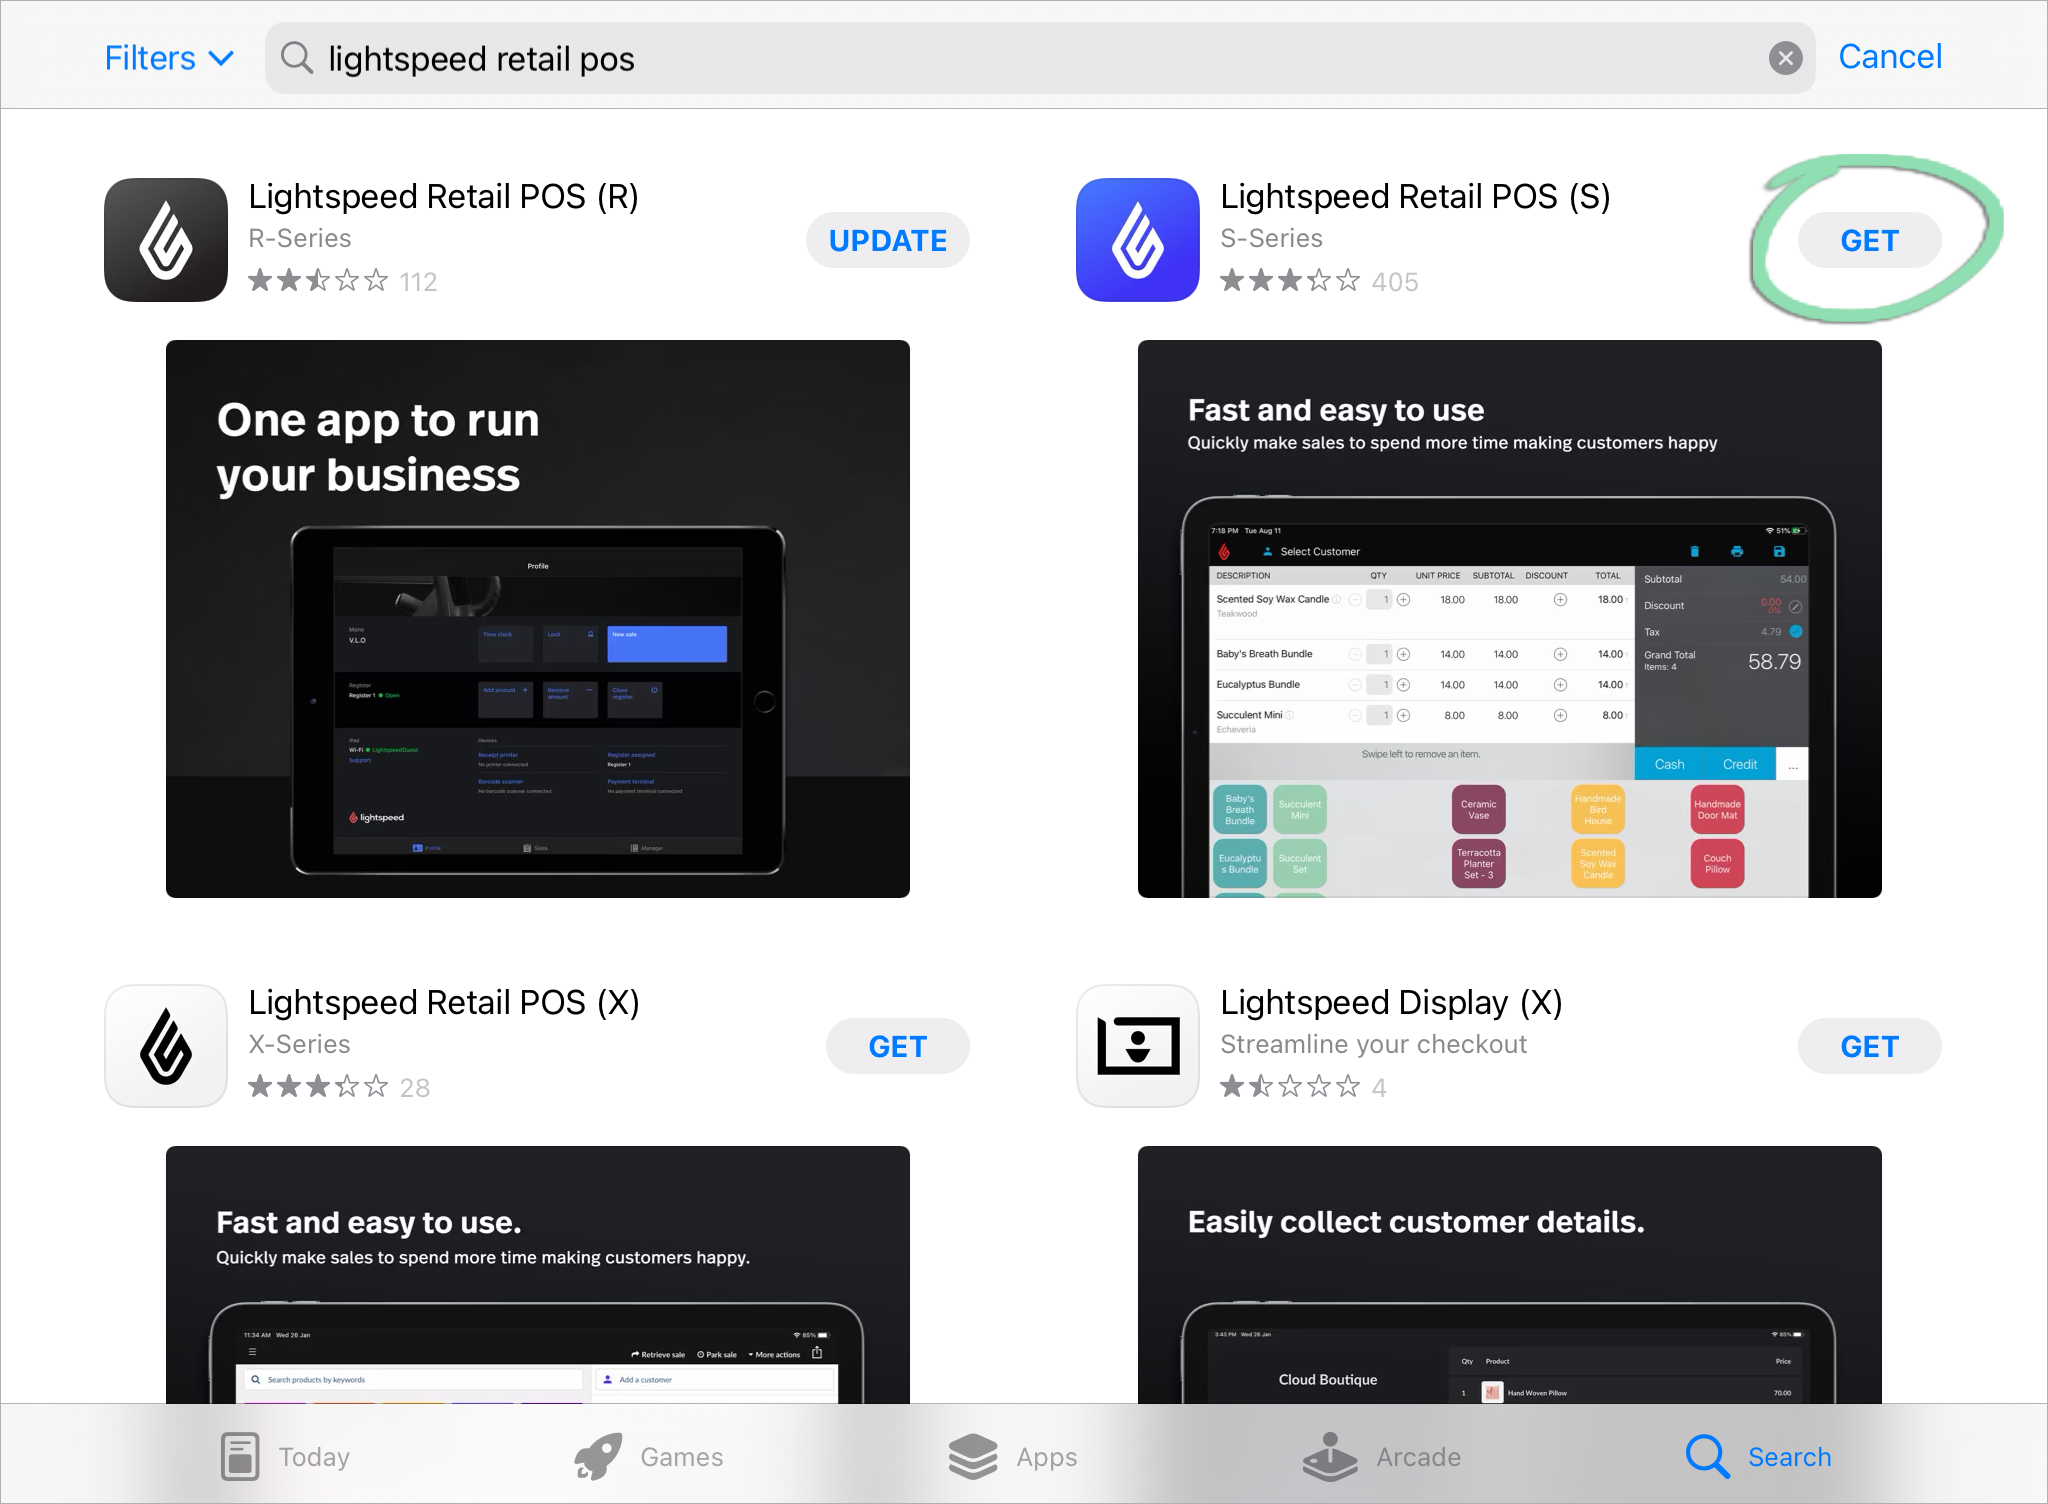
Download the Retail POS (S-Series) App
Browse the App Store to download apps, such as the Retail POS (S-Series) app or Lightspeed Pocket (S), to the iPad.
Downloading apps requires an Apple ID. Don’t have an Apple ID? Visit Apple Support to learn how to set one up.
If prompted, use Face ID, Touch ID, or your Apple ID password to authorize the download.
For help using Touch ID or Face ID, visit Apple Support.
Depending on your internet speed, the app downloads in a few moments.
When the download finishes, open the app.
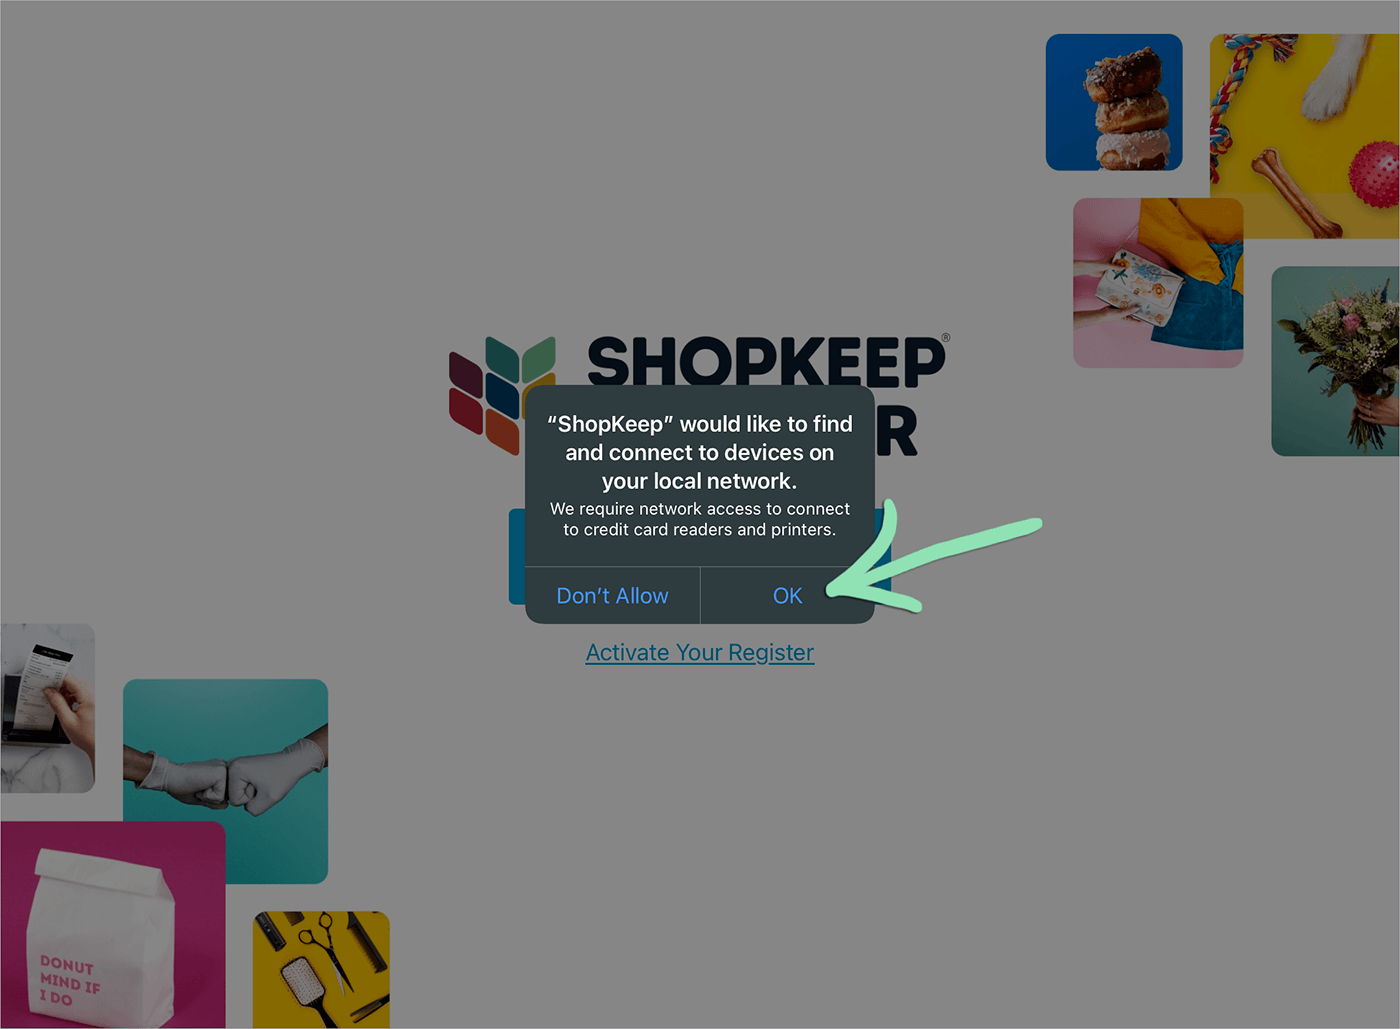
In the Retail POS (S-Series) app, tap ‘OK’ on each prompt to allow access to local network devices and Bluetooth for Lightspeed Retail.
Local network and/or Bluetooth access is required for most printers, credit card readers, and barcode scanners to connect to the Retail POS (S-Series) app. Access can be disabled or re-enabled at any time from the Settings app.
For answers to questions about setting up a register, visit our Setup FAQ.
Update the Retail POS (S-Series) App
Retail POS (S-Series) software updates deliver new features, bug fixes, and more reliable performance to the Register app. For the best experience, update the Retail POS (S-Series) app whenever a new version is released.
For help updating iOS, the iPad’s operating system, visit the Updating iOS article instead.
Before updating the Retail POS (S-Series) app…
1. DO NOT delete the app.
2. Make sure auto-updates are turned OFF on the iPad.
3. CLOSE any open register shifts.
4. Perform updates during NON-BUSINESS hours.
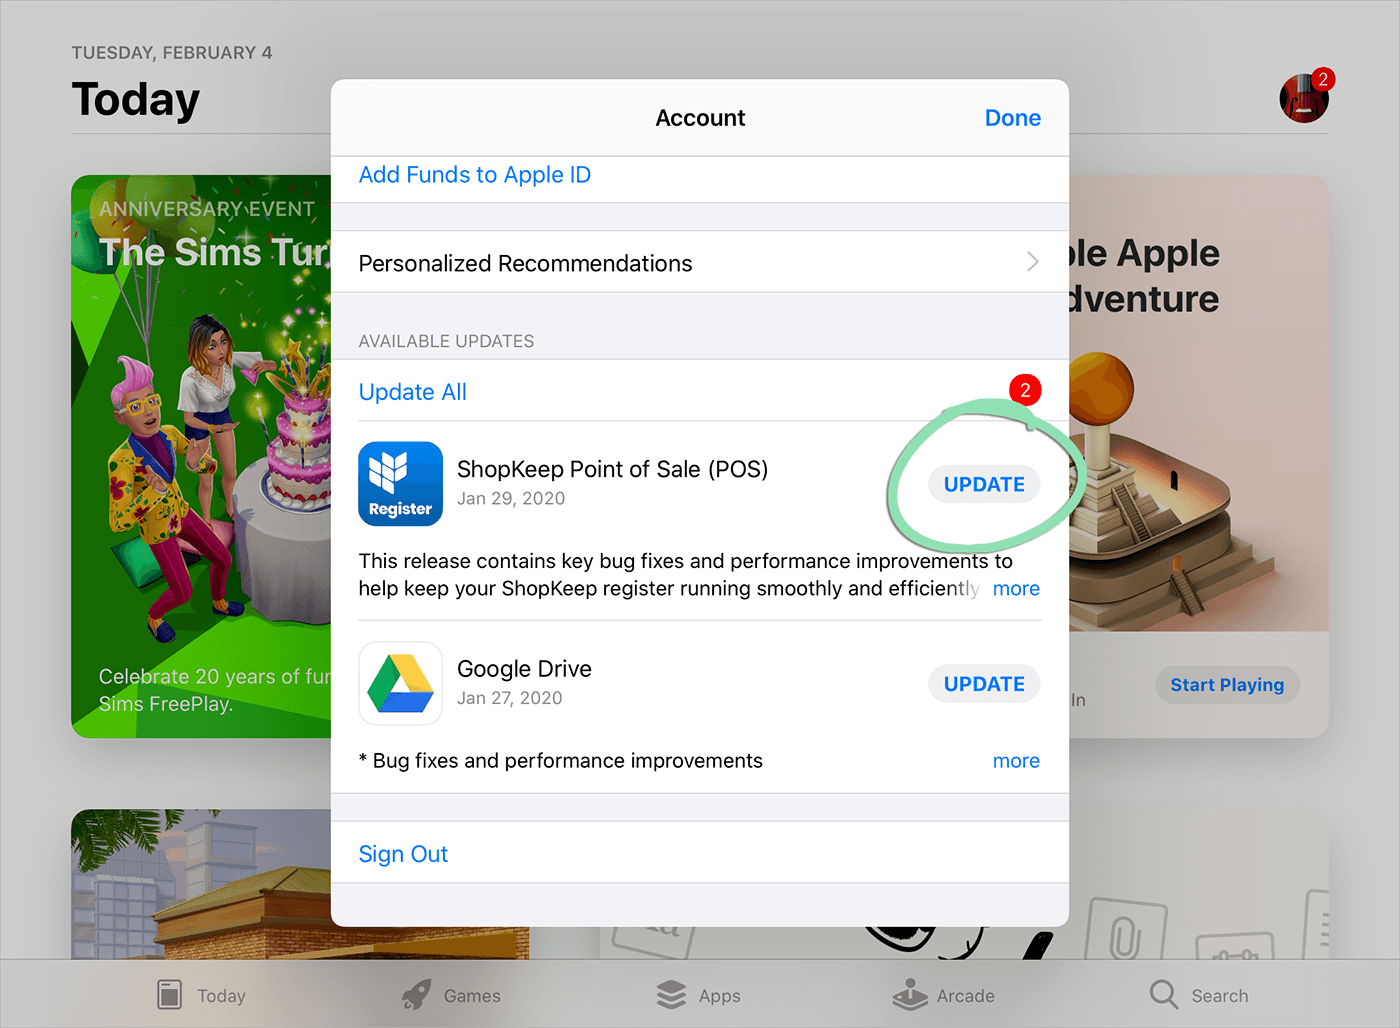
Under ‘Available Updates’, tap 'Update' next to the Lightspeed Retail POS (S) app.
Click to Enlarge
After the update has downloaded, open Retail POS (S-Series).
Wait for the register to update its database.
Update times vary based on internet speed, number of inventory items, and number of customers. The larger the register database, the longer updating will take. In some cases, updating the Retail POS (S-Series) app can take 10 minutes or more to finish after downloading. Once the update is complete, the sign in screen will appear.