With BackOffice setup complete, it’s time to get familiar with the register. Learn how to sign in and out, ring up sales, and use some of the additional features we recommend for grocery stores.
Table of Contents
Sign In & Out
Each employee signs in with a unique register code to run transactions on the register. Management can then track sales by employee by running an X/Z report or the Sales by Employee report.
Sign In & Out
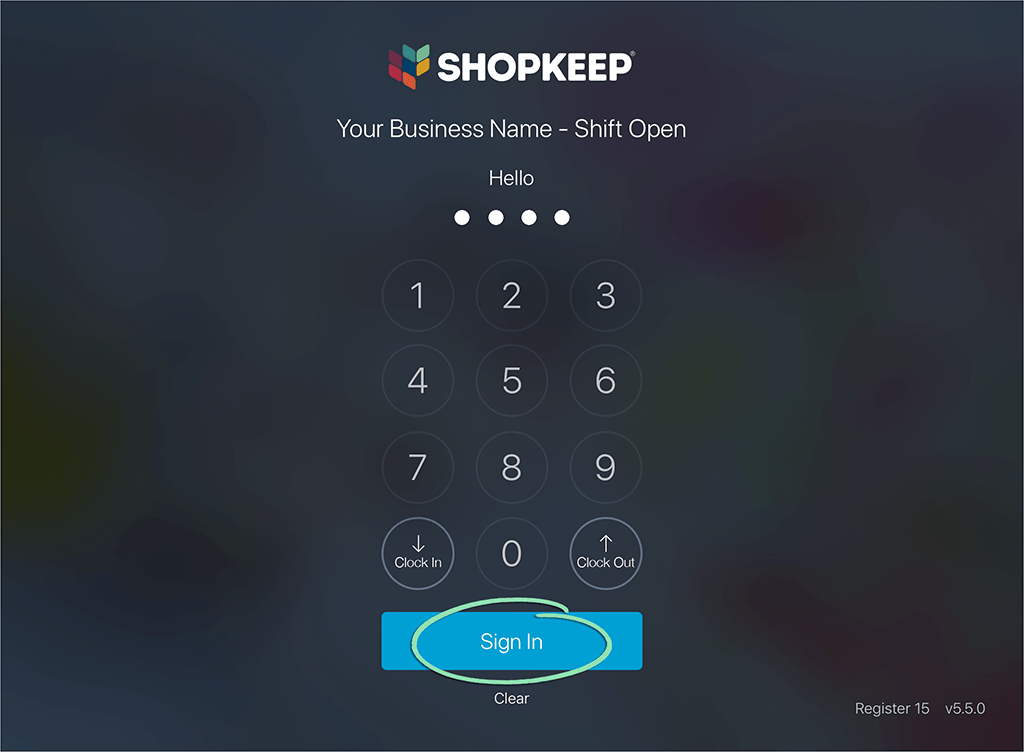
Employees must sign in to use the register. After entering their register code, employees remain signed in until they manually sign out. Signing out allows another employee to sign in with their code.
On the sign in screen, enter your 4-digit register code and tap 'Sign In'.
Enable timed auto signout to force employees to sign back in after a period of inactivity. This guards against cashiers processing sales under someone else’s code.
For the Retail POS (S-Series) app for Android, learn how to enable auto signout here.
From adding items to accepting payment, learn the basics of running a sale on your new register. Before following along, make sure to open a register shift to get things started.
If you have questions about using the register, visit our Register FAQ.
Add & Remove Items
To start a sale, add the customer’s purchase items to the New Sale screen. Don’t worry if you make a mistake, you can remove items before completing the sale.
Tap a shortcut, search by item name, SKU, or UPC, or scan an item to add it to the sale.
Click to Enlarge
(Optional) Swipe left across an item and tap 'Delete' to remove the item from the sale.
Or tap the trash can icon at the top to remove all items.
For Cash, enter how much the customer gives you and tap 'Calculate Change' to confirm.
Tender buttons below ‘Calculate Change’ update dynamically based on the total transaction amount if it is over $20. For example, a total of 28.23 will have the buttons 29.00, 30.00, and 40.00.
Last but not least, here are a few more register features designed to make running your grocery store easier.
Time Clock
Employees clock in at the start of their shift and clock out at the end to record clock punches so the Business Owner and employees with the relevant BackOffice permissions can accurately track their hours worked in the BackOffice Time Clock report.
Clocking in and out requires an active internet connection. Without internet, clock punches will not be recorded or synced to BackOffice.
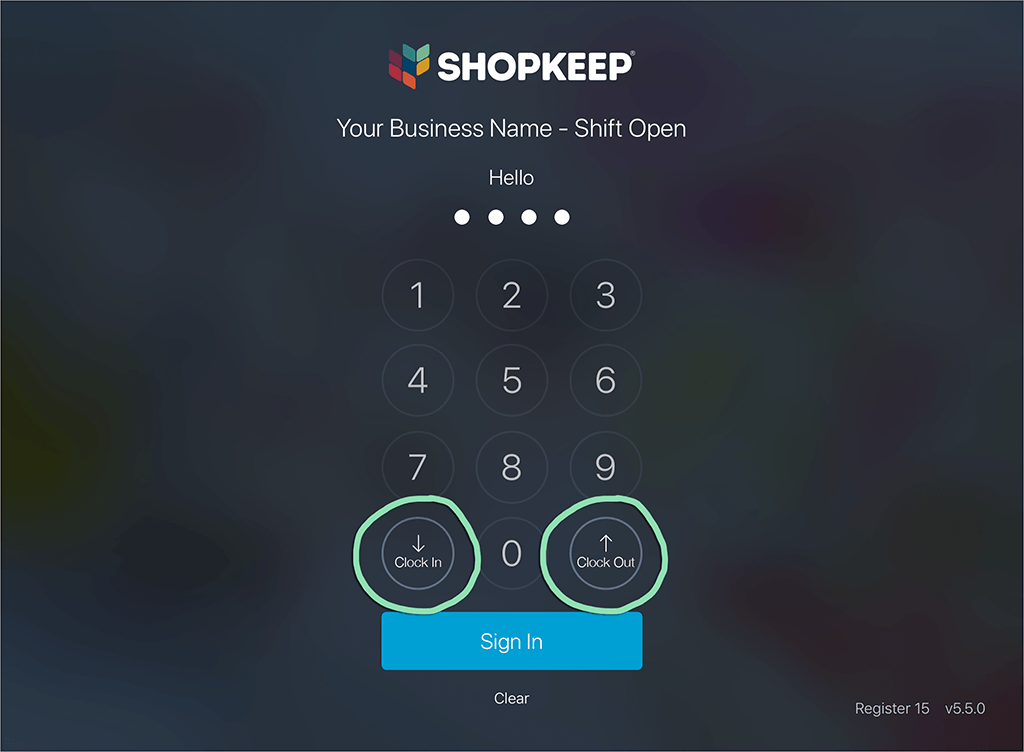
On the sign in screen, enter your 4 digit register code.
Tap 'Clock In' or 'Clock Out' to record a clock punch.
Click to Enlarge
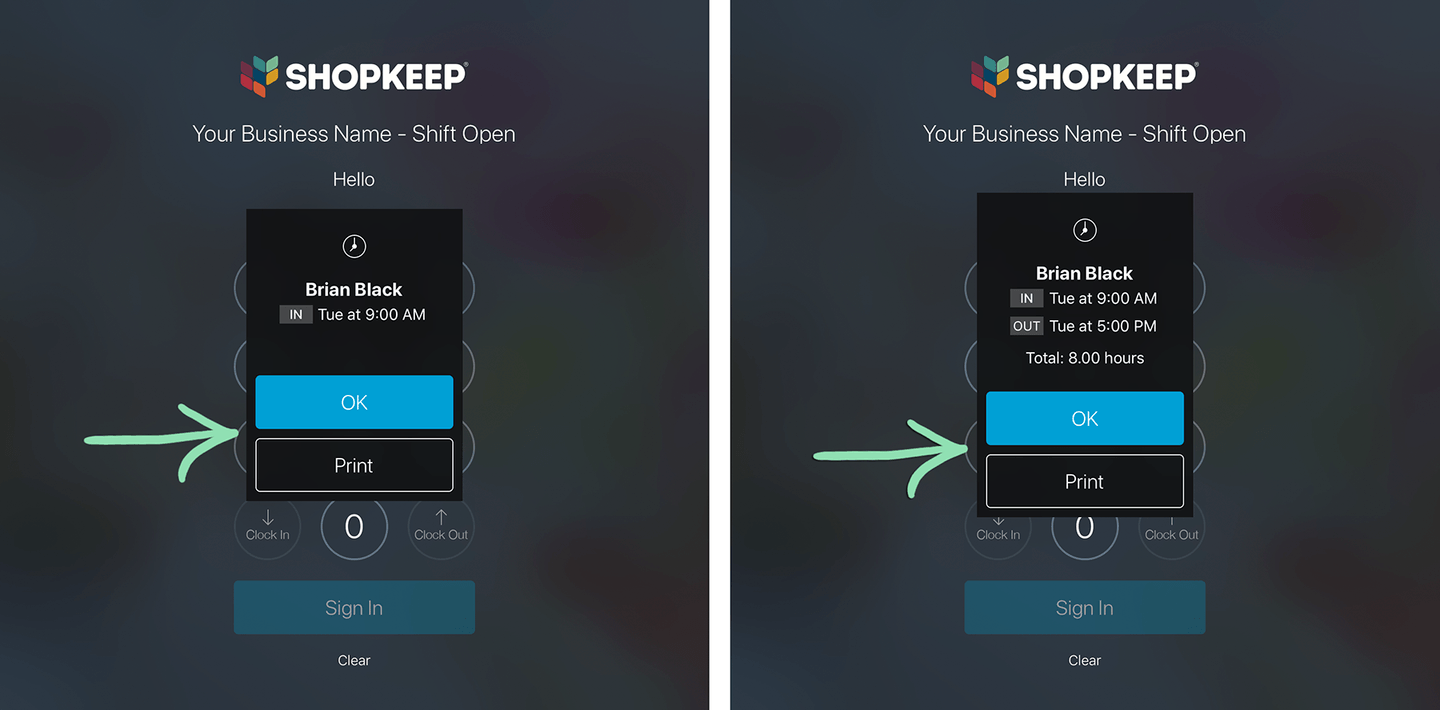
Tap ‘OK’ to dismiss the clock punch notification or ‘Print’ to print a chit to a connected receipt printer confirming the punch.
Employees must be clocked in to be able to clock out and vice versa.
Don’t have a receipt printer? Take a screenshot or photo of the screen.
If a different clock punch notification appears, stay tuned as we slowly roll out this new experience for everyone.
Visit our Using the Time Clock article to learn how to view employee clock punches in BackOffice. Having issues clocking in or out? Check out our troubleshooting guide for help.
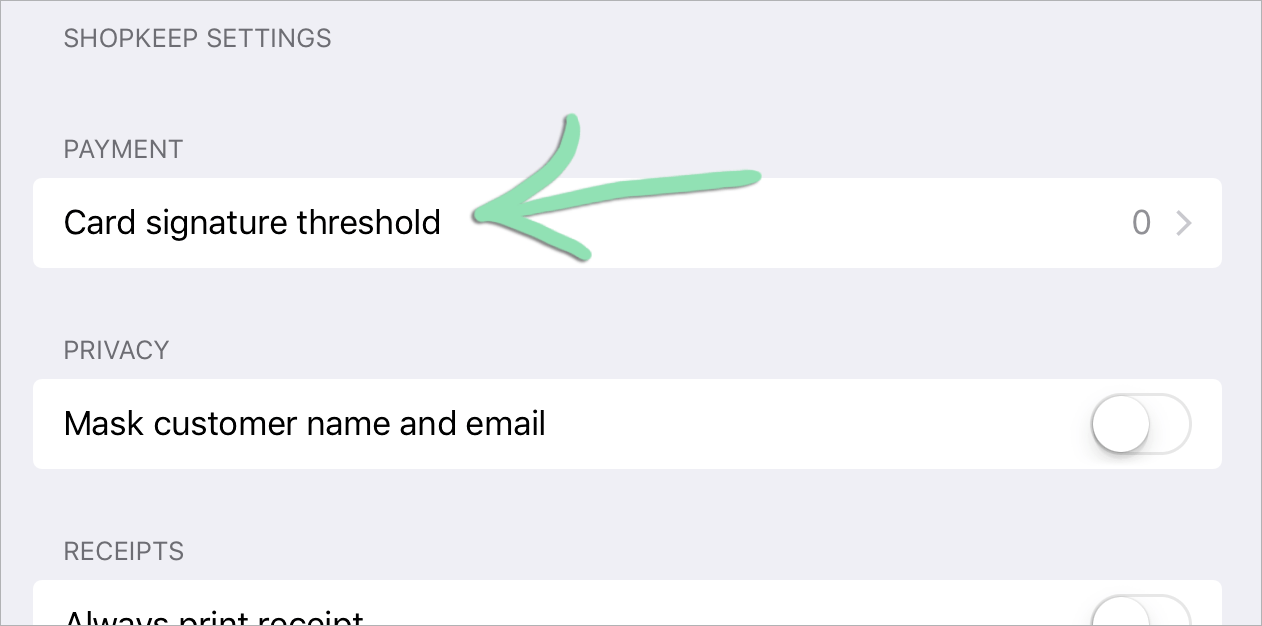
Set a signature threshold to speed up credit card transactions at the register. Any sale under the selected threshold will not require the customer to sign.