Specialty food shops include candy stores, cheese shops, and other retailers that focus primarily on one type of food product. Add your inventory, customize receipts, set up discounts, and learn about other features important for this type of business.
Table of Contents
Add Inventory Items
Inventory items are the various goods your business sells. Set up each of your items in BackOffice or from the Retail POS (S-Series) app (employees with the relevant BackOffice permissions only), and create item shortcuts so cashiers can quickly find the relevant items.
If you have questions about adding or managing items, visit our Inventory FAQ.
Unit Priced Items
Specialty food items, such as cheese and fudge, are usually sold by the pound, ounce, or some other type of measure. These types of goods are known as unit priced items.
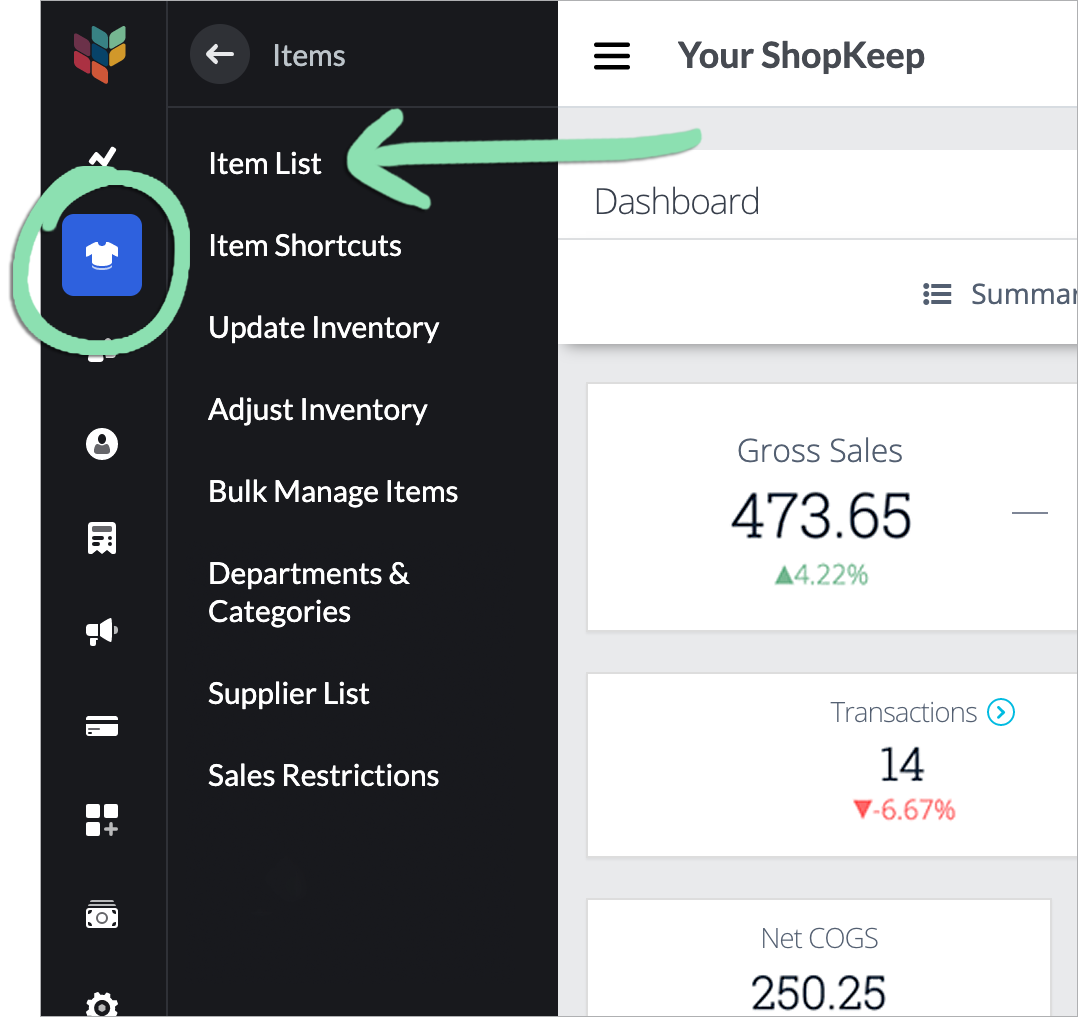
Visit the Item List in BackOffice or from the Retail POS (S-Series) app (employees with BackOffice permissions only).
In BackOffice, click ‘Items’ and select ‘Item List’.
In the Retail POS (S-Series) app for iOS, tap ‘Manage Items’ on the Main Menu. For the Retail POS (S-Series) app for Android, tap ‘Setup’ on the register menu, then select ‘Manage Items’.
Price Type | Determines how the item gets rung up at the register.
Fixed: Item has a predetermined price.
At the Register: Cashier enters the sales price at the register.
Unit Price: Cashier weighs the item and manually enters its weight (oz, lb, etc.) or places the item on an integrated scale to automatically enter its weight (Android only).
Unit | Required for Unit Price. How the item is measured. Limited to 2 characters (lb, oz, etc.).
Sales Price Per Unit | What customers pay for each unit of the item.
Track Quantity on Hand | Determines whether the item’s quantity is tracked.
Leave toggled off for made-to-order items or those without a quantity. Toggle on for countable items, such as retail goods or bottled drinks.
Quantity | Number of units of the item in stock.
Click the default save option or click the arrow to select another save option to finish creating the item.
Save and create new | Save the current item and create a new basic item. Save and keep editing | Save the current item and remain on the details page to make adjustments. Save and close | Save the current item and return to the Item List.
The last used selection will be remembered as the default save option.
For help with item properties not covered above, visit our Add Basic Items article.
Item Shortcuts
Cashiers tap item shortcuts on the register to ring up the items a customer wants. An organized item shortcuts panel means cashiers can more easily locate the items they need.
Visit the item shortcuts setup page in BackOffice or from Retail POS (S-Series) app (employees with BackOffice permissions only).
In BackOffice, click ‘Items’ and select ‘Item Shortcuts’.
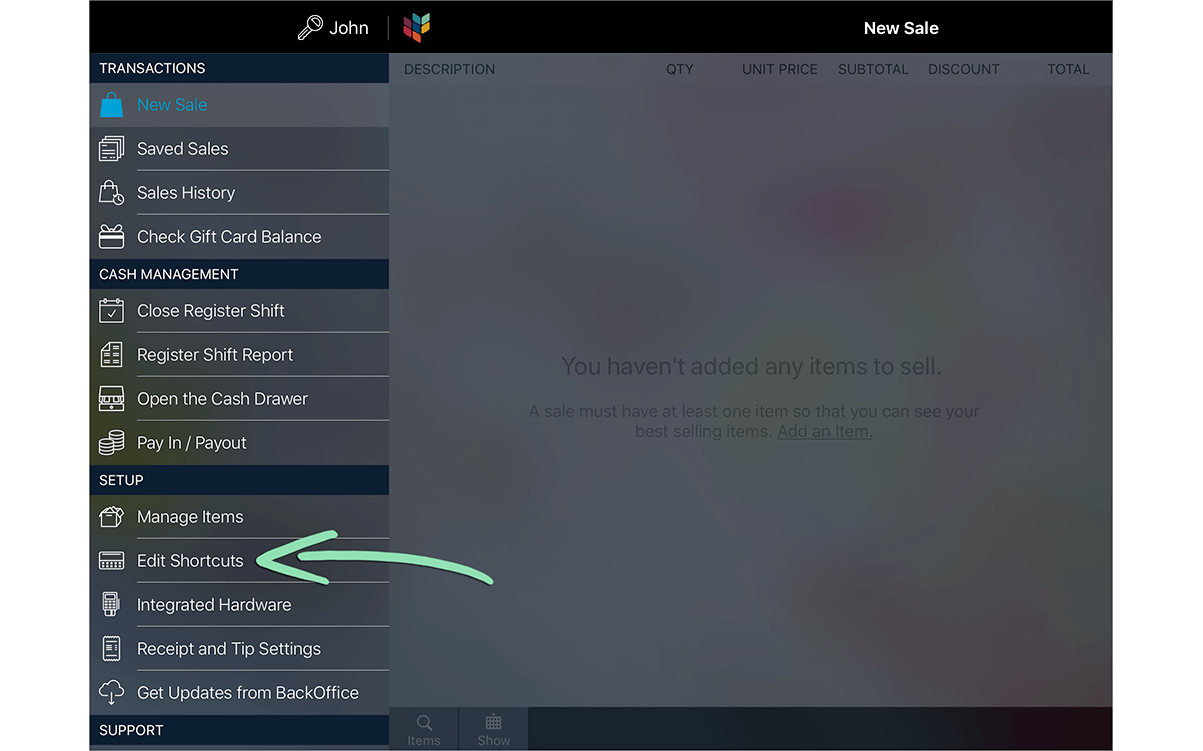
In the Retail POS (S-Series) app for iOS, tap ‘Edit Shortcuts’ on the Main Menu. For the Retail POS (S-Series) app for Android, tap ‘Setup’ on the register menu, then select ‘Edit Shortcuts’.
Paper receipts print quickly, but email receipts allow you to collect customer info for marketing purposes. Follow along below to customize both paper and email receipts in BackOffice or from the Retail POS (S-Series) app (Business Owners only).
Sign into BackOffice as an employee with the relevant permissions or the Retail POS (S-Series) app as the Business Owner and open receipt settings.
In BackOffice, click ‘Settings’ and select ‘Receipts and Tips’.
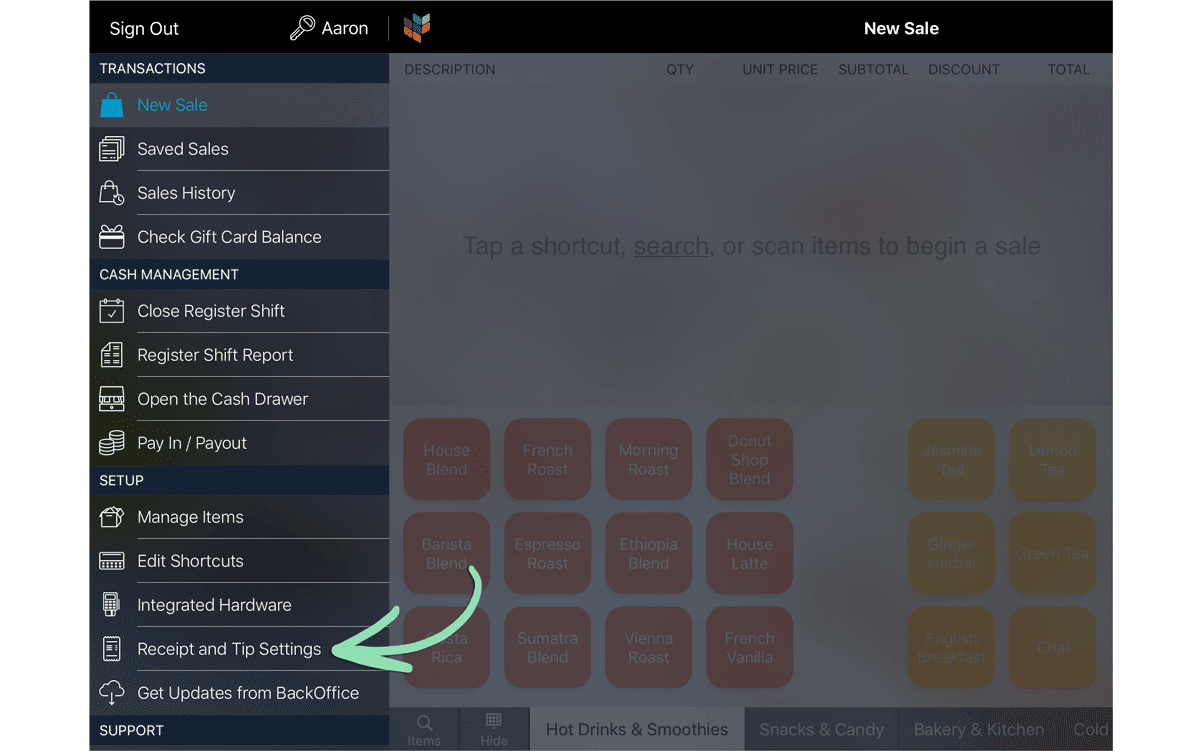
In the Retail POS (S-Series) app for iOS, select ‘Receipt and Tip Settings’ from the Main Menu. For the Retail POS (S-Series) app for Android, tap ‘Setup’ on the register menu, then select ‘Receipt and Tip Settings’.
Fill in as much 'Business Info' as desired for receipts.
Click to Enlarge
(Optional) Click ‘Choose Image’ to upload a business logo for the top of email receipts.
Click to Enlarge
Click 'Save' to save changes.
Click the 'Email Receipt' tab.
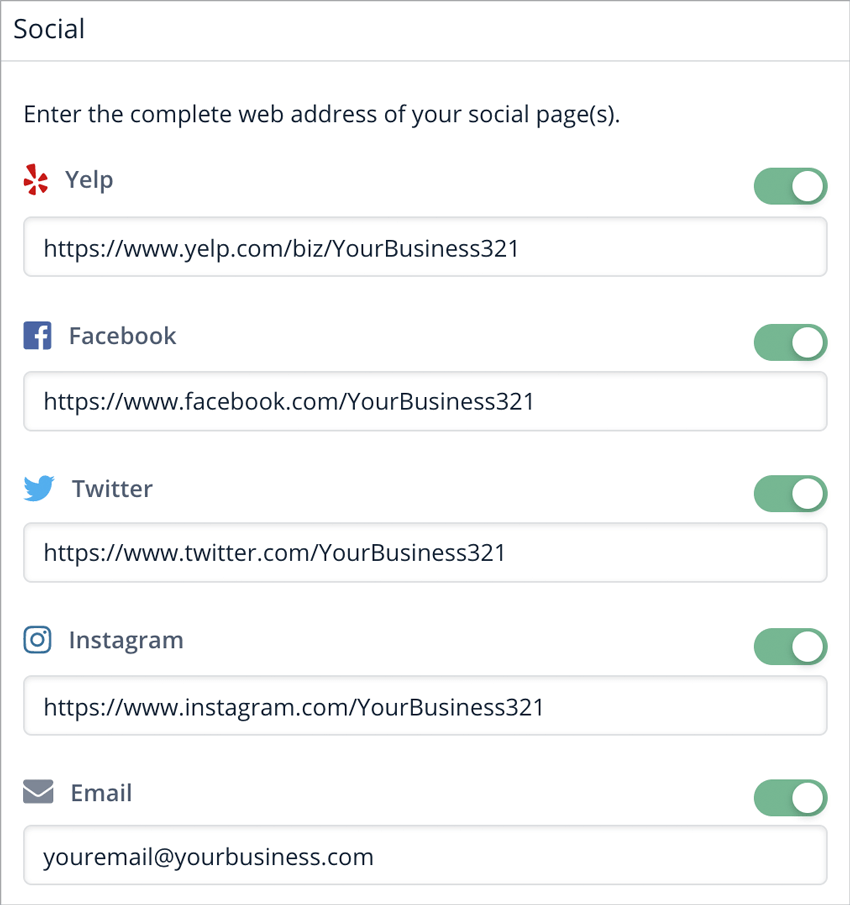
Fill in the information to appear on the email receipt.
Click to Enlarge
Logo Link | Enter a URL to make the logo a clickable link. Heading | A heading that appears under the logo. Message | A message that appears under the Receipt Heading.
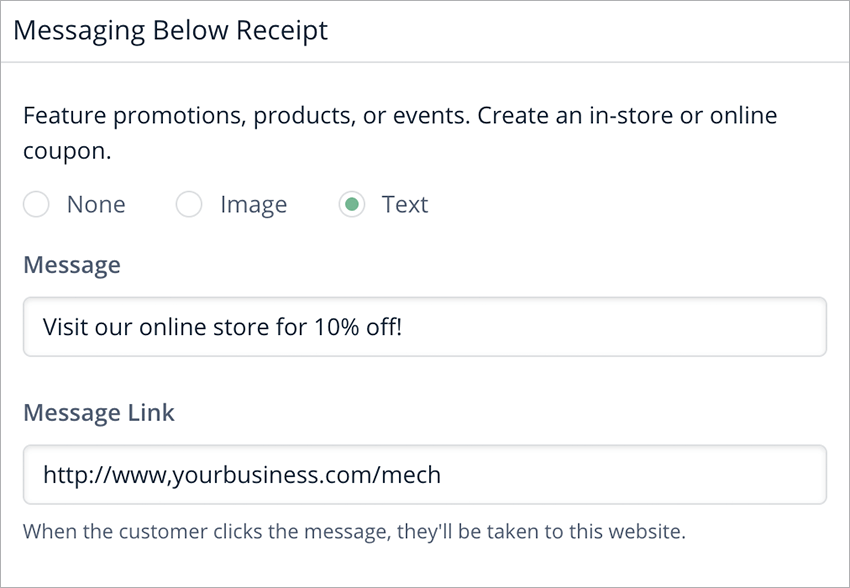
None / Image / Text | Upload an image or enter text to appear above your social media links. For ‘Image’, tap ‘Choose Image’ to upload an image file. Banner images must be in .PNG, .JPG, or .GIF format and cannot exceed 70kB in size. For ‘Text’, enter a message. Message Link | Enter a website URL to send customers to when they click the image or text banner.
Maybe you run promotions or give your staff a percentage off their purchases. Continue below to learn how to set up frequently used discounts so cashiers don’t have to enter discounts manually at the register.
In BackOffice, click 'Settings' and select 'Discounts'.
Click to Enlarge
Name | What the discount is called on the register when selected and on reporting. Receipt description | What the discount is called on the customer’s receipt. Type | Choose to discount by a dollar amount or percentage. Percent / Amount | Depending on the ‘Type’ chosen, enter the discount’s dollar amount or percent. Open | Check this box to have the cashier enter the discount amount or percent at the register. Applies to | Allow the discount to be applied to items only, the overall sale, or both. Requires manager | Check this box to require a manager code before a cashier can apply the discount.
Visit the full Discounts article to see how discounts work at the register.
Have an existing customer list you need to keep track of? Want to send email marketing campaigns to customers? Continue below to learn about more recommended features for specialty food shops.
Add Customers
If you have a list of existing customers, add their information to BackOffice to track the purchases they make at the register.
If you have questions about adding or managing customers, visit our BackOffice FAQ.
In BackOffice, click 'Customers' and select 'Customer List'.
Click to Enlarge
Mailchimp enables you to build and send email marketing campaigns to the customers you add in Lightspeed Retail. Visit the Mailchimp site to learn what it can do for your business.
This feature is only available for Lightspeed Retail merchants on select pricing packages.
In BackOffice, click 'Integrations' and select 'Mailchimp'.
Click to Enlarge
Click 'Login' to log into an existing Mailchimp account.
Don’t have a Mailchimp account? Click ‘Sign Up’ to create one.