This feature is only available to merchants on select pricing packages.
Lightspeed Loyalty
Use Lightspeed Loyalty to reward regular customers and bring in new ones by allowing customers to earn points toward in-store rewards, such as discounts on future sales. After setting up this feature in BackOffice, customers can earn loyalty points on every purchase and redeem points for rewards via the Retail POS (S-Series) app.
Table of Contents
Upgrade to Lightspeed Loyalty
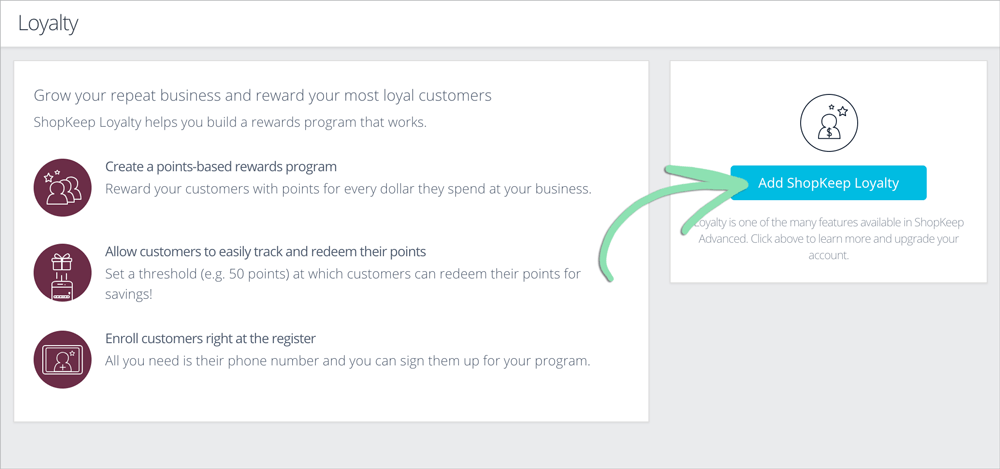
If Lightspeed Loyalty is not part of your current pricing package, follow the steps in this section to upgrade to a package that includes this feature.
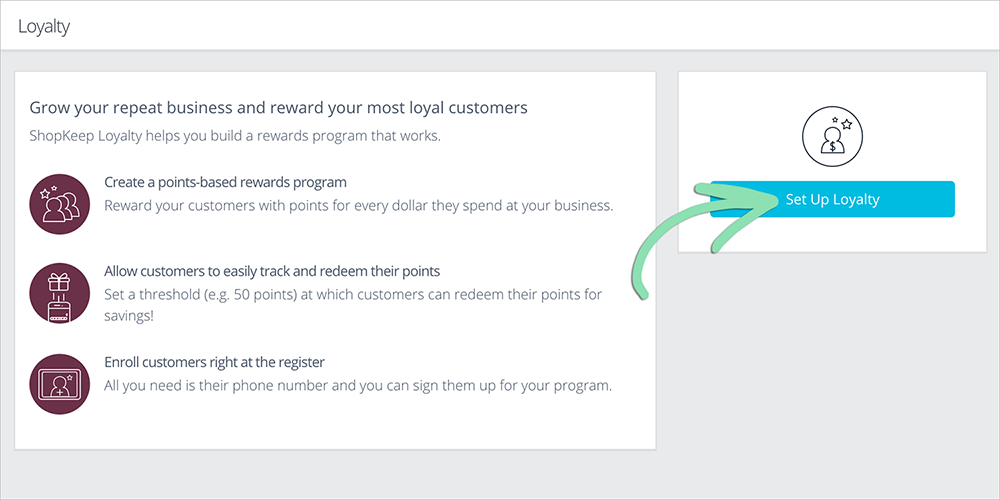
If your current package does include Lightspeed Loyalty, skip this section and follow the steps in the setup section below to get started.
Sign into BackOffice as the Business Owner or as an employee with 'Manage Account' and 'Manage Loyalty' permissions.
Learn more about customizing BackOffice access here.
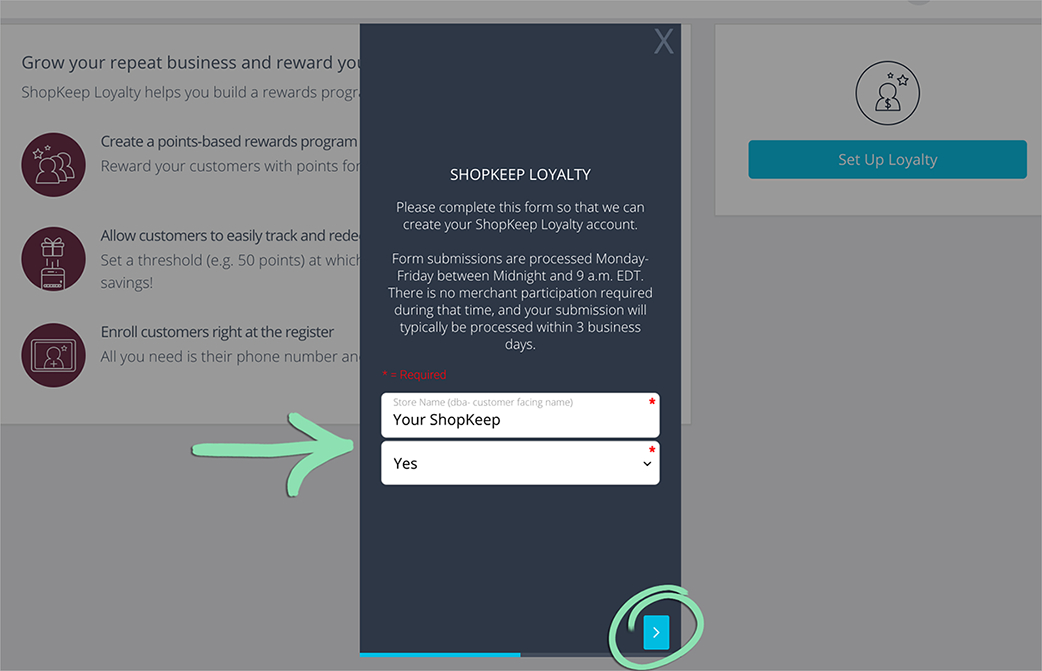
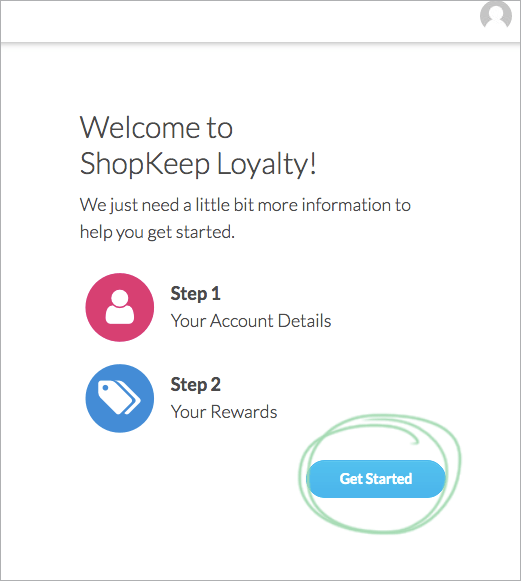
Fill out the setup form in BackOffice to send our team the information needed to create your Lightspeed Loyalty account. Once created, access your Lightspeed Loyalty account to set point thresholds and reward values, then enable your registers to use this feature.
Sign into BackOffice as the Business Owner or an employee with 'Manage Loyalty' permissions.
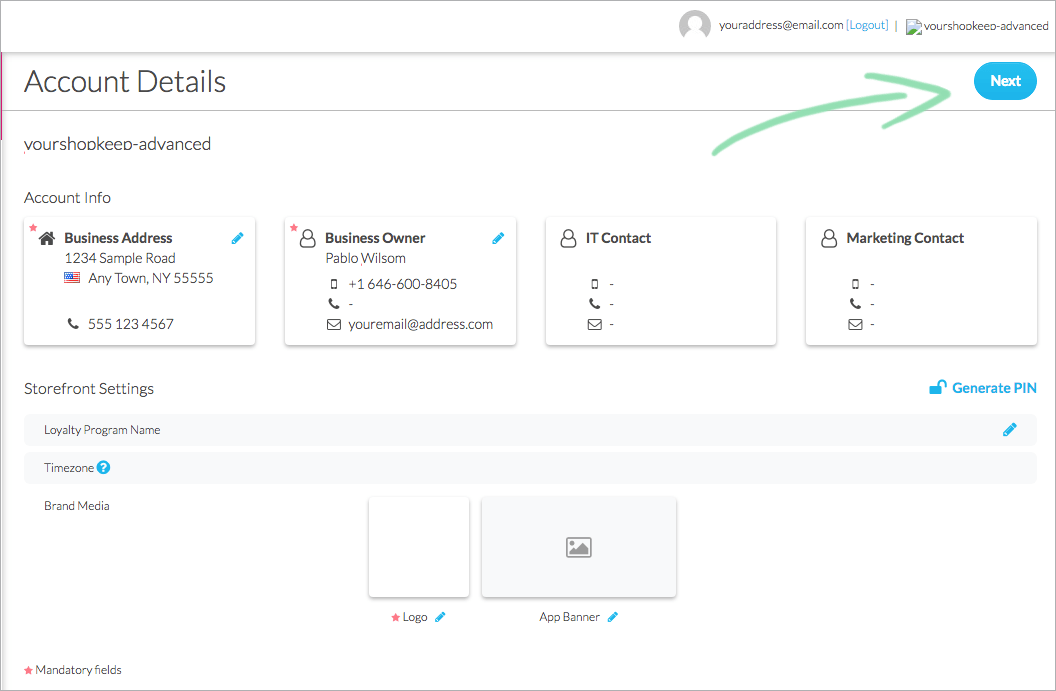
Enter your business information in the form, then click the arrow to continue.
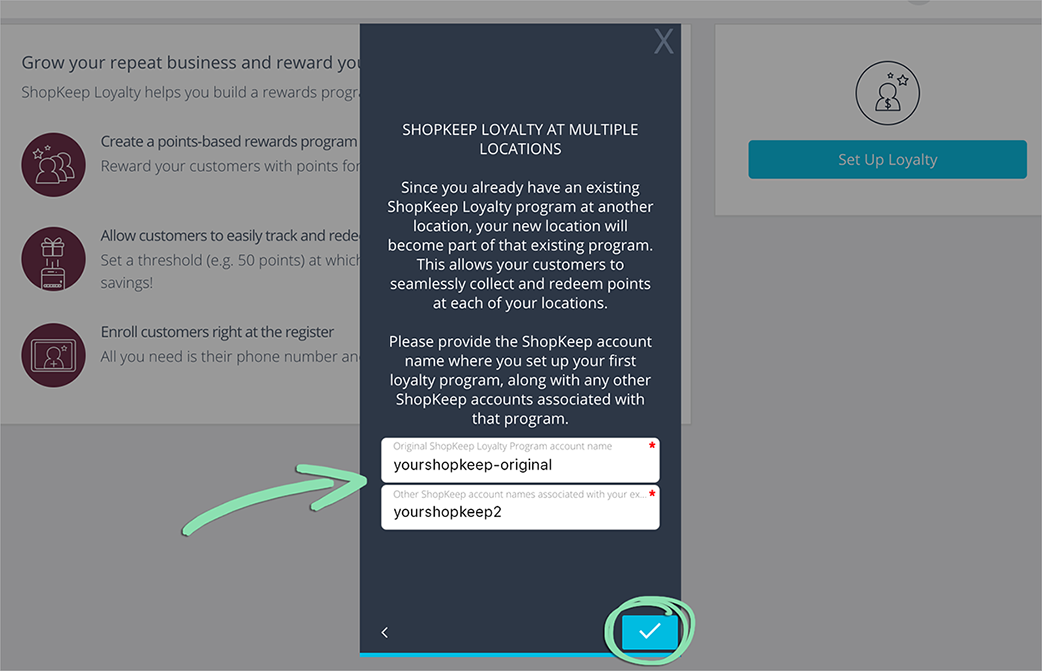
Store Name (DBA) | Your customer-facing store name. Do you have an active Lightspeed Loyalty program at any other Lightspeed location? | Select ‘Yes’ or ‘No’ based on whether Lightspeed Loyalty is set up at another store.
If you previously set up Lightspeed Loyalty for another store, enter the Lightspeed Retail store name(s) for the other location(s) and click the checkmark to submit.
Click to Enlarge
Wait 3 - 5 business days to receive an email indicating your Lightspeed Loyalty account was created.
Click to Enlarge
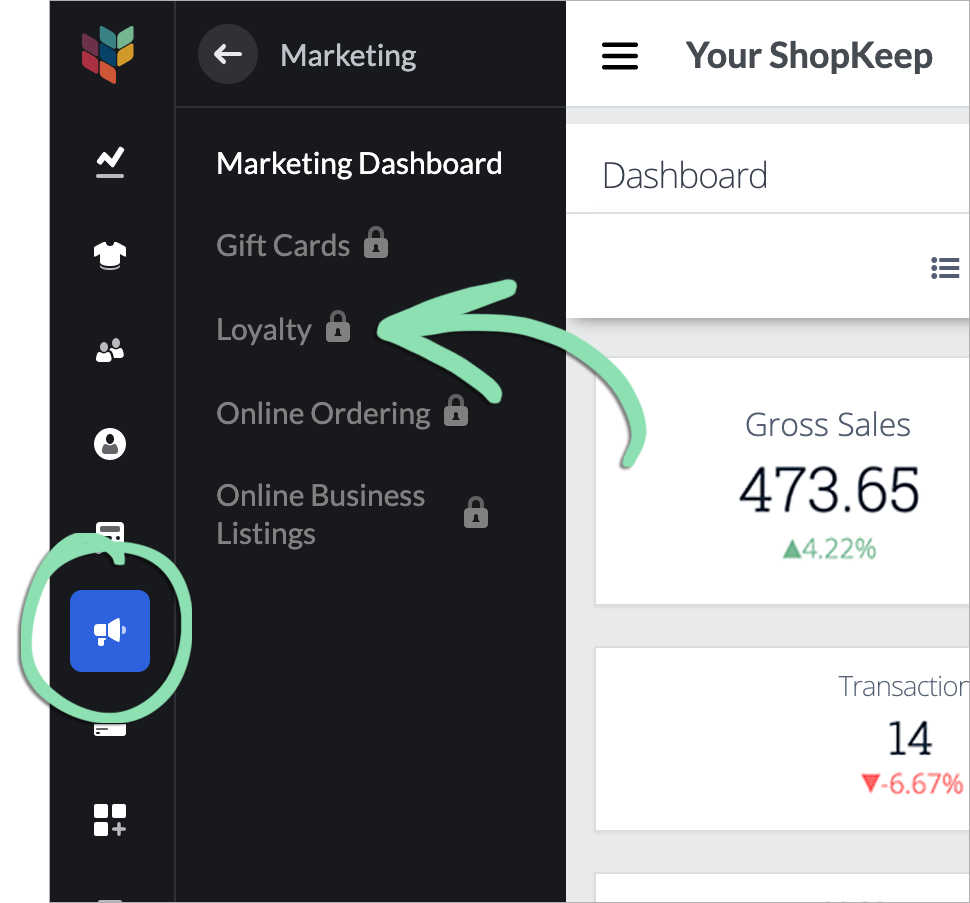
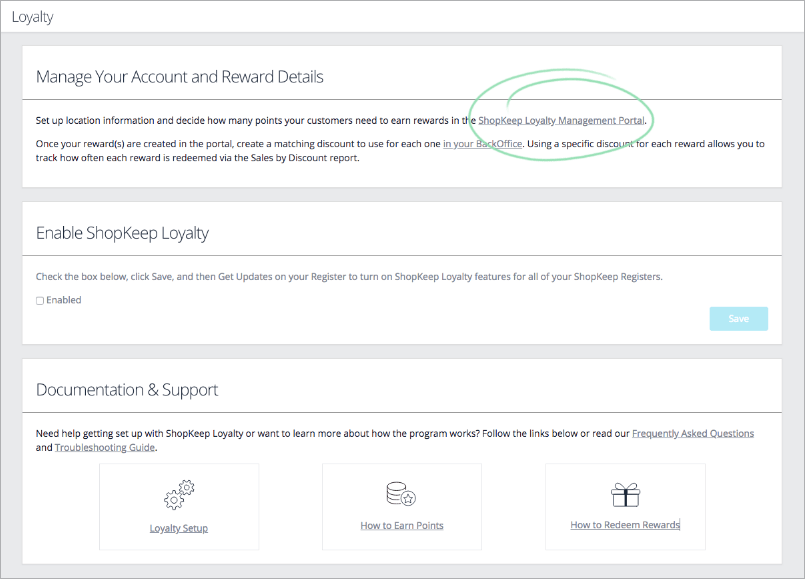
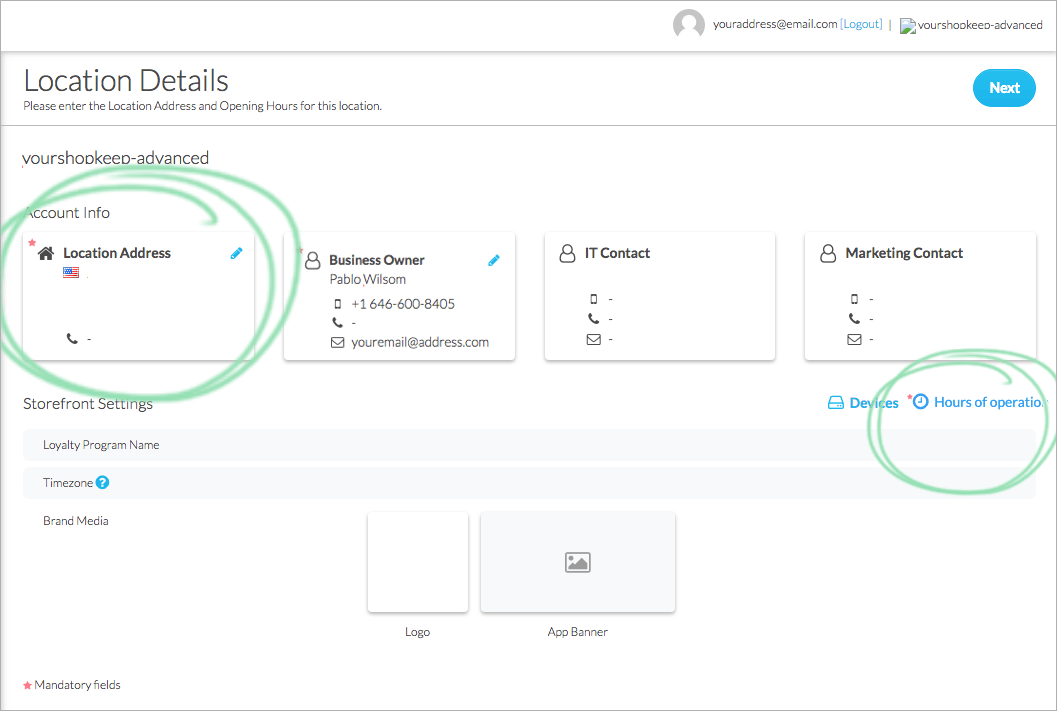
In BackOffice, click 'Marketing' and select 'Loyalty'.
Click to Enlarge
Click the 'ShopKeep Loyalty by Lightspeed Management Portal' link to continue setup.
Click to Enlarge
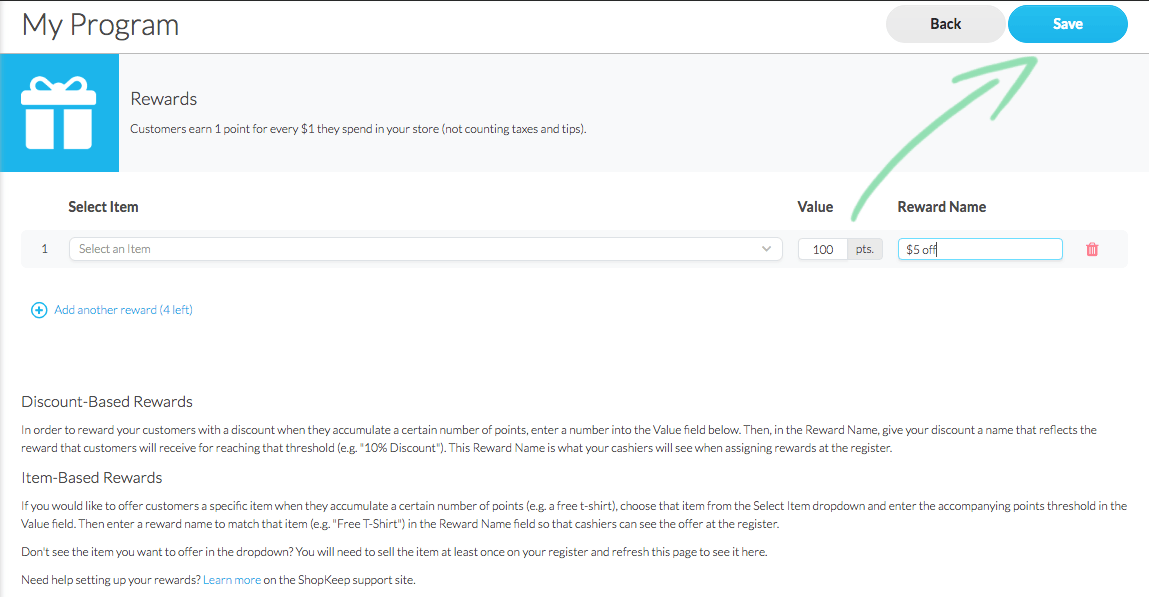
Click 'Next' to go to the rewards program page.
Click to Enlarge
Fill in the fields to set up your first discount or item-based reward.
Select Item | Choose an item to redeem the reward for or leave blank for a discount-based reward. Items will only appear if they were sold at the register after your Lightspeed Loyalty account was created. Value | Number of points a customer must earn before they are eligible for the reward. Customers earn 1 point for every whole dollar they spend in the Retail POS (S-Series) app (not including tax or gratuity). Reward Name | What the reward is called in the Retail POS (S-Series) app (e.g. ‘$5 Off’ or ‘Free Burger’).
In BackOffice, click 'Enable', then 'Save' to turn on the Lightspeed Loyalty feature.
Click to Enlarge
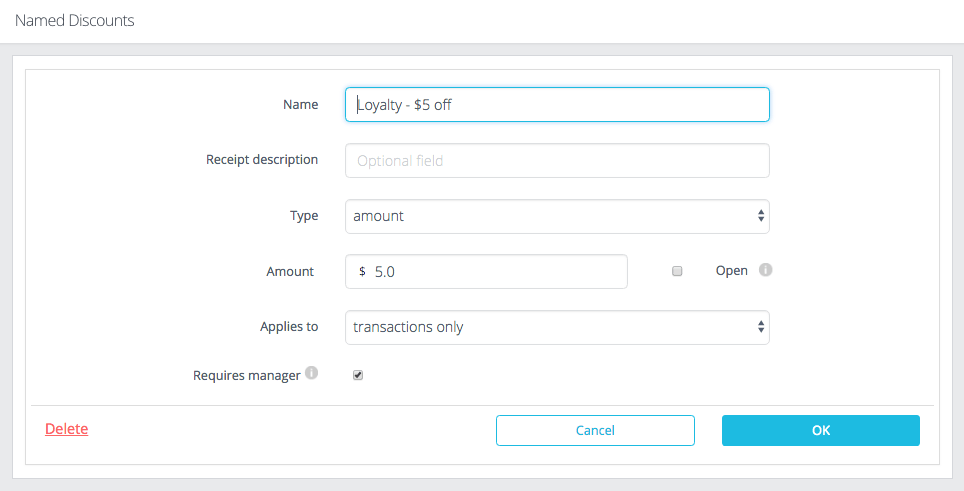
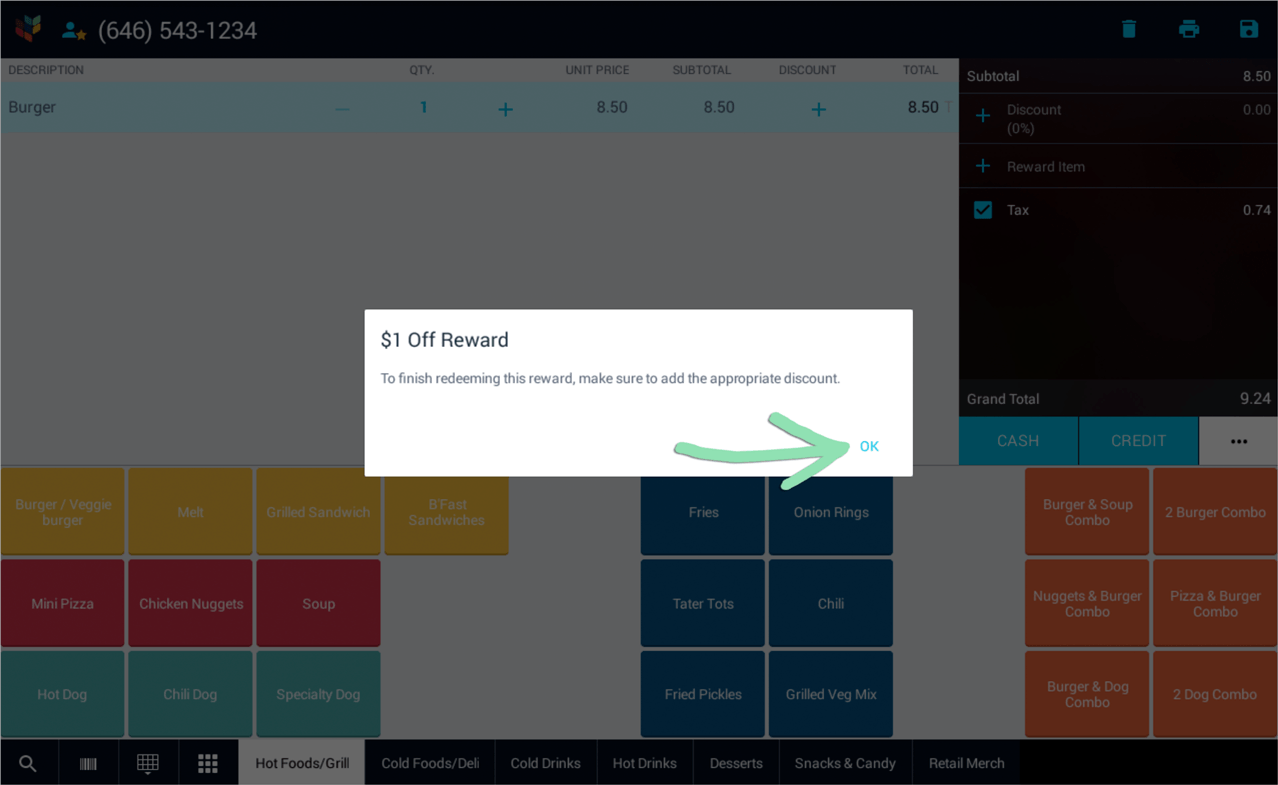
Follow the steps here to create a matching discount to use for each reward created.
Creating a specific discount for each reward, such as ‘Loyalty – $5 Off’ or ‘Loyalty – Free Burger’, allows you to track how often each reward is redeemed via the Sales by Discount report.
As customers visit and make purchases, link their Lightspeed Retail transactions to their phone numbers to allow rewards points to accumulate. Reward points equal the number of whole dollars spent (not counting taxes and tips) and points always round down, so if a customer spends $25.76, they will receive 25 points.
Points can only be earned through sales performed on a Lightspeed Retail POS register. Points do not expire and cannot be assigned to a customer after a sale is complete.
In the Retail POS (S-Series) app, add items to a sale, select a tender, and complete the sale as usual.
If the customer is in your Customer List, tag them to the sale before tendering it. Tagged customers who previously earned points will be able to skip step 2 below.
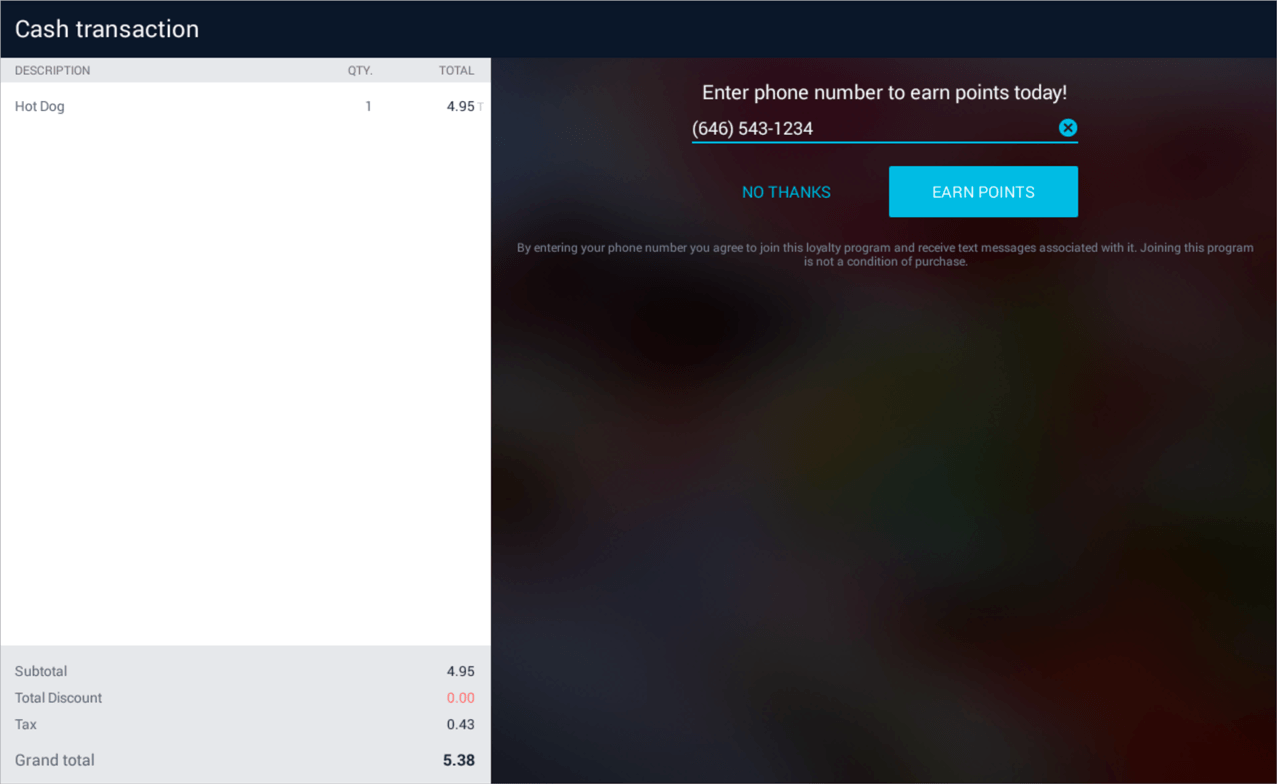
Customer enters their phone number on the register and taps 'Earn Points' to earn points for the sale.
This screen will only appear when Lightspeed Loyalty is enabled.
Tagged customers who have never earned points will have their phone number prefilled. If they do not have a number on file, the one entered here will be added to their record on the Customer List.
If no customer is tagged to the sale, entering a phone number here will add a new customer to the Customer List. Duplicate customer records cannot be merged later.
When customers ask if they have enough points for a reward, use the Retail POS (S-Series) app to view their current points total and earned rewards. Points do not expire, so customers can save them up until they are ready to redeem.
In the Retail POS (S-Series) app, tap 'Select Customer' (iOS) or the customer icon (Android) and search for the customer's phone number.
Click to Enlarge
Tap the ⓘ icon next to the customer to see more detailed information.
Click to Enlarge
Scroll to the 'Loyalty' section to view points and rewards information (iOS), or see available points under ‘Loyalty points’ (Android).
To view a customer’s earned rewards in the Retail POS (S-Series) app for Android, follow steps 1 – 3 in the Redeem Points section.
Once a customer earns enough points for a reward, they can redeem those points at the register to receive that reward. The specific steps to redeem points will vary based on whether you use the iOS or Android Retail POS (S-Series) app.
On iOS
For the Retail POS (S-Series) app for iOS, follow the steps below to redeem a customer’s earned loyalty points at the register for a reward.
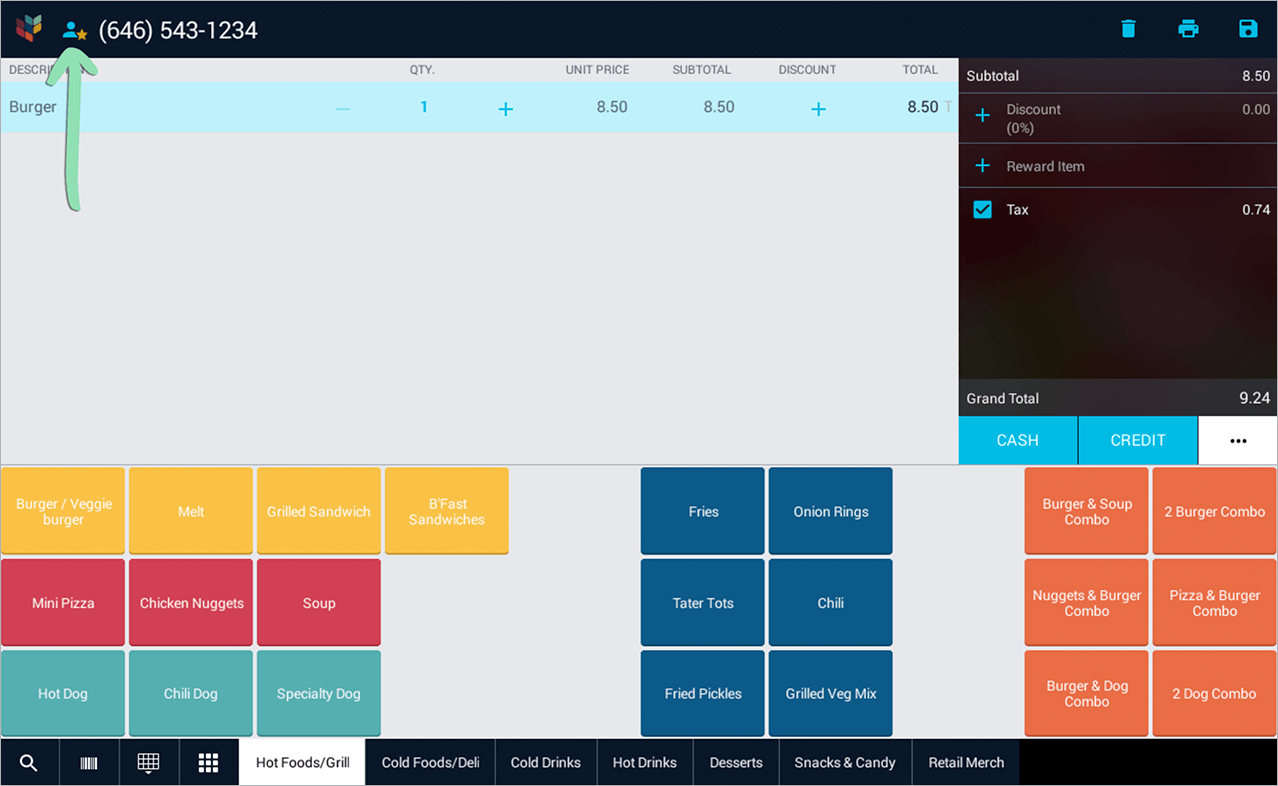
In the Retail POS (S-Series) app, add items to a sale.
Click to Enlarge
Tap 'Select Customer', enter the customer's phone number, and select them.
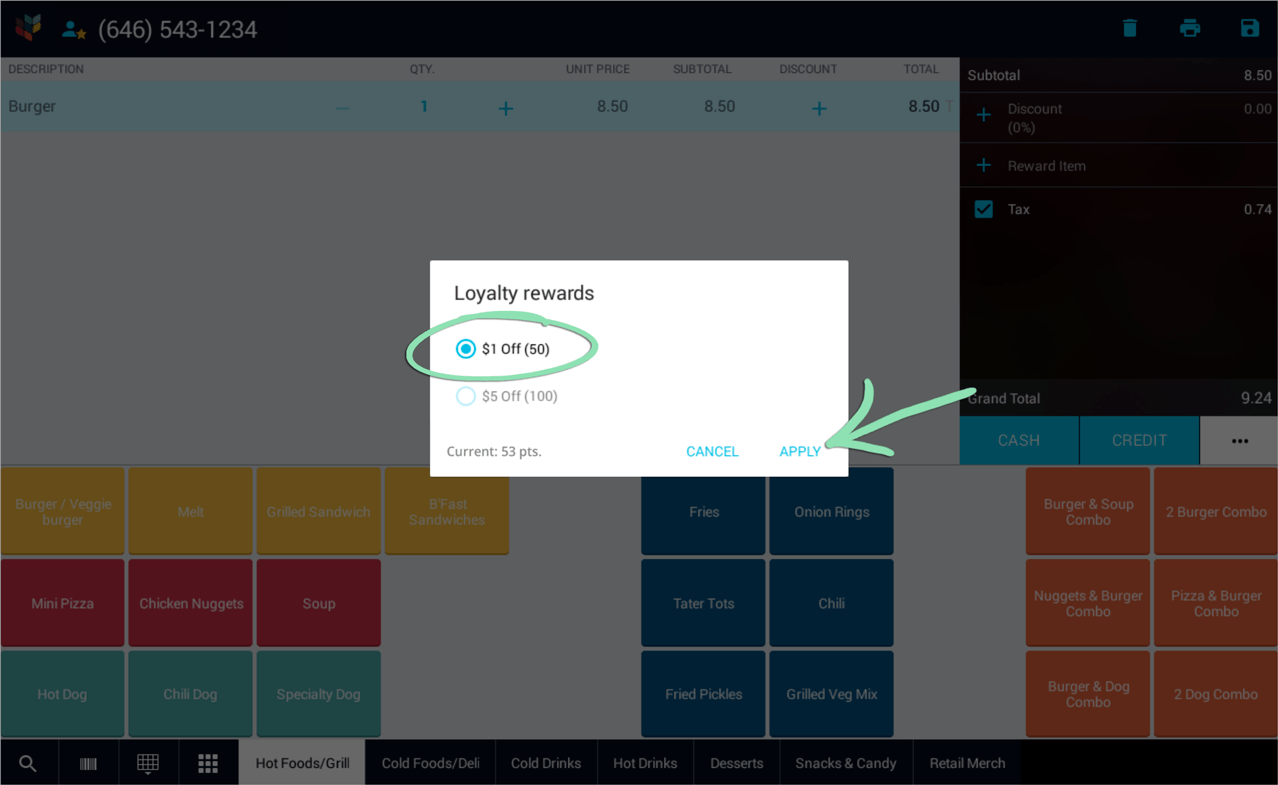
Tap the star icon to view and apply available rewards.
This icon shows the loyalty status of the selected customer at a glance: Empty Star | Customer has not signed up for loyalty or does not have enough points for a reward. Full Yellow Star | Customer has earned enough points for a reward. Gift | A reward has been selected. Tap to display a popup box allowing you to remove the reward.
A star next to the customer icon on the New Sale screen shows the customer’s loyalty status at a glance:
Empty Star | Customer currently has no points. Full Yellow Star | Customer has earned enough points for a reward. Half-full Yellow Star | Customer has earned points, but not enough for a reward. No Star | Customer has not yet signed up for loyalty.