Manage tax settings in BackOffice to ensure the correct tax amount is charged at the register for every item. First enter the default tax rate to be automatically applied to all taxable items, then add other rates to override the default tax for specific items, set up tax groups to apply multiple rates to items, and assign items to tax rates and tax groups individually or in bulk.
IMPORTANT: Sales tax figures in reporting are estimates based on how you configure your tax rates and tax groups. For official filings, always verify your current local rates, then manually calculate tax using net taxable and non-taxable revenues. Be aware that tax laws can change at any time and, you should contact a tax professional for specific advice regarding your business.
Name | Name of the tax rate as it appears in BackOffice reporting (e.g. ‘Prepared Food Tax’). Rate | Percentage of tax charged for this tax rate (e.g. 7%, 8.875%, etc.) Receipt Name | Name that appears on receipts when the ‘Display tax rates on receipts’ setting is enabled and multiple tax rates are charged on a transaction. If left blank, this will default to ‘Tax’. Don’t see this field? Stay tuned as we roll out this feature for everyone. Set as Default | When checked, the tax rate becomes the default tax applied to all items not already assigned to a tax rate or group.
Get updates on the iOS or Android register to sync the changes made to the register.
Manage Tax Rates
After entering the default tax rate, you can add additional rates for each individual tax you charge, and you can edit or remove existing rates. Tax rates can be applied individually to inventory items or added to tax groups in order to apply more than one rate to specific items.
To view the amount of tax collected at the register for each tax rate, visit the Sales by Tax Rate report. Learn how to run this report here.
Add Tax Rates
Set up a separate tax rate for each different tax the business charges. Additional tax rates can override the default tax for items assigned to them, or they can be added to tax groups for applying multiple rates to specific items.
Enter the tax rate details, and click 'Save' to create the new rate.
Click to Enlarge
Name | Name of the tax rate as it appears in BackOffice reporting (e.g. ‘Prepared Food Tax’). Rate | Percentage of tax charged for this tax rate (e.g. 7%, 8.875%, etc.) Receipt Name | Name that appears on receipts when the ‘Display tax rates on receipts’ setting is enabled and multiple tax rates are charged on a transaction. If left blank, this will default to ‘Tax’. Don’t see this field? Stay tuned as we roll out this feature for everyone. Set as Default | When checked, the tax rate becomes the default tax applied to all items not already assigned to a tax rate or group.
Follow the steps here to assign items to the tax rate.
From the Item Creation Page
Visit the 'Item List' from BackOffice or the Retail POS (S-Series) app (employees with relevant BackOffice permissions only).
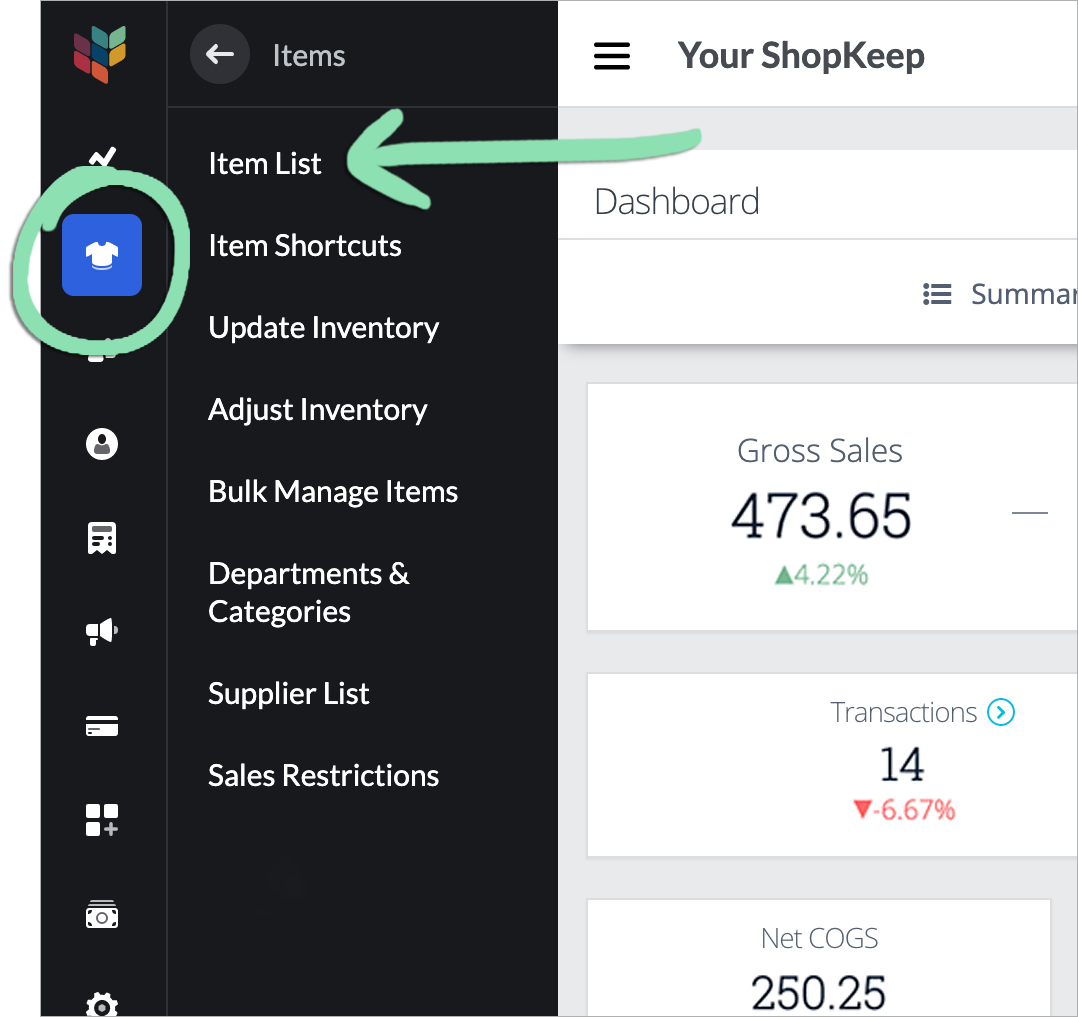
In BackOffice, click ‘Items’ and select ‘Item List’.
In the Retail POS (S-Series) app for iOS, tap ‘Manage Items’ on the Main Menu. For the Retail POS (S-Series) app for Android, tap ‘Setup’ on the register menu, then select ‘Manage Items’.
Enter the tax rate details, then tap 'Save' to create the new rate and assign it to the item.
Click to Enlarge
Name | Name of the tax rate as it appears in BackOffice reporting (e.g. ‘Prepared Food Tax’). Rate | Percentage of tax charged for this tax rate (e.g. 7%, 8.875%, etc.) Make Default | When checked, the tax rate becomes the default tax applied to all items not already assigned to a tax rate or group.
Select a save option to finish editing the item.
(Optional) Follow the steps here to assign additional items to the tax rate.
If accessing the Item List from BackOffice, get updates on the iOS or Android register to sync the changes to the register.
If you receive an error while getting updates, visit our troubleshooting guide for help.
Edit and Delete Tax Rates
Edit a tax rate to change its name, percentage, receipt name, or to make it the default tax. If a tax rate is no longer needed, delete it to remove it from use.
In BackOffice, click 'Settings' and select 'Taxes'.
Click to Enlarge
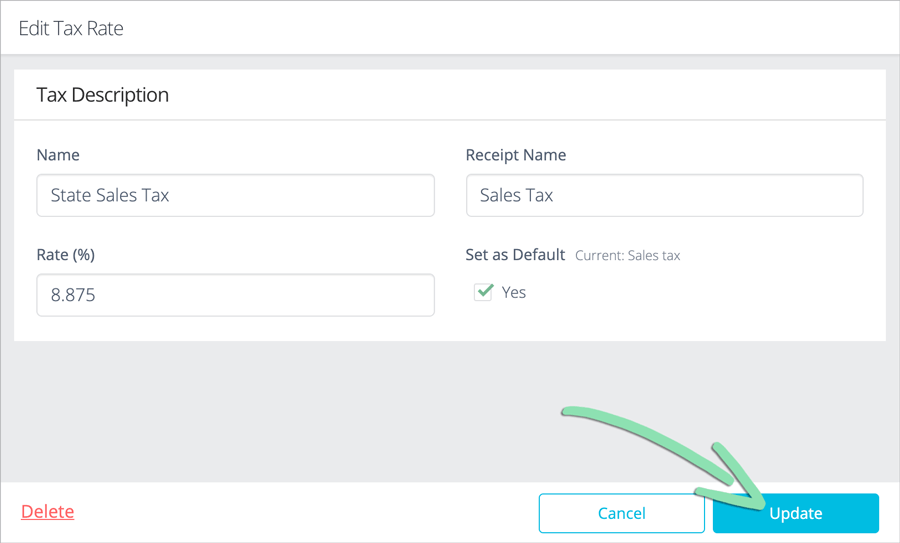
To edit the tax rate, make changes to it, then click 'Update'.
Changing the name of a tax rate will also update it in some historical reporting. To learn more, visit the article for a specific report from our BackOffice support page.
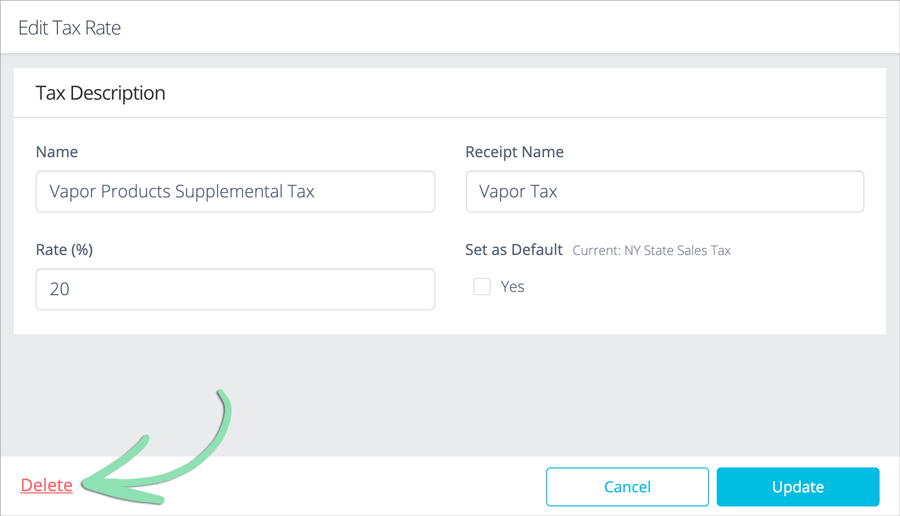
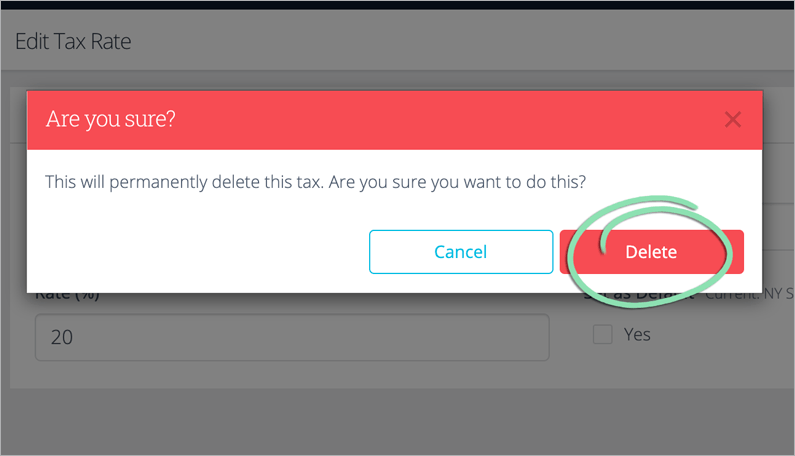
To delete the tax rate, click 'Delete', then ‘Delete’ again to confirm.
The default tax cannot be deleted. If a non-default tax rate is assigned to items, deleting it will automatically reassign those items to the default tax. If a tax rate is assigned to a tax group, deleting the rate will automatically remove it from that tax group.
Get updates on the iOS or Android register to sync the changes to the register.
If you receive an error while getting updates, visit our troubleshooting guide for help.
Manage Tax Groups
Tax groups allow a business to apply more than one tax rate to specific items. After adding some tax rates, set up a tax group to combine multiple rates into a single grouping that can be applied to items.
Tax groups are available to select merchants using the latest compatible versions of the iOS and Android Retail POS (S-Series) apps. Stay tuned as we roll out this feature for everyone.
Tax groups do not appear on reporting or customer receipts. To view the amount of tax collected for each tax rate, run the Sales by Tax Rate report.
Add Tax Groups
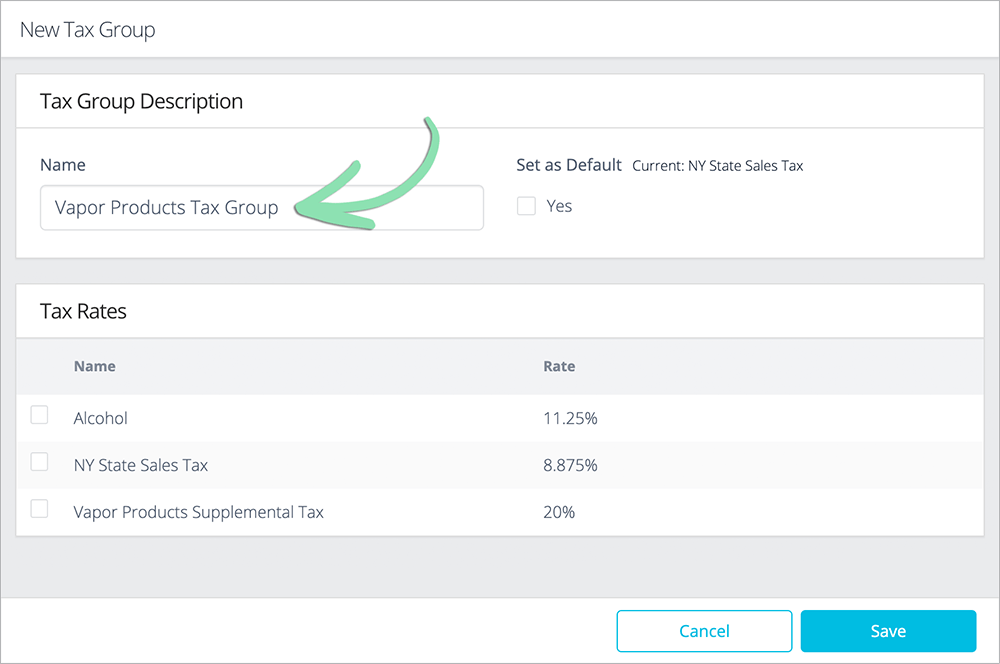
Set up a separate tax group for each combination of tax rates that needs to be applied to inventory items. Tax groups can override the default tax for items assigned to them, allowing multiple tax rates to be applied to specific items.
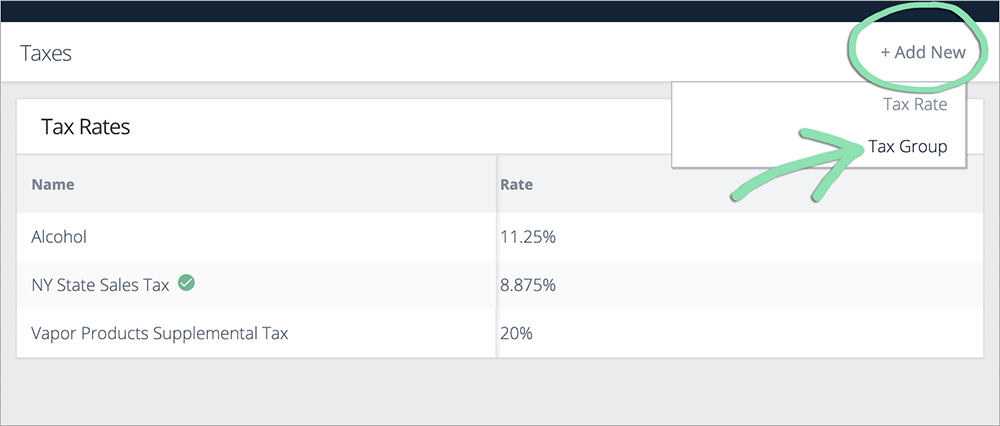
In BackOffice, click ‘Settings’, then select ‘Taxes’.
Click to Enlarge
Click 'Add New', and select 'Tax Group'.
Don’t see ‘Tax Group’? Stay tuned as we roll out this feature for everyone.
At the register, each tax rate in the tax group will be applied separately to the item price and rounded, then the totals for each rate will be summed. Learn more here about how tax is calculated in Lightspeed Retail.
Follow the steps here to assign items to the tax group.
Edit and Delete Tax Groups
Edit a tax group to change its name, add or remove tax rates from it, or make it the default tax. If a tax group is no longer needed, delete it to remove it from use.
In BackOffice, click ‘Settings’ and select ‘Taxes’.
Click to Enlarge
Select an existing tax group to edit or delete.
Click to Enlarge
To edit the tax group, make changes to it, then click 'Update'.
Click to Enlarge
To delete the tax group, click 'Delete', then ‘Delete’ again to confirm.
The default tax cannot be deleted. If a non-default tax group is assigned to items, deleting it will automatically reassign those items to the default tax.
Get updates on the iOS or Android register to sync the changes to the register.
If you receive an error while getting updates, visit our troubleshooting guide for help.
Display Tax Rates on Receipts
Enable this optional receipt setting to list individual tax rates on customer receipts for transactions where more than one rate is charged. This setting is disabled by default, with receipts showing only a single ‘Total Tax’ line.
This feature is available to select merchants using the latest compatible versions of the iOS and Android Retail POS (S-Series) apps. Stay tuned as we roll out this feature for everyone.
Follow the steps here to open paper receipt settings in BackOffice or the Retail POS (S-Series) app.
Select ‘Display each tax rate charged individually’.
View an example of how receipts appear after enabling this setting here.
If updating receipt settings from BackOffice, get updates on the iOS or Android register to sync the changes to the register.
Change the Default Tax
After adding tax rates and/or tax groups, you can change which rate or group is set as the default tax. The default tax is automatically applied to all taxable inventory items not already assigned to a tax rate or group.
In BackOffice, click 'Settings' and select 'Taxes'.
Click to Enlarge
Select an existing tax rate or tax group to make the default tax.
Click to Enlarge
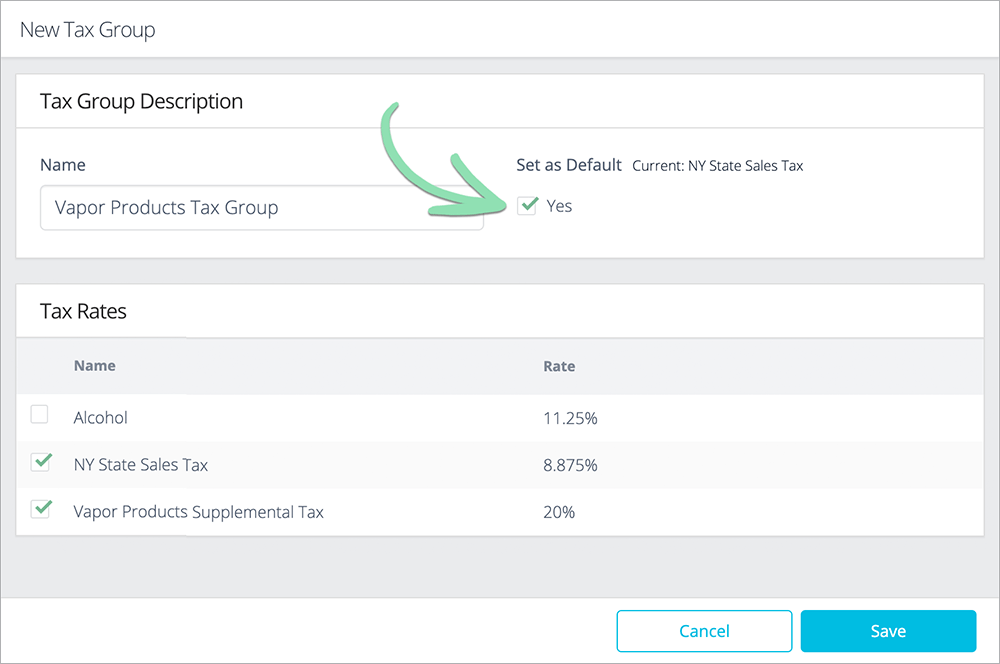
Check the 'Yes' box under 'Set as Default', then click 'Update'.
Click to Enlarge
Get updates on the iOS or Android register to sync the changes to the register.
If you receive an error while getting updates, visit our troubleshooting guide for help.
Assign Items to Taxes
Items that require a tax rate or group different from the default tax must be manually assigned to the relevant rate or group. Assign items from the Item List in BackOffice or at the register if there are only a few to manage, or use Bulk Management in BackOffice for larger quantities of items.
From the Item List
Only have a few items to assign to tax rates or groups? Update items one by one from the Item List in BackOffice or the Retail POS (S-Series) app (as shown below), or visit our Bulk Edit article to learn how to update several items from the Item List at the same time.
Visit the 'Item List' in BackOffice or from the Retail POS (S-Series) app (employees with relevant BackOffice permissions only).
In BackOffice, click ‘Items’, then select ‘Item List’.
In the Retail POS (S-Series) app for iOS, tap ‘Manage Items’ on the Main Menu. For the Retail POS (S-Series) app for Android, tap ‘Setup’ on the register menu, then select ‘Manage Items’.
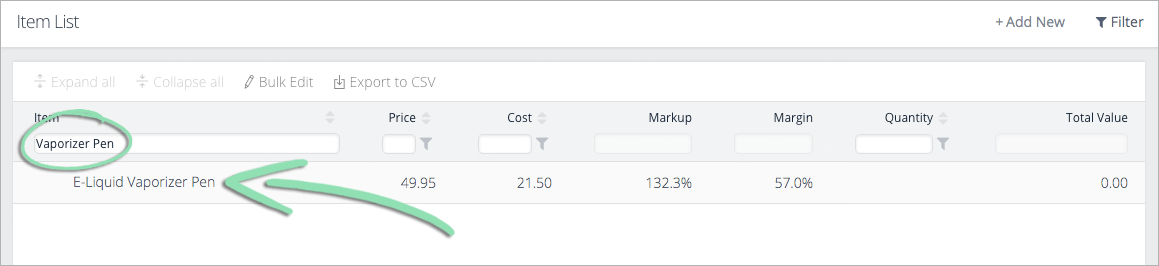
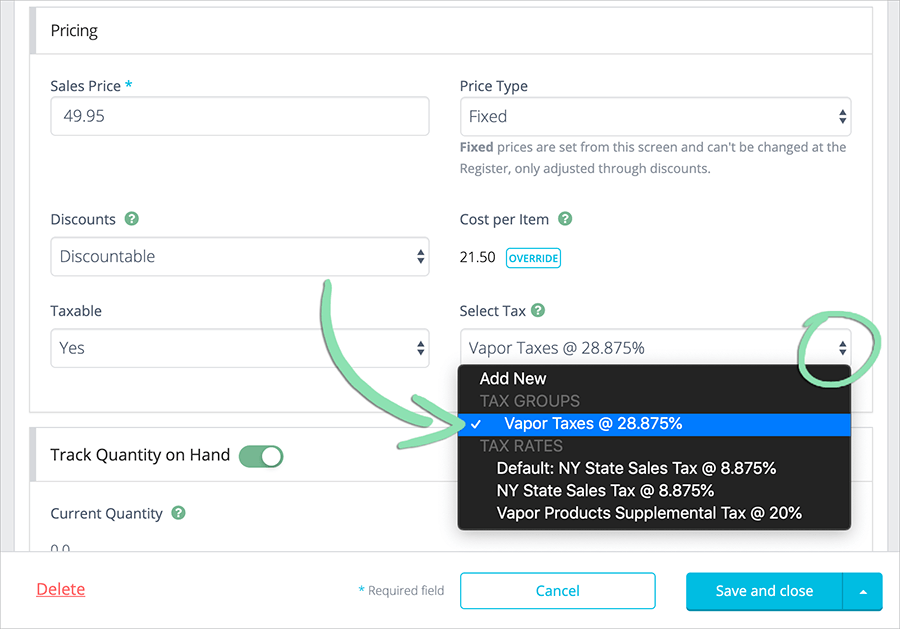
Select a tax rate or group to assign to the item from the ‘Select Tax’ or 'Tax Rate' dropdown.
Click to Enlarge
Select a save option to finish editing the item.
(Optional) Repeat steps 2 - 4 for each additional inventory item.
If accessing the Item List from BackOffice, get updates on the iOS or Android register to sync the changes to the register.
If you receive an error while getting updates, visit our troubleshooting guide for help.
Using Bulk Management
If you have many items to assign to tax rates or tax groups, using Bulk Management is more efficient. Bulk Management allows for updating multiple items at once using a spreadsheet.
Follow the steps here to start a new 'Update Items' job in Bulk Management.
On the inventory export spreadsheet, enter the name and percentage of the tax rate or group you want to assign to an item in the 'Tax Group or Rate' column.
Don’t see ‘Tax Group or Rate’? Enter tax information in the ‘Tax Rate’ column.
Enter [rate/group name] @ [rate percentage] (e.g. Food tax @ 9%). Use the ‘Name’ of the tax rate or group, not the ‘Receipt Name’. For tax groups, enter the sum total of all tax rates in the group.
Do not remove the ‘Item UUID, ‘Name’, or ‘Taxable’ columns from the spreadsheet. These columns must be mapped during the import for the Bulk Management job to be successful.