Bluetooth Printer Troubleshooting

This article focuses on solving problems that can occur while using the Star Micronics 650II Bluetooth receipt printer. If you have not yet set up your printer, visit our setup article.

If you are having issues with a Bluetooth Epson TM-m10 / TM-m30 receipt printer, visit our Epson Printer Troubleshooting guide instead.

Table of Contents

Connection & Pairing Issues

Bluetooth printers connect wirelessly to the iPad. This section covers issues that affect that link between the two devices.

My printer will not pair with the iPad.

If you run into an issue pairing the printer with your iPad, follow these steps to troubleshoot.

  1. Open the iPad Settings app and tap 'Bluetooth'
  2. Tap the blue 'i' next to the 'Star Micronics' device.

    If there is no ‘i’, skip to step 5.

  3. Select 'Forget This Device'.
    Click to Enlarge
  4. Tap 'OK' to confirm'.
    Click to Enlarge
  5. Power the printer off, then back on.
  6. Force quit the Lightspeed Retail POS (S) app.
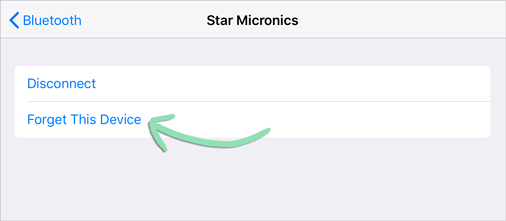
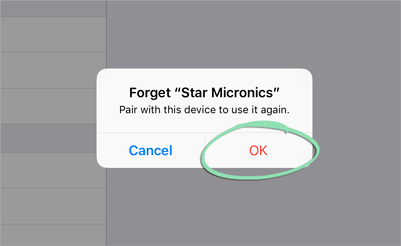
  7. Follow the steps in our setup guide to pair and set up the printer.

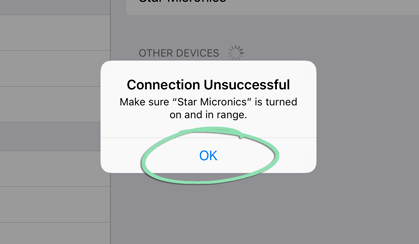
The ‘Printer Setup’ screen does not list my printer.

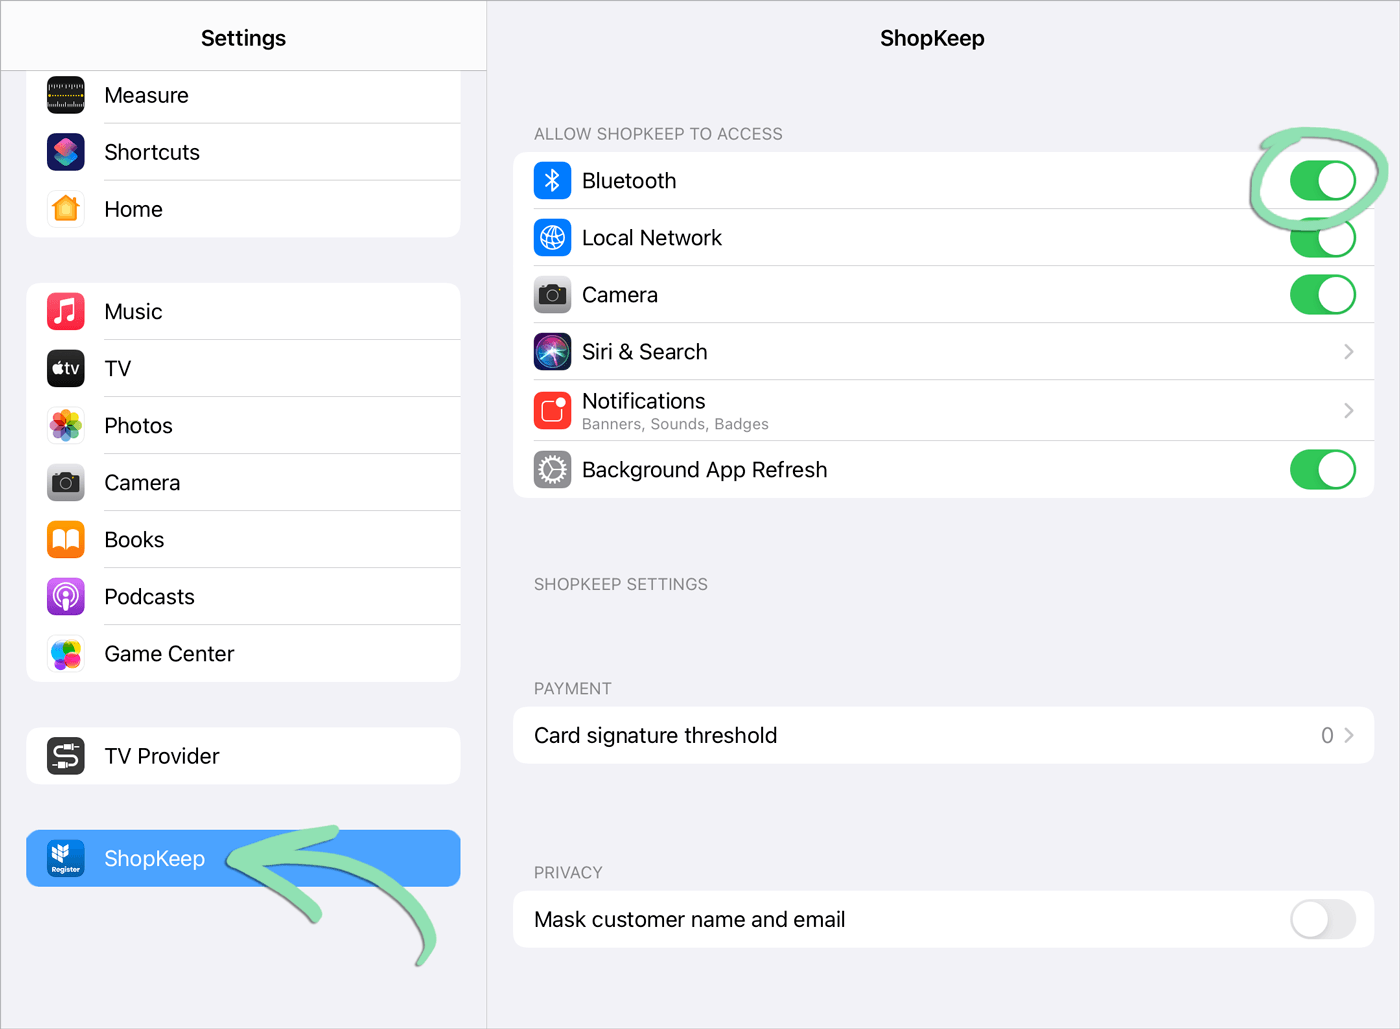
This issue can occur for a few different reasons. The printer might not be powered on or paired with the iPad, or Bluetooth access may be disabled for the Lightspeed Retail POS (S) app.

  1. Follow the steps here to troubleshoot this issue.

The printer will not print receipts or X/Z reports.

This issue occurs if the printer and iPad cannot communicate with each other or if the printer is not set up properly.

  1. Open the iPad's Settings app and tap 'Bluetooth'.

    If an Automatic Bluetooth Pairing request appears, tap Pair.

  2. Make sure that 'Bluetooth' is toggled on.
  3. Check the status of the 'Star Micronics' printer.
    • If the printer is Connected, continue to step 4.
    • If the printer is Not Connected, follow the steps here to troubleshoot.
    • If the printer does not appear on this screen, pair the printer with the iPad.
    Click to Enlarge
  4. Tap ‘Retail (S)’, then enable Bluetooth access for the Lightspeed Retail POS (S) app.
    Click to Enlarge
  5. Open the Lightspeed Retail POS (S) app.
  6. On the Main Menu, tap ‘Integrated Hardware’ and select ‘Printers’.
  7. Toggle on the switch next to ‘Star Micronics’.
    Click to Enlarge
  8. Reprint a receipt or X/Z report.
  9. If the problem persists, follow these steps above to troubleshoot.

"No Receipt Printer"

This error appears when you try to print or reprint a receipt, but the printer was never set up properly or it disconnected from the register.

  1. Tap ‘Open’ to open the 'Printers' screen.
    Click to Enlarge
  2. Follow the specific steps below that reflect whether your receipt printer is listed on the 'Printers' screen.
  • If the receipt printer does appear on the ‘Printers’ screen:
    1. Toggle the printer on and tap ‘Done’.
      Click to Enlarge
  • If the receipt printer does not appear on the ‘Printers’ screen:
    1. Tap ‘Done’.
      Click to Enlarge
    2. Follow the steps here to troubleshoot the printer’s connection to the register.

    The printer will not print kitchen tickets.

    Ticket printing is not available for the Bluetooth 650II printer. Instead, use the Epson Ethernet Ticket Printer or the Epson TM-m10 / TM-m30 Bluetooth Printer. Visit this guide to learn about printing kitchen tickets.

    The printer's status is "Not Connected" in my iPad's Bluetooth settings.

    This problem can occur when the printer or iPad is powered off or if there is interference from other Bluetooth-enabled devices.

    1. If the printer is powered off, turn it back on.

      Printer not turning on? Follow these steps to troubleshoot the issue.

    2. Tap 'Star Micronics' to reconnect the printer.
      Click to Enlarge
    3. Follow the specific steps below that reflect the outcome of step 2.
  • If the printer’s status changes to ‘Connected’:
    1. Open the Lightspeed Retail POS (S) app.
    2. On the Main Menu, tap ‘Integrated Hardware’ and select ‘Printers’.
    3. Toggle on the switch next to ‘Star Micronics’.

      Don’t see the printer listed? Follow the steps here to troubleshoot that issue.

      Click to Enlarge
  • If the connection is unsuccessful:
    1. Tap ‘OK’ to dismiss the error message.
    2. Follow these steps above to troubleshoot the error.

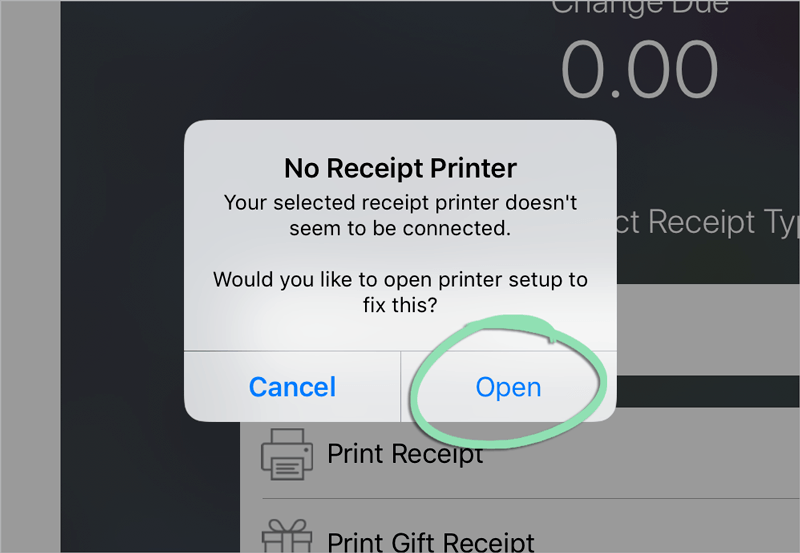
    "Printer Failure. Could not connect to..."

    This error message appears on the Lightspeed Retail POS (S) app when there is a problem communicating with the printer. Follow the steps below to resolve this issue.

    1. Force quit the Lightspeed Retail POS (S) app.
    2. Power cycle the printer.

      Switch the printer off, count to 10, and turn the printer back on.

    3. Reopen the Lightspeed Retail POS (S) app.
    4. On the Main Menu, tap 'Integrated Hardware'.
    5. Select 'Printers'.
    6. Tap the printer icon to check the printer's connection.

      If successful, this prints a slip of paper with the printer’s name.

    7. If the error persists, follow the additional steps below:

    Hardware Issues

    This section covers issues related to the printer hardware and assumes your iPad is communicating with the printer but not printing correctly.

    Receipts print out blank.

    The Bluetooth 650II is a thermal printer that uses special thermal receipt paper. Make sure you are not using regular paper bought elsewhere or included with a ticket printer.

    1. Push the lever to open the back cover.
    2. Check to see if you are using thermal receipt paper.

      Thermal paper is shinier on one side and turns black when scratched. Not using thermal paper? Purchase some from the Lightspeed Store.

    3. Make sure the paper is installed correctly.

      Thermal paper only prints on one side. Load the paper so it feeds up from the bottom of the roll.

    4. Reprint a receipt.
    5. If the problem persists, follow these steps below to troubleshoot.

    Receipt text is printing lighter than usual.

    Newer versions of the Lightspeed Retail POS (S) include a fix that ensures receipts print at the correct level of darkness.

    1. Close any open register shifts.
    2. Update the Lightspeed Retail POS (S) app to the latest version.

    The printer cuts receipts before they finish printing.

    If a receipt is cut by the printer after only part of it prints, follow the steps below to resolve the issue.

    1. Sign into the Lightspeed Retail POS (S) app as a manager.
    2. Open the System Diagnostics Screen.
    3. Tap 'Force Get Updates'.
      Click to Enlarge
    4. Reprint a receipt.
    5. If the issue persists, contact Customer Care.

    My printer works, but the cash drawer doesn't open.

    Cash drawers are printer driven and require no special setup other than a connection to the printer.

    1. If performing a sale, make sure you tendered it to Cash.

      The drawer opens for Cash sales but not for other tenders, such as Credit.

    2. Make sure the drawer is unlocked.

      The lock should be in the vertical position.

    3. Check the connection between the printer and cash drawer.

      Follow these steps to learn how to check the connection.

    The POWER light and ERROR light are both solid.

    This combination of lights means either the printer’s cover is open or the paper is not loaded correctly. This error may also be accompanied by the message “Cover is open”.

    1. Open the printer’s back cover and remove the paper.
    2. Reload the paper and close the cover.

      The paper must be loaded so it feeds from the bottom of the roll.

    If the problem persists, follow the additional steps below:
    1. Power the printer off.
    2. Open the iPad Settings app and tap 'Bluetooth'.
    3. Toggle 'Bluetooth' off.
    4. Turn the printer back on.
    5. Toggle 'Bluetooth' back on.
    6. Follow these steps above to finish troubleshooting.

    The POWER light is solid, but the ERROR light is flashing.

    In this case, the flashing light indicates the printer paper is either low or has run out.

    1. Push the lever to open the back cover.
    2. Load a new roll of paper into the printer.

      Visit the Lightspeed Store if you need to order more thermal printer paper.

    3. Close the cover on the paper.

    The POWER light is off and the ERROR light is flashing.

    Depending on the frequency of the flashing, this indicates one of several different errors.

    1. Flip the power switch to turn the printer off.
    2. Visit page 23 of the printer's manual to diagnose the error.
    3. Follow the manual's steps for resolving that specific issue.

    None of the printer’s lights are on.

    This indicates that the printer is either turned off or not receiving power.

    1. Toggle the power switch to make sure the printer is not turned off.
    2. Unplug the power cable from the printer, then plug it securely back in.
    3. Unplug the printer from its power outlet and plug it into a different outlet.

      Make sure to connect the cable to an outlet you know for sure is working.

    I'm having problems with a different Bluetooth printer.

    The Lightspeed Retail POS (S) app is compatible with the Star Micronics 650II and Epson TM-m10 / TM-m30 Bluetooth printers. Other Bluetooth printers are not supported.

    For help troubleshooting an Epson Bluetooth printer, visit our Epson Printer Troubleshooting guide.

    Miscellaneous Issues

    This section covers miscellaneous issues unrelated to the sections above.

    “Failed to print QR code. Please try again.”

    This error appears when the register is unable to print a QR code for a Pay by Link sale. The printer may be disconnected from the register, out of paper, or there may be a physical problem with the printer.

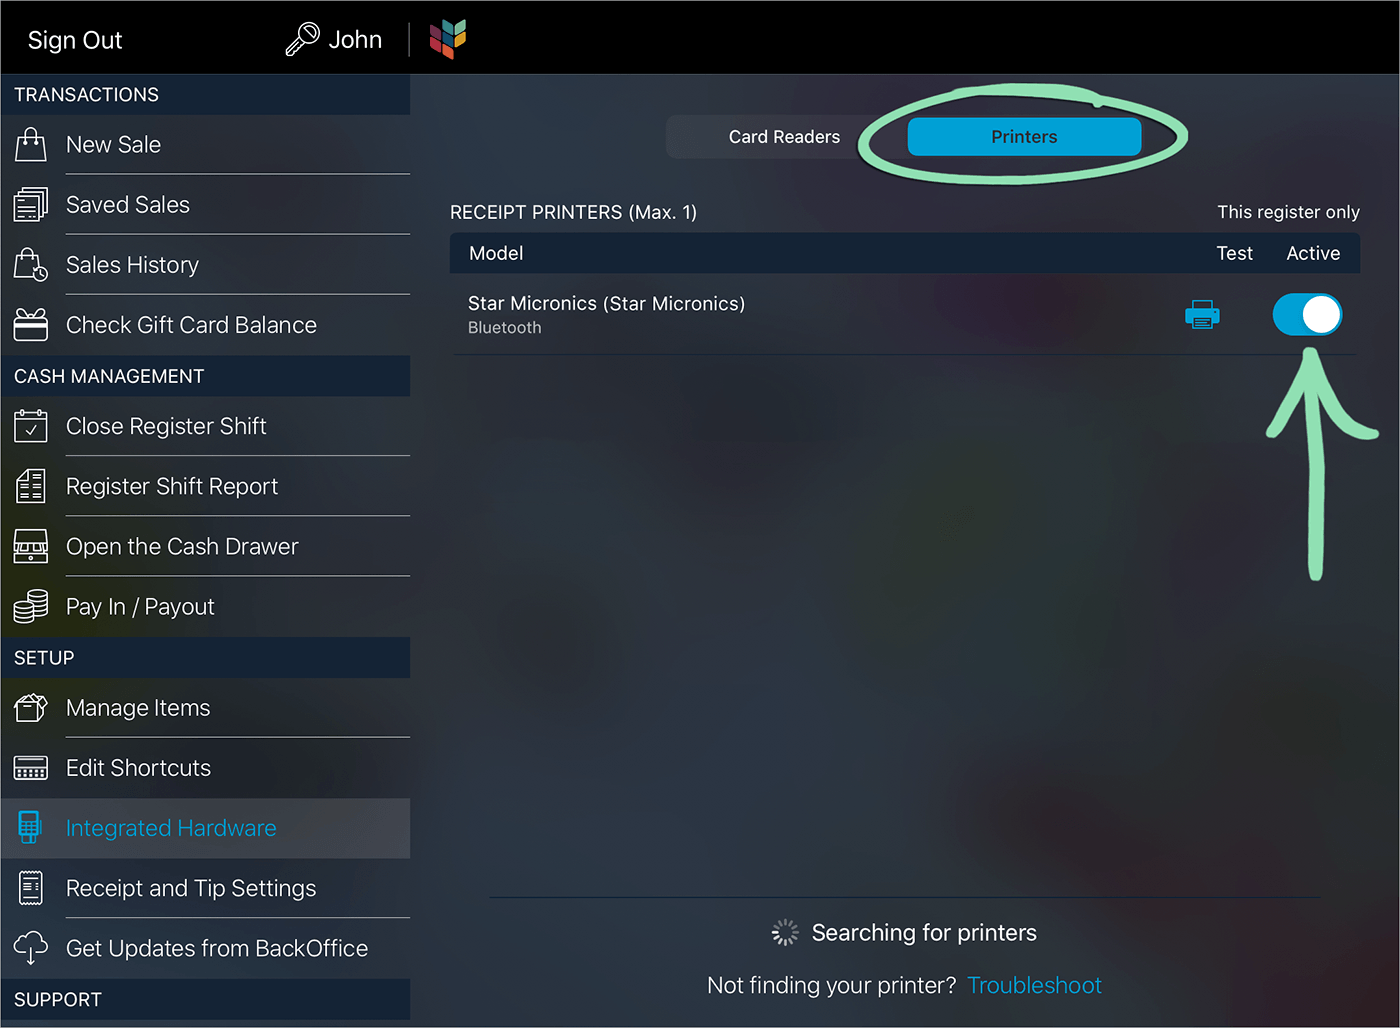
    1. Follow the steps here to make sure the printer is enabled on the Printer Setup screen.

      If the printer does not appear in Printer Setup, follow the steps here to troubleshoot.

    2. Make sure there is paper loaded in the printer.
    3. Examine the lights on the printer.

      If anything is flashing, find the relevant issue in this troubleshooting guide to resolve the situation.

    4. If unable to resolve the printer issue, select ‘Display QR Code’ or ‘Share’ to share the payment link with the customer.

      Display QR Code | Show a QR code on the register screen that, when scanned, opens the payment link.
      Share | Open the iOS ‘Share’ menu to select a method of sharing the payment link. Available sharing options will vary based on the specific apps installed and set up on the iPad but may include the abilities to email, copy, and AirDrop the payment link.

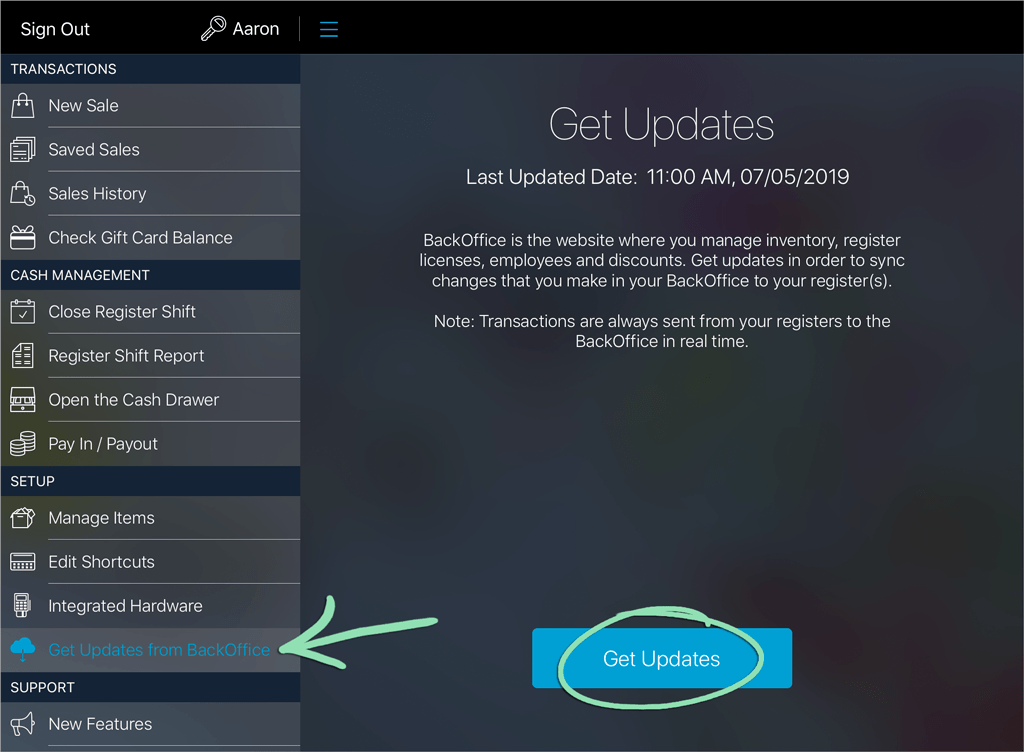
    Suggested tips do not print on my receipts.

    This issue occurs if the suggested tips setting is not enabled, the register needs to sync with BackOffice, or the Lightspeed Retail POS (S) app is out of date.

    1. Visit receipt settings from BackOffice or the Lightspeed Retail POS (S) app.
    2. From the ‘Tips and Signature’ tab, enable ‘Show tip suggestions on paper receipts’.
      Click to Enlarge
    3. Customize each tip’s value and type (‘$’ or ‘%’).
    4. Click ‘Save’.
    5. If updating tip settings from BackOffice, go to the register and Get Updates from BackOffice.
      Click to Enlarge
    6. If the problem persists, update the Lightspeed Retail POS (S) app.

    My business logo does not print on receipts.

    This issue occurs if a logo has not been uploaded, the ‘Show Logo on Printed Receipt’ setting is not enabled, the register needs to sync with BackOffice, or the Lightspeed Retail POS (S) app is out of date.

    1. Visit receipt settings from BackOffice or from the Lightspeed Retail POS (S) app.
    2. From the ‘Business Info’ tab, check if a store logo is uploaded.
      Click to Enlarge
    3. If there is no logo, tap ‘Choose Image’ to upload one.

      We recommend following these tips to optimize the logo for printing.

    4. Click the ‘Paper Receipt’ tab.
    5. Enable ‘Show Logo on Printed Receipt’, then click ‘Save’.
      Click to Enlarge
    6. If updating receipt settings from BackOffice, go to the register and Get Updates from BackOffice.
      Click to Enlarge
    7. If the problem persists, update the Lightspeed Retail POS (S) app.

    My business logo on printed receipts looks different than my email receipt logo.

    Logos printed on paper receipts look different than logos on email receipts due to the limitations of thermal printers. For best results, optimize your logo for printing, then upload that new version to update the logo used for paper receipts, email receipts, and invoices.

    1. Follow these tips to optimize your logo for paper receipts.
    2. Upload the new logo.
    3. On the register, open the Main Menu and tap ‘Get Updates from BackOffice’, then ‘Get Updates’.