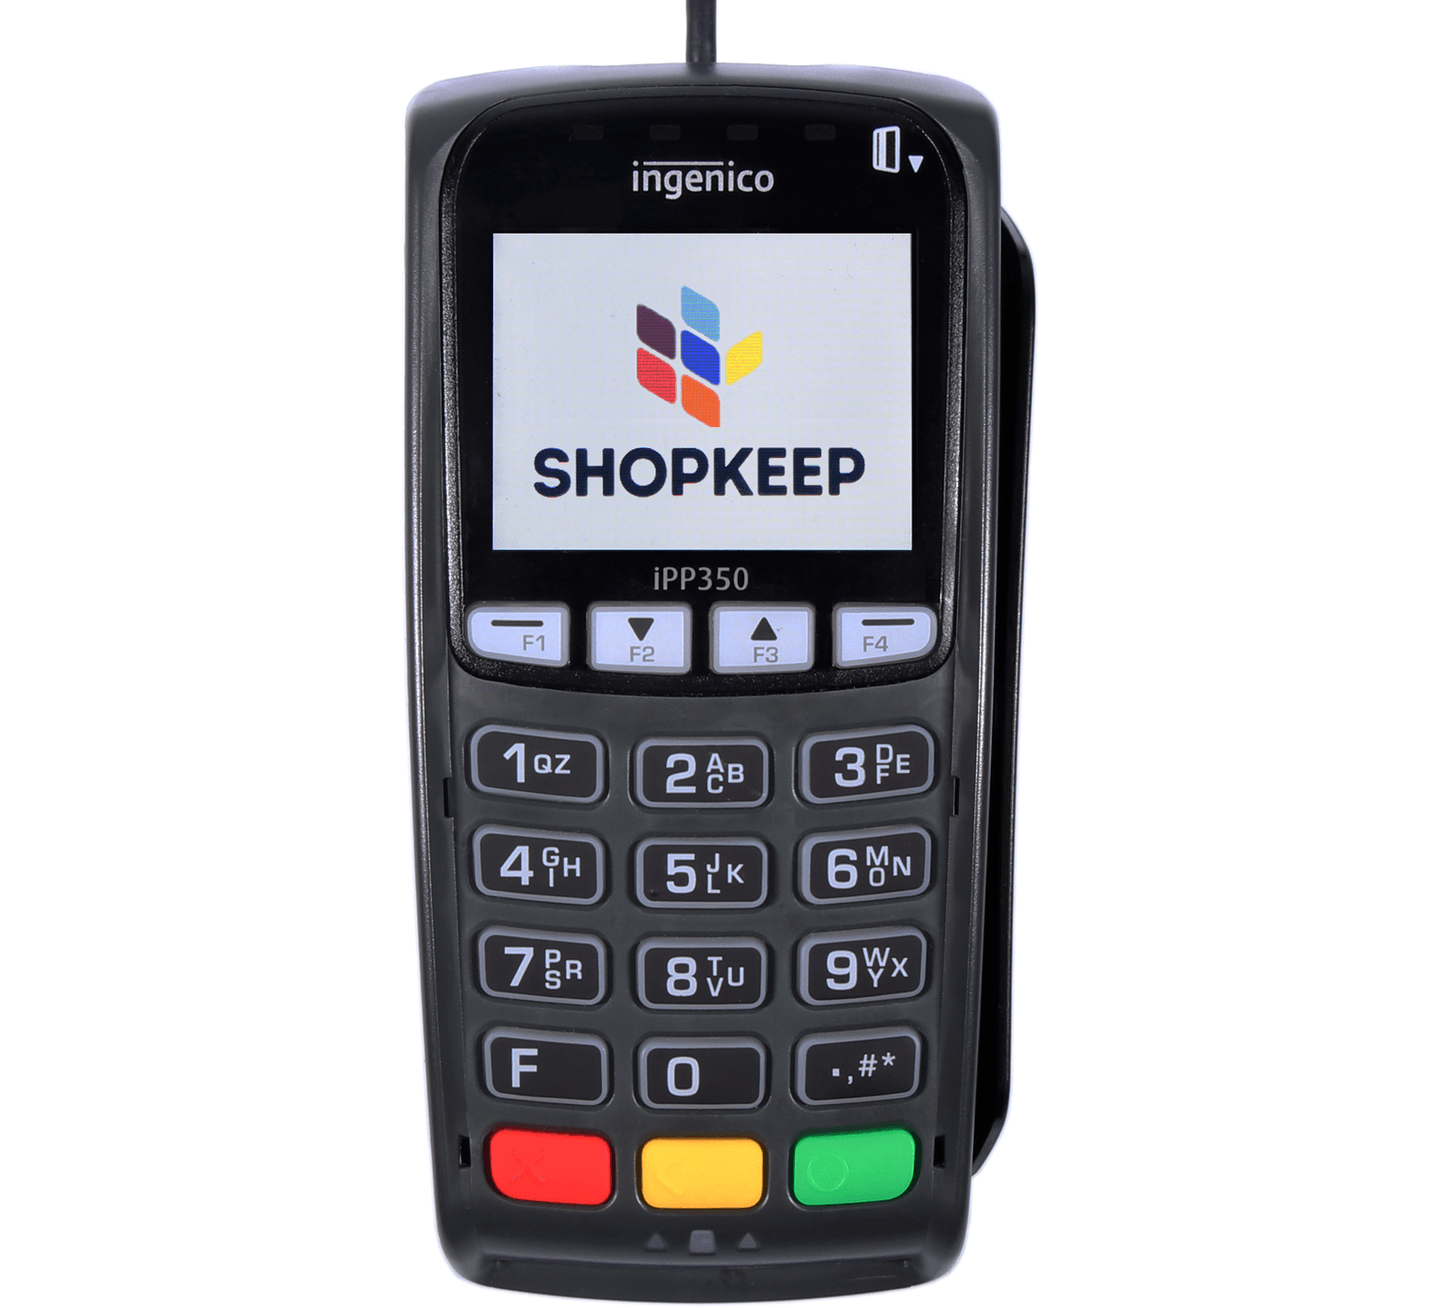
The Ingenico iPP Series Ethernet Credit Card Reader plugs directly into your router and connects to the Retail POS (S-Series) app for iOS over your internet network to process swiped and EMV credit payments and Apple Pay. Set up the card reader hardware and connect it to the Lightspeed Retail POS to use it to accept credit cards.
Table of Contents
In the Box
The iPP320 and iPP350 Ethernet Credit Card Readers ship with the parts listed below.
Ingenico iPP320 or iPP350 Ethernet Credit Card Reader
Connection cable
Power adapter
Three screws
User guide (not pictured)
Ethernet cable coupler (only included if purchased)
Ethernet cable (only included if purchased)
Hardware Setup
Complete the basic steps of setting up the iPP320 or iPP350 hardware so you can connect the device to the Retail POS (S-Series) app.
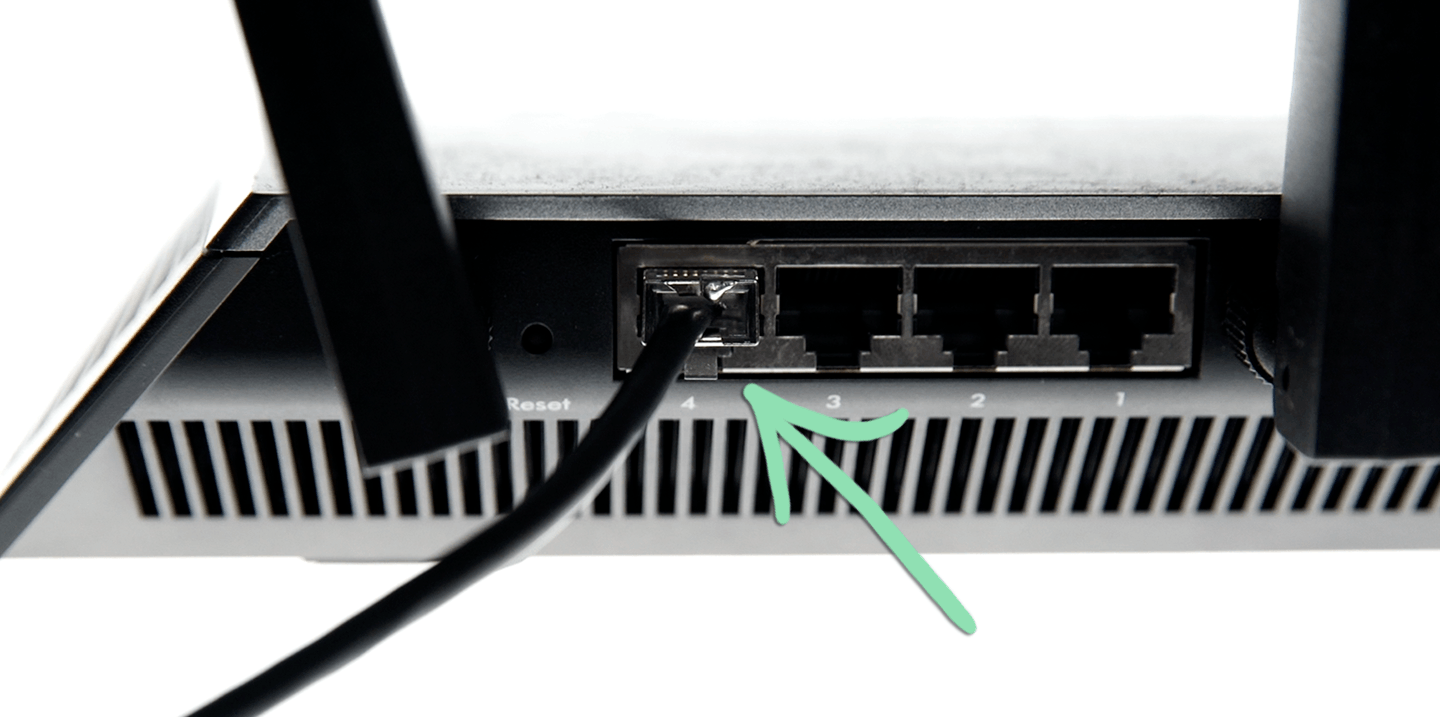
IMPORTANT: This device must be physically plugged into your router to be able to connect to Lightspeed Retail. You must also have Wi-Fi at the location or have your iPad connected to the router with an ethernet adapter to complete setup.
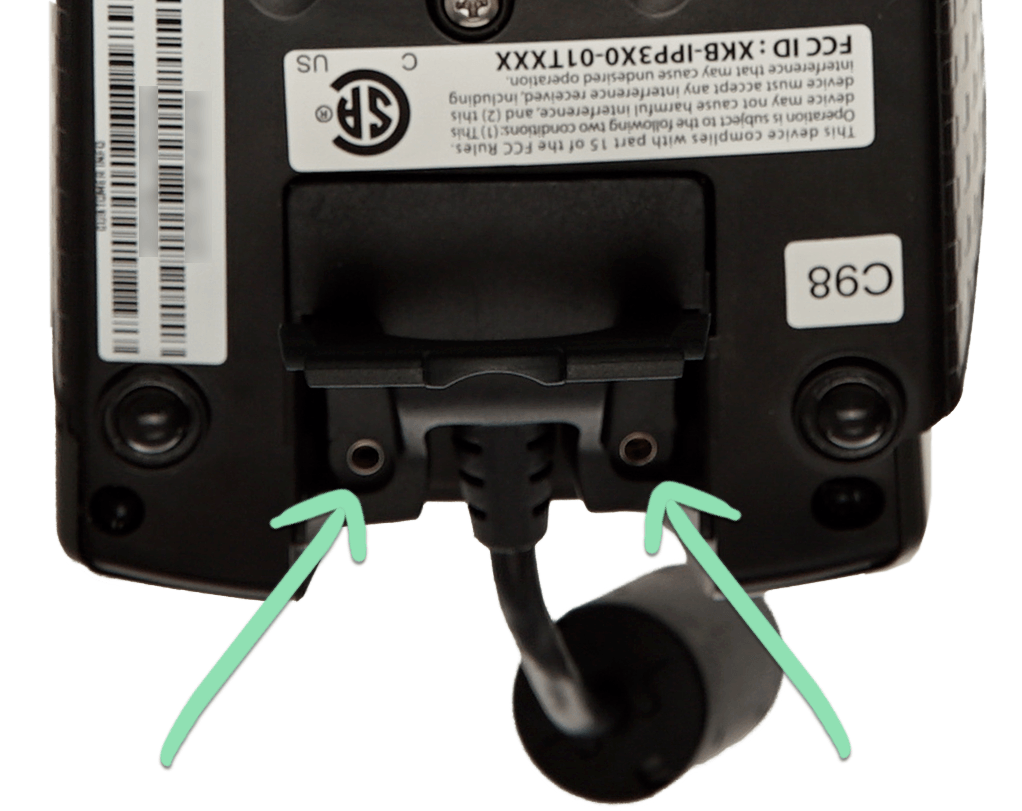
Pull up on the handle of the connection cable.
Plug the connection cable into the port on the bottom of the reader.
Click to Enlarge
Use 2 of the included screws to secure the cable in place.
Click to Enlarge
The iPP320 and iPP350 also act as a customer facing display to show transaction details as a cashier uses the register. Learn below about the customer facing display’s features and how to toggle the display off or on.
Display Features
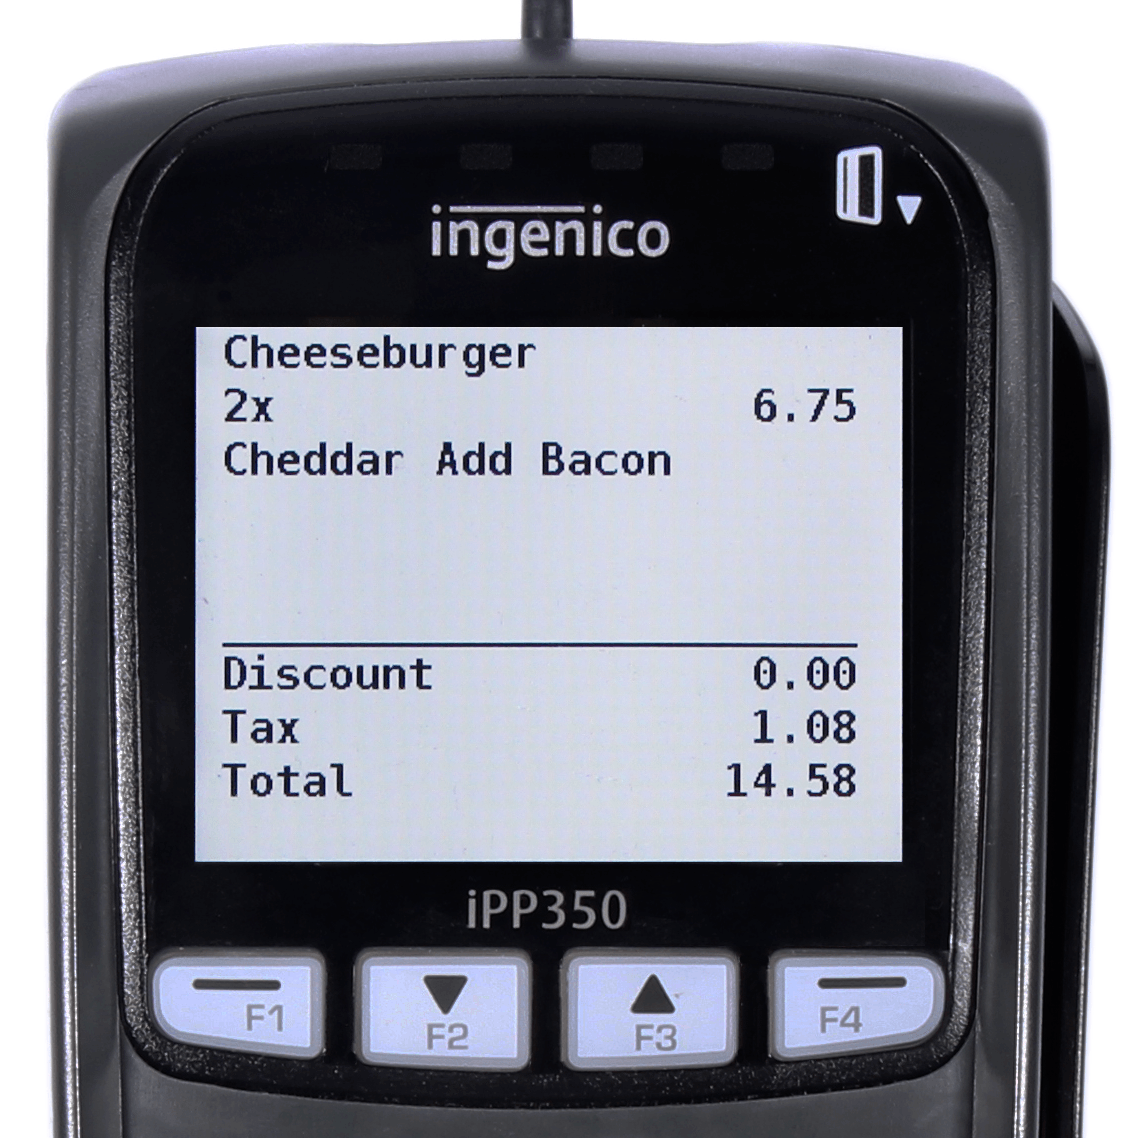
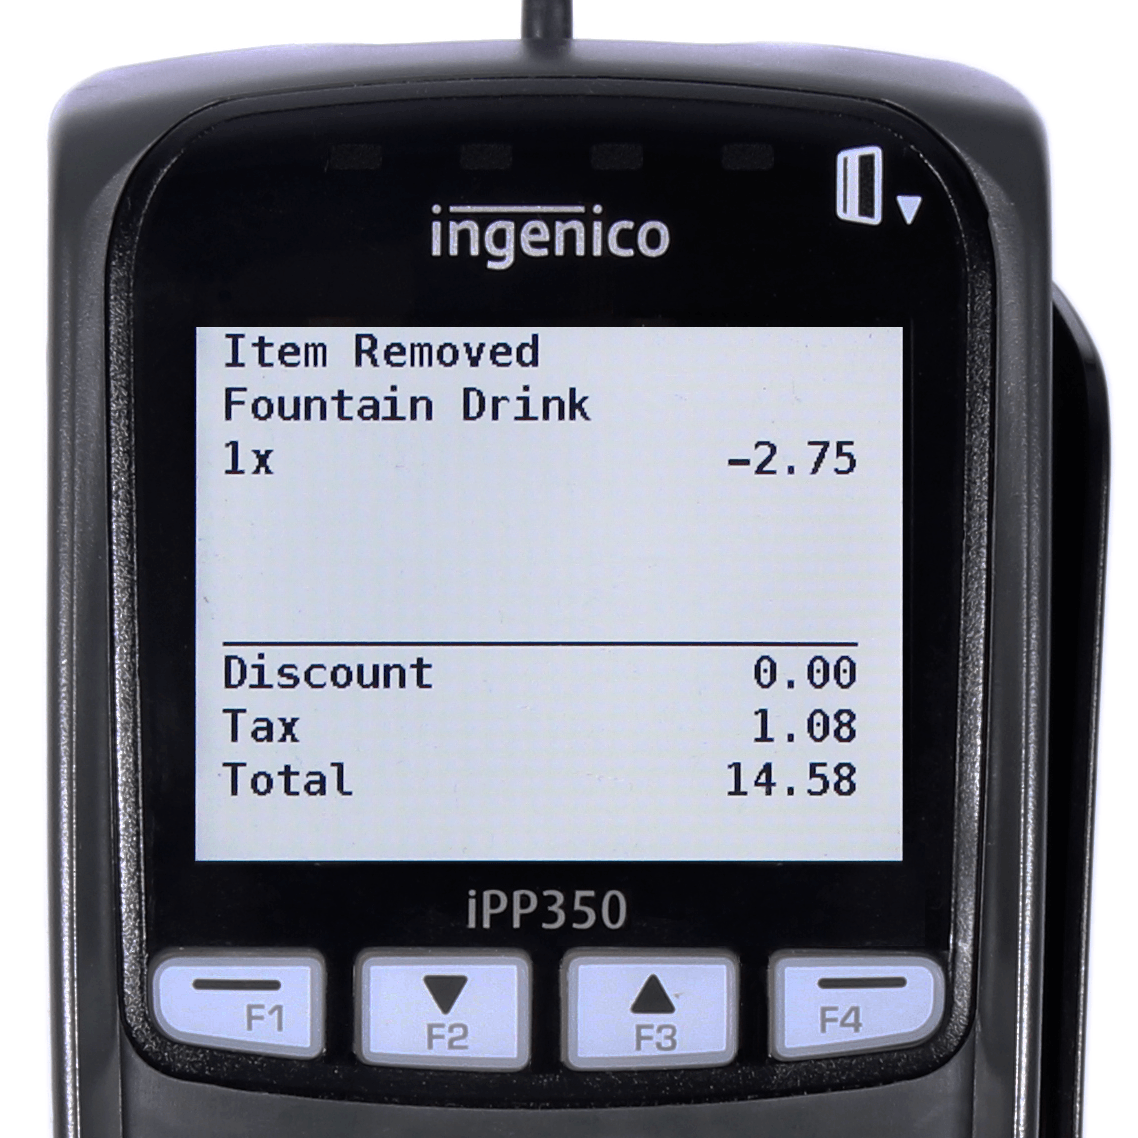
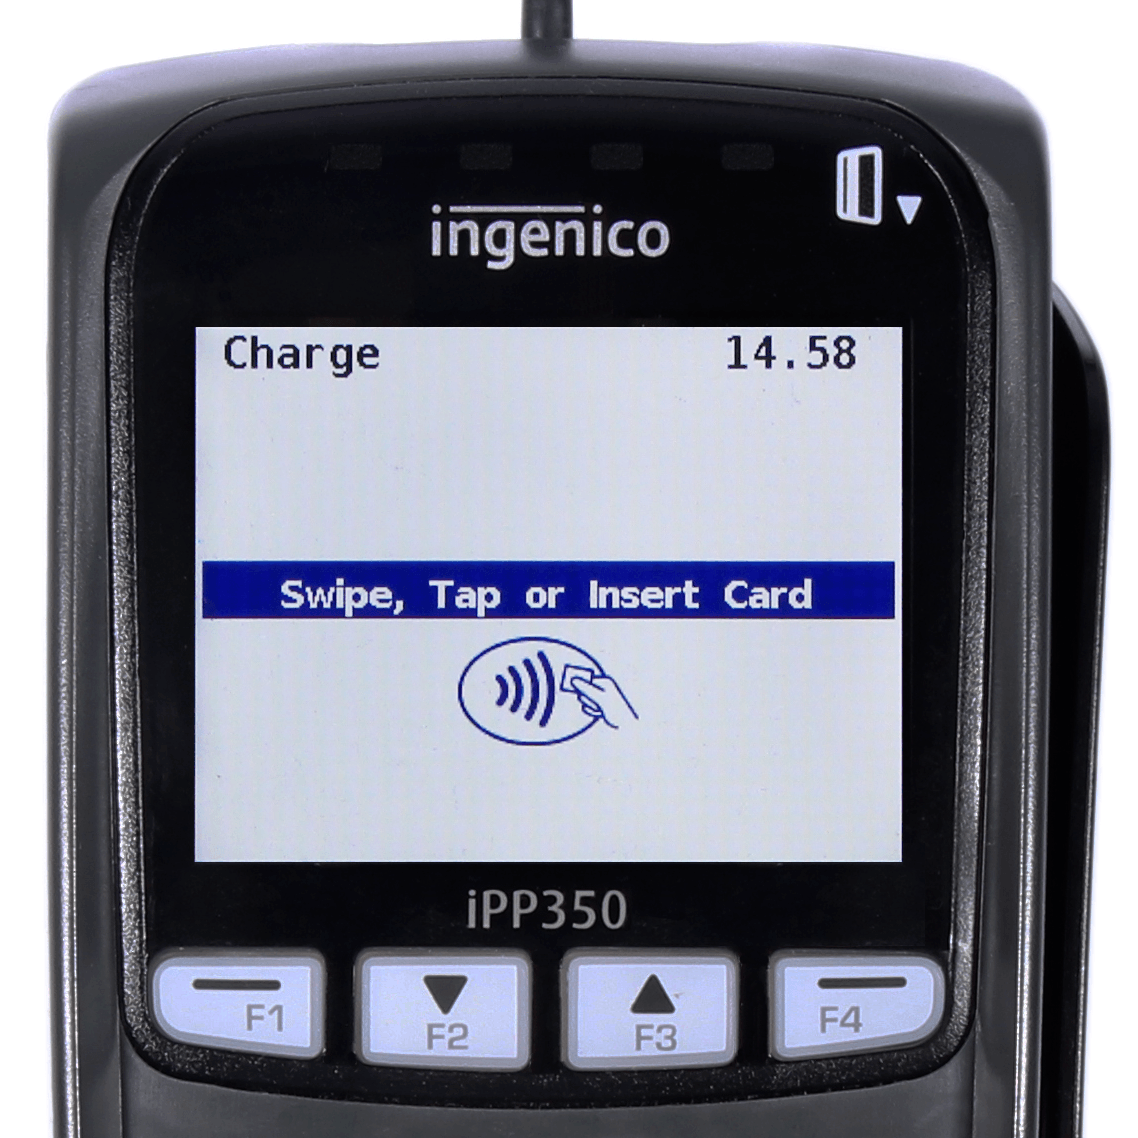
View below what your customer sees on the iPP320 or iPP350 as the cashier moves through a sale.
The reader shows the last item added or edited along with its quantity and modifiers.
‘Item Removed’ indicates the cashier deleted that item from the sale.
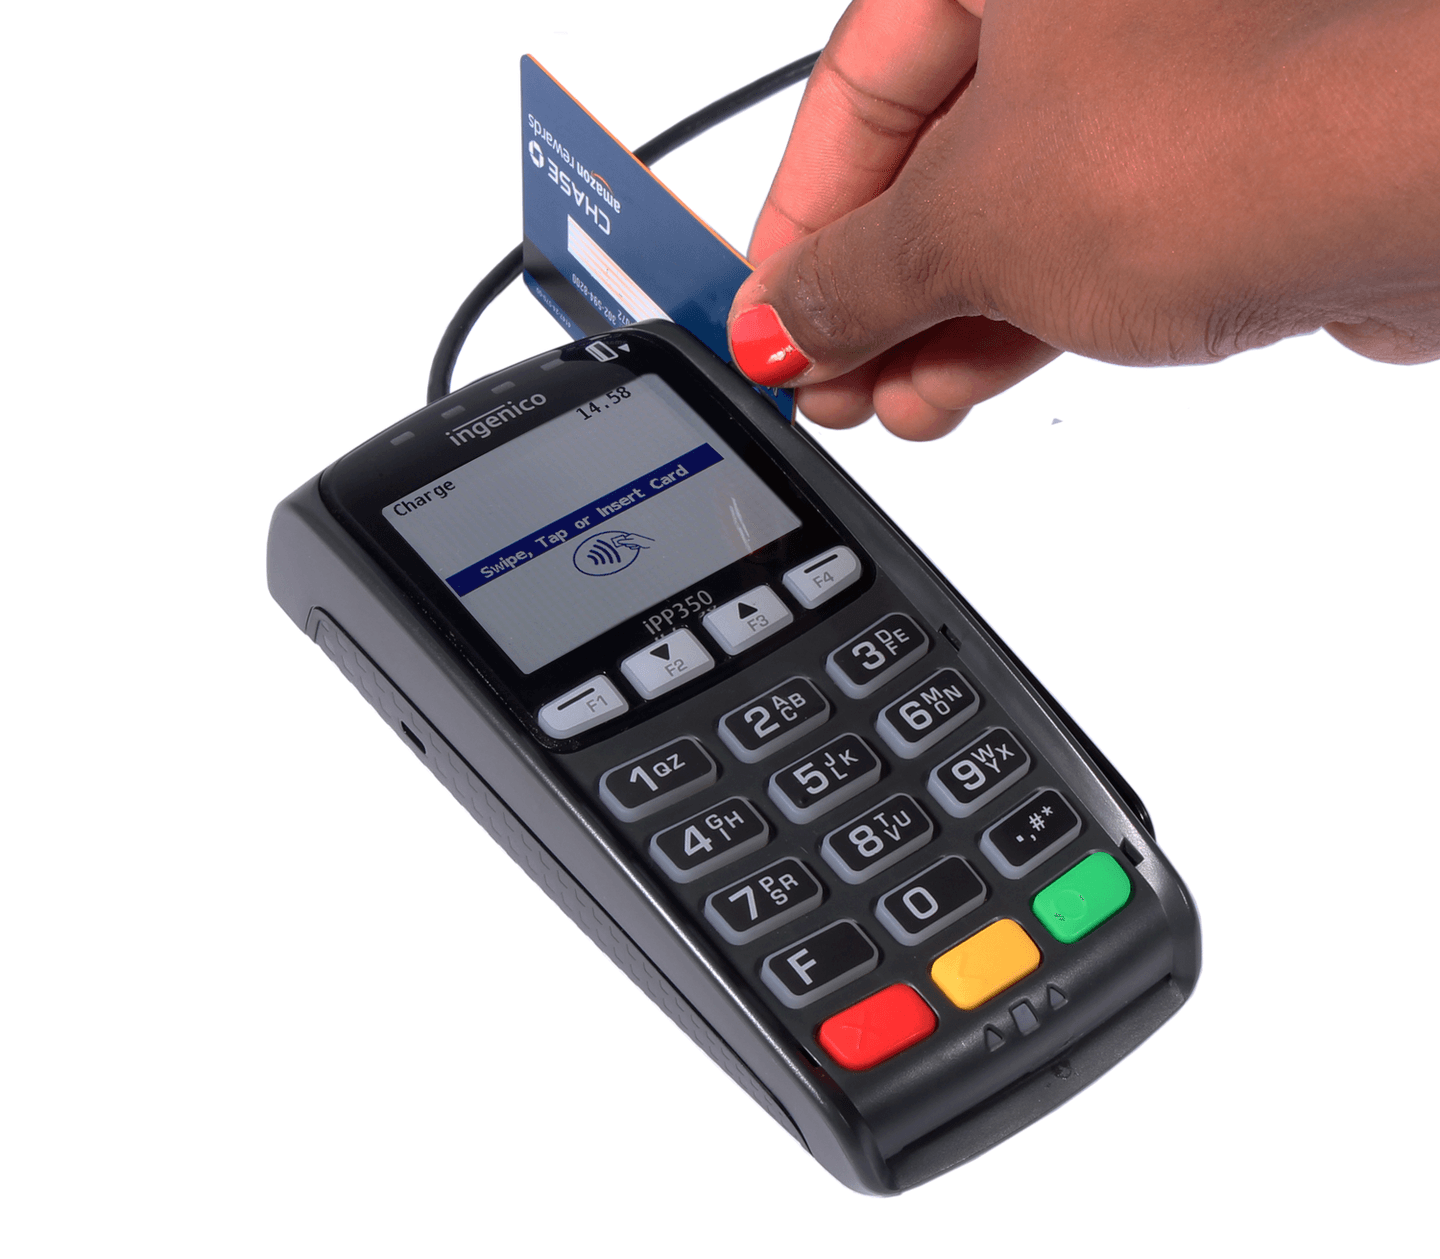
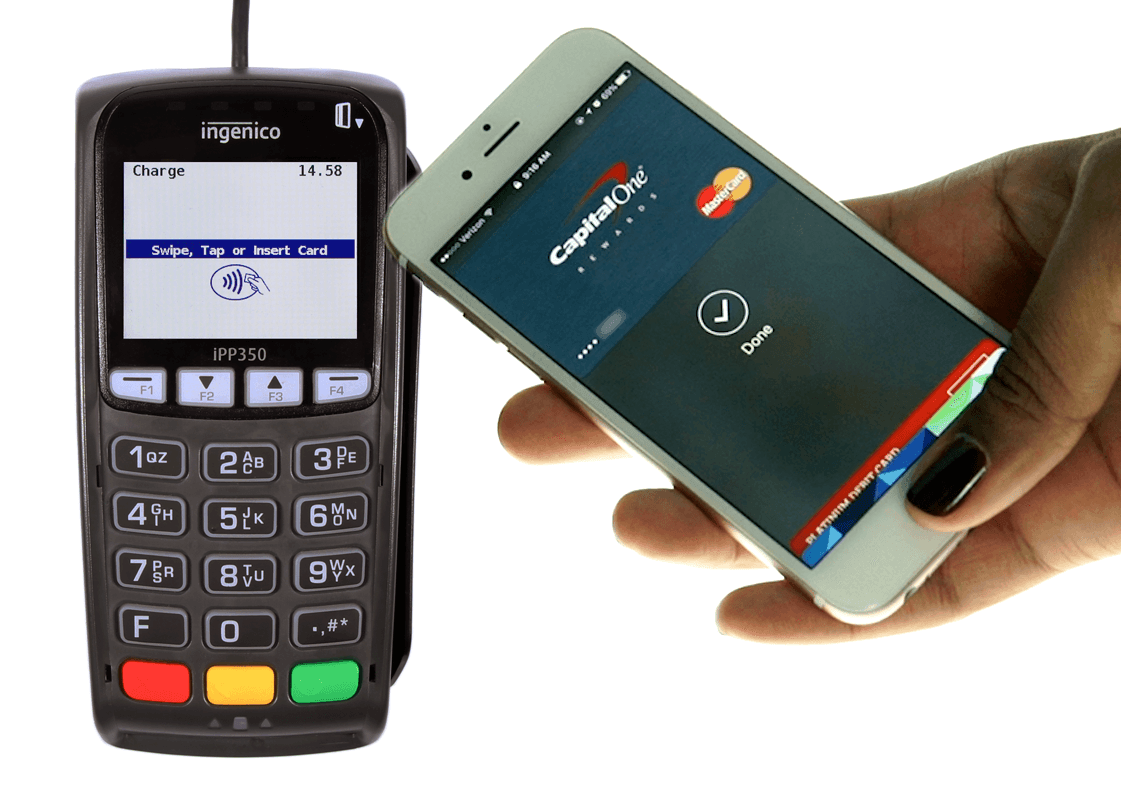
When the cashier tenders a sale to Credit, customers see their total and a message to swipe/tap/insert a card.
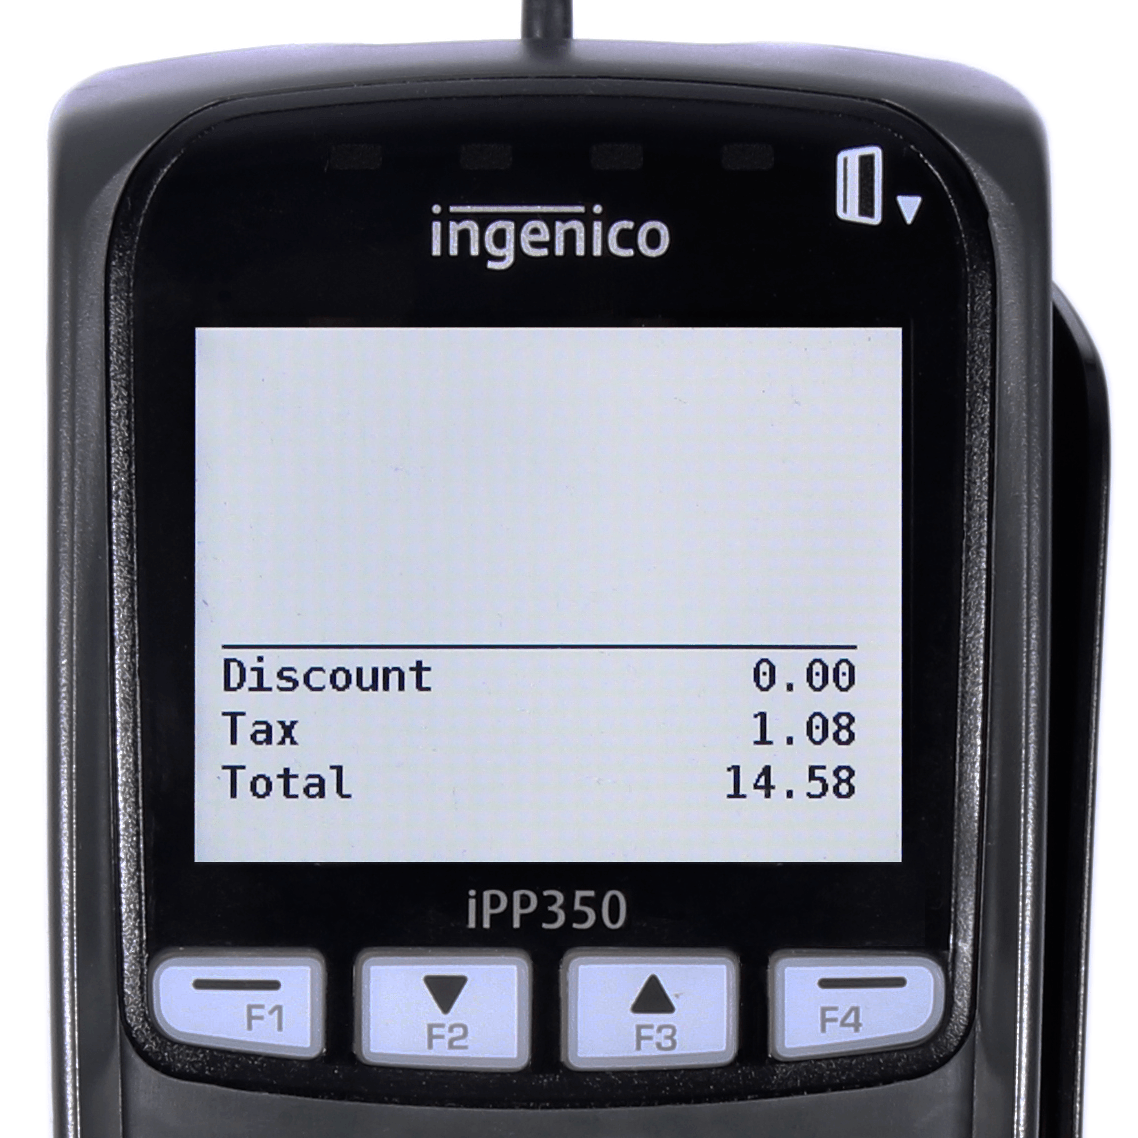
For non-credit tenders, the reader displays discounts, tax, and the total due.
This screen also appears for returns and saved checks.
If the cashier selects Split Tender, each payment’s total appears as the cashier tenders it.
Display Settings
The customer facing display feature is enabled by default, but you can toggle it off or back on as desired.
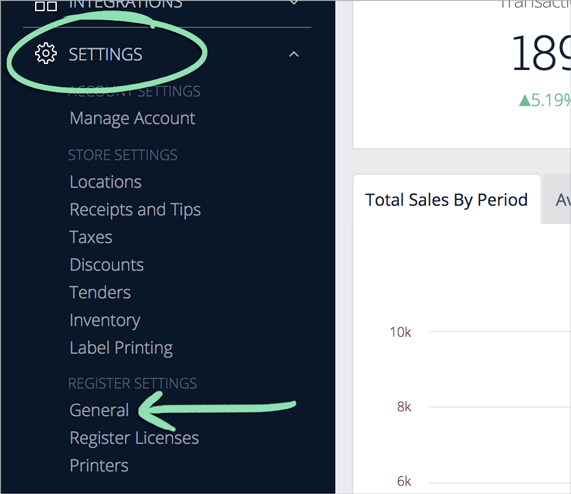
In BackOffice, click 'Settings' and select 'General'.
To disable the display, uncheck the 'Enable' box and click 'Save'.
The iPP320 and iPP350 support a few different types of credit payments. Follow the steps below to learn the basics of how to accept EMV chip cards, swiped credit cards, and Apple Pay.
Before accepting credit cards, your Lightspeed Retail account must be boarded for credit card processing. Learn how to set up credit card processing here.
Tip and signature settings control how customers leave tips and sign for credit sales: on the screen of the register or on a paper receipt. Learn how to change these settings here.
The customer holds their device within 1" of the reader.
The customer waits for a vibration, checkmark, and beep on their device to confirm the payment.
Wait for payment to be approved.
Continue closing the sale.
Do you have questions about your card reader? Visit our Hardware FAQ. Running into issues while processing payments? Visit our troubleshooting guide for help.
Help us improve Lightspeed Support. Was this article helpful?