Save a sale to start a check or tab that will remain open on the register until a customer is done ordering. A saved sale can be modified to add more items to the order and closed when the customer is ready to pay. Saved sale reporting shows the quantity, value, and items present on saved sales and allows you to delete saved sales.
Table of Contents
Save a Sale
Saving a sale holds a transaction open until the customer is done ordering and ready to pay, freeing up the register for other tasks. Saved sales can be modified to add, reorder, and void items as needed.
Visit the New Sale screen in the Retail POS (S-Series) app.
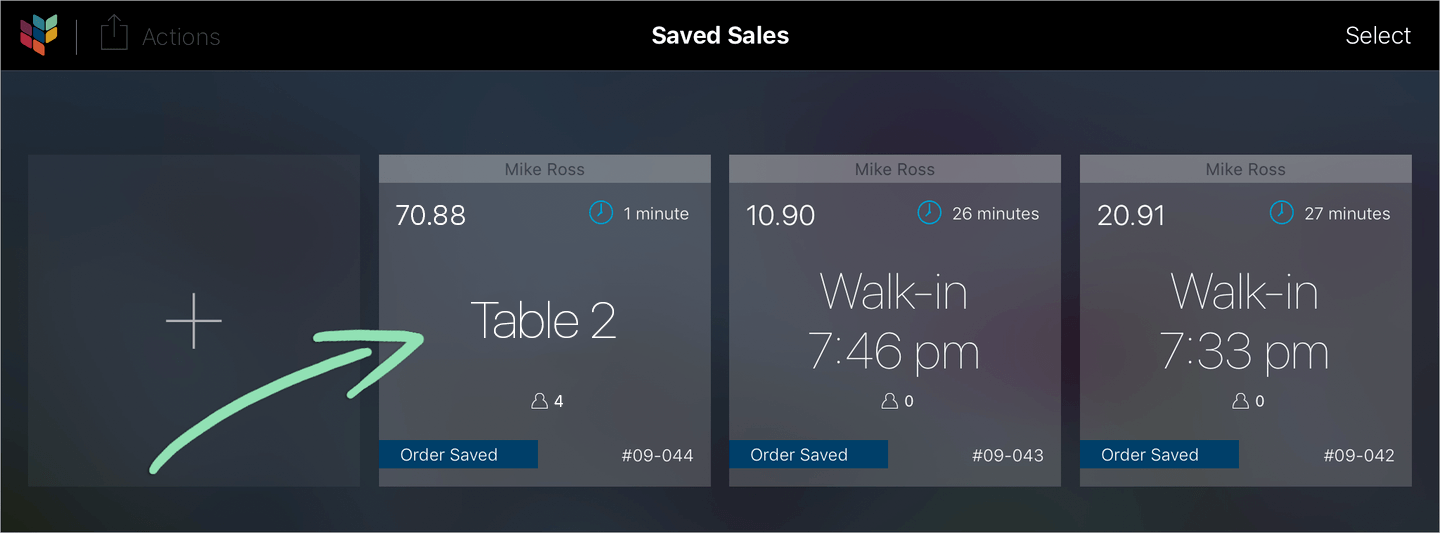
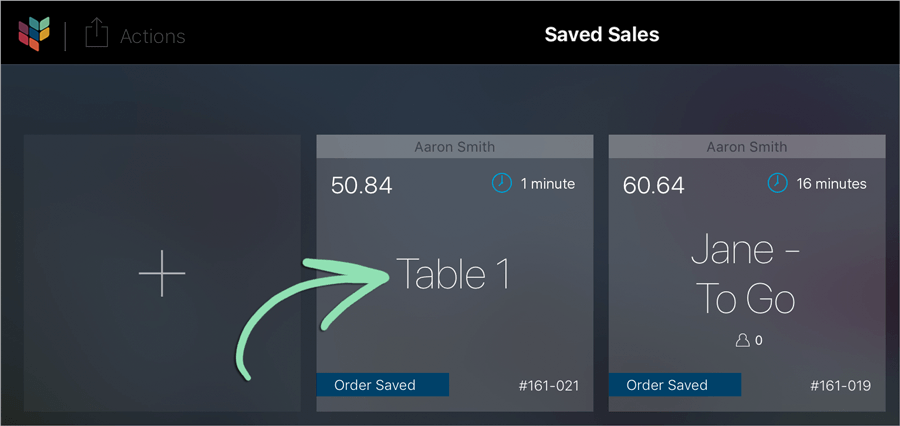
If starting from the Saved Sales screen, tap the ‘+’ to get to the New Sale screen.
If starting from the Tables screen, tap an empty table to get to the New Sale screen.
If Guest Count is enabled, enter the number of guests for the sale.
aIf prompted with a keypad, enter the guest count and tap ‘Done’.
Use ‘None’ to record 0 guests when the exact count is unknown, such as with to-go or phone orders.
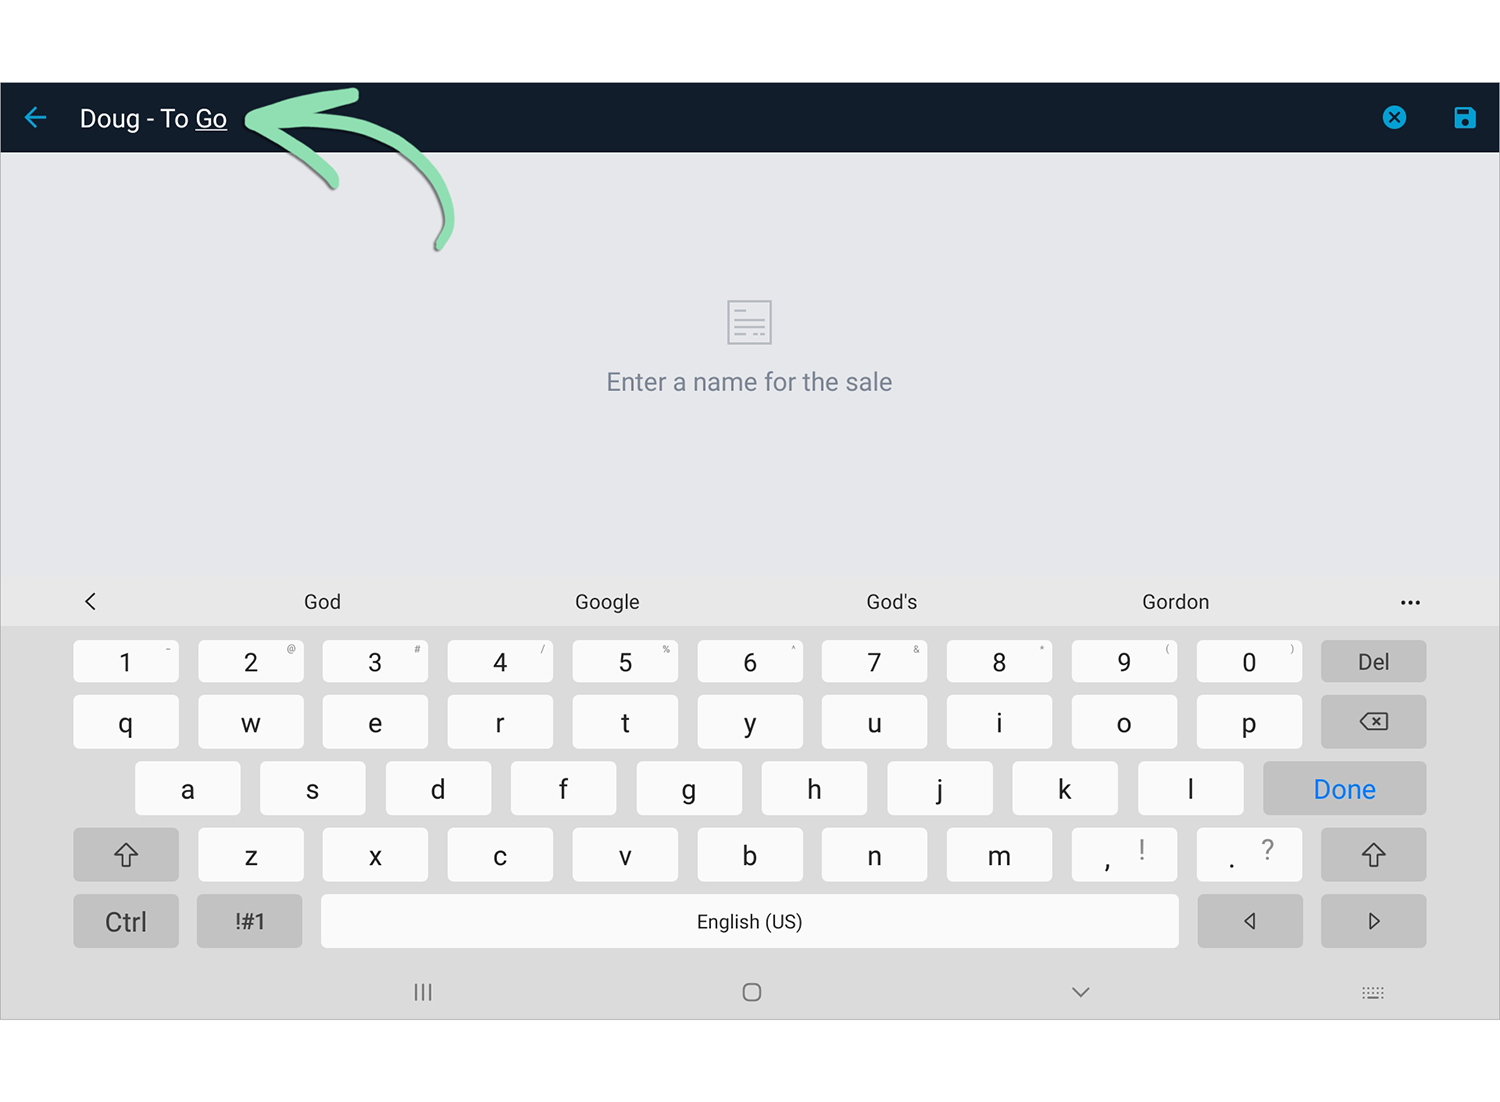
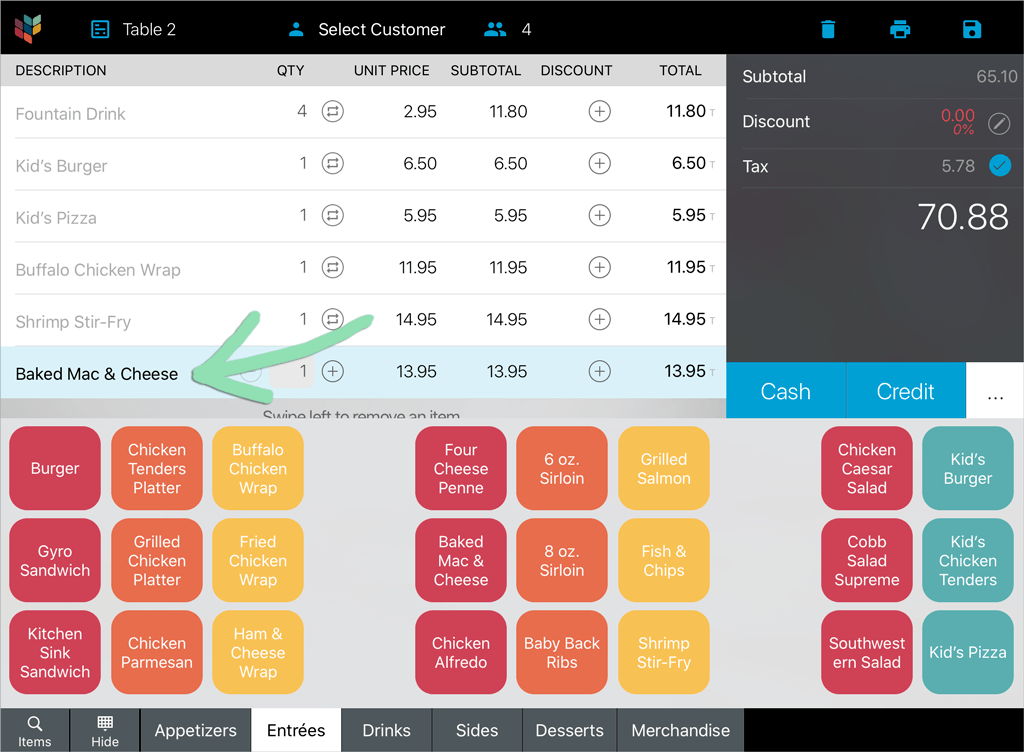
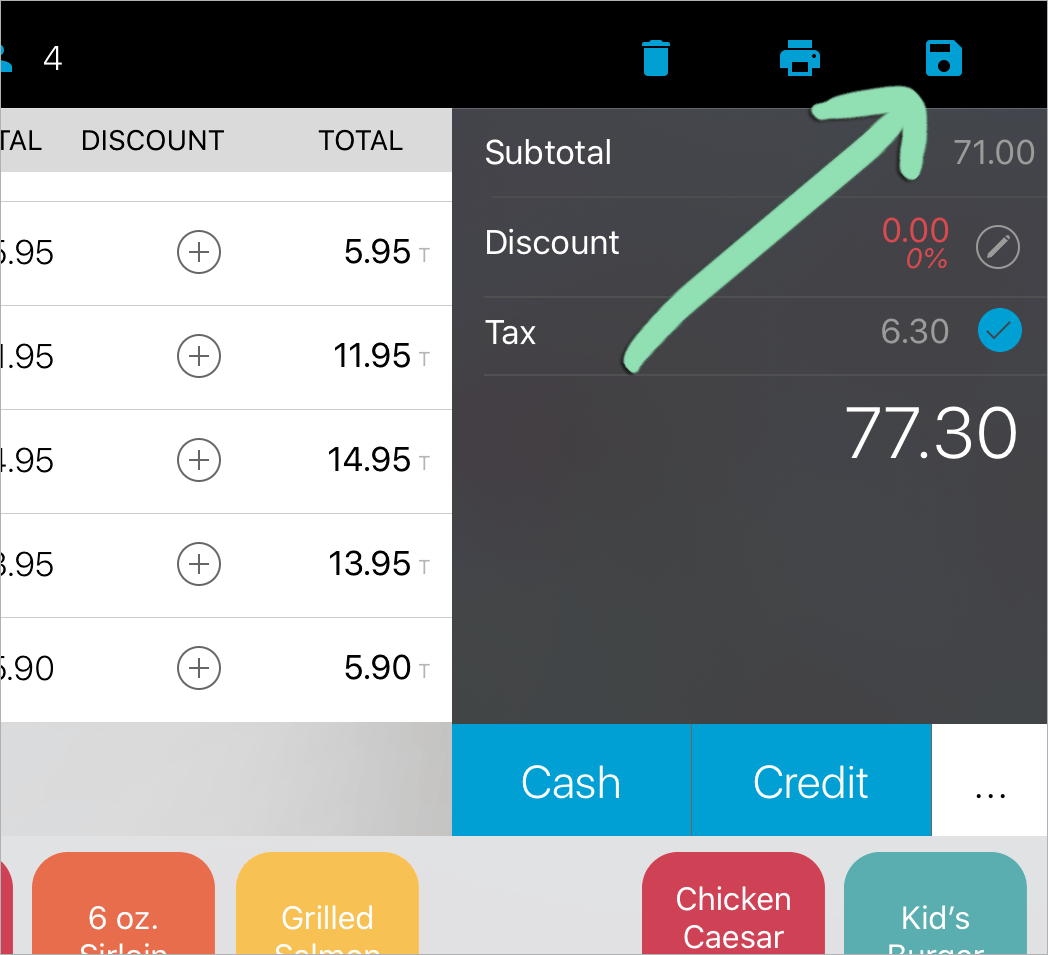
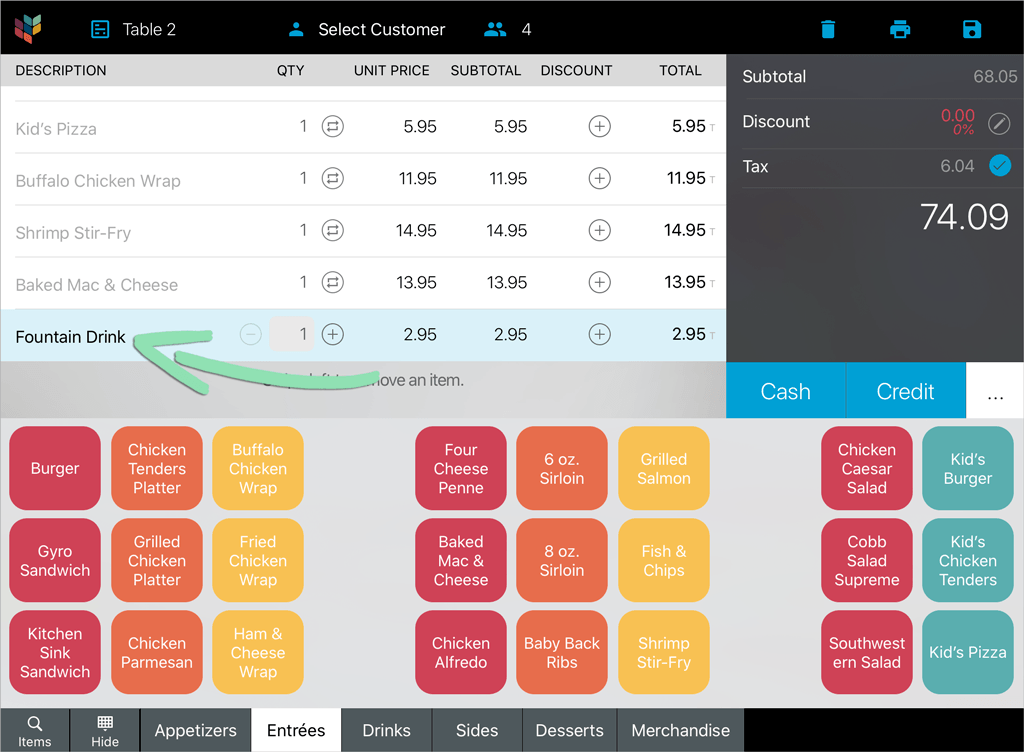
Add some items to the sale and tap the disk icon to save.
Click to Enlarge
(Optional) Enter a new name for the saved sale, or swipe a credit card through a connected iDynamo card reader to automatically assign the cardholder's name to the sale.
The sale name will default to the customer tagged to the sale. If no customer is tagged, it will default to ‘Walk-in’ or the table where the order was started, plus the current time.
If paying by credit card, the card must be swiped again when closing the sale. Swiping a credit card to name a saved sale does not save card information or pre-authorize the purchase.
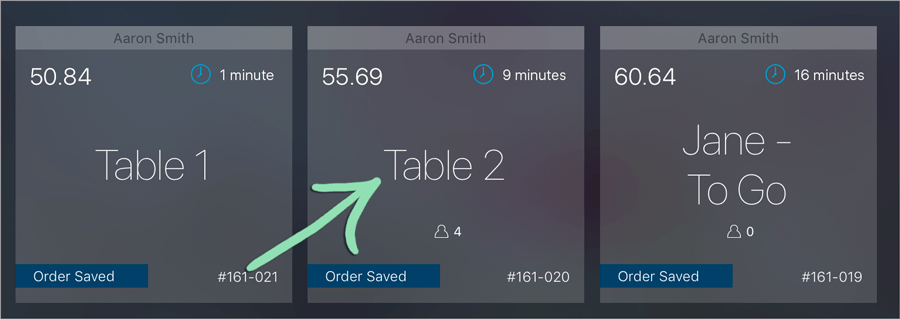
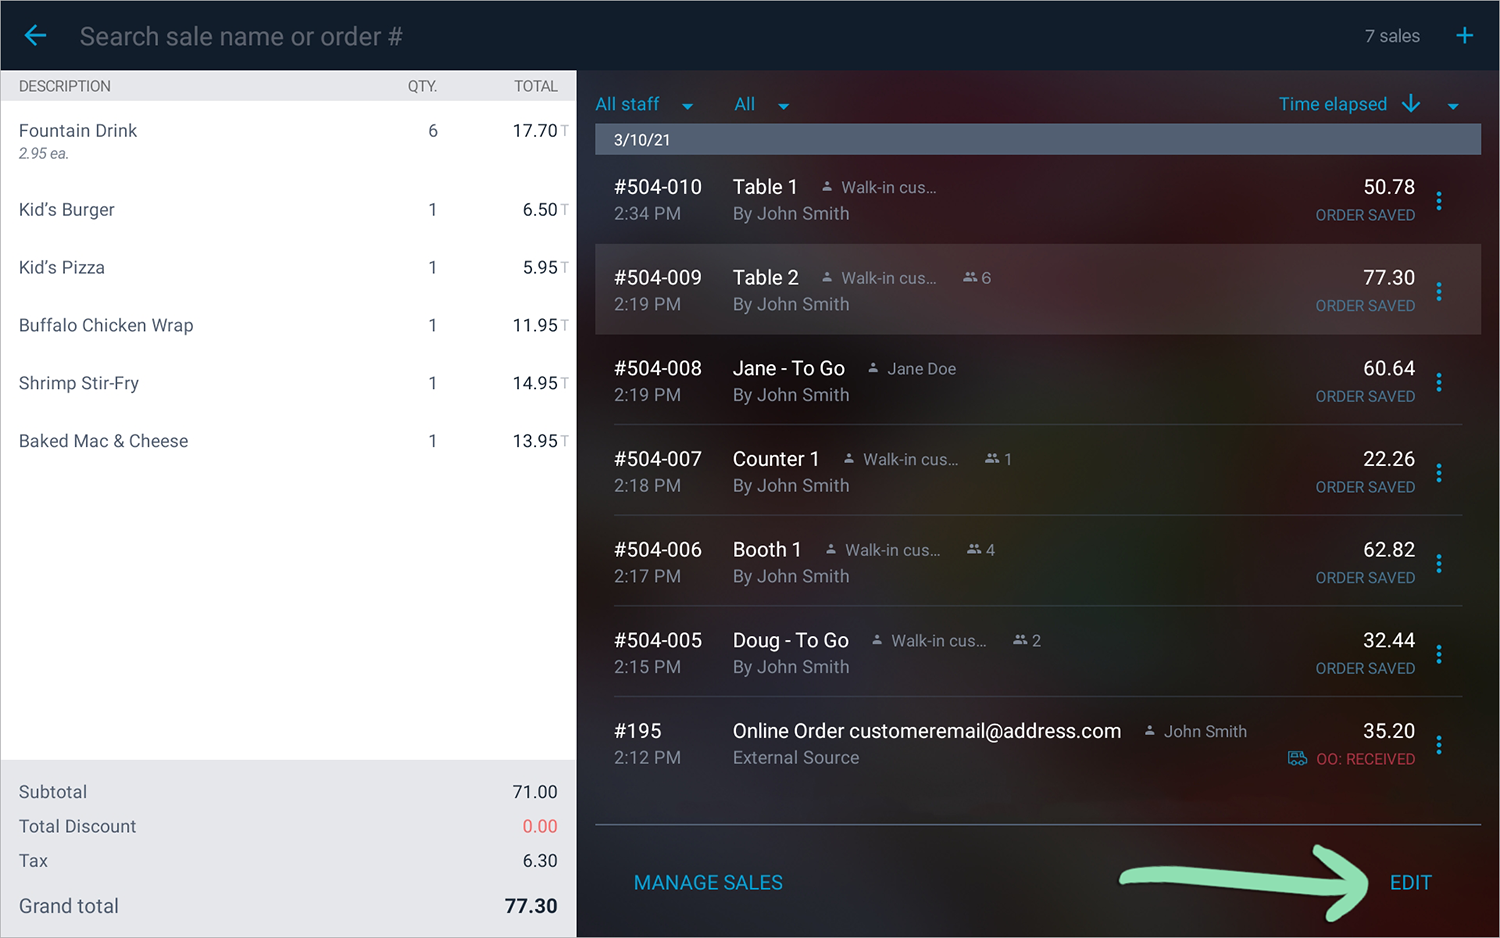
The Saved Sales screen displays all sales currently saved on that specific register. If Saved Sales Sync or Serverless Sync™ is enabled, saved sales from all connected registers will appear on this screen.
Saved sales can also be viewed in the Lightspeed Pay mobile app and in BackOffice if Saved Sales Sync is enabled.
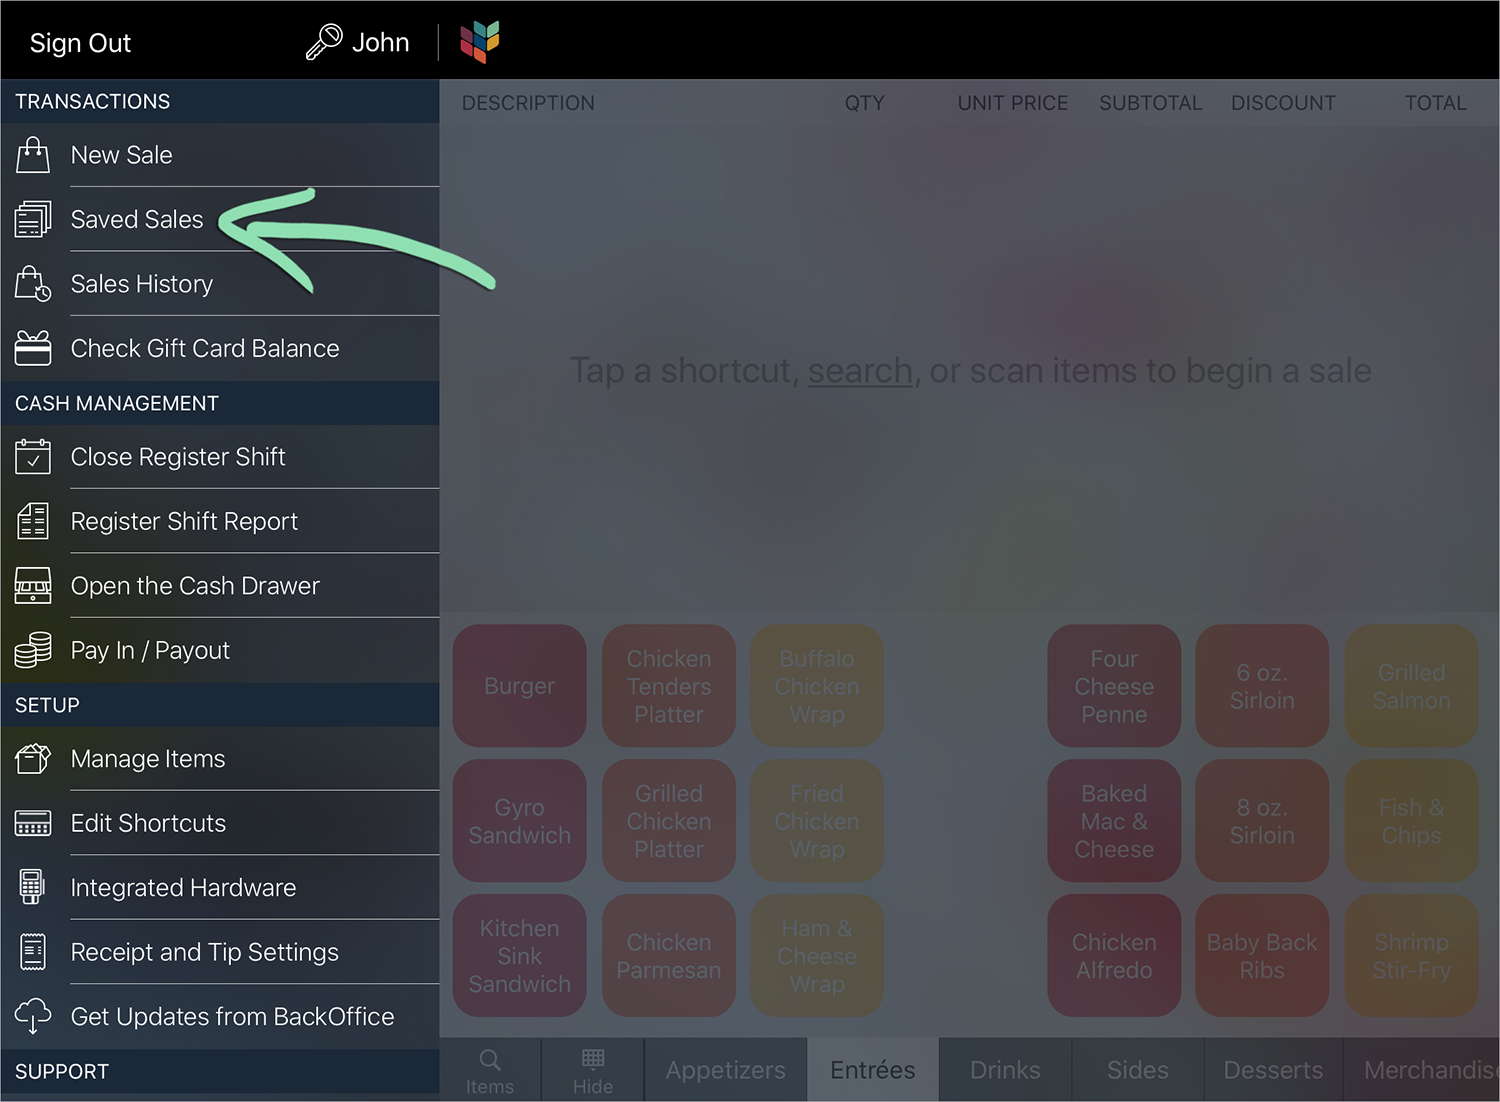
In the Retail POS (S-Series) app, tap ‘Saved Sales’ on the Main Menu (iOS) or register menu (Android).
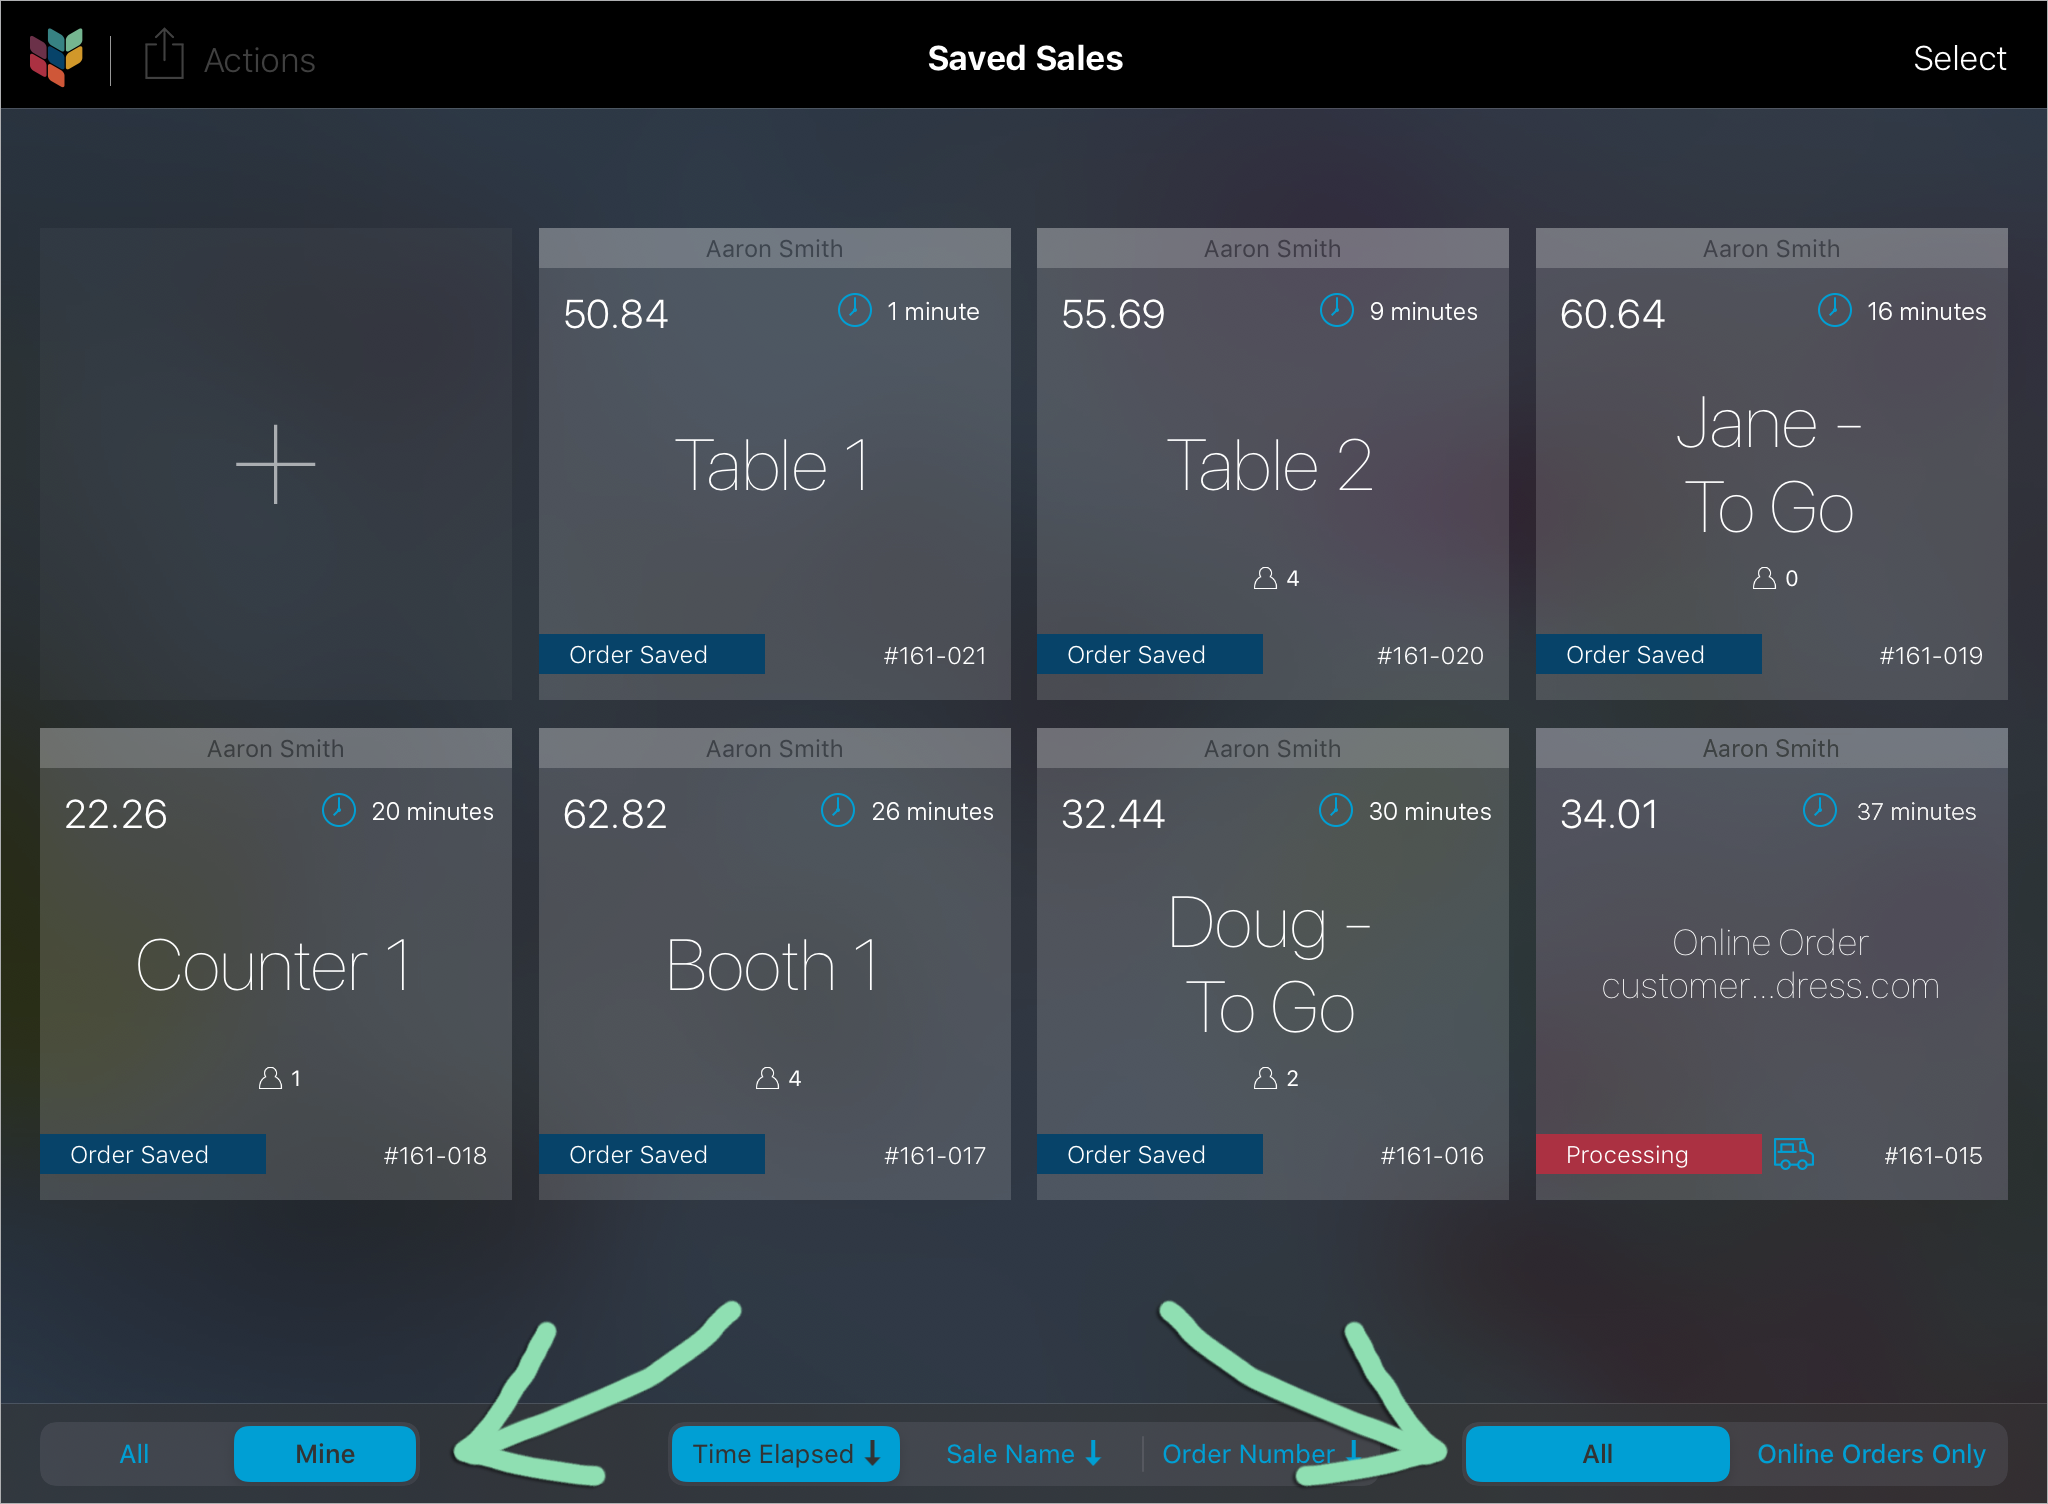
The Saved Sales screen displays sales saved on the current register or, if Saved Sales Sync or Serverless Sync™ is enabled, sales saved on all registers. Each tile (iOS) or row (Android) contains the employee assigned to the sale, its total, duration, and name, number of guests, order status, and order number.
(Optional) Filter the Saved Sales screen by employee and/or sale type.
If using the Retail POS (S-Series) app for iOS, select filter options from the bottom of the screen. Click to Enlarge
All / Mine | Display sales saved by all employees, or only sales saved by the employee who is signed in. All / Online Orders Only | Display all saved sales and Lightspeed eCom (E) online orders, or only Lightspeed eCom (E) online orders.
If using the Retail POS (S-Series) app for Android, select filter options from the drop-downs. Click to Enlarge
All Staff / Me / Employee / External Source | Display sales saved by all employees, only sales saved by the employee who is signed in, only sales saved by a specific employee, or only sales coming from an external source (e.g. Lightspeed eCom (E) online orders). All / In person / Online | Display all saved sales and Lightspeed eCom (E) online orders, only sales saved in person at the register, or only Lightspeed eCom (E) online orders.
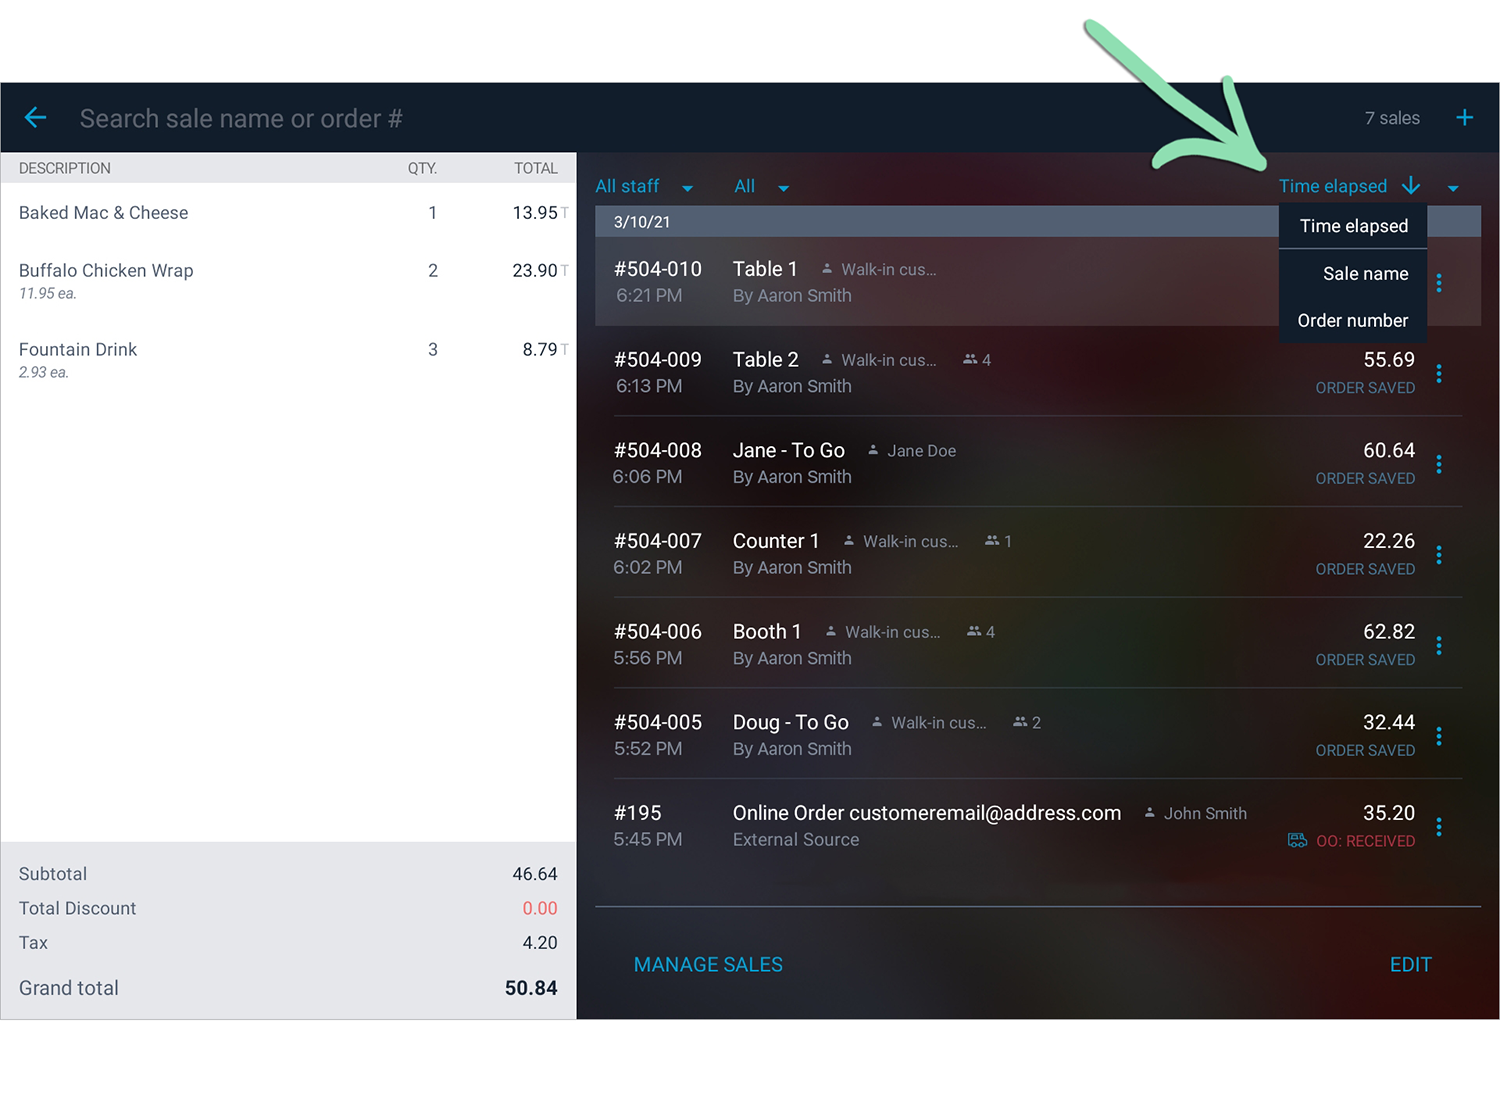
(Optional) Select a view option from the bottom of the screen (iOS) or from the drop-down (Android) to sort saved sales in ascending or descending order.
Time Elapsed | Sort saved sales by when they were saved at the register or received via online ordering. Sale Name | Sort saved sales alphabetically by name. Online orders begin with the letter ‘O’. Order Number | Sort saved sales by order number.
If adding items to an online order, follow the steps here to update the order in the Lightspeed eCom (E) Dashboard.
Adding items to an online order at the register as shown in steps 1 – 4 above will not automatically update the order in the eCommerce Dashboard. Failure to complete step 5 will cause a discrepancy between how the order appears on the register and in the Dashboard.
Reorder Items
Quickly reorder items from within a saved sale to save time at the register.
This feature is only available in the Retail POS (S-Series) app for iOS.
Tap the reorder icon to add a specific line item to the sale again.
By default, reordered items are given a quantity of 1 and have the same modifiers, variants, and/or kitchen ticket notes as the original item. Discounts applied to the original item will not be applied to the reordered item.
If reordering items for an online order, follow the steps here to update the order in the Lightspeed eCom (E) Dashboard.
Reordering items for an online order at the register as shown in steps 1 – 4 above will not automatically update the order in the eCommerce Dashboard. Failure to complete step 5 will cause a discrepancy between how the order appears on the register and in the Dashboard.
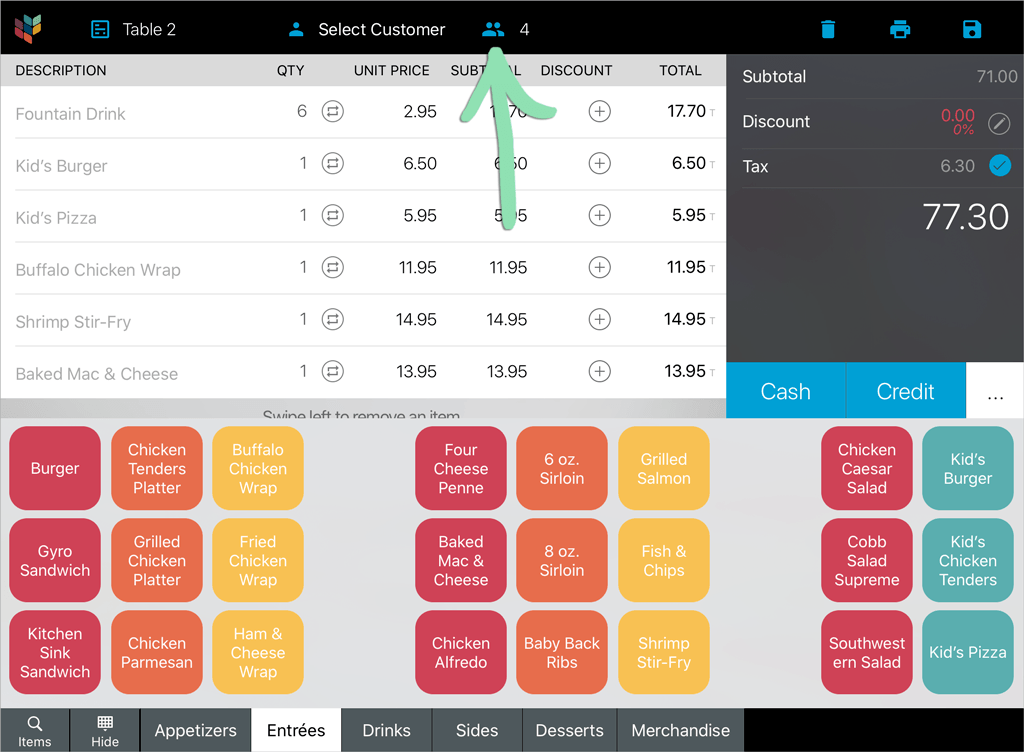
Update the Guest Count
Change the number of guests associated with a saved sale.
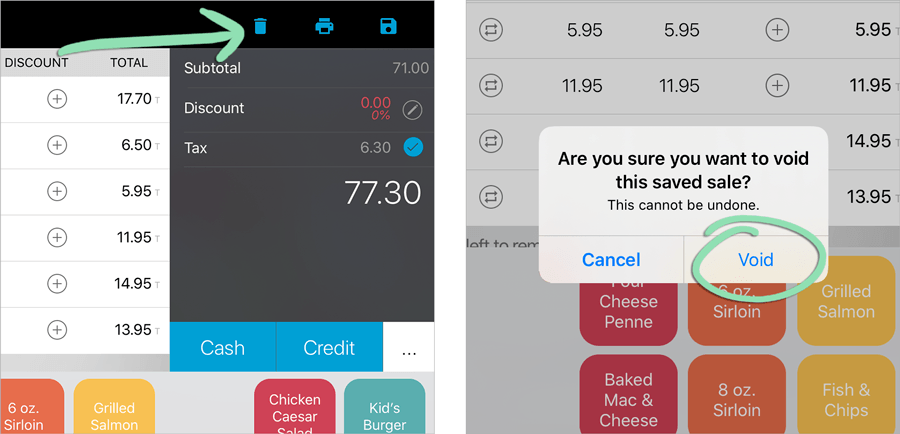
If an order is canceled before a saved sale is closed, perform a void to discard all or part of the saved sale without payment. Depending on your BackOffice Employee Settings, voids may require manager approval if performed by a cashier.
Voids are final once performed. If you void a sale or item by mistake, you must ring it back up again. Use void reporting to track the quantity and value of items voided at the register.
If a saved sale has already been closed, perform a return to refund the customer. Visit our Performing Returns article for more information.
If voiding an online order, follow the steps here to update the status of the order in the Lightspeed eCom (E) Dashboard.
Rename
Maybe a customer changes tables or a cashier misspells their name. Whatever the case, you can rename Saved Sales directly from the Sale screen.
Renaming an online order will not automatically update it on the Lightspeed eCom (E) Dashboard. Orders on the eCommerce Dashboard do not have an order name that can be edited.
If a sale’s status is ‘Awaiting Tip’, the customer’s credit card was already pre-authorized, but a tip was not entered. Visit the Tip Later article to learn how to enter the tip to close the sale.
At the register, saved sales reporting displays the quantity and value of sales currently saved on the Saved Sales screen. In BackOffice, individual saved sales can be viewed along with quantity and value totals.
Register Reporting
At the register, run a Register Shift Report during an open register shift to view the number and value of sales currently saved on the Saved Sales screen.
During an open register shift, open the Main Menu (iOS) or register menu (Android) and tap ‘Register Shift Report’.
Open Sales | Number of sales currently saved on the Saved Sales screen. If using Saved Sales Sync or Serverless Sync™, saved sales from all connected registers will be included. In the Retail POS (S-Series) app for iOS, this changes to 0 after the shift is closed (even if sales are still saved). Open Sales Total | Current value of all ‘Open Sales’ based on the prices of each sale’s items, discounts applied, and sales tax. In the Retail POS (S-Series) app for iOS, this changes to 0 after the shift is closed (even if sales are still saved).
(Optional) Managers can select an employee to see their individual report.
Click to Enlarge
(Optional) Tap ‘Print X Report’ to print a copy to a connected receipt printer.
In BackOffice, visit the Dashboard to view the total number and value of sales currently saved on the Saved Sales screen of registers with Saved Sales Sync enabled. Run the BackOffice Transactions Report to see individual saved sales along with open and past due invoices as well as delete saved sales.
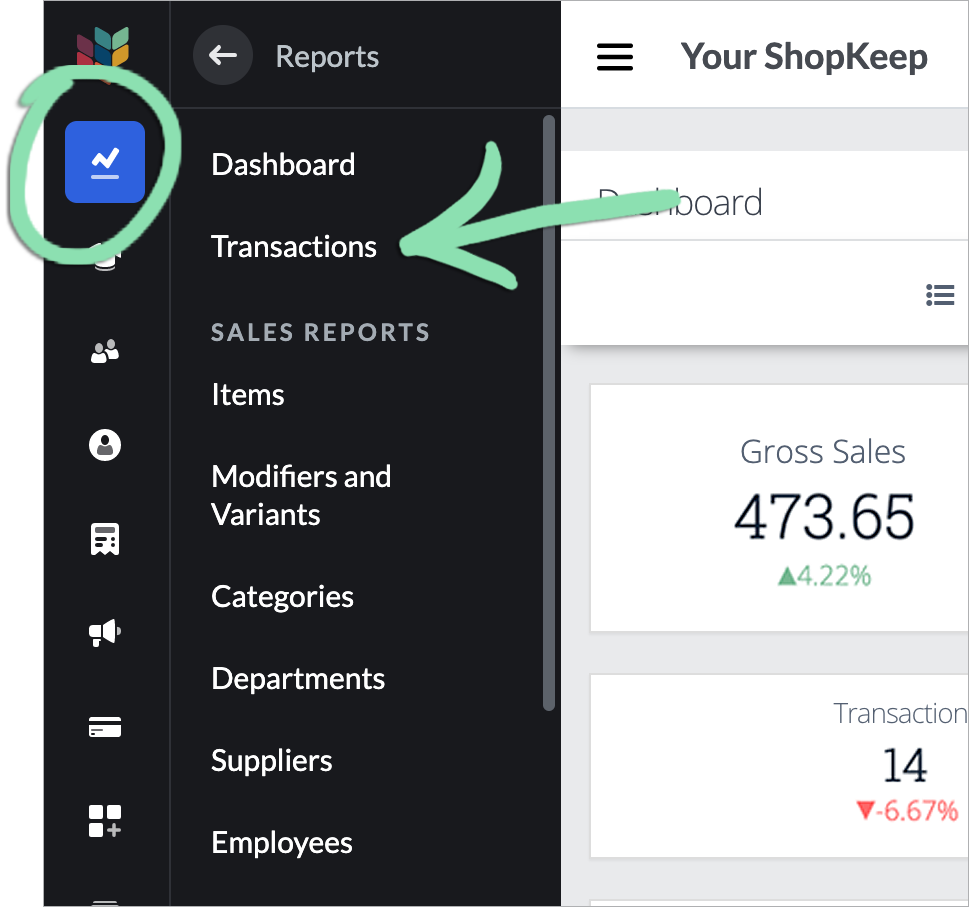
Dashboard
In BackOffice, click ‘Reports’, then select ‘Dashboard’.
Click to Enlarge
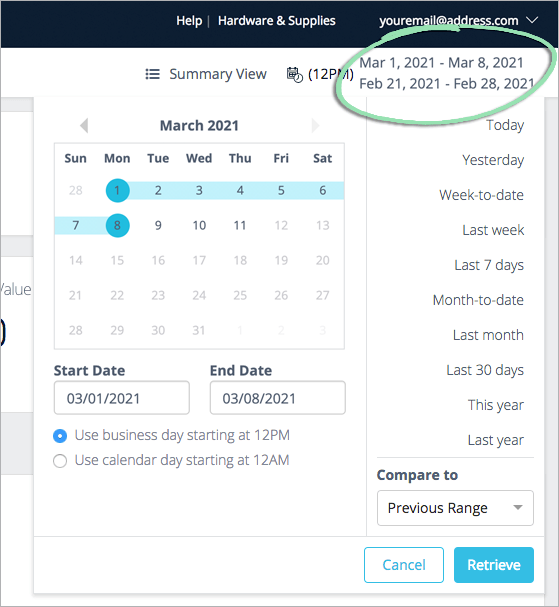
Click the date icon to choose a preset or custom range.
Click to Enlarge
The report shows the total number and value of open saved sales last saved during the date range.
# of Saved Sales | Number of saved sales currently open on registers with Saved Sales Sync enabled. Saved sales will only appear in the selected date range if they are open at the register and were last saved during the range. Historical saved sales data is not available. Net Saved Sales | Value of all saved sales included in the ‘# of Saved Sales’ tile. This is the pre-tax subtotal of each saved sale minus discounts applied.
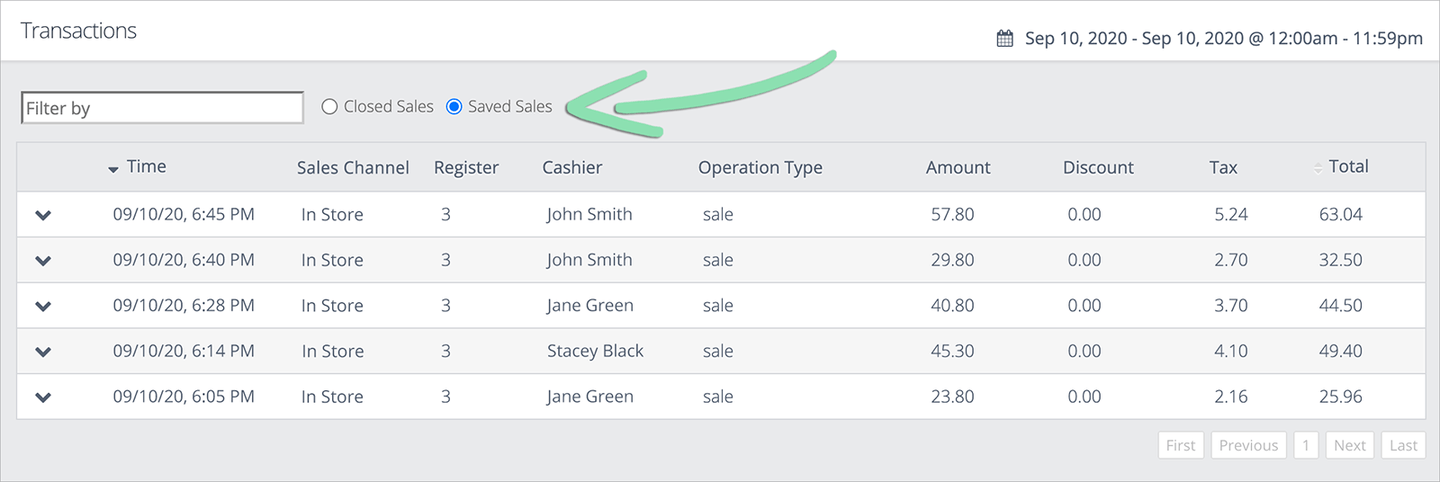
Transactions Report
In BackOffice, click ‘Reports’, then select ‘Transactions’.
Click to Enlarge
Use the calendar to select a date range for the report that includes the current day.
For example, select ‘Today’, ‘Week-to-date’, or a custom range ending today.
This option can only be selected when the date range of the report includes the current day, such as when it is set to ‘Today’, ‘Week-to-date’, or a custom range ending today.
The Transactions Report displays saved sales currently open on registers with Saved Sales Sync enabled that were last saved during the selected range, along with open and past due invoices that were last finished or edited during the range. Businesses open past midnight can set business hours in BackOffice to view reporting based on when they are open.
Time | Date and time the sale was last saved or the invoice was last finished or edited. Sales Channel | Indicates whether a transaction is a saved sale (‘In Store’) or an invoice (‘Invoicing’). Register | Number of the register from which the sale was last saved. This is left blank for invoices. Cashier | Name of the employee who originally saved the sale as it is currently entered in BackOffice. For open invoices, this is the name of the employee who last finished or edited the invoice. Operation Type | Type of transaction: sale. Amount | Total dollar amount of the items in the saved sale or invoice. Discount | Total discount amount applied to the saved sale or invoice. Tax | Total tax amount. Total | Total amount charged for the order after discounts and tax.
(Optional) To view the individual items on a saved sale or invoice, click the arrow next to the transaction.
Click to Enlarge
Description | Name of the item as it is currently entered. Department | Name of the department assigned to the item at the time the sale was saved or invoice was finished. Category | Name of the category assigned to the item when the sale was saved or invoice was finished. Price | Price per item. Quantity | Total number or amount of the item present on the saved sale or invoice. Subtotal | Item total before discounts and tax. Discount | Discount amount applied to the item. Net Total | Total amount charged for each item after discounts.